“No Knead Bread Recipe” That Breaks the Internet: Zero Effort, Bakery-Level Crust
👩🍳 The Home Chef's Essential Kitchen
Consistently cooking incredible, healthy meals at home is so much easier when you aren't fighting with cheap tools. These are the 5 absolute powerhouse kitchen essentials that professional chefs and serious home cooks rely on every single day to get perfect results.
🍳 Lodge 10.25" Cast Iron Skillet
The single greatest value in all of cookware. It retains heat infinitely better than cheap non-stick pans, allowing you to get a restaurant-quality crust on steaks or perfect crispy edges on cornbread. With proper care, this $20 pan will literally outlive you.
🔪 Victorinox Fibrox Pro 8" Chef's Knife
A dull knife makes cooking a frustrating chore. This specific blade is the undisputed champion of the culinary world—it holds a terrifyingly sharp edge, features a comfortable non-slip grip, and performs identical to German knives that cost quadruple the price.
🌡️ ThermoPro Instant Read Thermometer
Never serve dry chicken or undercooked pork again. An instant-read thermometer is the secret difference between amateur cooks who 'guess' when protein is done, and professionals who know exactly when to pull meat off the heat for maximum juiciness.
🍲 Lodge Enameled Cast Iron Dutch Oven
The ultimate workhorse for soups, stews, braised short ribs, and baking crusty artisanal bread. The enameled interior provides incredible heat distribution for slow-cooking while eliminating the intense seasoning maintenance required by bare cast iron.
🥄 Bpa-Free Silicone Utensil Set
Throw away those melting plastic spatulas and bacteria-harboring wooden spoons. This pure silicone set is heat-resistant up to 600°F, won't scratch your expensive pans, and features seamless designs that make cleaning out thick sauces and batters effortless.
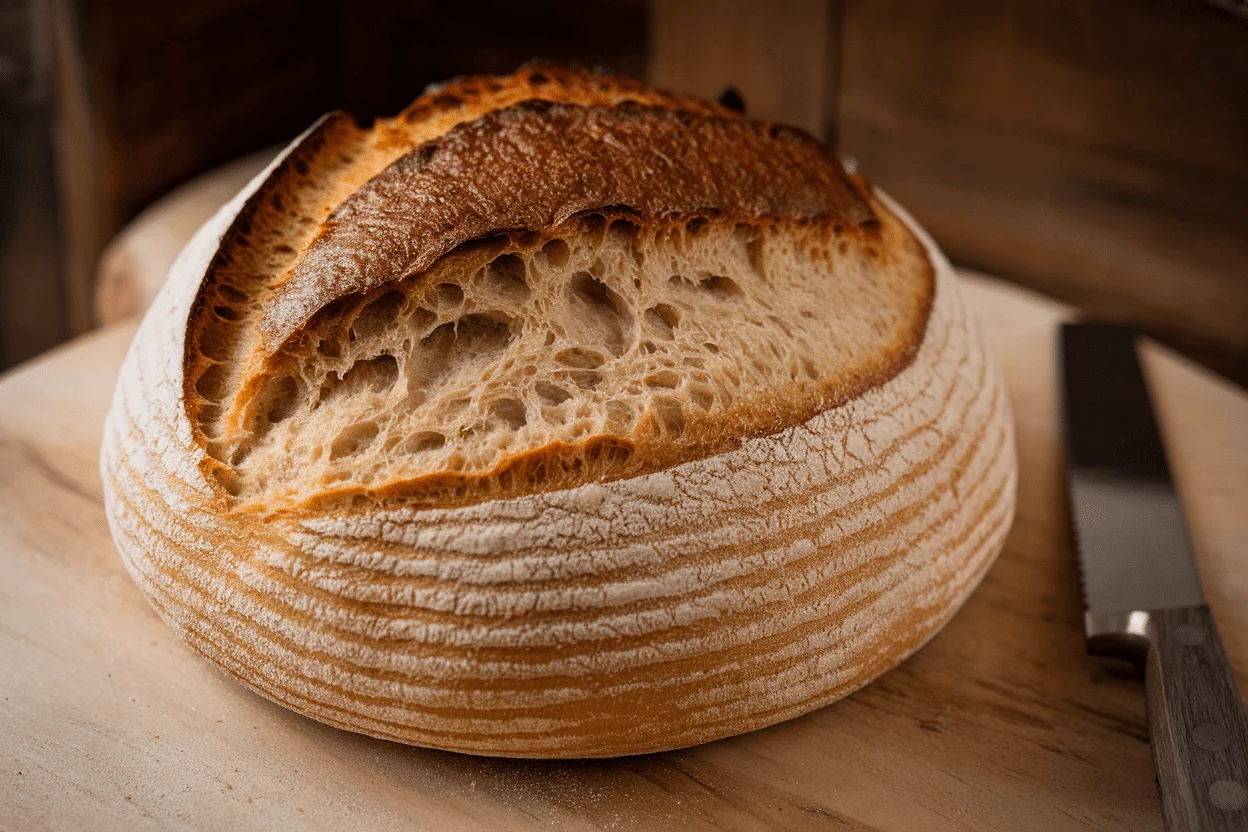
You don’t need a mixer, a degree in French baking, or forearms like a blacksmith to make knockout bread. You need time, a bowl, and the nerve to believe great crust can come from a lazy dough. This no knead bread recipe turns water, flour, yeast, and salt into a loaf that sounds like applause when you crack it open.
The catch? You let patience do the heavy lifting while you do literally anything else. By the time it’s done, you’ll swear off store-bought loaves—and your friends will assume you have a secret bakery.
What Makes This Special
This method flips traditional bread-making on its head: gluten forms with time, not punching.
That extended rest unlocks deep flavor and a custardy interior, without a single knead. Baking in a hot, covered pot traps steam for an insane crust—like a professional deck oven, minus the industrial price tag.
It’s also ridiculously forgiving. Missed your timer by 30 minutes?
No big deal. Used tap water that’s not perfectly warm? Still fine.
The dough is basically a self-driving car that parks itself in your oven and emerges as a showpiece.
Ingredients Breakdown
- 3 cups (360 g) bread flour — High-protein flour gives chew and structure. All-purpose works too, but aim for unbleached.
- 1 1/2 teaspoons kosher salt — Flavor insurance. Don’t skip or skimp.
- 1/2 teaspoon instant yeast — Low yeast, long rise.
Active dry also works (see FAQ).
- 1 1/2 cups (360 ml) cool water — Cooler water slows the rise for more flavor. Lukewarm is acceptable.
- Optional add-ins: 1 tablespoon honey, 1 tablespoon olive oil, 1/2 cup seeds, herbs, or chopped olives for personality.
- For dusting: Cornmeal or flour to prevent sticking.
The Method – Instructions
- Mix the shaggy dough: In a large bowl, whisk flour, salt, and yeast. Add water and stir with a spoon until no dry patches remain.
It should look messy and sticky—perfect.
- Cover and rest: Cover the bowl with plastic wrap or a lid. Let it sit at room temperature for 12–18 hours until doubled, bubbly, and jiggly. The surface should look like a moon landscape.
- Shape lightly: Flour your hands and a work surface.
Tip out the dough. With minimal handling, fold edges toward the center to create a round. Don’t deflate it aggressively—treat it like it’s holding a grudge.
- Second rest (proof): Place the dough seam-side down on a piece of parchment dusted with flour or cornmeal.
Cover with a towel and rest for 45–60 minutes, until puffed.
- Preheat the oven and pot: About 30 minutes into the proof, place a heavy Dutch oven (4–6 quart) with lid in the oven and preheat to 450°F (230°C). The pot should be screaming hot.
- Score (optional but pro): Use a sharp knife or lame to make a 1/2-inch slash on top for controlled expansion. One big slash or a cross does the trick.
- Bake covered: Carefully remove the hot pot (use oven mitts, obviously).
Lift the dough by the parchment and place it in the pot. Cover and bake for 30 minutes.
- Finish uncovered: Remove the lid and bake another 12–18 minutes until deep golden-brown with blistered crust. Internal temp should read ~205–210°F (96–99°C).
- Cool properly: Transfer to a rack and cool for at least 45 minutes.
Cutting too early lets steam escape, resulting in gummy crumbs (patience pays).
Storage Tips
- Room temp: Store cut-side down on a board or loosely wrapped in a paper bag for up to 2 days. Avoid plastic—it softens the crust.
- Freeze: Slice, wrap tightly, and freeze up to 2 months. Toast straight from frozen for elite breakfasts.
- Refresh crust: If it softens, bake at 350°F (175°C) for 8–10 minutes.
Back to shatter-city.
Nutritional Perks
- Short ingredient list: No weird additives. Just flour, water, yeast, and salt—clean and simple.
- Better digestibility: Long fermentation can make gluten easier on some people (not a medical claim, FYI).
- Lower sodium control: You decide the salt level, unlike most store loaves.
- Smart carbs: Pair with protein and fats for sustained energy. Add seeds for extra fiber and minerals.
Pitfalls to Watch Out For
- Too much flour when shaping: It’ll tighten the crumb.
Use just enough to keep it from sticking.
- Underproofing: If the dough isn’t puffy before baking, your loaf may be dense. Give it the full time, especially in cooler rooms.
- Skipping the preheated pot: That steam chamber is your crust MVP. Cold pot = meh crust.
- Slicing hot bread: It’s tempting, but it compresses the crumb.
Let it cool—your patience is rewarded.
- Too much yeast: More isn’t better here. High yeast + long rise = harsh flavor and collapsed structure.
Variations You Can Try
- Seeded Country Loaf: Add 3 tablespoons mixed seeds (sesame, flax, sunflower). Sprinkle extra on top before baking.
- Olive & Herb: Fold in 1/2 cup chopped olives and 1 tablespoon chopped rosemary.
Salty, aromatic, unstoppable.
- Whole Wheat Boost: Swap 1 cup of bread flour for whole wheat. Add 1–2 tablespoons extra water to keep hydration happy.
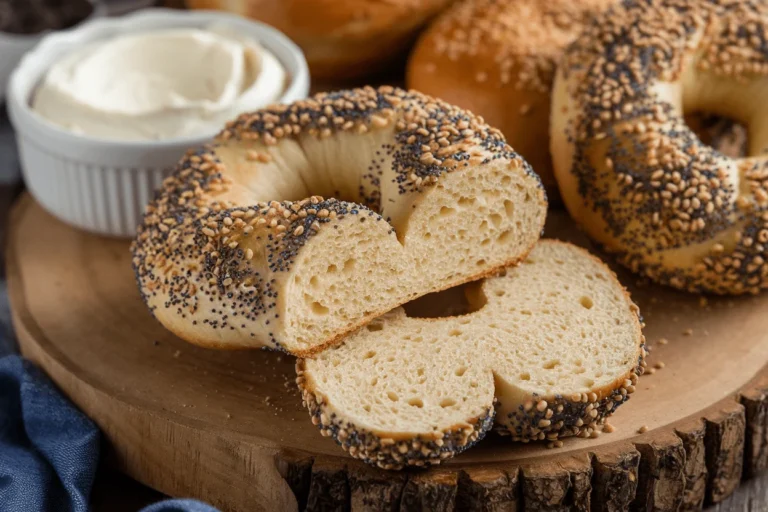
- Everything Seasoning Crust: Brush top with water and sprinkle everything bagel seasoning before baking uncovered. Because we’re extra.
- Garlic Parmesan: Mix in 1/3 cup finely grated Parmesan and 1 teaspoon garlic powder.
It’s like bread did a mic drop.
FAQ
Can I use active dry yeast instead of instant?
Yes. Use the same amount (1/2 teaspoon). Bloom it in a few tablespoons of the recipe’s water (lukewarm) for 5–10 minutes before mixing.
If it foams, you’re good. If it doesn’t, your yeast is on vacation—get new yeast.
What if my kitchen is cold?
Extend the bulk rise to 18–24 hours or use a warm spot (inside the oven with the light on). You’re looking for a doubled, bubbly dough; time is a guideline, but visual cues are king.
Do I need a Dutch oven?
It’s ideal, but not mandatory.
Alternatives: a lidded stainless pot, a baking cloche, or a preheated pizza stone with an inverted metal bowl over the dough to trap steam. No lid? Add a tray of hot water on the lower rack, though results vary.
Why is my crust pale?
Oven might be running cool or you pulled it too early.
Bake uncovered longer to deepen color. A tiny drizzle of honey in the dough can encourage browning (caramelization for the win).
How sticky should the dough be?
Sticky enough to cling to your fingers but still gather into a ball with light flouring. Too dry equals tight crumb; too wet turns handling into chaos.
Err slightly wetter; the pot saves the shape.
Can I make it same day?
Yes—use 1 teaspoon instant yeast and let it rise 3–4 hours, then shape and proof 45–60 minutes. Flavor won’t be as complex, but the loaf will still slap (IMO).
Is bread flour necessary?
No. All-purpose works fine.
Bread flour gives extra chew and structure, but AP creates a tender, open crumb that many people love. Use what you have—no excuses.
How do I know it’s fully baked?
Tap the bottom; it should sound hollow. Or use a thermometer—look for 205–210°F in the center.
If in doubt, bake 5 more minutes. Underbaked bread is sad bread.
The Bottom Line
This no knead bread recipe is the ultimate culinary cheat code: five minutes of work, an overnight nap, and a crust that snaps like a movie soundtrack. It’s reliable, adaptable, and outrageously good for the effort involved.
Once you master the rhythm—mix, rest, shape, bake—you’ll have a bakery-level loaf whenever you want. The question isn’t “Can I do this?” It’s “How soon can I make another?”