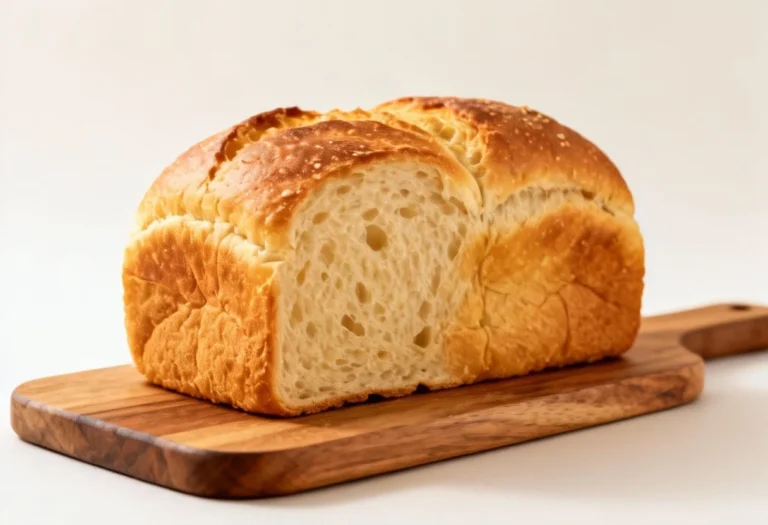
The Only White Sandwich Bread Recipe You’ll Ever Need (The Soft, Sliceable Loaf That Never Lasts a Day)
👩🍳 The Home Chef's Essential Kitchen
Consistently cooking incredible, healthy meals at home is so much easier when you aren't fighting with cheap tools. These are the 5 absolute powerhouse kitchen essentials that professional chefs and serious home cooks rely on every single day to get perfect results.
🍳 Lodge 10.25" Cast Iron Skillet
The single greatest value in all of cookware. It retains heat infinitely better than cheap non-stick pans, allowing you to get a restaurant-quality crust on steaks or perfect crispy edges on cornbread. With proper care, this $20 pan will literally outlive you.
🔪 Victorinox Fibrox Pro 8" Chef's Knife
A dull knife makes cooking a frustrating chore. This specific blade is the undisputed champion of the culinary world—it holds a terrifyingly sharp edge, features a comfortable non-slip grip, and performs identical to German knives that cost quadruple the price.
🌡️ ThermoPro Instant Read Thermometer
Never serve dry chicken or undercooked pork again. An instant-read thermometer is the secret difference between amateur cooks who 'guess' when protein is done, and professionals who know exactly when to pull meat off the heat for maximum juiciness.
🍲 Lodge Enameled Cast Iron Dutch Oven
The ultimate workhorse for soups, stews, braised short ribs, and baking crusty artisanal bread. The enameled interior provides incredible heat distribution for slow-cooking while eliminating the intense seasoning maintenance required by bare cast iron.
🥄 Bpa-Free Silicone Utensil Set
Throw away those melting plastic spatulas and bacteria-harboring wooden spoons. This pure silicone set is heat-resistant up to 600°F, won't scratch your expensive pans, and features seamless designs that make cleaning out thick sauces and batters effortless.
You know that bread you keep buying because it looks soft on the bag but chews like memory foam? Yeah, let’s fix that. This white sandwich bread recipe turns out shockingly soft slices with a golden top and tight crumb—perfect for PB&J, grilled cheese, or “I’m eating toast for dinner again.” It’s the kind of loaf that makes you feel like a bakery boss with zero drama.
No specialty equipment, no mystery steps, just reliable, repeatable, ridiculously good bread. Your toaster won’t know what hit it.
What Makes This Special
- Soft but sturdy: Tender crumb that still stands up to stacking, toasting, and heavy spreads.
- Everyday ingredients: Flour, yeast, sugar, milk, butter—nothing exotic, just smart technique.
- Flexible timeline: Make it same-day, or slow-proof in the fridge for better flavor.
- Beginner-friendly: Clear cues for dough texture, rise, and bake. No guessing games.
- Kid-approved: Slightly sweet, super soft, and slices like a dream.
Ingredients
- 3 1/4 to 3 1/2 cups (390–420 g) bread flour (or all-purpose; see notes)
- 2 1/4 tsp (7 g) instant yeast (or active dry; see FAQ)
- 3 tbsp (38 g) granulated sugar
- 1 1/2 tsp (9 g) fine sea salt
- 1 cup (240 ml) whole milk, warmed to 105–115°F (40–46°C)
- 1/2 cup (120 ml) warm water, 105–115°F (40–46°C)
- 3 tbsp (42 g) unsalted butter, softened
- 1 large egg, room temperature (optional but recommended for richness)
- 1 tbsp (14 g) butter, melted, for brushing the crust
How to Make It – Instructions
- Warm the liquids: Heat milk and water until warm, not hot.
If you can hold a finger in it for a couple seconds, you’re in the zone. Too hot = yeasty tragedy.
- Mix the base: In a large bowl, whisk flour (start with 3 1/4 cups), yeast, sugar, and salt. Add warm milk, water, egg, and softened butter.
Stir with a sturdy spoon until a shaggy dough forms.
- Knead to smooth: Knead by hand 8–10 minutes or in a mixer 6–7 minutes on medium-low. Add flour 1 tablespoon at a time only if the dough sticks aggressively. You want soft, slightly tacky, and elastic—not dry.
- First rise: Shape into a ball, place in a lightly oiled bowl, and cover.
Let rise in a warm spot until doubled, 60–90 minutes. If your kitchen is chilly, it might take longer—no big deal.
- Shape the loaf: Gently deflate. Pat into a rectangle roughly 8×12 inches.
Fold the top third down, bottom third up, then roll tightly from the short side, pinching the seam sealed. Tuck ends under for a clean loaf.
- Pan it: Place seam-side down in a 9×5-inch loaf pan lightly greased. Cover and let rise until the dough crowns 1 inch over the rim at the center, 40–60 minutes.
- Preheat and prep: While it proofs, preheat oven to 350°F (175°C).
Optional: light slash down the center with a sharp knife for a controlled bloom.
- Bake: Bake 30–35 minutes until the top is deep golden and the internal temp hits 195–200°F (90–93°C). If the top darkens too fast, tent loosely with foil at the 20-minute mark.
- Finish like a pro: Turn out onto a rack immediately. Brush the hot crust with melted butter for that soft, glossy bakery finish.
Cool at least 1 hour before slicing. Yes, waiting is pain. Worth it.
Storage Tips
- Room temp: Wrap in a clean bread bag or foil and keep at room temp for 2–3 days.
Avoid the fridge; it dries bread out, FYI.
- Freeze: Slice, then wrap tightly and freeze up to 2 months. Toast straight from frozen or thaw on the counter.
- Refresh: Day-old slices come back to life with 2–3 minutes in a 300°F (150°C) oven or a quick toast.
What’s Great About This
- Better than store-bought: No preservatives, no weird chew—just clean flavor and soft texture.
- Budget win: Costs less than a “premium” loaf and tastes like the fancy stuff.
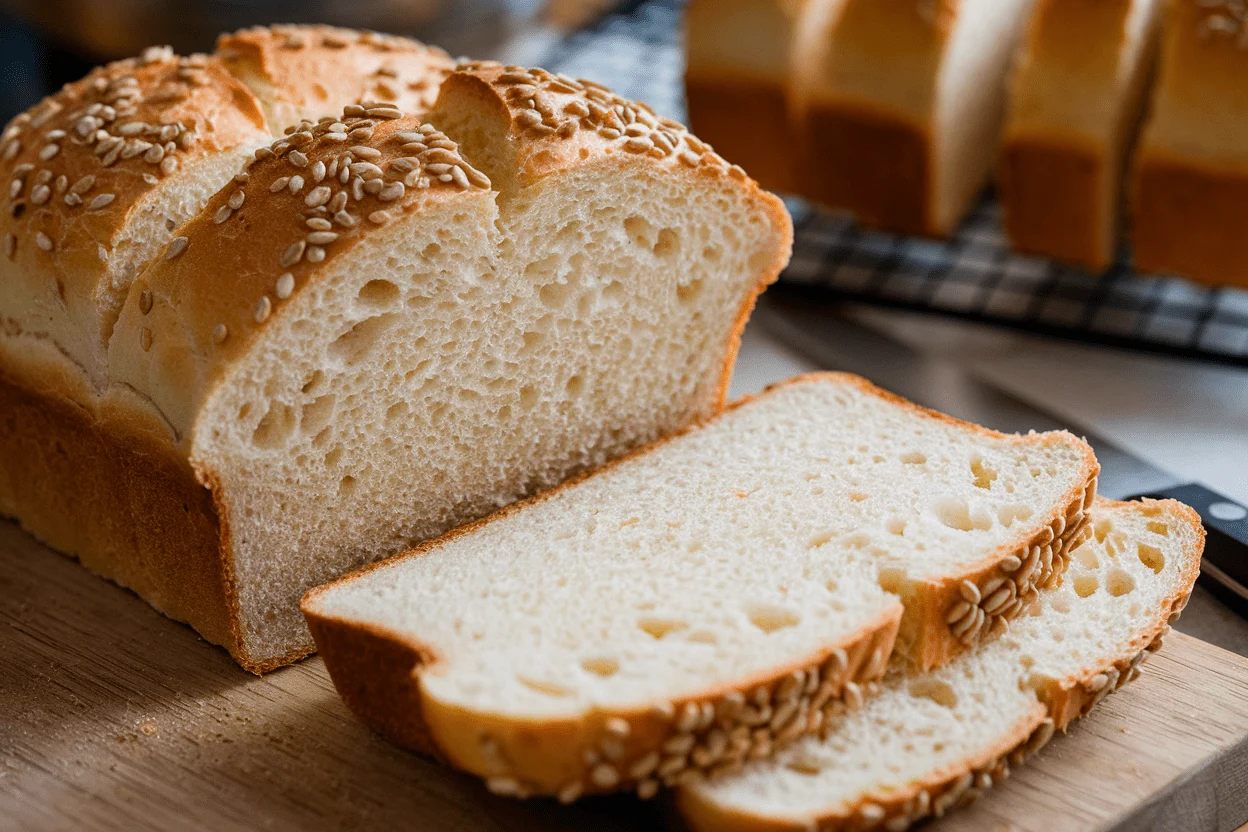
- Versatile crumb: Tight enough for thin slices, soft enough for plush toast. Best of both worlds.
- Scalable: Easily double for two loaves; same process, more glory.
Avoid These Mistakes
- Over-flouring: A stiff dough bakes into a brick.
Keep it slightly tacky. Your hands can handle a little stickiness.
- Hot liquid meltdown: Liquids above 120°F (49°C) can kill yeast. Warm, not hot, is the rule.
- Under-kneading: If the dough tears easily and lacks elasticity, knead longer.
Aim for a smooth surface and good stretch.
- Rushing the rise: Time is flavor. If the room is cold, let it take longer. Don’t shove it in a hot oven to “speed it up.”
- Slicing hot: It’s tempting, but steam will gum up the crumb.
Cool first for clean slices. Patience, padawan.
Mix It Up
- Milk swap: Use 2% or dairy-free milk (oat or soy) for a lighter loaf. Whole milk gives the plushest crumb.
- Half-and-half flour: Replace up to 1 cup with whole wheat flour and add 1–2 tsp extra water if needed.
- Honey loaf: Swap sugar for 2–3 tbsp honey for subtle floral sweetness and extra moisture.
- Garlic butter swirl: Before shaping, spread a thin layer of softened garlic butter.
Roll, pan, bake. Hello, grilled cheese upgrade.
- Seeds on top: Brush with milk and sprinkle sesame or poppy seeds before baking for bakery vibes.
FAQ
Can I use active dry yeast instead of instant?
Yes. Use the same amount.
Bloom it first in the warm water with a pinch of sugar for 5–10 minutes until foamy, then proceed. If it doesn’t foam, your yeast is likely dead—start over with fresh yeast.
Do I need bread flour?
No, but it helps. Bread flour gives a chewier bite and better structure.
All-purpose works fine; the loaf will be slightly more tender. If using all-purpose, avoid over-hydrating and knead thoroughly to build strength.
How do I know when I’ve kneaded enough?
The dough should be smooth, slightly tacky, and elastic. It should stretch thin (a rough windowpane) without tearing immediately.
If it rips fast, knead 2–3 minutes more and recheck.
My dough isn’t rising. What now?
Check the temperature first—yeast likes 75–80°F (24–27°C) environments. Move it to a warmer spot, like a turned-off oven with the light on.
If nothing happens after 90 minutes, your yeast was likely inactive or the liquid too hot. Second time’s the charm.
Can I proof overnight?
Absolutely. After kneading, let the dough rise about 30 minutes at room temp, then refrigerate covered overnight.
The next day, shape cold, proof until puffy, and bake. Flavor gets deeper—worth the wait, IMO.
What size pan should I use?
A standard 9×5-inch loaf pan is ideal. An 8.5×4.5-inch pan also works but may crown higher and bake a touch faster.
Keep an eye on color and internal temperature.
How do I get super soft crust?
Brush the hot loaf with melted butter right out of the pan and let it cool under a clean towel for 20 minutes. This traps a little steam and keeps the crust tender.
Can I make this without eggs?
Yes. Omit the egg and add 1–2 tablespoons extra milk or water if the dough seems stiff.
The loaf will be slightly less rich but still excellent.
Why is my loaf collapsing after baking?
It was likely over-proofed or under-baked. Next time, bake to 195–200°F internal and proof only until the dough rises about 1 inch over the rim and springs back slowly when poked.
Wrapping Up
This white sandwich bread recipe delivers that soft, sliceable, golden-top loaf you keep chasing from the store—except it’s fresher and better. With straightforward steps, a forgiving dough, and pantry ingredients, you’ll lock in a weekly staple that actually tastes like bread should.
Bake it once, and you’ll get why it never lasts past day two. Your toaster’s about to be very busy.