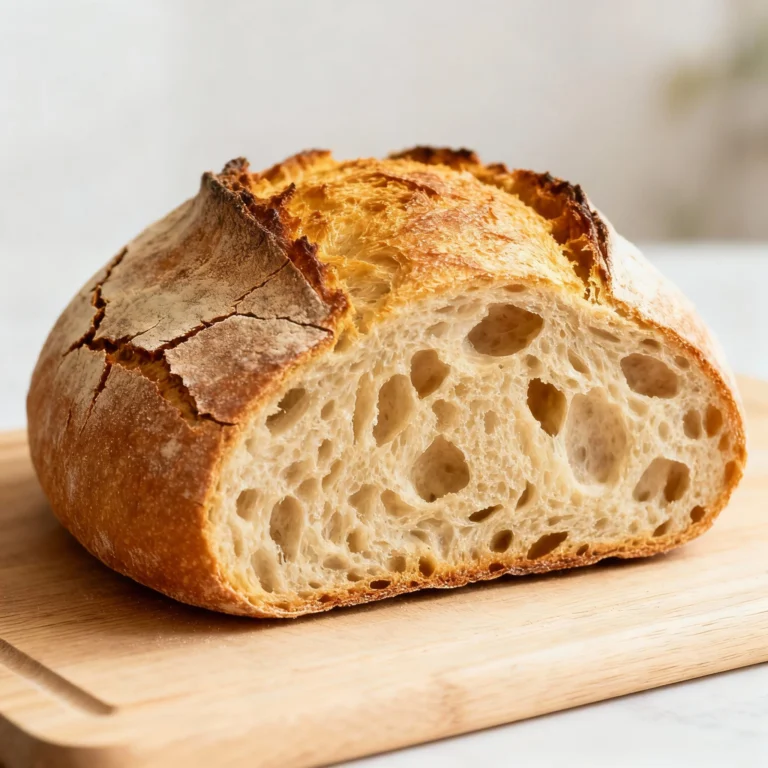
🥖 Artisan Sourdough Bread Recipe: The Ultimate Guide
👩🍳 The Home Chef's Essential Kitchen
Consistently cooking incredible, healthy meals at home is so much easier when you aren't fighting with cheap tools. These are the 5 absolute powerhouse kitchen essentials that professional chefs and serious home cooks rely on every single day to get perfect results.
🍳 Lodge 10.25" Cast Iron Skillet
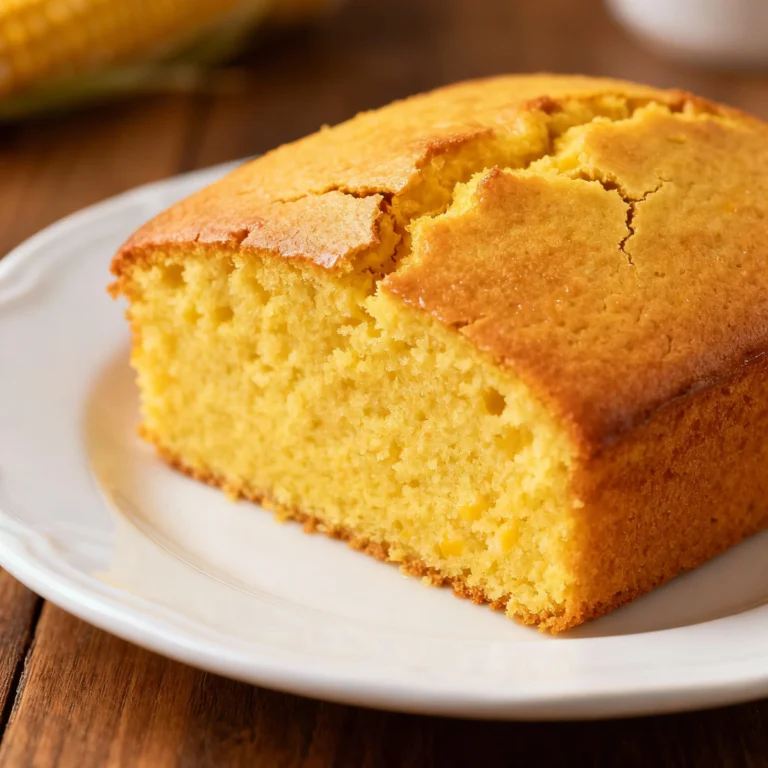
The single greatest value in all of cookware. It retains heat infinitely better than cheap non-stick pans, allowing you to get a restaurant-quality crust on steaks or perfect crispy edges on cornbread. With proper care, this $20 pan will literally outlive you.
🔪 Victorinox Fibrox Pro 8" Chef's Knife
A dull knife makes cooking a frustrating chore. This specific blade is the undisputed champion of the culinary world—it holds a terrifyingly sharp edge, features a comfortable non-slip grip, and performs identical to German knives that cost quadruple the price.
🌡️ ThermoPro Instant Read Thermometer
Never serve dry chicken or undercooked pork again. An instant-read thermometer is the secret difference between amateur cooks who 'guess' when protein is done, and professionals who know exactly when to pull meat off the heat for maximum juiciness.
🍲 Lodge Enameled Cast Iron Dutch Oven
The ultimate workhorse for soups, stews, braised short ribs, and baking crusty artisanal bread. The enameled interior provides incredible heat distribution for slow-cooking while eliminating the intense seasoning maintenance required by bare cast iron.
🥄 Bpa-Free Silicone Utensil Set
Throw away those melting plastic spatulas and bacteria-harboring wooden spoons. This pure silicone set is heat-resistant up to 600°F, won't scratch your expensive pans, and features seamless designs that make cleaning out thick sauces and batters effortless.
So, you finally decided to join the sourdough cult. Welcome. We don’t have matching jackets (yet), but we do have endless jars of sticky goo on our counters and enough flour in our pantries to survive an apocalypse.
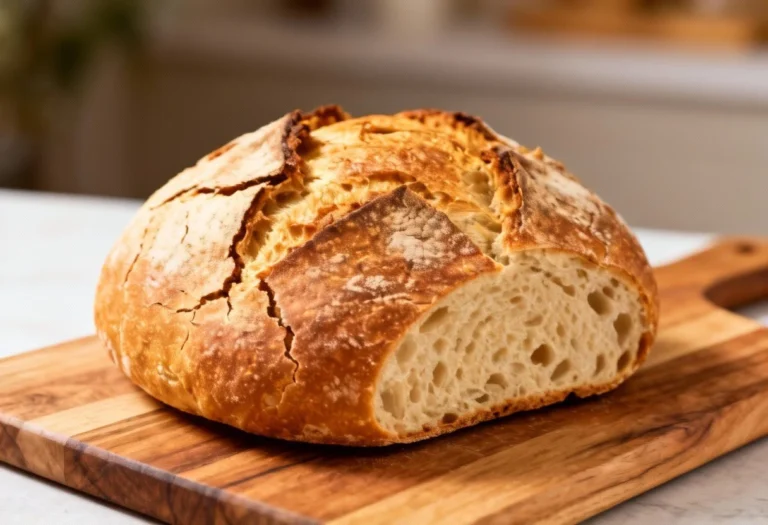
Let’s be real for a second: you’re probably here because you saw a photo of a loaf on Instagram that looked better than most of your relationships. It had that dark, blistered crust, a distinct “ear” that curled up perfectly, and an interior (we call it the “crumb” to sound fancy) so airy it looked like a cloud. And now, you want to make it.
But then you googled it, and suddenly people are talking about hydration percentages, autolyse, levain vs. starter, and ambient temperatures, and you almost ordered a pizza instead. Don’t do it. Put the phone down.
Making incredible Artisan Sourdough Bread is actually surprisingly simple once you get the rhythm. It’s mostly just waiting around while biology does the work for you. This guide is going to walk you through every single sensory detail so you can bake a loaf that will make your friends ask, “Wait, you made this?”
Why This Recipe is Awesome
Look, I’ve baked enough bread to build a small fort. I’ve baked dense bricks that could break a window, and I’ve baked floppy pancakes that tasted like sadness. This specific artisan sourdough bread recipe is the sweet spot. It is the Goldilocks of bread making.
Here is why you are going to obsess over this specific method:
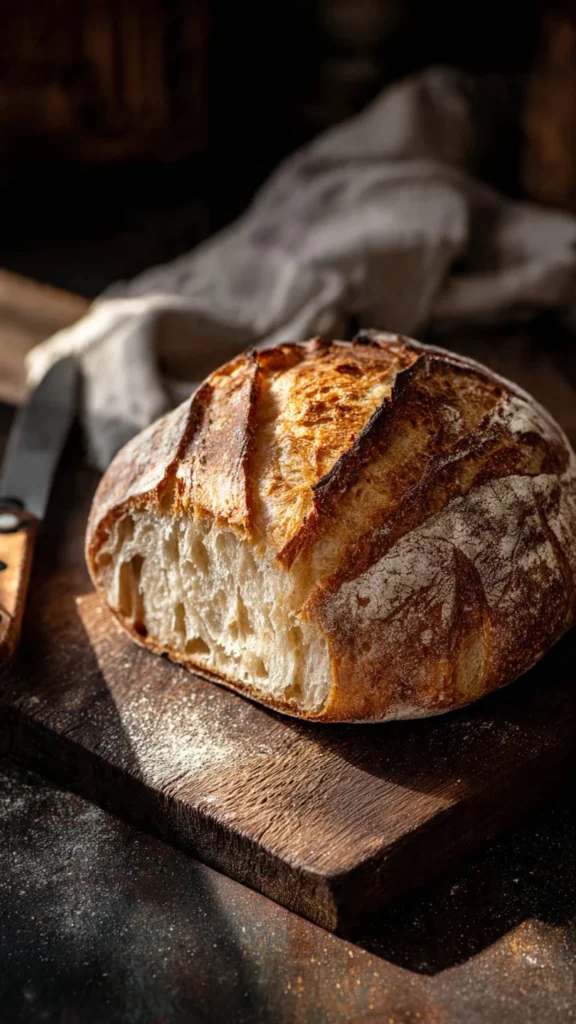
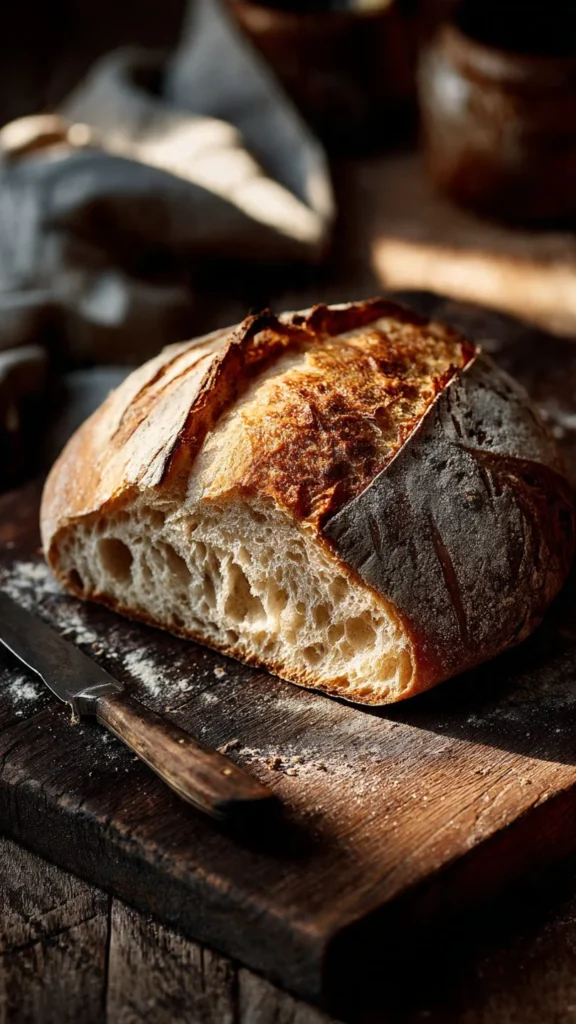
- The Crust Factor: We are aiming for a crust that sings. I’m serious. When you pull this loaf out of the oven and it starts cooling, it will literally crackle and pop. It’s a “shattering” crust—thick, caramelized, and deeply flavorful, offering that perfect textural contrast to the soft inside.
- It’s Forgiving-ish: Sourdough can be a diva, but this hydration level (the ratio of water to flour) is manageable. It’s not so wet that it feels like trying to wrestle a soup, but it’s wet enough to get those beautiful big holes in the bread.
- Flavor Depth: Because we are doing a long, cold fermentation in the fridge, the flavor has time to get complex. It’s not just “sour”; it’s nutty, creamy, and slightly tangy. It tastes like something you paid $12 for at a bakery in San Francisco.
- You Look Like a Genius: There is practically zero active work time here. It’s maybe 20 minutes of actual hands-on effort. The rest is just letting the dough sit there. But when you pull a rustic, flour-dusted boule out of the oven, people will think you possess ancient culinary secrets.
Ingredients You’ll Need
We aren’t making a rocket ship; we are making bread. You only need four things. However, quality matters here. Don’t bring a knife to a gunfight, and don’t bring bleached cake flour to a sourdough battle.
- Bread Flour (500g): Do not use All-Purpose flour unless you want a sad, flat loaf. You need Bread Flour (look for 12-14% protein content). Protein = Gluten = Structure. Structure is what holds the air bubbles in.
- Water (350g + 10g): Use filtered water. Tap water often has chlorine, and chlorine kills wild yeast. If you kill your yeast, you’re just making paper mache paste. Temperature wise? Aim for lukewarm (about 80°F/26°C).
- Active Sourdough Starter (100g): This needs to be bubbly, active, and happy. If it smells like nail polish remover or looks flat, feed it and wait. It should be at its “peak”—meaning it has doubled or tripled in size since you last fed it.
- Sea Salt (10g): Fine sea salt is best. Don’t skimp on this. Bread without salt tastes like nothing. It’s scientifically proven (probably).
Equipment check: You really need a Dutch Oven (cast iron pot with a lid) and a Kitchen Scale. If you are trying to use cups and spoons for sourdough, stop. Just stop. Flour compacts differently every time. Weigh your ingredients, fam.
Step-by-Step Instructions
Alright, apron up. We are doing this.
1. The “Is It Ready?” Check (The Float Test)
Before you start mixing, drop a teaspoon of your starter into a glass of water. Does it float?
- Yes: It’s party time. Your yeast is gassy and ready to raise the roof.
- No: It sinks like a stone. Feed it again and wait 2–4 hours. Do not pass Go.
2. The Mix (Autolyse-ish)
In a large mixing bowl, dissolve your 100g starter into 350g of warm water. Stir it around until it looks like milky sludge. Now, add your 500g Bread Flour. Mix this with your hand (yes, get messy) or a dough whisk just until no dry flour remains. It will look shaggy and ugly. That’s fine.
- Let it rest for 30 minutes. Cover with a damp towel. This allows the flour to hydrate fully before we stress it out with salt and kneading.
3. Adding the Flavor
After the rest, sprinkle the 10g of salt and that extra splash of 10g water over the dough. Squeeze the dough with your hand to incorporate the salt. The dough might separate a bit—just keep squishing. It will come back together.
4. Stretch and Folds (The “Kneading”)
We are not kneading this on the counter like a grandma in a 1950s movie. We are doing “Stretch and Folds.” This builds gluten gently.
- Grab the dough on one side, pull it up as high as it will go without tearing, and fold it over to the center.
- Rotate the bowl 90 degrees. Repeat.
- Do this 4 times (North, South, East, West). That is one set.
- The Schedule: Perform one set every 30 minutes for the next 2 hours (4 sets total).
- Sensory Note: By the 4th set, the dough should feel smooth, elastic, and sexy. It should stop sticking to your hands as much.
5. Bulk Fermentation (The Long Wait)
Now, cover the bowl and walk away. Place it somewhere warm (75°F-ish). This is the “Bulk Rise.” Depending on your kitchen temp, this takes 3 to 5 hours. How to tell it’s done: The dough should look aerated (bubbles on top), it should jiggle like Jell-O when you shake the bowl, and it should have increased in volume by about 50-75%. Do not let it double. If it doubles, it might collapse later. We want it to still have some fuel left in the tank for the oven.
6. The Pre-Shape
Dump the dough onto a non-floured surface. Yes, sticky side down. Use a bench scraper to gently spin it into a round ball. Let it sit there on the counter, uncovered, for 20 minutes. This is the “Bench Rest.” It relaxes the gluten so we can shape it tightly in a minute.
7. The Final Shape
Dust the top of the dough lightly with flour. Flip it over so the floured side is down. Fold the bottom up to the middle. Fold the sides in like an envelope. Roll it down from the top to create a log or ball. Use your hands to cup the dough and drag it toward you across the counter to create surface tension. You want the “skin” of the dough to be tight, like a drum.
8. Cold Proof (The Sleepover)
Dust a banneton (proofing basket) or a bowl lined with a cotton towel generously with Rice Flour. (Rice flour doesn’t contain gluten, so it won’t stick to the dough). Place your dough upside down (seam side up) into the basket. Put the whole thing in a plastic bag and toss it in the fridge. Leave it there for 12 to 16 hours.
- Why? Cold dough is easier to score (cut), and the long fermentation creates those little blisters on the crust and deepens the sour flavor.
9. The Bake (Fire it Up!)
Next morning/afternoon: Place your Dutch Oven (lid on) into the oven and preheat to 500°F (260°C). Let it heat up for at least 45 minutes. It needs to be nuclear hot.
- Flip the cold dough onto a piece of parchment paper.
- Score it: Use a razor blade or sharp knife to slash the top. One long slash or a cross. Go deep (about half an inch). This tells the bread where to expand so it doesn’t explode out the side.
- Carefully lower the parchment and dough into the hot Dutch Oven. Put the lid on.
- Bake for 20 minutes with the lid ON (this steams the bread, allowing it to rise).
- Remove the lid. Reduce heat to 450°F (230°C).
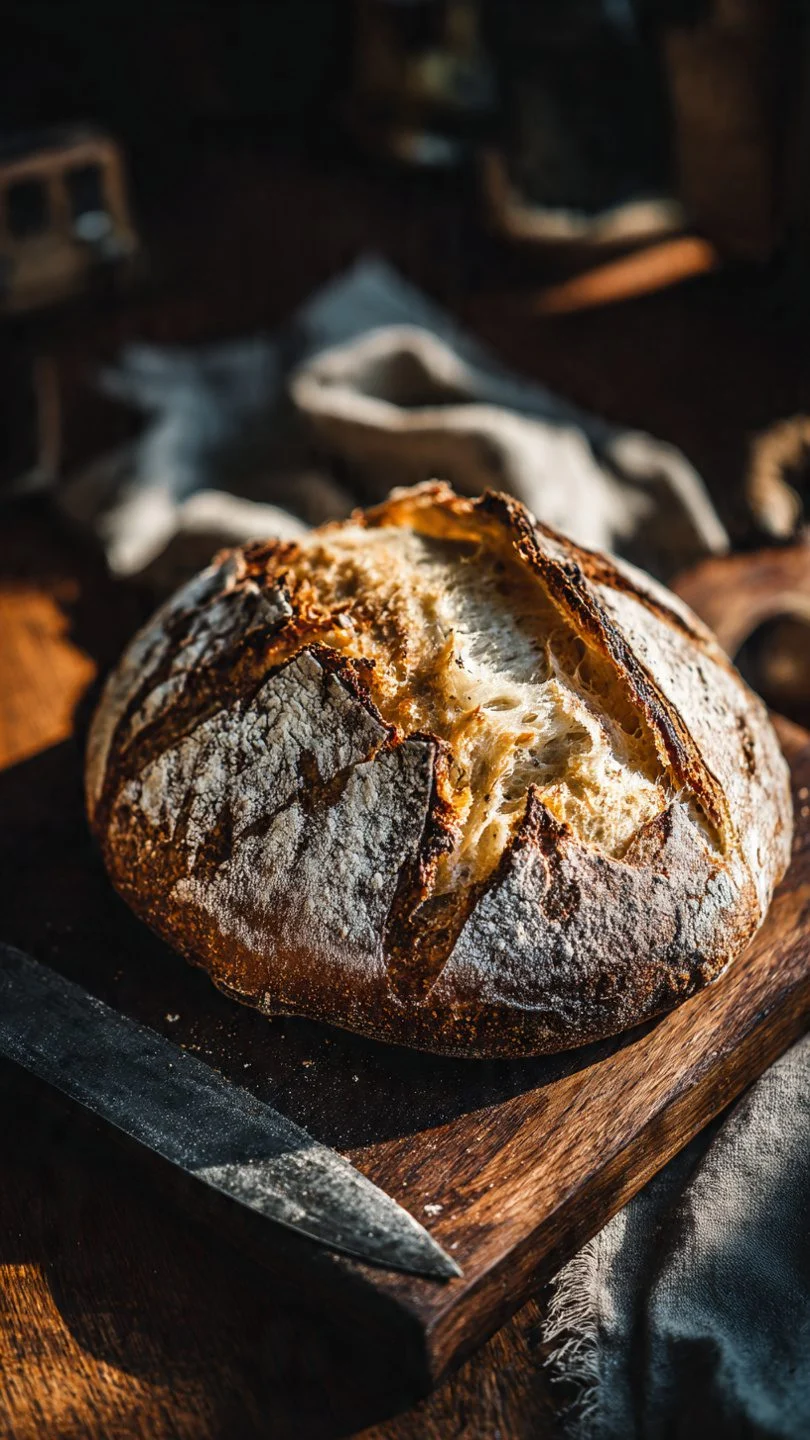
- Bake for 20–25 more minutes with the lid OFF. This is where the crust happens. You want a dark, mahogany color. Do not be afraid of “burnt” spots. That is flavor.
10. The Hardest Part
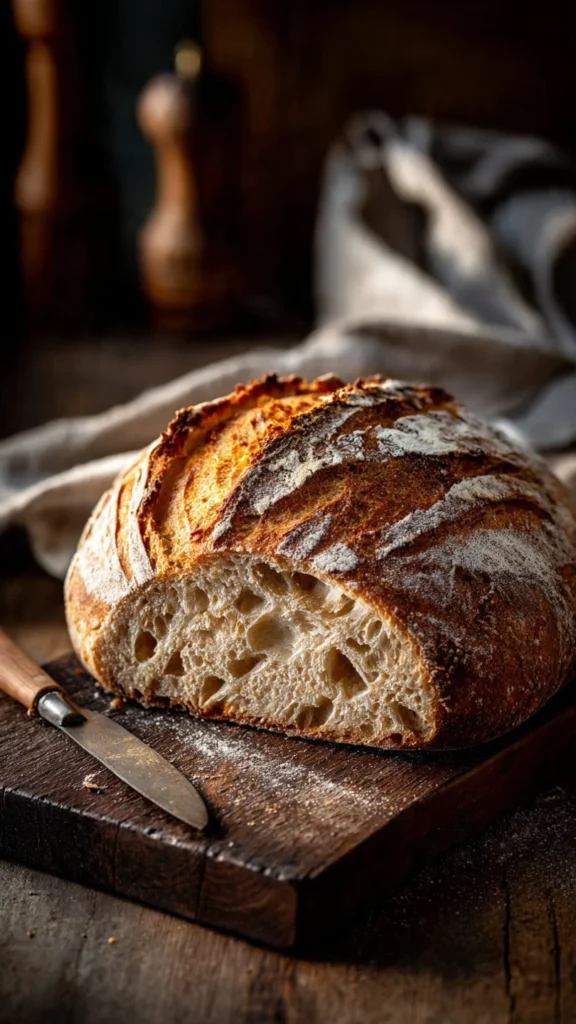
Remove from the oven and place on a cooling rack. WAIT AT LEAST 1 HOUR BEFORE SLICING. I know. It smells amazing. You want to eat it hot. Don’t. The bread is still cooking inside. If you cut it now, the steam escapes, and the inside turns gummy and doughy. You’ve waited 24 hours; you can wait 60 more minutes.
Common Mistakes to Avoid
Even the pros mess up. Here is how to avoid the walk of shame to the trash can:
- The “Frisbee” Loaf: If your bread comes out flat as a pancake, you likely over-proofed it during the bulk fermentation. If you let it rise too long in the bowl, the yeast runs out of food and the gluten structure degrades. Next time, shorten the bulk rise.
- The Dense Brick: This is usually under-proofing. If you cut into it and there are giant holes near the top but dense, gummy dough at the bottom (the “fool’s crumb”), you didn’t let it ferment long enough.
- Using All-Purpose Flour: I mentioned this, but I’ll say it again. Standard AP flour just doesn’t have the muscle to hold up a high-hydration sourdough. It will spread out instead of rising up.
- Slicing Too Soon: Seriously, I wasn’t joking. Cutting hot bread mashes the crumb structure. It ruins the texture you worked so hard for.
Alternatives & Substitutions
Want to spice things up? Once you master the basic recipe, get weird with it.
- Whole Wheat: You can swap about 10-20% of the white bread flour for whole wheat or rye without changing the water amount much. It adds a great nuttiness.
- Add-ins: Jalapeño Cheddar is a classic for a reason. Add about 150g of cubed cheese and pickled jalapeños during the second set of stretch and folds.
- Sweet Sourdough: Throw in some cranberries and walnuts. Toast the walnuts first, obviously—we aren’t savages.
- No Dutch Oven? It’s harder, but possible. You can use a pizza stone and a tray of water/ice cubes on the rack below to create steam. It won’t be quite as good, but it works in a pinch.
FAQ (Frequently Asked Questions)
Q: My starter smells like dirty gym socks. Is that normal? A: Technically… yes? It should smell sour, yeasty, and maybe a little like ripe fruit or vinegar. If it smells like straight-up vomit or has pink/orange streaks, throw it out and start over. Mold is not a flavor profile.
Q: Can I skip the autolyse? A: You can, but why would you? It makes the dough stretchier and easier to handle. It’s literally just letting the bowl sit there. Take the break.
Q: Why is my crust soft and not crunchy? A: Your oven probably wasn’t hot enough, or you stored the bread in a plastic bag. Sourdough needs to breathe. Store it cut-side down on a cutting board or in a paper bag. Plastic turns the crust into a chew toy.
Q: Can I freeze sourdough? A: Absolutely. Slice the whole loaf, put the slices in a freezer bag, and freeze. Toast them straight from frozen. It’s the best toast you will ever have.
Q: Do I really need to weigh the water? A: Yes. “One cup” of water is accurate, but “one cup” of flour can vary by 30% depending on how you scooped it. Since baking is a ratio, just weigh everything. It’s actually faster—fewer dishes to wash!
Final Thoughts
There you have it. The holy grail of carbohydrates.
Making an Artisan Sourdough Bread Recipe isn’t just about feeding yourself; it’s about slowing down. It’s tactile, it smells incredible, and there is a primal satisfaction in turning flour and water into something beautiful.
If your first loaf looks a little weird? Who cares. Toast it, slather it in salted butter, and eat it anyway. It will still taste better than anything from the grocery store aisle.
Now go impress someone—or yourself—with your new culinary skills. You’ve earned it!