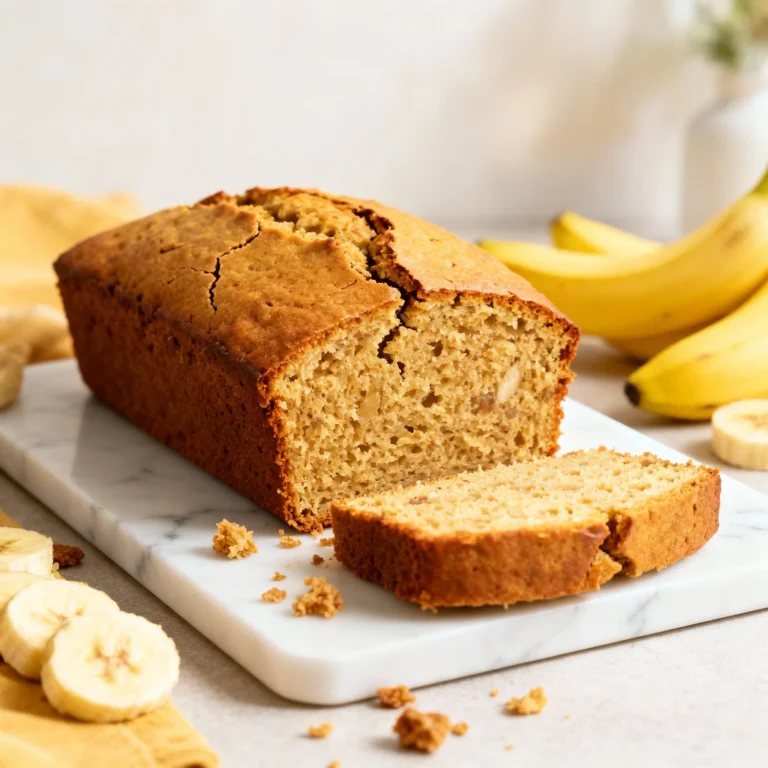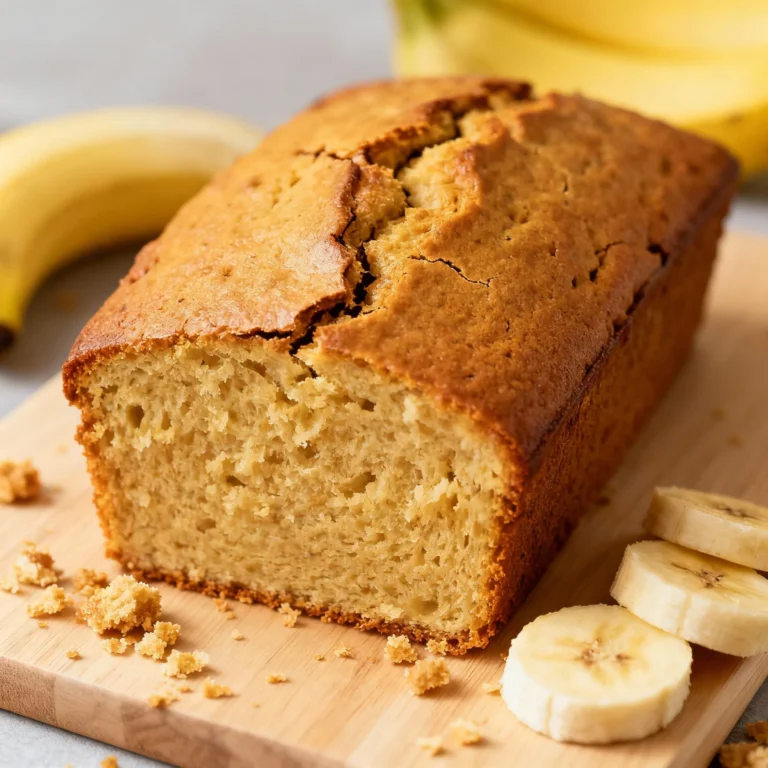
🍌 Best Banana Bread Recipe Ever (Moist & Easy!)
👩🍳 The Home Chef's Essential Kitchen
Consistently cooking incredible, healthy meals at home is so much easier when you aren't fighting with cheap tools. These are the 5 absolute powerhouse kitchen essentials that professional chefs and serious home cooks rely on every single day to get perfect results.
🍳 Lodge 10.25" Cast Iron Skillet
The single greatest value in all of cookware. It retains heat infinitely better than cheap non-stick pans, allowing you to get a restaurant-quality crust on steaks or perfect crispy edges on cornbread. With proper care, this $20 pan will literally outlive you.
🔪 Victorinox Fibrox Pro 8" Chef's Knife
A dull knife makes cooking a frustrating chore. This specific blade is the undisputed champion of the culinary world—it holds a terrifyingly sharp edge, features a comfortable non-slip grip, and performs identical to German knives that cost quadruple the price.
🌡️ ThermoPro Instant Read Thermometer
Never serve dry chicken or undercooked pork again. An instant-read thermometer is the secret difference between amateur cooks who 'guess' when protein is done, and professionals who know exactly when to pull meat off the heat for maximum juiciness.
🍲 Lodge Enameled Cast Iron Dutch Oven
The ultimate workhorse for soups, stews, braised short ribs, and baking crusty artisanal bread. The enameled interior provides incredible heat distribution for slow-cooking while eliminating the intense seasoning maintenance required by bare cast iron.
🥄 Bpa-Free Silicone Utensil Set
Throw away those melting plastic spatulas and bacteria-harboring wooden spoons. This pure silicone set is heat-resistant up to 600°F, won't scratch your expensive pans, and features seamless designs that make cleaning out thick sauces and batters effortless.
Let’s be real for a second. You are currently staring at a cluster of bananas on your counter that look like they’ve gone 12 rounds in a boxing match. They are brown, spotty, and honestly, a little depressing to look at. You swore you were going to eat them as a healthy snack three days ago, but here we are.
So, you’re craving something tasty but you’re too lazy to spend forever in the kitchen, right? Same.
Instead of tossing those sad, mushy fruits into the compost and feeling guilty about food waste, we are going to turn them into the most glorious loaf of carbs known to man. This isn’t just a banana bread recipe; it’s a redemption arc for your counter space. Grab a bowl and let’s turn that “I should eat a fruit” guilt into “I am a baking goddess” glory.
Why This Recipe is Awesome
Look, the internet is flooded with banana bread recipes. There are literally millions of them. So why stick with this one? Because I have personally eaten enough dry, flavorless brick-loaves to know exactly what not to do.
First off, texture is everything. A lot of recipes result in a loaf that’s either gummy in the middle (gross) or so dry you need a gallon of milk just to swallow a slice. This recipe hits the holy grail: a moist, tender crumb with a slightly crisp, caramelized top. It’s the Goldilocks of baked goods.
Secondly, it is idiot-proof. I don’t say that to be mean; I say that as someone who has forgotten to put eggs in a cake before. This recipe is forgiving. It uses the “melted butter” method, which means you don’t have to wait three hours for your butter to reach room temperature (who has the patience for that?) or bust out the heavy-duty stand mixer. You need one bowl, a fork, and a spatula. That’s it. Less cleanup means you get to the eating part faster.
The Science of the “Ugly” Banana
Here is a little nerdy baking tip for you: The uglier the banana, the better the bread. We aren’t just using brown bananas because we have to; we are using them because of science.
As bananas ripen, the starch converts into sugar. A yellow banana is mostly starch (which isn’t very sweet). A brown, spotty, mushy banana is almost entirely simple sugars (fructose and glucose). This does two magical things:
- Natural Sweetness: It provides a depth of flavor that white sugar alone can’t achieve.
- Moisture: The breakdown of the fruit structure ensures your bread stays moist for days.
So, if your bananas look like they belong in a horror movie, they are perfect. If they are bright yellow with a hint of green? Put the bowl down. You’re not ready.
Ingredients You’ll Need
Don’t panic—you probably have all of this in your pantry right now. No trips to the specialty grocery store required.
- Bananas: You need 3 large or 4 medium ones. Again, the browner, the better. If they are leaking a little liquid? Gold mine.
- Melted Butter: 1/2 cup (1 stick). Salted or unsalted? Honestly, I use salted because I live on the edge, but if you use unsalted, just pinch in a little extra salt later.
- Sugar: 3/4 cup. I prefer a mix of brown and white sugar (half and half) for that molasses depth, but plain white sugar works if that’s all you’ve got.
- Egg: 1 large egg. Just one. Don’t get crazy.
- Vanilla Extract: 1 teaspoon. Measure with your heart. If a little extra slips in, nobody is going to complain.
- All-Purpose Flour: 1 and 1/2 cups. The backbone of our operation.
- Baking Soda: 1 teaspoon. Do not confuse this with baking powder. They are not the same, and your bread will be sad if you mix them up.
- Salt: Pinch (about 1/4 tsp). Salt is crucial in baking; it wakes up the sugar flavors.
- The “Secret” Spice: Cinnamon (1/2 tsp). Optional, but highly recommended for that “cozy Sunday morning” vibe.
Step-by-Step Instructions
Alright, apron on (or pajamas, I don’t judge). Let’s make some magic.
1. Heat It Up
Preheat your oven to 350°F (175°C). Do this first. Don’t be the person who mixes the batter and then stands around waiting for the oven to beep. Grease a 4×8-inch loaf pan with butter or non-stick spray. If you’re feeling fancy, line it with parchment paper for an easy lift-out later.
2. The Great Mash
Peel those bananas and toss them into a large mixing bowl. Take a fork (or a potato masher if you’re fancy) and smash them into oblivion.
- Sensory Check: You want a consistency somewhere between “chunky baby food” and “smooth applesauce.” A few small lumps are fine—they turn into delicious pockets of banana goo later.
- Therapy Moment: Visualize your stress melting away with every smash. Feels good, right?
3. The Wet Stuff
Pour your melted butter into the mashed bananas. It should sizzle slightly if the butter is hot, releasing that insane banana-toffee smell immediately. Stir it in. Add the sugar, egg, and vanilla. Whisk it all together with your fork or a spatula until it’s a uniform, sloppy, fragrant mixture.
4. The Dry Stuff
Sprinkle the baking soda, salt, and cinnamon right over the wet mixture. Give it a tiny stir just to incorporate those spices. Now, dump in the flour.
5. The Gentle Fold (Crucial Step!)
Switch to a spatula or a wooden spoon. Gently fold the flour into the wet batter.
- STOP! As soon as the last streak of white flour disappears, stop mixing. Seriously. Put the spoon down.
- The Science: Over-mixing develops gluten. We want tender bread, not a chewy baguette. If you mix it too much, your bread will be tough and rubbery.
6. Bake It
Pour the batter into your prepared loaf pan. Smooth the top. Pro Tip: If you want that bakery-style crack down the center, run a butter knife dipped in oil down the middle of the batter before baking. Pop it in the oven for 50 to 60 minutes.
7. The Waiting Game
Around the 45-minute mark, your kitchen is going to smell like heaven. It will smell like comfort and safety and sweetness. Resist the urge to open the oven. Opening the door causes a temperature drop that can make your bread sink in the middle.
8. The Toothpick Test
At 50 minutes, check it. Stick a toothpick (or a paring knife) into the center of the loaf.
- Wet batter? Needs 5-10 more minutes.
- Clean or moist crumbs? It’s done!
- Note: If the top is getting too brown but the middle is still raw, tent a piece of aluminum foil loosely over the top to protect it while it finishes baking.
9. Cool Down
Remove from the oven and let it sit in the pan for about 10 minutes. Then, transfer it to a wire rack. I know you want to eat it immediately, but slicing hot bread mashes the texture and makes it gummy. Wait until it’s warm, not piping hot.
Common Mistakes to Avoid
Even though this is an easy banana bread recipe, things can go wrong. Here is how to avoid a kitchen disaster.
- Using Yellow Bananas: I cannot stress this enough. If there are no spots, there is no flavor. If you are desperate, you can bake yellow bananas in their skins at 300°F for 15 minutes to soften them, but nature’s way is best.
- Measuring Flour Wrong: Don’t scoop the flour directly with the measuring cup. You pack it down, which means you end up with too much flour and a dry loaf. Instead, spoon the flour into the cup and level it off with a knife.
- Checking Too Early: Opening the oven every 5 minutes “just to see” is the quickest way to get a sunken loaf. Trust the process.
- Slicing Too Soon: As mentioned, hot bread = gummy bread. Let the steam escape naturally as it cools.
Alternatives & Substitutions
Want to jazz it up? This batter is a blank canvas.
- Chocolate Chip Banana Bread: obviously the superior choice. Add 1/2 cup of semi-sweet chocolate chips.
- Nutty Professor: Add 1/2 cup of chopped walnuts or pecans for a nice crunch. Toast them in a pan for 2 minutes beforehand for extra flavor.
- Healthy-ish: You can swap half the sugar for honey or maple syrup, but the texture will be slightly denser.
- Dairy-Free: Swap the butter for melted coconut oil or a neutral vegetable oil. It works perfectly.
- Gluten-Free: This works surprisingly well with a 1:1 Gluten-Free flour blend (like King Arthur or Bob’s Red Mill).
FAQ (Frequently Asked Questions)
1. Can I freeze banana bread? Absolutely. In fact, future-you will love you for it. Slice the cooled loaf, wrap individual slices in plastic wrap, and freeze. When the craving hits, pop a slice in the toaster. Boom. Instant breakfast.
2. Why is my banana bread dry? You likely added too much flour or baked it too long. Check your oven temperature (some ovens run hot!) and remember the “spoon and level” flour method.
3. Can I use margarine instead of butter? Well, technically yes, but why hurt your soul like that? Butter provides flavor. Margarine provides… oiliness. Stick to butter or coconut oil if you can.
4. My bread is dark on the outside but raw in the middle. Help! Your oven is too hot. Tent the bread with foil to stop the top from burning and lower the oven temp by 25 degrees. Let it keep baking.
5. How long does it stay fresh? About 3-4 days on the counter in an airtight container (if it lasts that long). A week in the fridge. Three months in the freezer.
6. Can I make these into muffins? Yes! Pour the batter into a muffin tin. Bake for 18-22 minutes instead of an hour. Perfect for grab-and-go breakfasts.
Final Thoughts
There you have it—a banana bread recipe that is moist, delicious, and requires zero culinary school training. Baking doesn’t have to be a high-stress science experiment. Sometimes, it’s just about mashing up some ugly fruit and watching it turn into something beautiful.
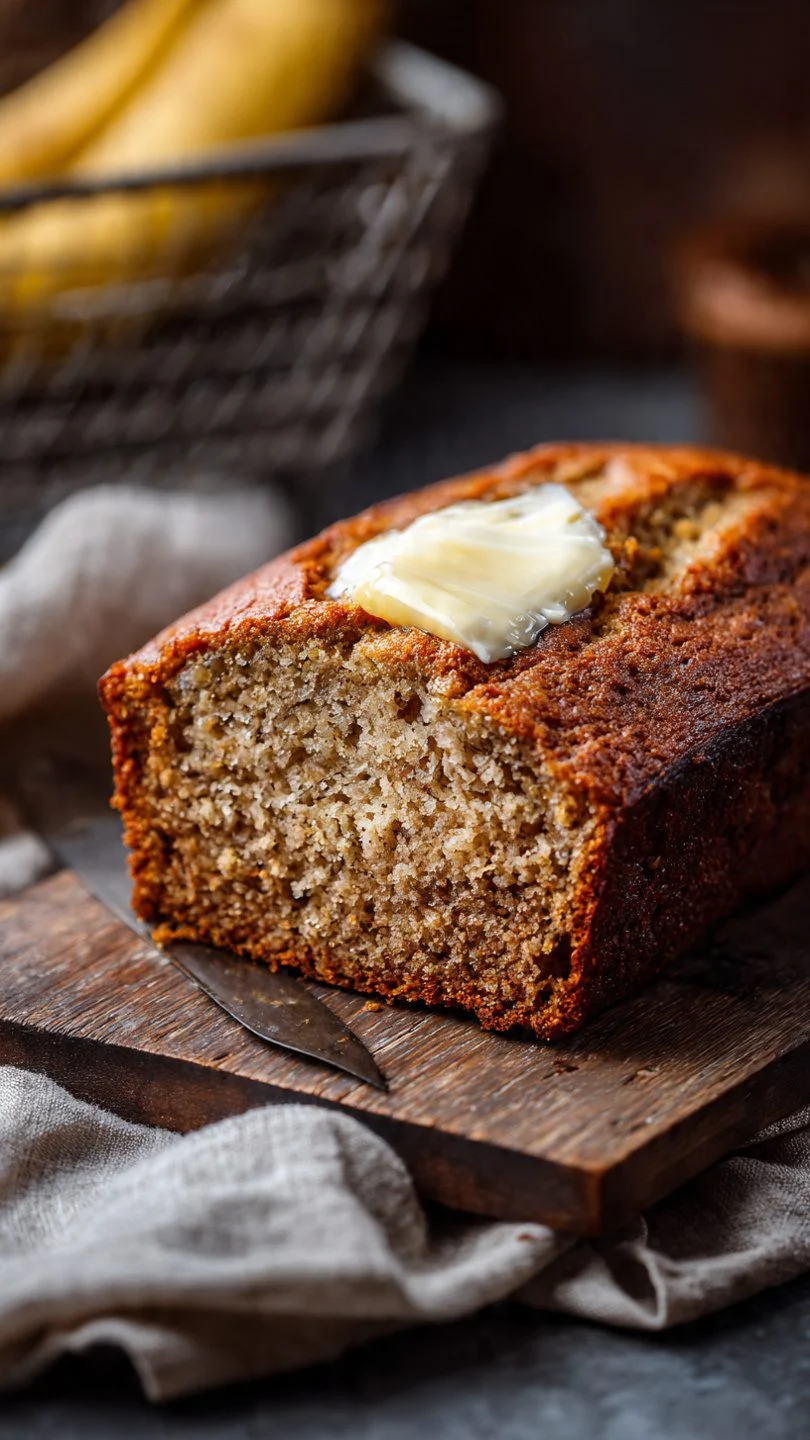
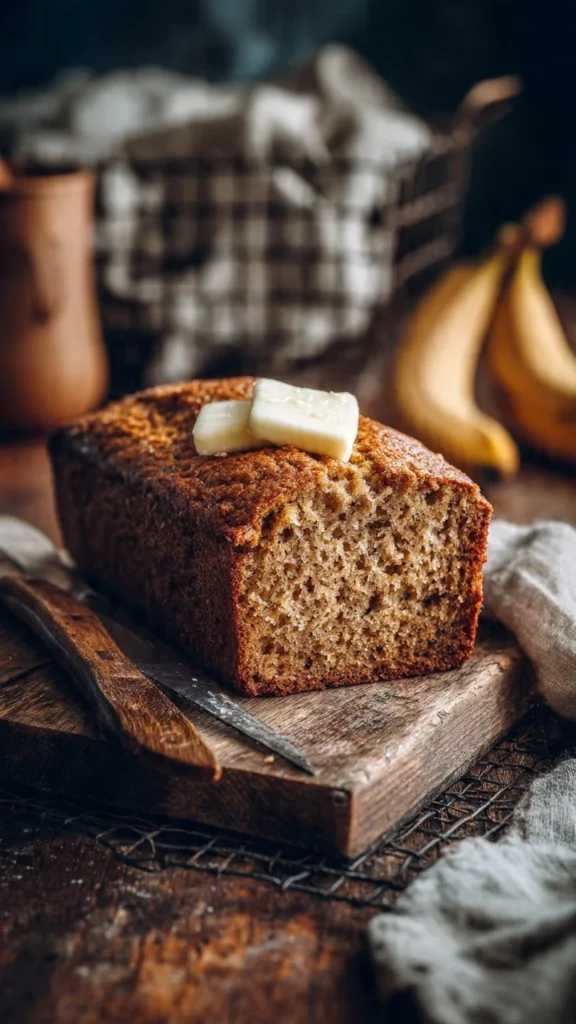
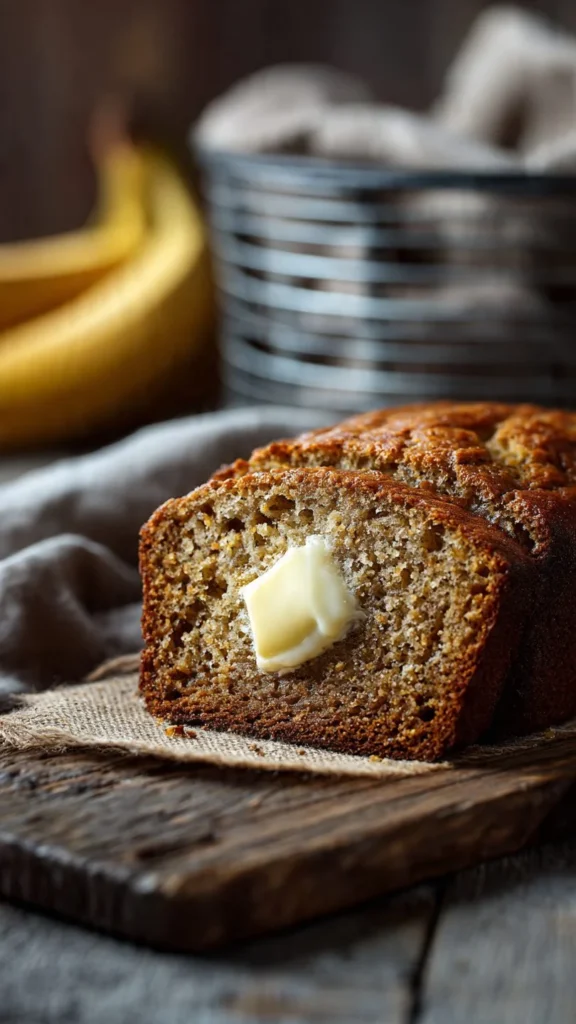
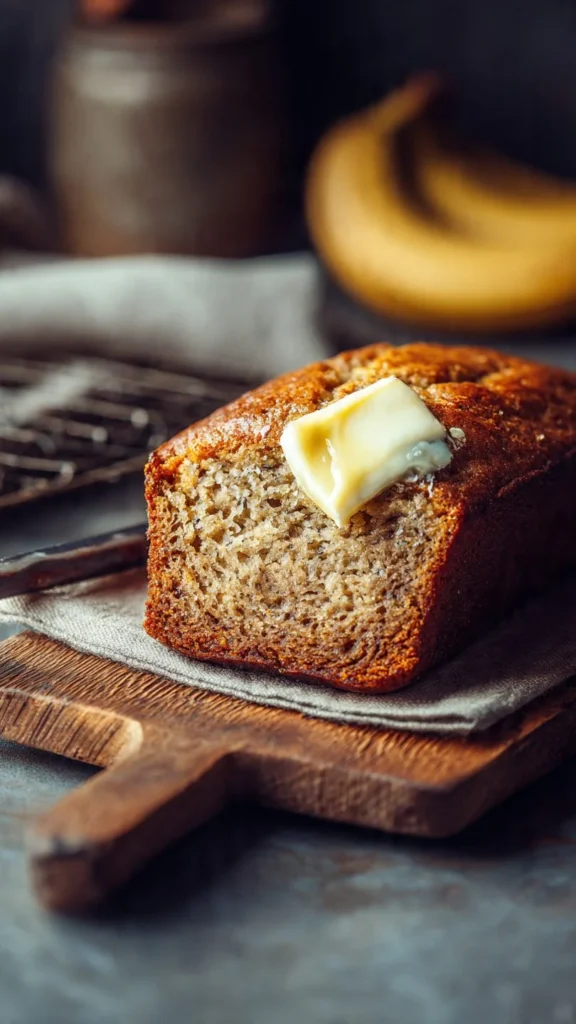
The best way to eat this? A thick slice, slightly warm, with a slab of salted butter on top that melts into the crumbs. Maybe a coffee on the side.
Now go impress someone—or yourself—with your new culinary skills. You’ve earned it!