3 Ingredient Fudge Recipe: Decadent Dessert in Minutes!
👩🍳 The Home Chef's Essential Kitchen
Consistently cooking incredible, healthy meals at home is so much easier when you aren't fighting with cheap tools. These are the 5 absolute powerhouse kitchen essentials that professional chefs and serious home cooks rely on every single day to get perfect results.
🍳 Lodge 10.25" Cast Iron Skillet
The single greatest value in all of cookware. It retains heat infinitely better than cheap non-stick pans, allowing you to get a restaurant-quality crust on steaks or perfect crispy edges on cornbread. With proper care, this $20 pan will literally outlive you.
🔪 Victorinox Fibrox Pro 8" Chef's Knife
A dull knife makes cooking a frustrating chore. This specific blade is the undisputed champion of the culinary world—it holds a terrifyingly sharp edge, features a comfortable non-slip grip, and performs identical to German knives that cost quadruple the price.
🌡️ ThermoPro Instant Read Thermometer
Never serve dry chicken or undercooked pork again. An instant-read thermometer is the secret difference between amateur cooks who 'guess' when protein is done, and professionals who know exactly when to pull meat off the heat for maximum juiciness.
🍲 Lodge Enameled Cast Iron Dutch Oven
The ultimate workhorse for soups, stews, braised short ribs, and baking crusty artisanal bread. The enameled interior provides incredible heat distribution for slow-cooking while eliminating the intense seasoning maintenance required by bare cast iron.
🥄 Bpa-Free Silicone Utensil Set
Throw away those melting plastic spatulas and bacteria-harboring wooden spoons. This pure silicone set is heat-resistant up to 600°F, won't scratch your expensive pans, and features seamless designs that make cleaning out thick sauces and batters effortless.
Craving a rich, chocolatey treat but short on time and ingredients? Look no further! This 3-ingredient fudge recipe is your answer to instant gratification. It’s unbelievably easy, surprisingly delicious, and requires only a handful of pantry staples. Forget complicated recipes and hours in the kitchen; with this recipe, you can whip up a batch of decadent fudge in just minutes. Get ready to impress your friends and family (or just yourself!) with this foolproof, melt-in-your-mouth dessert.
Why This Recipe Works
The magic of this recipe lies in the perfect combination of simple ingredients and a straightforward process. Here’s why it works so well:
- Sweetened Condensed Milk: This is the backbone of the fudge, providing sweetness, richness, and a smooth, creamy texture. It acts as the binding agent, holding everything together beautifully.
- Chocolate Chips: Choose your favorite chocolate chips! Semi-sweet, dark, milk chocolate, or even white chocolate – the possibilities are endless. The chocolate chips melt seamlessly into the sweetened condensed milk, creating a deep, chocolatey flavor.
- Vanilla Extract (Optional, but Recommended): While technically making it a 4-ingredient fudge, a touch of vanilla extract enhances the chocolate flavor and adds a subtle layer of complexity. It’s the secret ingredient that elevates this simple recipe to the next level.
The combination of these ingredients creates a chemical reaction that results in a smooth, fudgy texture. The heat gently melts the chocolate chips, which then bind with the sweetened condensed milk to form a stable structure. The result is a fudge that’s firm enough to slice but soft enough to melt in your mouth.
Ingredients
- 1 (14 ounce) can Sweetened Condensed Milk
- 2 cups Chocolate Chips (Semi-sweet, dark, milk, or white chocolate)
- 1 teaspoon Vanilla Extract (Optional)
Instructions
- Prepare the Pan: Line an 8×8 inch square baking pan with parchment paper. This will make it easy to remove the fudge later. Leave some overhang on the sides for easy lifting.
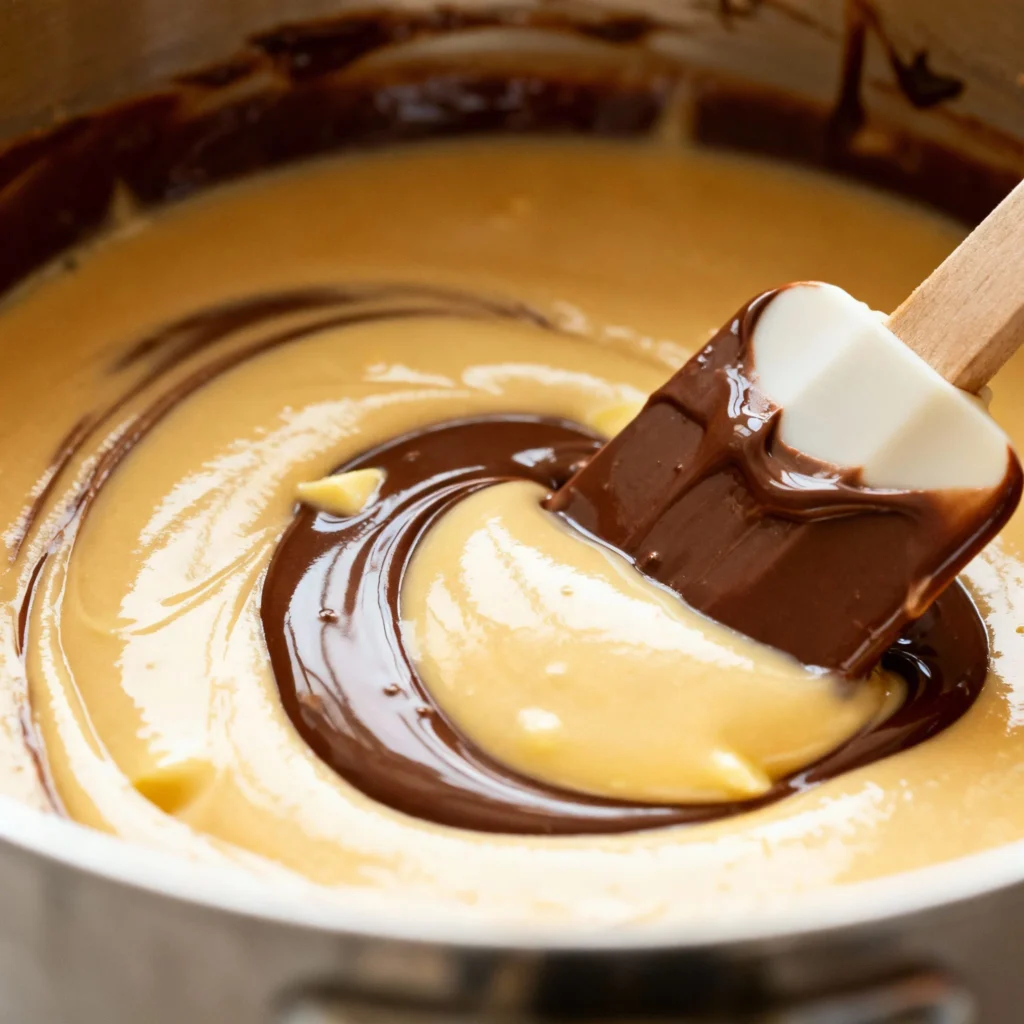
- Melt the Chocolate and Sweetened Condensed Milk: In a microwave-safe bowl, combine the chocolate chips and sweetened condensed milk. Microwave in 30-second intervals, stirring well after each interval, until the chocolate is completely melted and the mixture is smooth. Be careful not to overheat the chocolate, as it can burn.
- Add Vanilla Extract (Optional): Stir in the vanilla extract until well combined.
- Pour into Pan: Pour the melted chocolate mixture into the prepared baking pan and spread evenly with a spatula.
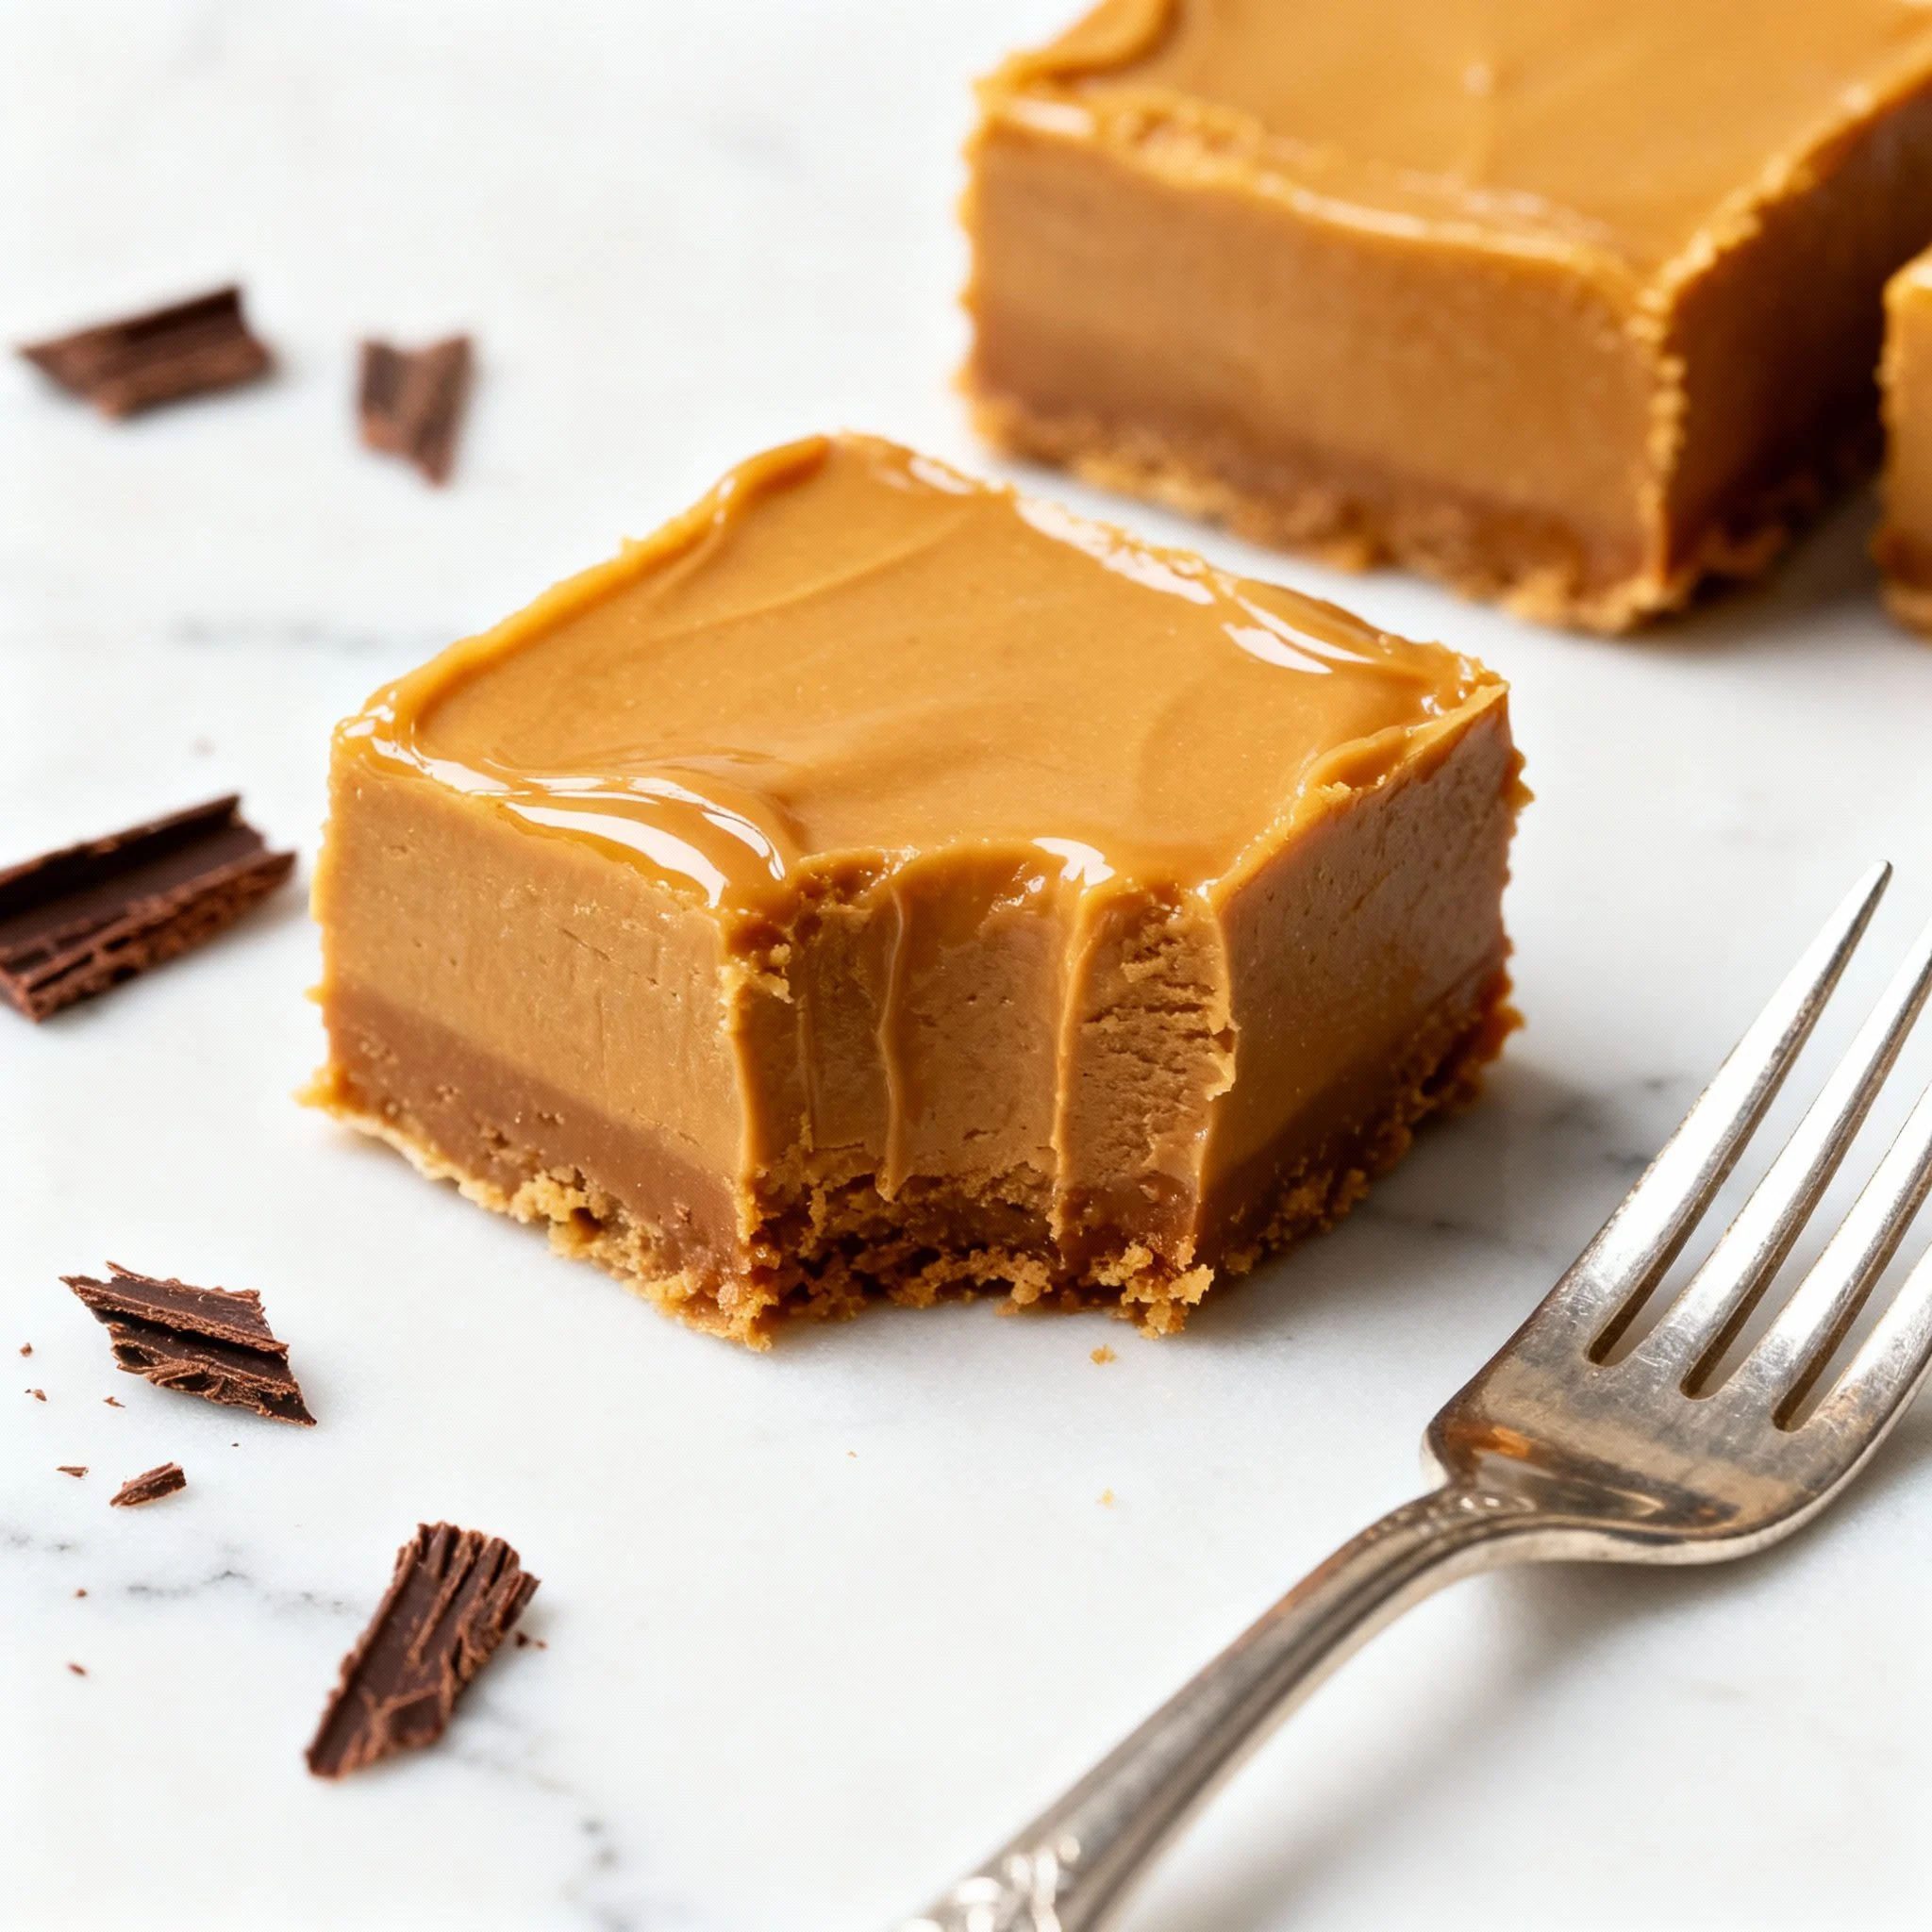
- Chill: Cover the pan with plastic wrap and refrigerate for at least 2 hours, or preferably overnight, to allow the fudge to set completely.
- Cut and Serve: Once the fudge is firm, lift it out of the pan using the parchment paper overhang. Cut into small squares and serve. Enjoy!
Tips for Success
To ensure your 3-ingredient fudge turns out perfectly every time, keep these tips in mind:
- Use High-Quality Chocolate: The quality of your chocolate chips will directly impact the flavor of the fudge. Opt for a good-quality brand for the best results.
- Microwave in Intervals: Microwaving the chocolate and sweetened condensed milk in short intervals prevents the chocolate from burning or seizing. Stir well between each interval to ensure even melting.
- Don’t Overheat: Overheating the chocolate can result in a grainy or dry fudge. Be patient and microwave in short bursts until just melted.
- Line the Pan: Lining the pan with parchment paper is crucial for easy removal. The overhang makes lifting the fudge out of the pan a breeze.
- Chill Thoroughly: Allow the fudge to chill completely before cutting. This ensures it’s firm enough to hold its shape and prevents it from being too soft.
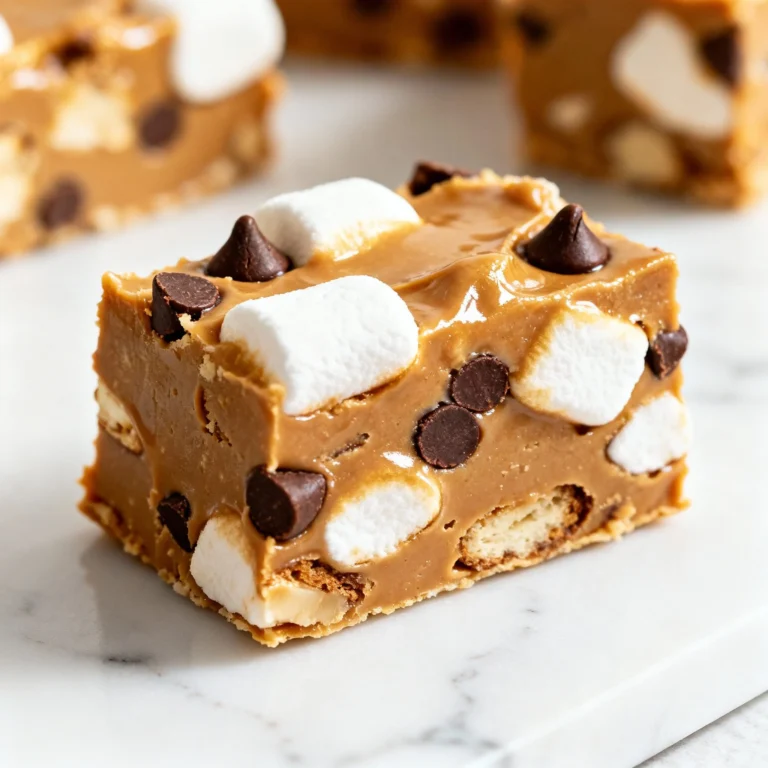
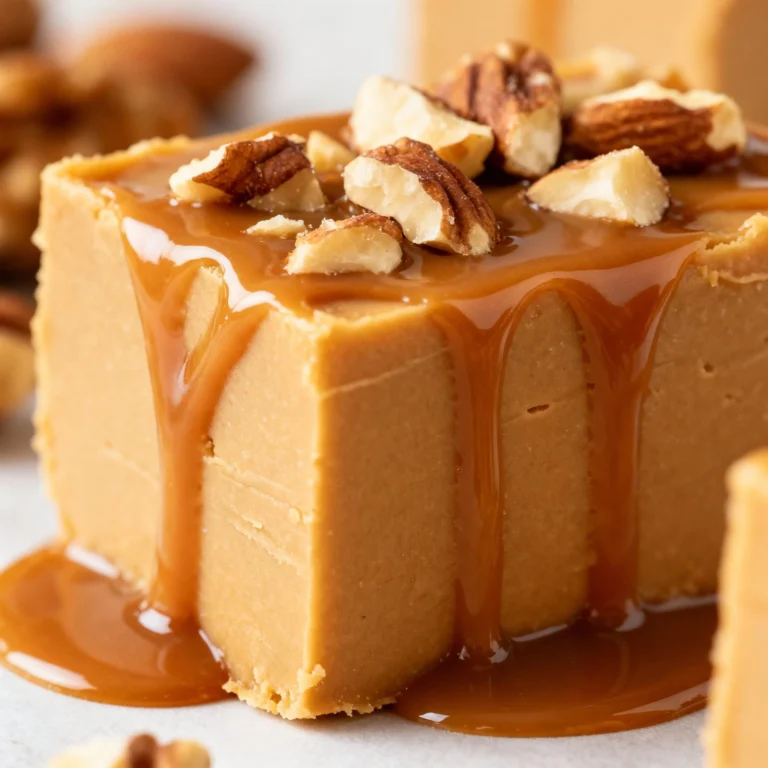
- Get Creative with Mix-ins: While the basic recipe is delicious on its own, feel free to add your favorite mix-ins! Chopped nuts, dried fruit, sprinkles, or even a swirl of peanut butter can add extra flavor and texture. Add these after you’ve poured the fudge into the pan but before it sets.
- Adjust Sweetness: If you prefer a less sweet fudge, use dark chocolate chips or add a pinch of salt to balance the sweetness.
- Different Chocolate Types: Experiment with different types of chocolate chips! White chocolate fudge with dried cranberries and pistachios is a holiday favorite, while milk chocolate fudge with chopped walnuts is a classic combination.
Storage Instructions
Store your 3-ingredient fudge in an airtight container at room temperature for up to 1 week, or in the refrigerator for up to 2 weeks. For longer storage, you can freeze the fudge for up to 2 months. Wrap the fudge tightly in plastic wrap and then place it in a freezer-safe bag or container. Thaw the fudge in the refrigerator before serving.

FAQ
Q: Can I use a different size pan?
A: Yes, you can use a different size pan, but the thickness of the fudge will vary. A smaller pan will result in thicker fudge, while a larger pan will result in thinner fudge. Adjust the chilling time accordingly.
Q: Can I use evaporated milk instead of sweetened condensed milk?
A: No, evaporated milk is not a suitable substitute for sweetened condensed milk. Sweetened condensed milk is much thicker and sweeter, and it plays a crucial role in the texture and flavor of the fudge.
Q: My fudge is too soft. What did I do wrong?
A: The most common reason for soft fudge is not chilling it long enough. Make sure to chill the fudge for at least 2 hours, or preferably overnight, to allow it to set completely. Overheating the chocolate can also contribute to soft fudge.
Q: My fudge is grainy. What did I do wrong?
A: Grainy fudge is usually caused by overheating the chocolate. Be sure to microwave in short intervals and stir well between each interval. Avoid using old or expired chocolate chips.
Q: Can I add nuts to this recipe?
A: Absolutely! Chopped nuts are a great addition to this fudge. Add them after you’ve poured the fudge into the pan but before it sets.
🍰 The Master Baker & Prep Kit
Baking is a science, and meal prep requires efficiency. If you want consistently flaky pie crusts, perfectly risen cakes, and healthy meals ready for the week, these are the 5 upgrade tools that take your execution to the next level.
⚖️ OXO Good Grips 11lb Food Scale
The secret to why bakery bread and cookies are always perfect while home batches vary wildly. Measuring by weight (grams) instead of volume (cups) guarantees precise hydration and flawlessly consistent results every single time you bake.
🧑🍳 KitchenAid Classic Stand Mixer
The undisputed holy grail of the kitchen. From aggressively kneading heavy pizza doughs to whipping meringues into stiff peaks, this powerful motor saves your arms from exhaustion and cuts your hands-on prep time in half.
🍪 Silpat Premium Silicone Baking Mats
Stop wasting money on rolls of parchment paper or agonizing over cookies permanently fused to your metal pans. These reusable, professional-grade silicone mats ensure completely even heat distribution and instantly release even the stickiest caramel.
🌪️ Braun MultiQuick Immersion Blender
The ultimate shortcut tool for creamy tomato soups, lump-free gravies, and rapid smoothies. Avoid the burns and mess of dangerously transferring boiling liquids in batches to a traditional blender by simply blending right inside your cooking pot.
🍱 Premium Glass Meal Prep Containers
If you want to bake and cook healthier, batch preparation is required. These durable glass containers transition safely from freezer to microwave, never absorb tomato sauce stains, and feature airtight seals to keep your hard work fresh all week.
Conclusion
This 3-ingredient fudge recipe is a testament to the fact that delicious desserts don’t have to be complicated. With just a few simple ingredients and minimal effort, you can create a rich, decadent treat that’s sure to satisfy your sweet tooth. So, the next time you’re craving something sweet but short on time, give this recipe a try. You won’t be disappointed!