The Best Chocolate Cake Recipe You’ll Brag About: Moist, Fudgy, and Foolproof (Even If You Burn Toast)
You don’t need a culinary degree to bake a cake that shuts down conversation at the table. You just need a recipe engineered for ridiculous flavor and repeatable results. This one is like a magic trick: deep chocolate taste, plush crumb, and a silky frosting that spreads like a dream.
No weird chef flexes, no rare ingredients—just smart techniques and a few clutch swaps. If you want bakery-level cake without bakery-level drama, start here.
What Makes This Special
This cake leans on oil instead of butter for ultra-moist texture that lasts for days. A splash of hot coffee unlocks cocoa’s full flavor (no, it won’t make your cake taste like a latte).
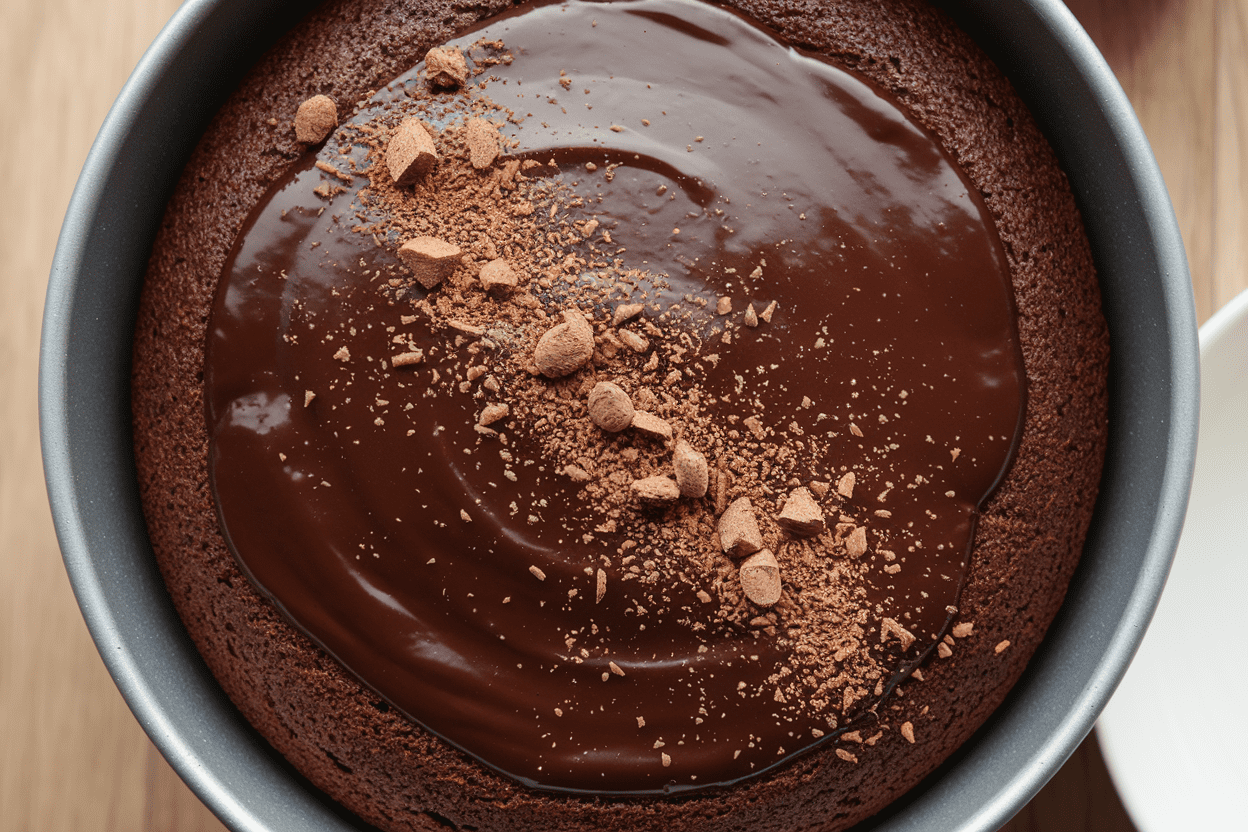
The batter is thin on purpose—that’s how you get that delicate crumb and flat, stackable layers. And the frosting? A dark chocolate sour cream frosting that’s glossy, tangy, and not cloyingly sweet.
Translation: one slice becomes two very quickly.
What Goes Into This Recipe – Ingredients
- Dry Ingredients:
- 2 cups (250 g) all-purpose flour
- 1¾ cups (350 g) granulated sugar
- ¾ cup (75 g) unsweetened cocoa powder, preferably Dutch-process
- 2 teaspoons baking powder
- 1½ teaspoons baking soda
- 1 teaspoon fine sea salt
- Wet Ingredients:
- 2 large eggs, room temperature
- 1 cup (240 ml) whole milk, room temperature
- ½ cup (120 ml) neutral oil (canola, grapeseed, or light olive oil)
- 2 teaspoons pure vanilla extract
- 1 cup (240 ml) hot brewed coffee (or hot water for caffeine-free)
- Dark Chocolate Sour Cream Frosting:
- 10 ounces (285 g) dark chocolate, 60–70%, chopped
- 1 cup (240 ml) heavy cream
- ¾ cup (180 g) full-fat sour cream, room temperature
- ½ cup (60 g) powdered sugar, sifted
- 1 teaspoon vanilla extract
- Pinch of salt
- Optional Add-Ins:
- 1 tablespoon espresso powder (boosts chocolate intensity)
- Flaky salt for finishing
Step-by-Step Instructions
- Prep the battlefield. Heat oven to 350°F (175°C). Grease two 8-inch round cake pans, line bottoms with parchment, and lightly flour the sides. This prevents the dreaded cake-tattoo-on-your-pan scenario.
- Whisk the dry team. In a large bowl, whisk flour, sugar, cocoa, baking powder, baking soda, and salt.
If using espresso powder, add it here. No lumps, no drama.
- Combine the wet team (except coffee). In a separate bowl, whisk eggs, milk, oil, and vanilla until smooth.
- Bring the squads together. Pour wet into dry and whisk until just combined. It’ll be thick.
Don’t overmix; we’re baking cake, not building gluten.
- Add the hot coffee. Slowly whisk in the hot coffee. The batter becomes thin—IMO, that’s the secret to a fine, moist crumb. Scrape the bowl well.
- Divide and bake. Pour evenly into pans.
Bake 28–34 minutes, until a toothpick comes out with a few moist crumbs. If it’s clean, you might’ve gone a smidge too far.
- Cool like a pro. Let cakes cool in pans 10 minutes, then turn out onto wire racks. Peel parchment and cool completely.
Warm cake + frosting = slip-n-slide.
- Make the frosting base. Heat cream just to a simmer. Pour over chopped chocolate in a heatproof bowl. Let stand 2 minutes, then whisk until glossy.
- Finish the frosting. Whisk in sour cream, powdered sugar, vanilla, and salt until smooth and spreadable.
If it’s too loose, chill 10–15 minutes; too firm, let it sit at room temp.
- Assemble. Place one cake layer on a stand. Add a generous frosting layer. Top with second cake.
Frost the sides and finish the top with swoops. Sprinkle flaky salt if you’re feeling fancy.
Storage Tips
- Room temp: Keep covered at cool room temperature for up to 2 days. The sour cream frosting is stable, but avoid hot kitchens.
- Fridge: Store tightly covered for 4–5 days.
Bring slices to room temp before serving for best texture.
- Freezer: Wrap unfrosted layers in plastic and foil; freeze up to 2 months. Thaw in the fridge overnight. Frosting can be made fresh or frozen separately and re-whipped.
- Leftover slices: Wrap individually for emergency cake moments.
You’re welcome.
Benefits of This Recipe
- Failsafe texture: Oil + hot liquid equals ultra-moist crumb that doesn’t dry out by day two.
- Big chocolate energy: Dutch-process cocoa and coffee amplify richness without bitterness.
- Beginner-friendly: No mixer needed for the batter. Minimal steps, maximal payoff.
- Frosting balance: Sour cream adds tang so the sweetness doesn’t punch you in the face.
- Flexible formats: Same batter works for cupcakes, sheet cakes, and layer cakes.
Avoid These Mistakes
- Skipping parchment rounds. This cake is tender. Parchment guarantees clean release—don’t test your luck.
- Overbaking. Pull it when crumbs still cling to a toothpick.
Dry cake is the villain here.
- Cold ingredients. Room-temp eggs and milk mix smoother and rise better. Cold = sluggish batter.
- Wrong cocoa. Natural cocoa works, but Dutch-process gives deeper color and smoother flavor. If using natural, reduce baking powder to 1½ teaspoons and keep baking soda the same.
- Frosting too warm. If the ganache base is hot, your frosting will slide.
Let it cool until spreadable.
Variations You Can Try
- Salted Caramel Core: Spread a thin layer of salted caramel between layers, then frost. Add a pinch of flaky salt on top.
- Mocha Madness: Add 2 teaspoons espresso powder to batter and 1 teaspoon to frosting. Coffee lovers will ascend.
- Blackout Crunch: Fold ¾ cup crushed chocolate wafers into the frosting for texture.
- Raspberry Royale: Add a jam layer between cakes and garnish with fresh raspberries.
Tart meets dark—yes, please.
- Gluten-Free Swap: Use a 1:1 gluten-free baking blend and add ½ teaspoon xanthan gum if not included. Bake time may vary slightly.
- Dairy-Free Twist: Use plant milk, swap sour cream for thick coconut yogurt, and make a ganache with dairy-free cream and chocolate.
- Cupcakes: Bake at 350°F for 18–22 minutes. This yields about 24 cupcakes.
FAQ
Can I make this without coffee?
Yes.
Use hot water instead. You’ll still get a great crumb, though the chocolate flavor will be slightly less intense.
Which cocoa is best?
Dutch-process cocoa gives a smoother, darker flavor and color. If you only have natural cocoa, it works—just note the flavor will be a bit brighter and you may need the leavening tweak mentioned above.
Why is my batter so thin?
It’s supposed to be.
The hot liquid blooms the cocoa and thins the batter, which bakes into a moist, tender cake with level tops. Don’t panic.
Can I bake this as a sheet cake?
Absolutely. Use a 9×13-inch pan and bake 32–38 minutes.
Cool in the pan and frost directly for party-friendly slices.
How do I get cleaner slices?
Chill the frosted cake for 20–30 minutes, then use a hot, clean knife, wiping between cuts. Instagram-ready edges, unlocked.
What if I only have 9-inch pans?
Use them, but start checking a few minutes earlier since layers will be thinner. Or scale the recipe by 1.25x for thicker layers.
Can I make the frosting ahead?
Yes.
Refrigerate up to 3 days. Let it soften at room temp and re-whisk briefly before spreading. If it’s too stiff, warm the bowl slightly.
Is this sweet enough for kids but not too sweet for adults?
Totally.
The cake has balanced sweetness and the sour cream frosting keeps it from tasting sugary. It’s a crowd-pleaser, FYI.
The Bottom Line
This best chocolate cake recipe is built for maximum flavor with minimum fuss. You get bakery-level texture, real chocolate depth, and a frosting that behaves.
Whether it’s a birthday, a Tuesday, or a “just because,” this one delivers—no fancy skills required. Bake it once, and it becomes your signature move.
