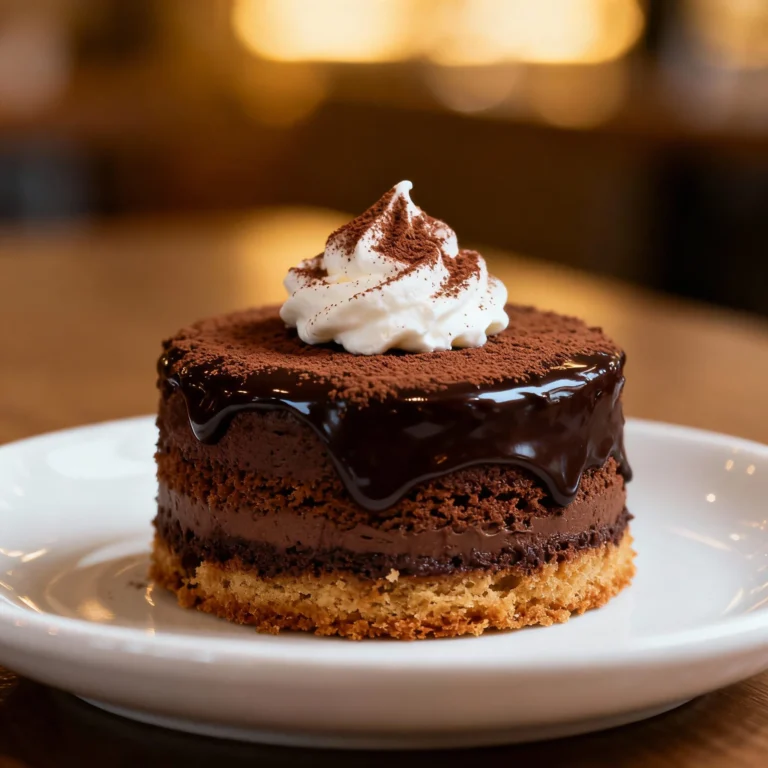
Choco Lava Cake Recipe That Oozes Like a Dream: 10-Minute Dessert Flex You’ll Brag About
👩🍳 The Home Chef's Essential Kitchen
Consistently cooking incredible, healthy meals at home is so much easier when you aren't fighting with cheap tools. These are the 5 absolute powerhouse kitchen essentials that professional chefs and serious home cooks rely on every single day to get perfect results.
🍳 Lodge 10.25" Cast Iron Skillet
The single greatest value in all of cookware. It retains heat infinitely better than cheap non-stick pans, allowing you to get a restaurant-quality crust on steaks or perfect crispy edges on cornbread. With proper care, this $20 pan will literally outlive you.
🔪 Victorinox Fibrox Pro 8" Chef's Knife
A dull knife makes cooking a frustrating chore. This specific blade is the undisputed champion of the culinary world—it holds a terrifyingly sharp edge, features a comfortable non-slip grip, and performs identical to German knives that cost quadruple the price.
🌡️ ThermoPro Instant Read Thermometer
Never serve dry chicken or undercooked pork again. An instant-read thermometer is the secret difference between amateur cooks who 'guess' when protein is done, and professionals who know exactly when to pull meat off the heat for maximum juiciness.
🍲 Lodge Enameled Cast Iron Dutch Oven
The ultimate workhorse for soups, stews, braised short ribs, and baking crusty artisanal bread. The enameled interior provides incredible heat distribution for slow-cooking while eliminating the intense seasoning maintenance required by bare cast iron.
🥄 Bpa-Free Silicone Utensil Set
Throw away those melting plastic spatulas and bacteria-harboring wooden spoons. This pure silicone set is heat-resistant up to 600°F, won't scratch your expensive pans, and features seamless designs that make cleaning out thick sauces and batters effortless.
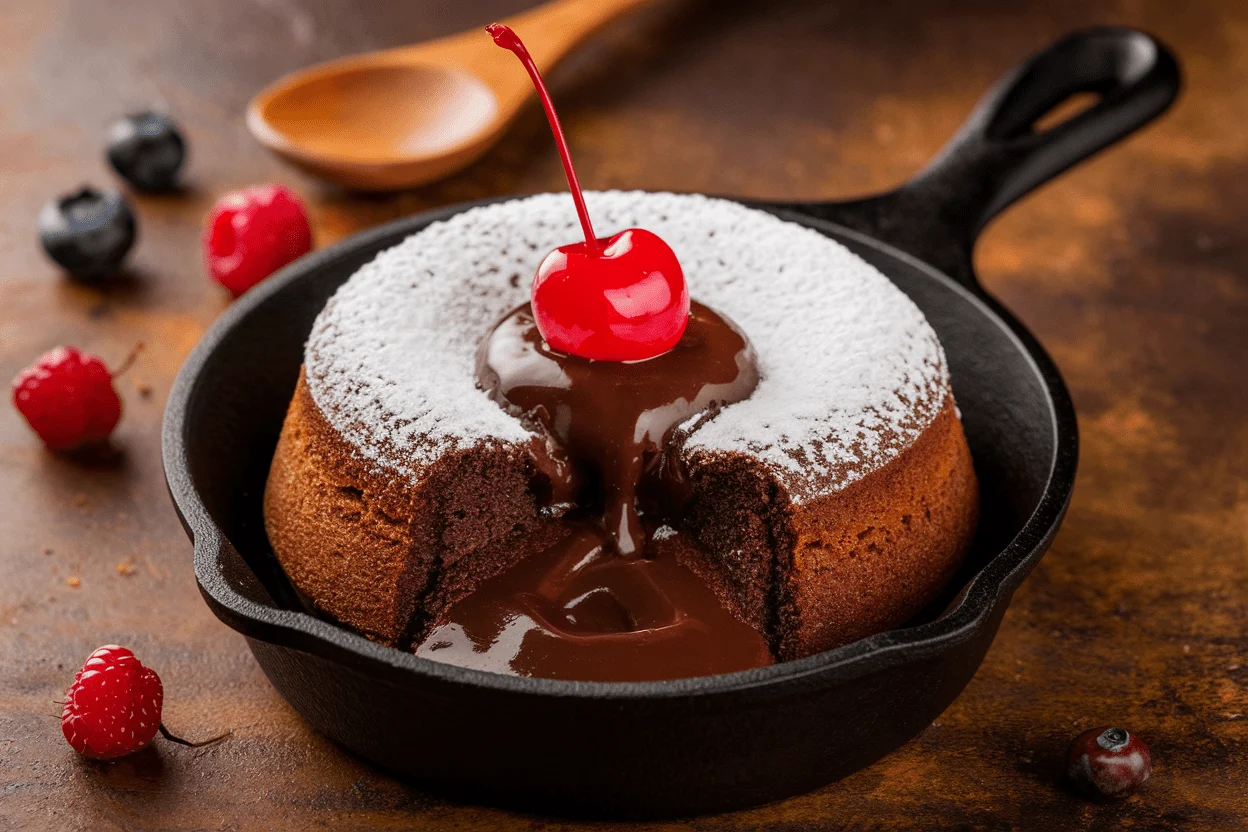
You know that dessert that makes dinner guests go silent, then clap, then ask for the recipe? This is it. Rich, molten, unapologetically chocolatey—without the fuss of bakery school or fancy gear.
If you can melt butter and stir, you can pull off this choco lava cake recipe like a pro. And yes, the middle really does flow like lava. Ready to make a dessert that looks expensive and tastes dangerous?
The Secret Behind This Recipe
Most lava cakes fail because people treat them like regular cakes.
Big mistake. The magic is in the timing and the batter structure: part brownie, part souffle, all swagger. We underbake just enough so the edges set while the center stays molten.
The second key is chocolate quality. Use real dark chocolate with at least 60–70% cocoa. Cheap chocolate equals dull flavor and a gummy texture.
Also, a smidge of flour and a bold amount of eggs create that signature “set outside, oozy inside” contrast we’re chasing.
What You’ll Need (Ingredients)
- 170 g (6 oz) dark chocolate (60–70% cocoa), chopped
- 115 g (1/2 cup) unsalted butter, plus more for greasing
- 2 large eggs
- 2 large egg yolks
- 100 g (1/2 cup) granulated sugar
- 1 tsp pure vanilla extract
- Pinch of fine salt
- 30 g (1/4 cup) all-purpose flour
- Cocoa powder for dusting ramekins
- Optional garnishes: powdered sugar, berries, vanilla ice cream, espresso shot, flaky sea salt
Cooking Instructions
- Prep your gear. Preheat oven to 220°C / 425°F. Grease 4 small ramekins (6 oz/180 ml each) with butter and dust with cocoa powder. This prevents sticking and gives clean releases.
- Melt chocolate and butter. Place the chopped chocolate and butter in a heatproof bowl over gently simmering water (or microwave in 20–30 second bursts), stirring until smooth.
Set aside to cool slightly for 2–3 minutes.
- Whisk eggs and sugar. In a separate bowl, whisk the eggs, yolks, sugar, vanilla, and salt until thick and slightly pale—about 1–2 minutes by hand. You want some air, not foam party.
- Combine wet ingredients. Stream the warm (not hot) chocolate-butter mixture into the egg mixture while whisking. It should become glossy and unified.
- Fold in flour. Sift in the flour and fold gently just until no dry streaks remain.
Don’t overmix—gluten is not your friend here.
- Fill ramekins. Divide the batter evenly among the prepared ramekins, filling about 3/4 full.
- Bake. Place ramekins on a baking sheet and bake for 9–12 minutes, depending on your oven and ramekin size. Edges should look set; centers should still jiggle slightly. If in doubt, underbake by 30 seconds.
- Rest and release. Cool for 60–90 seconds.
Run a thin knife around the edge, invert onto plates, and lift off the ramekin. A gentle tap may help.
- Finish strong. Dust with powdered sugar, add a scoop of vanilla ice cream, and maybe a pinch of flaky sea salt. Serve immediately.
Delay = less lava.
Storage Tips
- Make-ahead batter: Portion into greased, cocoa-dusted ramekins, cover, and refrigerate up to 24 hours. Bake straight from the fridge, adding 1–2 minutes to the time.
- Freeze unbaked: Wrap filled ramekins well and freeze up to 1 month. Bake from frozen at 220°C / 425°F for 13–15 minutes.
- Leftovers: Cooked lava cakes don’t store well.
The center sets as they cool. If you must, rewarm gently in the microwave for 10–15 seconds, but expect more fudge than lava.
Benefits of This Recipe
- Fast win: From zero to hero in under 20 minutes. Perfect for last-minute dessert flexes.
- Restaurant-level finish: Looks like fine dining, tastes like a dream, and costs a fraction.
- Scalable: Double or triple with ease.
The batter behaves—no diva moves.
- Customizable: Simple base recipe with room for flavors like espresso, orange, or chili. Your kitchen, your rules.
- Gluten-light option: Minimal flour already; easy to swap with almond flour or a 1:1 gluten-free blend.
Avoid These Mistakes
- Overbaking: The number-one lava killer. Pull them when the edges are set but the center still wobbles.
- Using poor chocolate: Low-quality chocolate = flat flavor and greasy texture.
Invest in good bars, not chips (chips contain stabilizers).
- Skipping the dusting: Greasing alone is risky. Butter + cocoa ensures a clean release and keeps the sides chocolatey, not floury.
- Hot batter shock: Pouring scorching chocolate into eggs can scramble them. Let it cool a minute before mixing.
- Wrong ramekin size: Larger dishes alter bake time drastically.
Stick to 6 oz/180 ml or adjust time accordingly, FYI.
Variations You Can Try
- Mocha Lava: Add 1–2 tsp instant espresso to the chocolate while melting. Finish with espresso powder dusting. Awake and delicious.
- Orange Dark Chocolate: Add 1 tsp orange zest and a splash (1 tbsp) of Grand Marnier.
Garnish with candied peel.
- Salted Caramel Core: Freeze small dollops of thick caramel, then push one into the center of each ramekin before baking. Double ooze, double joy.
- Peanut Butter Swirl: Marble 1 tbsp warmed peanut butter into each portion just before baking. Sprinkle with crushed peanuts.
- Spicy Aztec: Add 1/4 tsp cinnamon and a pinch of cayenne.
A subtle kick that sneaks up—in a good way.
- Gluten-Free: Swap flour for 1:1 gluten-free blend or 20 g almond flour. Texture stays rich and fudgy.
- Mini Skillet Style: Bake in small cast-iron pans for 10–12 minutes. Serve right in the skillet (careful, it’s hot—obviously).
FAQ
Can I make choco lava cake without ramekins?
Yes.
Use a muffin tin lined with parchment cups and bake for 7–9 minutes. They’ll be smaller, so watch them closely to keep the centers molten.
Why did my lava cake not ooze?
Likely overbaked or left sitting too long. Pull them while the center still jiggles and serve immediately.
Also check ramekin size—larger dishes need less time per depth.
Can I reduce the sugar?
A little. Drop to 80 g (about 1/3 cup + 1 tbsp). Any lower and the texture may suffer—sugar impacts structure and moisture, not just sweetness.
What chocolate percentage works best?
Aim for 60–70%.
Below 55% is too sweet and dull; above 75% can taste bitter and tighten the crumb unless you adjust sugar, IMO.
How do I know when they’re done?
Edges look set and slightly puffed; the center still trembles when you jiggle the ramekin. A quick toothpick test should show wet batter only in the center.
Can I make it dairy-free?
Yes. Use high-quality dairy-free dark chocolate and replace butter with coconut oil or a vegan butter stick.
Expect a slightly different flavor profile but still lush.
Is it safe to eat with a gooey center?
Yes, because the eggs are cooked to a safe temperature at the edges and the center is a fluid batter, not raw egg puddle. If concerned, use pasteurized eggs.
Wrapping Up
This choco lava cake recipe is your shortcut to dessert glory: minimal effort, maximum applause. Nail the timing, use great chocolate, and serve hot.
In under 20 minutes, you’ll have a plate that screams date-night, birthday-party, or “I just crushed Tuesday.” Go melt some hearts—literally and figuratively.