Best Butternut Squash Recipe: Creamy, Dreamy, and Effortlessly Delicious
Fall is in the air, and that means one thing: butternut squash season! While there are countless ways to enjoy this versatile vegetable, we’re confident that this recipe will become your go-to. Forget bland, boring squash – this method delivers a creamy, subtly sweet, and deeply flavorful dish that’s perfect as a side, a base for soup, or even enjoyed on its own. We’re talking restaurant-quality results with minimal effort. Are you ready to unlock the full potential of the humble butternut squash?
Why This Recipe Works
This recipe isn’t just about roasting butternut squash; it’s about coaxing out its natural sweetness and creating a velvety smooth texture. Here’s why this method stands out:
- High-Heat Roasting: Roasting at a higher temperature caramelizes the squash’s natural sugars, intensifying its flavor and creating those desirable slightly charred edges.
- Strategic Seasoning: We use a blend of classic and unexpected spices to complement the squash’s sweetness without overpowering it. Think cinnamon, nutmeg, and a touch of cayenne for a subtle kick.
- Simple Preparation: No fussy peeling or intricate chopping required. We’ll show you the easiest way to prep your squash for maximum flavor with minimal effort.
- Versatility: This recipe is a blank canvas. Enjoy it as is, add it to salads, soups, or even pasta dishes. The possibilities are endless!
- Easy Clean-Up: We use parchment paper to line the baking sheet, making cleanup a breeze.
Ingredients
- 1 medium butternut squash (about 2-3 pounds)
- 2 tablespoons olive oil
- 1 teaspoon kosher salt
- 1/2 teaspoon ground cinnamon
- 1/4 teaspoon ground nutmeg
- 1/4 teaspoon garlic powder
- Pinch of cayenne pepper (optional)
- 1 tablespoon maple syrup (optional, for extra sweetness)
- Fresh parsley, chopped (for garnish)

Instructions
- Preheat the Oven: Preheat your oven to 400°F (200°C). Line a baking sheet with parchment paper.
- Prepare the Squash: Carefully cut the butternut squash in half lengthwise from stem to base. Use a spoon to scoop out the seeds and stringy pulp.
- Season the Squash: Drizzle the olive oil over the cut sides of the squash. Sprinkle with salt, cinnamon, nutmeg, garlic powder, and cayenne pepper (if using). Gently rub the seasonings into the squash.
- Roast the Squash: Place the squash cut-side up on the prepared baking sheet. Roast for 45-60 minutes, or until the squash is fork-tender and easily pierced. The edges should be slightly browned and caramelized.
- Optional: Add Maple Syrup: If desired, drizzle the maple syrup over the roasted squash during the last 10 minutes of cooking. This will add an extra layer of sweetness and glaze.
- Serve and Enjoy: Remove the squash from the oven and let it cool slightly. Garnish with fresh parsley. Serve warm and enjoy!
Tips for Success
Want to ensure your butternut squash turns out perfectly every time? Here are a few helpful tips:
- Choose the Right Squash: Look for a squash that feels heavy for its size and has a deep tan color. Avoid squash with soft spots or bruises.
- Cutting the Squash: A sharp knife is essential for safely cutting through the tough skin of a butternut squash. If you’re having trouble, you can microwave the squash for a few minutes to soften it slightly.
- Don’t Overcrowd the Pan: Make sure the squash halves have enough space on the baking sheet. Overcrowding can lead to steaming instead of roasting.
- Adjust Seasonings to Your Taste: Feel free to experiment with different spices and herbs. Rosemary, thyme, or sage would also be delicious additions.
- Check for Doneness: The squash is done when it’s easily pierced with a fork. If it’s still firm, continue roasting for a few more minutes.
- Brown Sugar Variation: Substitute 1-2 tablespoons of brown sugar for the maple syrup for a different flavor profile.
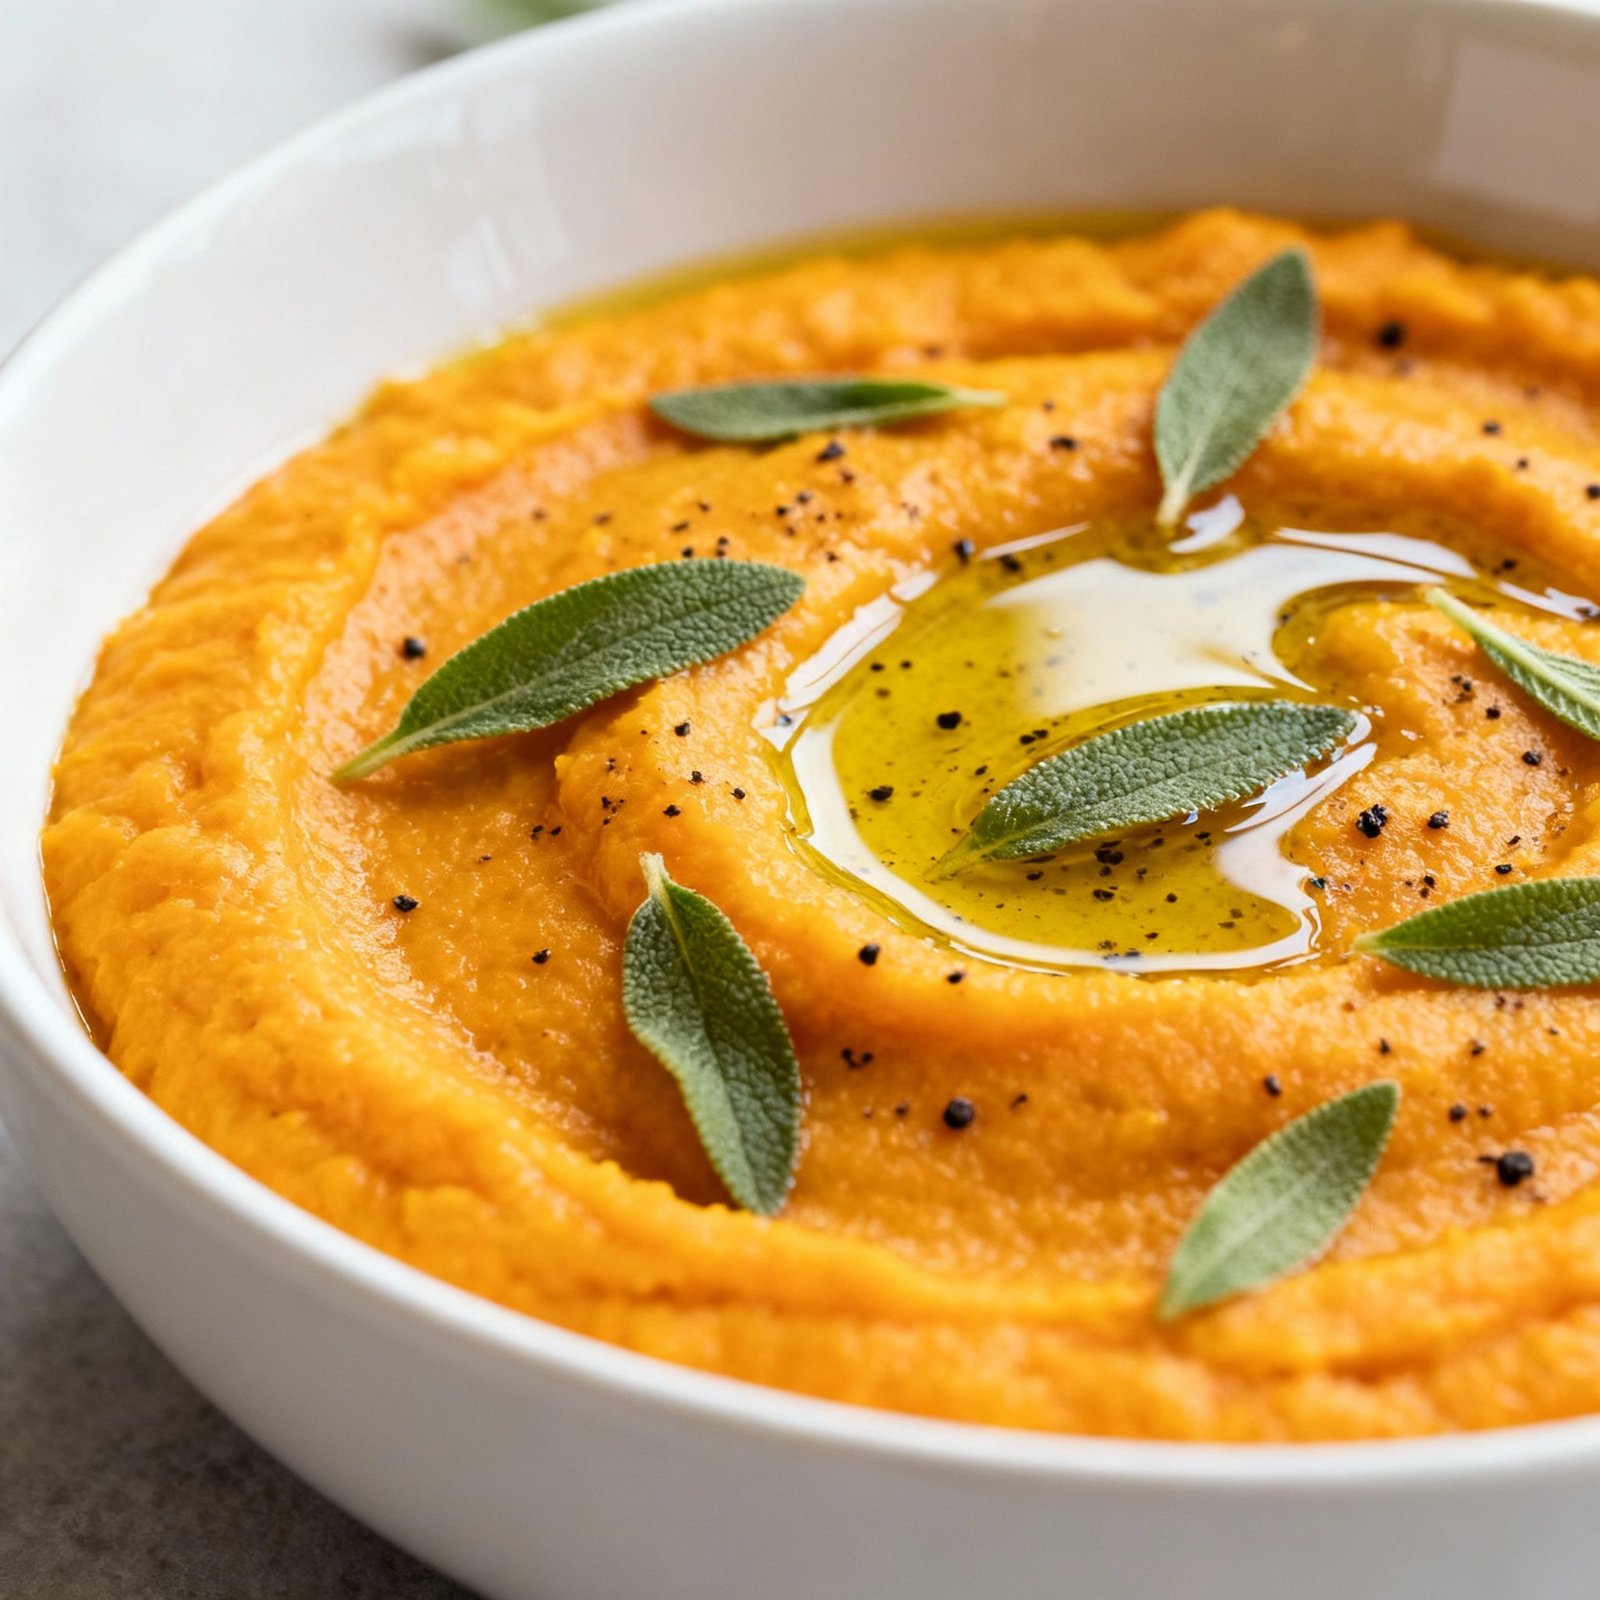
- For a Smoother Texture: After roasting, you can scoop out the flesh and blend it in a food processor or blender for a creamy puree.
Storage Instructions
Leftover roasted butternut squash can be stored in an airtight container in the refrigerator for up to 3-4 days. Reheat in the oven, microwave, or on the stovetop until warmed through. You can also freeze roasted butternut squash for up to 2-3 months. Thaw it overnight in the refrigerator before reheating.

FAQ
Here are some frequently asked questions about roasting butternut squash:
- Do I need to peel the butternut squash? No, peeling is not necessary for this recipe. The skin becomes soft and edible during roasting. However, some people prefer to peel it after roasting.
- Can I use pre-cut butternut squash? Yes, you can use pre-cut butternut squash to save time. Just make sure it’s fresh and not slimy.
- Can I roast the squash at a lower temperature? Yes, you can roast it at a lower temperature (e.g., 375°F) for a longer time (e.g., 60-75 minutes). Just keep an eye on it and make sure it doesn’t burn.
- What can I serve with roasted butternut squash? Roasted butternut squash pairs well with a variety of dishes, including roasted chicken, pork, fish, and vegetarian entrees. It’s also a great addition to salads, soups, and grain bowls.
- Can I add other vegetables to the baking sheet? Absolutely! Brussels sprouts, carrots, and onions roast beautifully alongside butternut squash. Just be sure to adjust the cooking time as needed.
Conclusion
This roasted butternut squash recipe is a game-changer. It’s simple, delicious, and incredibly versatile. Whether you’re looking for a healthy side dish, a flavorful ingredient for your favorite soup, or a comforting meal on a chilly evening, this recipe is sure to satisfy. So, grab a butternut squash and get ready to experience the magic of perfectly roasted squash! We guarantee you’ll be making this recipe again and again.