Best Cake Pop Recipe: Irresistibly Delicious & Easy!
Cake pops. Those bite-sized balls of cakey goodness dipped in a candy coating and perched atop a stick. They’re the ultimate party treat, the perfect little gift, and honestly, just a fun way to eat cake! But let’s be real – not all cake pop recipes are created equal. Some are dry, some are too crumbly, and some are just plain difficult to make. Fear not, cake pop enthusiasts! This recipe is your ticket to consistently perfect, melt-in-your-mouth cake pops that will impress everyone who tries them.
Forget complicated techniques and finicky ingredients. This recipe uses simple ingredients and straightforward instructions to deliver cake pops that are moist, flavorful, and beautifully coated. Whether you’re a seasoned baker or a complete beginner, you’ll be whipping up batches of these delightful treats in no time. Get ready to wow your friends and family with cake pops that taste as good as they look!
Why This Recipe Works
This recipe isn’t just another cake pop recipe; it’s a *refined* cake pop recipe. Here’s why it consistently delivers amazing results:
- Moist Cake Base: We start with a box cake mix, but we doctor it up with a secret ingredient (sour cream!) to add extra moisture and richness. This prevents the cake pops from being dry or crumbly.
- Perfect Binder: The ratio of frosting to cake is crucial. Too much frosting, and your cake pops will be overly sweet and mushy. Too little, and they’ll fall apart. We’ve found the sweet spot for a perfectly cohesive and flavorful cake pop.
- Smooth Candy Coating: We use candy melts specifically designed for coating, which melt smoothly and evenly, creating a beautiful, professional-looking finish.
- Easy to Handle: The recipe includes chilling steps that firm up the cake balls, making them much easier to dip and decorate without falling off the stick.
- Customizable: This recipe is a blank canvas for your creativity! Use different cake flavors, frosting flavors, and decorations to create cake pops that are uniquely yours.
Ingredients
- 1 box (15.25 oz) cake mix (any flavor you like!)
- Ingredients called for on the cake mix box (usually eggs, oil, and water)
- 1/2 cup sour cream (this is our secret ingredient!)
- 1/2 cup frosting (flavor should complement the cake mix)
- 12 oz candy melts (in your desired color)
- Cake pop sticks (4-inch or 6-inch)
- Vegetable shortening or coconut oil (optional, for thinning candy melts)
- Sprinkles, edible glitter, or other decorations (optional)

Instructions
- Bake the Cake: Prepare the cake mix according to the package directions, but add the sour cream to the batter. Bake as directed in a 9×13 inch pan.
- Cool Completely: Let the cake cool completely in the pan. This is crucial for preventing the cake pops from being too soft and difficult to handle.
- Crumble the Cake: Once the cake is completely cool, crumble it into a large bowl using your hands or a fork. Make sure there are no large chunks remaining.
- Mix in the Frosting: Add the frosting to the crumbled cake and mix well until everything is evenly combined. The mixture should be moist but not wet.
- Roll into Balls: Roll the cake mixture into 1-inch balls. Place the cake balls on a baking sheet lined with parchment paper.
- Chill the Cake Balls: Place the baking sheet with the cake balls in the refrigerator for at least 30 minutes, or in the freezer for 15 minutes. This will help them firm up and prevent them from falling off the sticks.
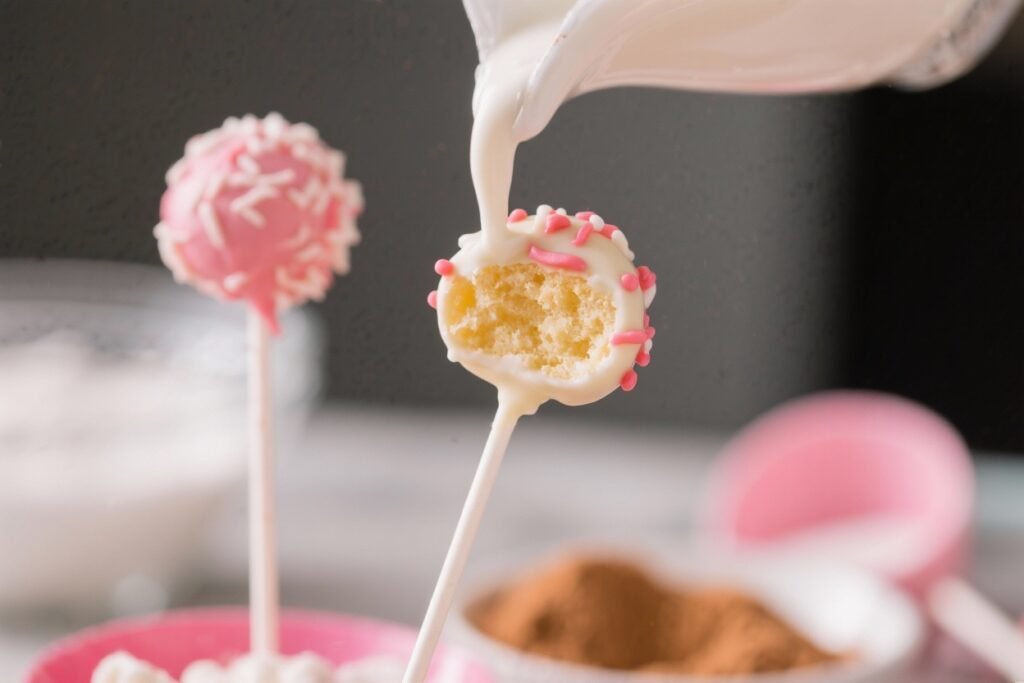
- Melt the Candy Melts: Melt the candy melts according to the package directions. You can use a microwave or a double boiler. If the candy melts are too thick, add a teaspoon of vegetable shortening or coconut oil at a time until they reach a smooth, flowing consistency. Be careful not to overheat the candy melts, as this can cause them to seize up.
- Dip the Sticks: Dip the tip of each cake pop stick into the melted candy and then insert it halfway into a chilled cake ball. This helps the stick adhere to the cake pop.
- Dip the Cake Pops: Dip each cake pop into the melted candy, making sure to completely coat the cake ball. Gently tap off any excess candy.
- Decorate: Immediately decorate the cake pops with sprinkles, edible glitter, or other decorations while the candy coating is still wet.
- Let Set: Place the decorated cake pops in a cake pop stand or stick them into a Styrofoam block to allow the candy coating to set completely. This usually takes about 30 minutes.
Tips for Success
- Don’t Overbake the Cake: Overbaked cake will be dry and crumbly, making it difficult to create smooth cake pops.
- Use a Cookie Scoop: A cookie scoop will help you create uniform cake balls, ensuring that they cook evenly and look consistent.
- Chill, Chill, Chill: Chilling the cake balls is essential for preventing them from falling apart during dipping. Don’t skip this step!
- Melt Candy Melts Carefully: Follow the package directions carefully when melting candy melts to avoid overheating or burning them.
- Thin the Candy Melts if Necessary: If the candy melts are too thick, they will create a clumpy coating. Add a small amount of vegetable shortening or coconut oil to thin them out.
- Tap Off Excess Candy: Gently tap off any excess candy after dipping to create a smooth, even coating.
- Work Quickly: The candy coating will set quickly, so work quickly when decorating the cake pops.
- Use a Cake Pop Stand: A cake pop stand will help you keep the cake pops upright while the candy coating sets, preventing them from getting flat spots.
Storage Instructions
Store your finished cake pops in an airtight container at room temperature for up to 3 days. You can also store them in the refrigerator for up to a week, but the candy coating may become slightly sticky. Cake pops can also be frozen for up to 2 months. Thaw them in the refrigerator before serving.
FAQ
- Can I use a different type of cake mix? Yes, you can use any flavor of cake mix that you like. Just make sure that the frosting flavor complements the cake flavor.
- Can I use homemade frosting? Yes, you can use homemade frosting. Just make sure that it is not too runny.
- Can I use chocolate instead of candy melts? Yes, you can use chocolate, but it is more difficult to work with than candy melts. Chocolate needs to be tempered to prevent it from blooming (developing white streaks).
- My candy melts are seizing up. What should I do? This usually happens when the candy melts are overheated or come into contact with water. Try adding a small amount of vegetable shortening or coconut oil to the candy melts and stirring gently. If that doesn’t work, you may need to start over with a fresh batch of candy melts.
- My cake pops are falling off the sticks. What am I doing wrong? Make sure that you are chilling the cake balls before dipping them. Also, make sure that you are dipping the tip of the cake pop stick into the melted candy before inserting it into the cake ball.
Conclusion
There you have it! The ultimate cake pop recipe that’s both easy to follow and guaranteed to produce delicious results. With a few simple ingredients and these helpful tips, you’ll be creating impressive cake pops for parties, gifts, or just a fun weekend treat. So, grab your ingredients, get baking, and prepare to be amazed by the deliciousness you can create! Happy cake popping!