This Best Sourdough Bread Recipe Will Ruin Store-Bought Forever (In the Best Way)
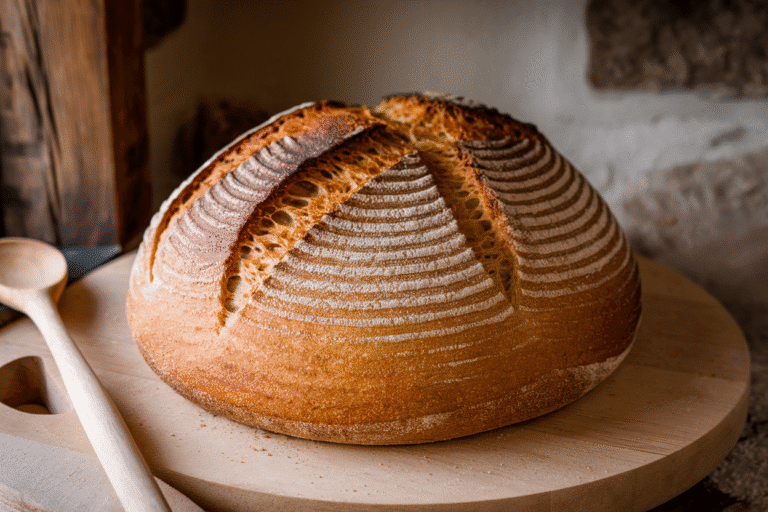
You want the kind of bread that makes people ask, “Wait, you baked this?” Good. Because this loaf is the flex. Big blistered crust, custardy crumb, and that sour tang that hits like a mic drop.
No gadgets, no wizardry—just a killer method and some patience. If you can stir, fold, and wait, you can make bakery-level sourdough at home. And yes, your house is about to smell like victory.
The Secret Behind This Recipe
The magic is in three simple levers: hydration, fermentation, and heat.
We use a moderately high hydration dough so the crumb stays moist with those dreamy holes—but not so wet that it turns into chaos. Long, cold fermentation develops flavor and strength without kneading your arms off. Finally, a screaming-hot oven and a covered bake trap steam, giving you that shattering crust.
We also build strength with stretch-and-folds instead of old-school kneading. It’s faster, cleaner, and results in an open crumb without overworking the dough. The bonus move?
A short autolyse that lets flour hydrate and gluten start forming naturally.
What You’ll Need (Ingredients)
- Active sourdough starter: 100 g (fed and bubbly, 100% hydration)
- Bread flour: 400 g
- Whole wheat flour: 100 g
- Water: 375–400 g (start with 375 g; add more if dough is very stiff)
- Fine sea salt: 10 g
- Rice flour + AP flour for dusting (prevents sticking in the proofing basket)
Cooking Instructions
- Feed your starter (morning): Make sure your starter is at peak activity—domed, bubbly, and floats in water. If it sinks, feed it and give it more time. This is non-negotiable.
- Autolyse (about 30–60 minutes): In a large bowl, mix bread flour, whole wheat flour, and 350 g of water until no dry bits remain.
It’s shaggy and that’s fine. Cover and rest.
- Mix in starter and salt: Add 100 g starter and 10 g salt. Squish with your hands until fully incorporated.
If the dough feels very stiff, add up to 25–50 g more water gradually. Aim for tacky, not soupy.
- Bulk fermentation + folds (3–4 hours at 75–78°F/24–26°C): Every 30 minutes for the first 2 hours, perform a set of stretch-and-folds: grab a side, pull up, and fold over; turn the bowl and repeat 4–6 times. The dough will transform from slouchy to bouncy.
After the last fold, let it rest undisturbed until puffy with some bubbles. It should increase by about 50%.
- Bench rest and pre-shape: Lightly flour the counter. Gently turn out the dough and coax edges toward the center to form a loose round.
Rest 20 minutes. This relaxes gluten so shaping is smooth, not a wrestling match.
- Final shape: For a boule: flip the dough, stretch into a rough rectangle, fold the top down 2/3, bottom up over the top, then roll it into a tight ball using the counter for tension. For a batard: same idea, but elongate slightly and tighten into an oval.
You want a snug, smooth surface.
- Proof (cold, 8–16 hours): Place seam-side up in a well-dusted banneton (rice flour + AP blend is clutch). Cover and refrigerate overnight. This slow proof deepens flavor and makes scoring way easier.
- Preheat like you mean it: Put a Dutch oven (or combo cooker) in your oven and preheat to 500°F (260°C) for at least 45 minutes.
Hot metal equals epic oven spring.
- Score and bake: Turn the dough onto parchment, seam-side down. Score with a sharp lame or razor at a 30–45° angle about 1/4-inch deep. Lower into the Dutch oven.
Cover and bake 20 minutes at 475°F (246°C).
- Uncover and finish: Remove the lid and bake another 18–25 minutes until deep brown with crackly blisters. If in doubt, darker is better. Internal temp should be around 208–212°F (98–100°C).
- Cool (seriously, wait): Cool on a rack at least 1 hour before slicing.
The crumb finishes setting as it cools. Cutting early = gummy sadness.
How to Store
- Short-term: Keep at room temp, cut-side down on a board, or wrapped in a clean towel for up to 2 days. Paper bag works too.
- Medium-term: Slice and freeze in a zip bag.
Toast straight from frozen—no regrets.
- Avoid: Plastic at room temp. It softens the crust and invites mold like it’s hosting a party.
- Revive: For a day-old loaf, bake at 350°F (175°C) for 8–10 minutes to re-crisp the crust.
Why This is Good for You
- Better digestion: Natural fermentation can make gluten and starches easier to handle. Your gut might actually send you a thank-you note (figuratively, obviously).
- Lower glycemic impact: The acids in sourdough slow down sugar absorption.
No carb crash-and-burn.
- Real ingredients: Flour, water, salt, starter. That’s it. No preservatives, no mystery goos.
- Micronutrients unlocked: Fermentation can increase mineral bioavailability—think iron and zinc.
Small wins, big impact.
Don’t Make These Errors
- Using a sleepy starter: If it doesn’t float and doesn’t smell lively, don’t bake. Feed it and wait. Patience beats a brick loaf.
- Over-hydrating early: Adding too much water out of the gate turns shaping into a slip-n-slide.
Start conservative; adjust by feel.
- Skipping the folds: Those folds build structure. No folds = flat, dense bread. You’ve been warned.
- Underproofing or overproofing: Underproofed dough tears when scored; overproofed collapses.
Look for puffy, airy dough that springs back slowly when poked.
- Cool oven, cool pot: If your Dutch oven isn’t scorching hot, you’ll miss the oven spring. Heat is your friend, not your fear.
Mix It Up
- Seeded crunch: Add 60–80 g mixed seeds (sesame, pumpkin, sunflower) during the last fold. Toast them first for big flavor.
- Olive and herb: Gently laminate in chopped olives and rosemary after the first hour of bulk.
Salt the olives lightly to avoid sogginess.
- Cheddar-jalapeño: Fold in 100 g shredded sharp cheddar and 1–2 diced jalapeños. Yes, it’s outrageous. You’re welcome.
- Higher whole grain: Swap up to 40% of the flour for whole grain.
Increase water by 10–20 g to compensate; whole grains are thirsty, IMO.
- Rye tang: Replace 50 g of whole wheat with rye for a spicy, complex finish. Great with butter and honey—don’t @ me.
FAQ
My dough is sticking to everything. What should I do?
Lightly wet your hands during folds, and use a bench scraper to move the dough.
For proofing baskets, dust generously with a 50/50 rice flour and AP flour blend—it’s the stick-prevention cheat code.
How do I know when bulk fermentation is done?
Look for a 40–60% rise, a domed surface, visible bubbles at the edges, and a gentle wobble when you shake the bowl. The dough should feel airy and strong, not slack and soupy.
Can I bake without a Dutch oven?
Yes. Preheat a baking stone or steel and place a tray of boiling water on the bottom rack for steam.
Alternatively, cover the dough on the stone with a large metal bowl for the first 20 minutes.
What if my loaf is too sour?
Use a younger starter (feed closer to mixing time), shorten the cold proof, and keep bulk on the shorter side. Also, avoid overripe starters that smell like nail polish remover—time to feed.
Why is my crumb dense?
Likely culprits: underproofing, inactive starter, or not enough heat. Also, rough handling during shaping can degas too much.
Be firm but gentle—like shaping a water balloon you actually like.
Can I scale this recipe?
Absolutely. Keep ratios the same, and remember that bigger loaves may need a few extra minutes uncovered to color up. Internal temp is your truth-teller.
Do I have to use bread flour?
Bread flour gives better structure due to higher protein.
If using all-purpose, reduce water by 10–20 g and expect a slightly tighter crumb.
The Bottom Line
This best sourdough bread recipe gives you a loaf with swagger: bold crust, tender crumb, and flavor that makes store-bought taste like cardboard cosplay. Respect your starter, trust the folds, and let the fridge do the heavy lifting. With a hot pot and a little timing, you’ll churn out bakery-level bread on repeat.
One bake and you’ll understand—homemade sourdough isn’t a flex, it’s a lifestyle.