Blueberry Jelly Recipe Canning: A Taste of Summer All Year Long!
Imagine spreading a vibrant, shimmering jelly on your morning toast, bursting with the sweet and slightly tart flavor of fresh blueberries. With this blueberry jelly recipe, you can capture the essence of summer and enjoy it all year round. Canning your own jelly is a rewarding experience, allowing you to control the ingredients and create a homemade treat that’s far superior to anything you’ll find on store shelves. This recipe is designed for both beginner and experienced canners, providing clear instructions and helpful tips to ensure a successful and delicious batch of blueberry jelly.
Why This Recipe Works
This recipe is built upon a foundation of tried-and-true canning principles, ensuring both safety and flavor. Here’s why it’s a winner:
- Precise Pectin Balance: The recipe uses the correct amount of pectin to achieve a perfect gel. Pectin is a naturally occurring substance in fruits that helps them thicken when cooked with sugar and acid. We’ll guide you on selecting the right type of pectin for your needs.
- Optimal Sugar Ratio: The sugar not only sweetens the jelly but also acts as a preservative. The ratio of sugar to fruit juice is carefully calculated to ensure proper preservation and a delightful flavor.
- Sufficient Acidity: Blueberries are naturally low in acid, so added lemon juice is crucial. Acid helps the pectin set properly and also contributes to the preservation process, preventing the growth of harmful bacteria.
- Proper Canning Technique: We’ll guide you through the water bath canning process step-by-step, ensuring that your jars are properly sealed and safe for long-term storage.
- Clear Instructions: The instructions are written in a clear and concise manner, making the process easy to follow, even for beginners.
Ingredients
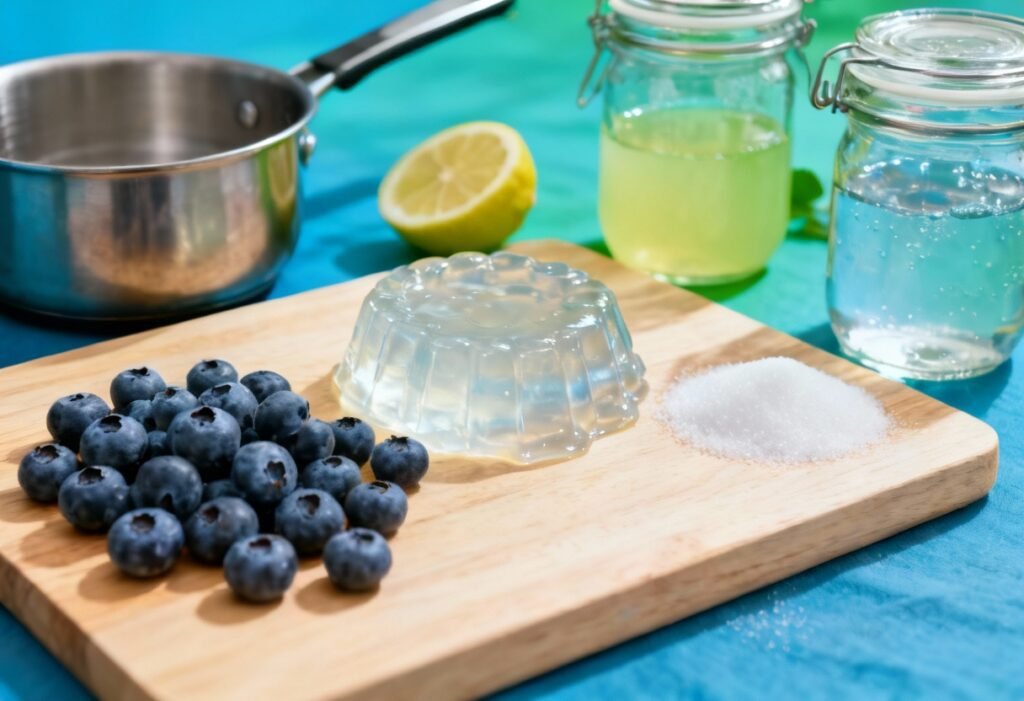
- 6 cups fresh blueberries, washed and stemmed
- 1 ½ cups water
- 4 ½ cups granulated sugar
- ¼ cup lemon juice, freshly squeezed
- 1 package (1.75 oz) powdered pectin (ensure it is for regular sugar recipes, not low-sugar)
Instructions
- Prepare the Blueberries: In a large stainless steel saucepan, crush the blueberries with a potato masher or the back of a spoon.
- Cook the Blueberries: Add the water to the crushed blueberries in the saucepan. Bring the mixture to a boil over medium-high heat, stirring occasionally to prevent sticking. Reduce the heat slightly and simmer for 10 minutes, stirring occasionally, until the blueberries are softened and have released their juice.
- Extract the Juice: Line a large bowl with several layers of cheesecloth. Place the bowl in a stable location. Pour the cooked blueberry mixture into the cheesecloth-lined bowl. Gather the edges of the cheesecloth and tie them together to form a bag. Suspend the bag over the bowl using a wooden spoon or kitchen twine tied to a cabinet handle, allowing the juice to drip out naturally. Let the juice drip for at least 2-3 hours, or preferably overnight. Do not squeeze the cheesecloth bag, as this will result in cloudy jelly.
- Prepare the Canning Equipment: While the juice is dripping, prepare your canning equipment. Wash canning jars, lids, and bands in hot, soapy water. Rinse well. Place the jars in a boiling water canner with a rack and fill with water, ensuring the jars are covered by at least 1 inch of water. Bring the water to a simmer (180°F). Keep the jars hot until ready to use. Place the lids in a separate small saucepan and cover with water. Bring to a simmer over low heat and keep hot until ready to use.
- Measure the Juice: After the juice has dripped, measure out 4 cups of blueberry juice. If you have more than 4 cups, discard the excess. If you have slightly less, you can add a little water to make up the difference, but do not exceed 4 cups.
- Combine Ingredients: In a large, clean stainless steel saucepan, combine the blueberry juice, lemon juice, and pectin. Stir well to dissolve the pectin.
- Boil and Add Sugar: Bring the mixture to a full rolling boil over high heat, stirring constantly. A full rolling boil is a boil that cannot be stirred down. Quickly add the sugar all at once. Stir constantly to dissolve the sugar.
- Cook to Gelling Point: Continue to cook over high heat, stirring constantly, until the jelly reaches the gelling point. This typically takes 1-3 minutes after adding the sugar. To test for gelling, place a small spoonful of the hot jelly on a cold plate that has been in the freezer for a few minutes. Return the plate to the freezer for 30 seconds. Push the jelly with your finger. If it wrinkles, it is ready. If it runs, continue cooking and test again in a minute or two.
- Remove from Heat: Once the jelly reaches the gelling point, remove the saucepan from the heat. Skim off any foam that may have formed on the surface of the jelly using a metal spoon.
- Fill the Jars: Carefully remove the hot jars from the simmering water using jar lifters. Empty any water from the jars. Place the jars on a heat-resistant surface lined with a towel. Using a canning funnel, carefully ladle the hot jelly into the hot jars, leaving ¼ inch headspace (the space between the top of the jelly and the top of the jar).
- Remove Air Bubbles: Use a non-metallic utensil (like a plastic knife or bubble remover) to gently run along the inside of each jar to release any trapped air bubbles.
- Wipe the Rims: Wipe the rims of the jars with a clean, damp cloth to remove any jelly residue. This is crucial for a proper seal.
- Apply Lids and Bands: Place a hot lid on each jar, centering it on the jar rim. Screw on a band until it is fingertip tight (tighten the band until you feel resistance, then tighten it only slightly more). Do not overtighten.
- Process in Boiling Water Canner: Carefully lower the filled jars into the boiling water canner using jar lifters. Ensure that the jars are covered by at least 1 inch of water. Bring the water to a rolling boil. Process the jars for 10 minutes, adjusting for altitude if necessary (see below).
- Cool the Jars: After processing, turn off the heat and carefully remove the jars from the canner using jar lifters. Place the jars on a heat-resistant surface lined with a towel, leaving at least 1 inch of space between the jars. Do not invert the jars. Let the jars cool undisturbed for 12-24 hours. You should hear a popping sound as the jars seal.
- Check the Seals: After the jars have cooled completely, check the seals. The lid should be concave (curved downward) and should not flex when pressed in the center. If a jar did not seal, you can either reprocess it with a new lid and band for the full processing time, or store it in the refrigerator and use it within a few weeks.
- Remove Bands and Store: Once you have confirmed that all the jars are sealed, remove the bands. Wash the jars with warm, soapy water and dry them thoroughly. Label the jars with the date and contents. Store the jars in a cool, dark, and dry place.
Altitude Adjustments for Processing Time:
- 0 – 1,000 feet: 10 minutes
- 1,001 – 6,000 feet: 15 minutes
- Above 6,000 feet: 20 minutes
Tips for Success
- Use Fresh, Ripe Blueberries: The quality of your blueberries will directly impact the flavor of your jelly. Choose plump, ripe berries for the best results.
- Don’t Squeeze the Cheesecloth: Squeezing the cheesecloth will result in cloudy jelly. Be patient and let the juice drip naturally.
- Use a Stainless Steel Pan: Avoid using aluminum pans, as they can react with the acid in the fruit and affect the color and flavor of the jelly.
- Sterilize Jars Properly: Proper sterilization is crucial for safe canning. Follow the instructions carefully.
- Test for Gelling Point Accurately: The cold plate test is the most reliable way to determine if your jelly has reached the gelling point.
- Leave Proper Headspace: Leaving the correct amount of headspace is essential for a proper seal.
- Don’t Overtighten Bands: Overtightening the bands can prevent the jars from sealing properly.
Storage Instructions
Properly canned blueberry jelly can be stored in a cool, dark, and dry place for up to 18 months. Once opened, refrigerate the jelly and use it within a few weeks.
FAQ
Q: Can I use frozen blueberries?
A: Yes, you can use frozen blueberries. Thaw them completely before using and drain off any excess liquid.
Q: Can I reduce the amount of sugar?
A: Reducing the sugar significantly can affect the gelling and preservation of the jelly. If you want to reduce the sugar, use a pectin specifically designed for low-sugar recipes and follow the manufacturer’s instructions.
Q: My jelly is cloudy. What did I do wrong?
A: Cloudy jelly is often caused by squeezing the cheesecloth when extracting the juice. It can also be caused by using overripe fruit or by cooking the jelly for too long.
Q: My jelly didn’t set. What can I do?
A: If your jelly didn’t set, you can try re-cooking it. Add 2 tablespoons of lemon juice and ½ package of pectin to the jelly and bring it back to a boil. Cook for a few more minutes and test for gelling again. If that doesn’t work, you can still use the jelly as a syrup.
Conclusion
Canning your own blueberry jelly is a delightful way to preserve the flavors of summer and enjoy a homemade treat throughout the year. With this recipe and these helpful tips, you’ll be well on your way to creating a batch of delicious and beautiful blueberry jelly that your family and friends will love. So gather your ingredients, prepare your canning equipment, and get ready to experience the satisfaction of homemade goodness!