This Bread Machine Sourdough Recipe Is So Good You’ll Unplug Your Toaster
You want bakery-level sourdough without babying a dough ball for 36 hours? Cool. This bread machine sourdough recipe gives you chewy tang, crackly crust, and that Instagram-worthy crumb—without a degree in fermentation.
We use your machine to do the heavy lifting and still keep that artisan flavor. Less stress, more wow. Is it cheating?
Only if winning is cheating.
What Makes This Recipe Awesome
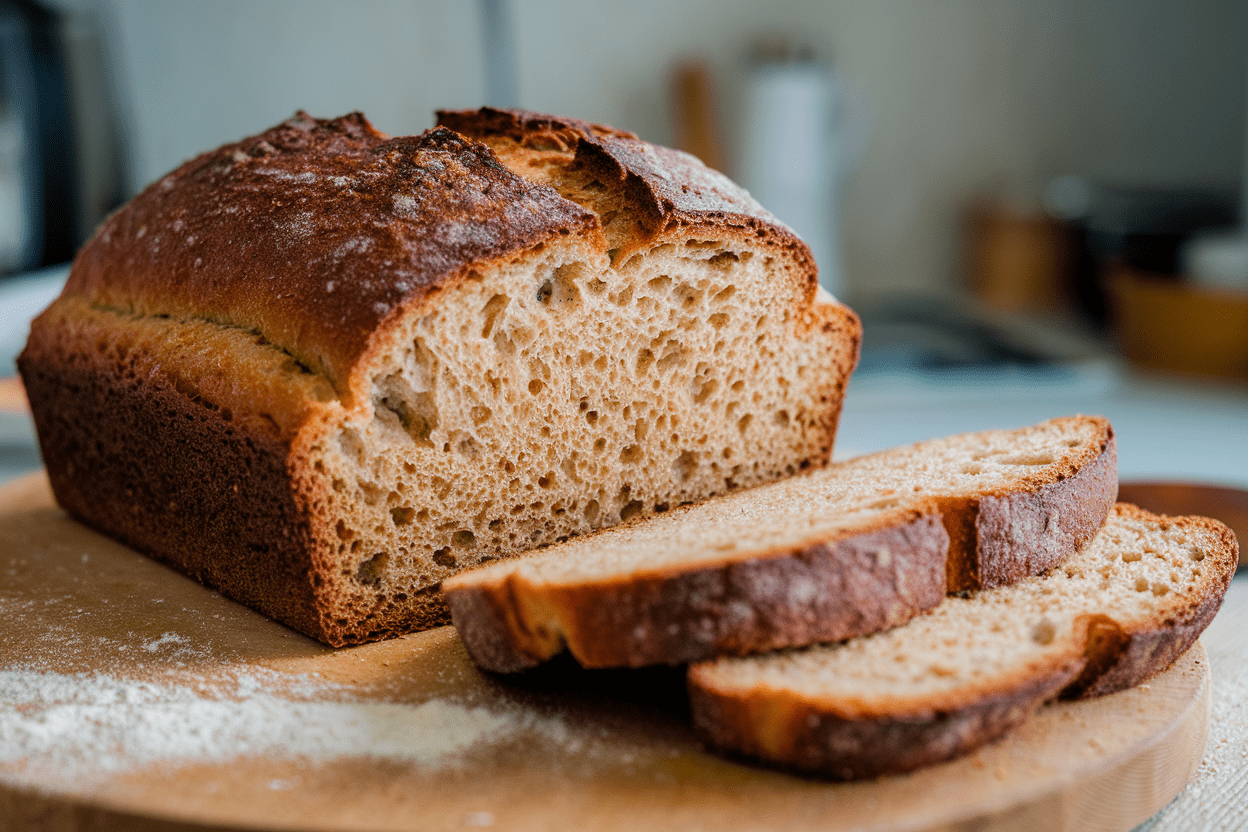
This recipe blends old-school sourdough taste with modern convenience. Your bread machine handles mixing and kneading like a champ, while a room-temp rise adds flavor and structure you simply can’t get on “Quick Bake.” The result? Bold tang, springy texture, and a crust that sings.
We’re working with a mature, active starter, robust hydration, and a method that nudges sourdough to play nice in a machine environment. You’ll get consistent results and a loaf that actually tastes like you waited for it—minus the waiting.
Also, this works whether your machine has a “Sourdough” program or not.
You’ll use the Dough cycle + a countertop rise + a Bake cycle for a legit loaf that slaps.
What You’ll Need (Ingredients)
- Active sourdough starter (100% hydration): 120 g (about 1/2 cup), freshly fed and bubbly
- Warm water: 240 g (1 cup), around 80–85°F
- Bread flour: 360 g (3 cups), plus 1–2 tbsp extra if needed
- Whole wheat flour: 60 g (1/2 cup) for flavor and structure (optional but recommended)
- Salt: 9 g (1 1/2 tsp)
- Honey or sugar: 10 g (2 tsp) to assist browning (optional)
- Olive oil or unsalted butter: 1 tbsp for tenderness (optional)
- Cornmeal or oil: for coating the pan if you plan to shape and bake in the machine
Step-by-Step Instructions
- Check your starter. Drop a spoonful in water—if it floats, it’s ready. If it sinks like a rock, feed it and try again in 3–6 hours. No buoyancy, no bounce.
- Load the pan in this order: water, starter, honey/oil (if using), then flours, and finally salt on top.
Keep salt off the starter at first—let the machine mix before they square up.
- Select the Dough cycle. Let the machine knead 10–15 minutes. After 5 minutes, check the dough. It should be soft, slightly tacky, and clearing the sides.
Add 1–2 tbsp flour if soupy, 1–2 tsp water if stiff. Adjust like you’re the dough whisperer.
- Finish the Dough cycle. This typically includes a short rise. That’s fine.
We’re going for strength first, flavor next.
- Long, flavorful rise. Leave the dough in the machine pan or transfer to a lightly oiled bowl. Cover and let rise at room temp until doubled, 2–4 hours depending on your starter and kitchen temp. Aim for puffy, domed, and jiggly, not collapsed.
- Shape for the pan. Gently deflate, tuck edges under to form a tight loaf, and return to the bread machine pan (greased).
You want surface tension—think smooth balloon, not wrinkled pillow.
- Final proof. Cover and proof until the dough rises about 1 inch above the pan’s center post or reaches 75–85% of its final baking height—about 60–120 minutes. Poke test: a light press should spring back slowly and leave a faint dent.
- Bake in the machine. Use the Bake or Bake Only setting for 50–60 minutes. If your machine doesn’t have Bake Only, use the Basic cycle’s bake stage, skipping pre-mix steps by starting it late.
Aim for an internal temp of 205–210°F.
- Crust upgrade (optional): For a bronzier crust, brush with water and bake 5 more minutes. Or remove and finish in a 450°F oven for 8–10 minutes. Steam optional, bragging rights guaranteed.
- Cool completely. Yes, it smells insane.
Yes, waiting stinks. But cool 1–2 hours before slicing or you’ll compress the crumb and lose steam-driven moisture. Patience = better bread.
Keeping It Fresh
Store at room temp in a breathable bag (paper or linen) for 1–2 days.
For longer, use a zip bag after day two to slow staling. Do not refrigerate—the fridge accelerates staling, FYI.
Freeze sliced: wrap tightly and stash up to 2 months. Toast straight from frozen and pretend it’s fresh-baked. Your future self will high-five you.
What’s Great About This
- True sourdough flavor: Natural fermentation yields tang and complexity—no packet yeast required.
- Hands-off kneading: The machine does the hard work, you do the glory work.
- Flexible timing: Room-temp proofing lets you adjust for your schedule and starter speed.
- Reliable structure: Bread flour plus a touch of whole wheat gives chew and loft.
- Beginner-friendly: Clear checkpoints, simple adjustments, and minimal gear.
Common Mistakes to Avoid
- Using a weak starter: If it doesn’t double after a feeding, it’s not ready.
Underpowered starter = brick loaf.
- Overproofing: Dough that rises sky-high then collapses was pushed too far. Watch the poke test, not the clock.
- Ignoring dough feel: Different flours absorb differently. Tune hydration during the first 10 minutes of kneading.
- Baking too early: If the dough hasn’t risen enough before bake, you’ll get a dense crumb.
Patience beats panic.
- Cutting hot bread: Steam escapes, crumb squishes, tears happen. Let it set. You’ve come this far—don’t fumble on the one-yard line.
Variations You Can Try
- Seeded Sourdough: Add 2 tbsp each of sesame, sunflower, and flax after the first 5 minutes of kneading.
Toast seeds for extra flavor.
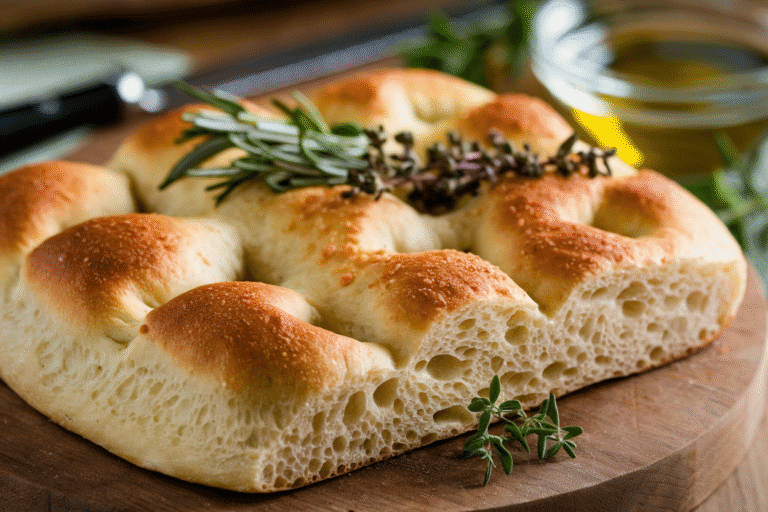
- Garlic-Herb: Mix in 1–2 tsp dried Italian herbs and 2–3 cloves roasted garlic, mashed. Your kitchen will smell like a trattoria, in a good way.
- Olive-Rosemary: Fold in 1/2 cup chopped kalamata olives and 1 tbsp minced fresh rosemary after mixing. Reduce water by 1–2 tsp to account for olive moisture.
- Oat Crust: Brush the shaped loaf with water and roll the top in rolled oats before final proof.
Nice crunch, cozy look.
- Higher Tang: Extend the first rise in a cooler spot (65–68°F) by an extra hour, or use 80 g starter and add 20 g water to keep hydration balanced.
FAQ
Can I use commercial yeast with this recipe?
Yes, add 1/2 tsp instant yeast to the flour if your starter is sluggish or you want insurance. It will rise faster and taste slightly less tangy but still delicious.
My bread caved on top. What happened?
Likely overproofing or too much hydration.
Next time, shorten the final proof by 15–30 minutes and/or add 1–2 tbsp flour during mixing. Also confirm your bake reached 205–210°F.
Do I need bread flour?
You’ll get better structure with bread flour’s higher protein. All-purpose works in a pinch—use 400 g AP plus 20 g vital wheat gluten if you have it.
How do I time this for the morning?
After kneading, refrigerate the dough overnight (8–12 hours).
In the morning, shape, proof at room temp 60–120 minutes, then bake. Cold fermentation = more flavor. IMO, worth it.
Can I bake entirely on the Basic cycle?
Sometimes, but sourdough is slower than yeasted dough.
The Basic cycle often underproofs or overkneads. Using Dough + custom proof + Bake gives better control and results.
What if my machine has no Bake Only setting?
Transfer the shaped, proofed dough to a preheated 425°F oven in a loaf pan. Bake 35–40 minutes until deep golden and 205–210°F inside.
How do I get a thinner, crispier crust?
Skip added fats, use honey sparingly, and finish the last 8 minutes in a 450°F oven.
Let the loaf cool on a wire rack, uncovered.
Wrapping Up
This bread machine sourdough recipe gives you artisan flavor without artisan drama. You’ll mix smart, proof with intention, and bake a loaf that crackles when you cut it—music to carb lovers everywhere. Follow the checkpoints, trust the dough, and tweak hydration like a pro.
Next round, try a variation and pretend you planned this mastery all along.