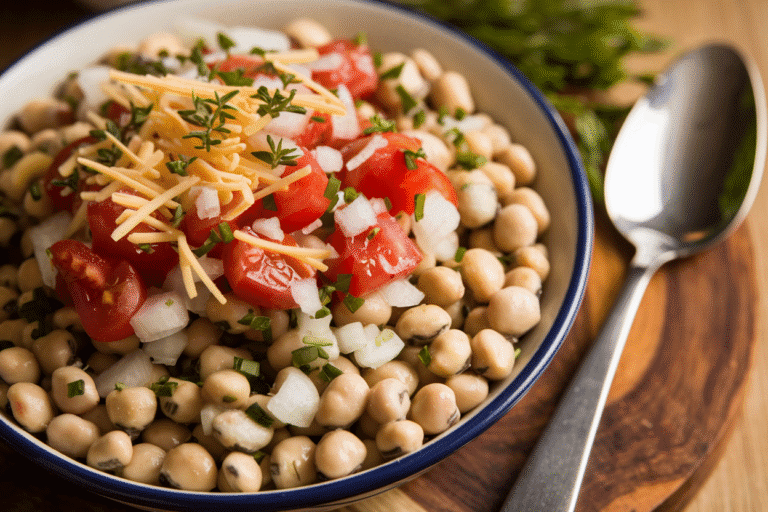
🤠 Best Canned Black Eyed Peas Recipe (Ready in 20 Mins!)
So, you’re staring at a can of beans in your pantry, craving something tasty, but absolutely refusing to spend the next eight hours soaking dried legumes. I feel you. We’ve all been there. You want that deep, soulful, Southern comfort food flavor, but you also want to watch three episodes of your favorite show before bed.
Well, grab your can opener, friend. We are about to perform some serious kitchen alchemy.
This isn’t just heating up a tin of beans; this is a canned black eyed peas recipe that cheats the system. We are going to take those humble, slightly metal-tasting beans and doctor them up until they taste like they’ve been simmering on a grandmother’s stove since last Tuesday. It’s quick, it’s dirty (in the best way), and it’s going to change your weeknight dinner rotation forever.

Why This Recipe is Awesome
Look, I know what you’re thinking. “It’s canned beans. How exciting can it be?”
First of all, lower your voice. Second of all, let me explain why this specific approach is a game-changer.
1. The “Zero-Soak” Lifestyle Let’s be real: soaking beans is a commitment. It requires planning 24 hours in advance, and I don’t know about you, but I usually don’t know what I want for dinner until about 15 minutes before I start screaming. This recipe utilizes the pre-cooked magic of canned goods but strips away that weird, slimy preserving liquid, replacing it with actual flavor.
2. Maximum Flavor, Minimum Effort We are building layers here. Most people just dump the can in a pot and cry. We aren’t doing that. We are using the “Holy Trinity” of cooking science: fat, aromatics, and acid. By rendering down some salty pork (or a vegan substitute) and sautéing veggies before the beans hit the pan, we create a flavor base—technically called a fond—that tricks your palate into thinking this dish took hours. It’s the culinary equivalent of putting on dry shampoo and messy-bunning your hair; it looks like you tried, but we know the truth.
3. Textural Wizardry One of the biggest complaints about canned black-eyed peas is the texture. They can be mushy or mealy. By simmering them in a reduced broth with a specifically timed addition of acidity (vinegar), we actually firm up the skins slightly and create a creamy, velvety sauce that coats the beans rather than a watery soup. We’re aiming for “stew,” not “bean water.”
4. It’s Cheaper Than Your Morning Latte Seriously. A can of peas costs barely anything. Combine that with some pantry staples, and you’re feeding a family (or just yourself for three days) for pennies. In this economy? That’s a win.
Ingredients You’ll Need
Don’t panic, you probably have most of this stuff hiding in your kitchen already.
- Canned Black-Eyed Peas (2 cans, 15oz each): The star of the show. Drain them, rinse them. We’ll talk about why later.
- Bacon or Salt Pork (3-4 slices): This provides the rendering fat. If you don’t eat pork, use turkey bacon or a heavy splash of olive oil. We need the fat to carry the flavor molecules.
- Onion (1 medium, chopped): White or yellow is fine. Don’t stress the dice size; rustic is just a fancy word for “I chopped this quickly.”
- Bell Pepper (1/2, diced): Green is traditional, red adds sweetness. Use whatever is rotting in your crisper drawer.
- Celery (1 stalk, diced): It adds a savory backbone you can’t quite put your finger on.
- Garlic (3-4 cloves, minced): If you want to use jarred garlic, I won’t call the police, but fresh is better. And yes, you can add more. Measure garlic with your heart.
- Chicken or Vegetable Broth (1 cup): Better than water. Always.
- Smoked Paprika (1 tsp): This is non-negotiable. It gives you that “cooked over a fire” vibe without the fire hazard.
- Dried Thyme (1/2 tsp): Earthy goodness. Oregano works in a pinch.
- Apple Cider Vinegar (1 tbsp): The secret weapon. It cuts the heaviness and wakes up the beans.
- Hot Sauce (to taste): Tabasco or Crystal works best here.
- Salt & Pepper: Be careful with the salt—the bacon and broth are already bringing the sodium party.
Step-by-Step Instructions
Alright, apron up. Let’s turn these pantry staples into something edible.
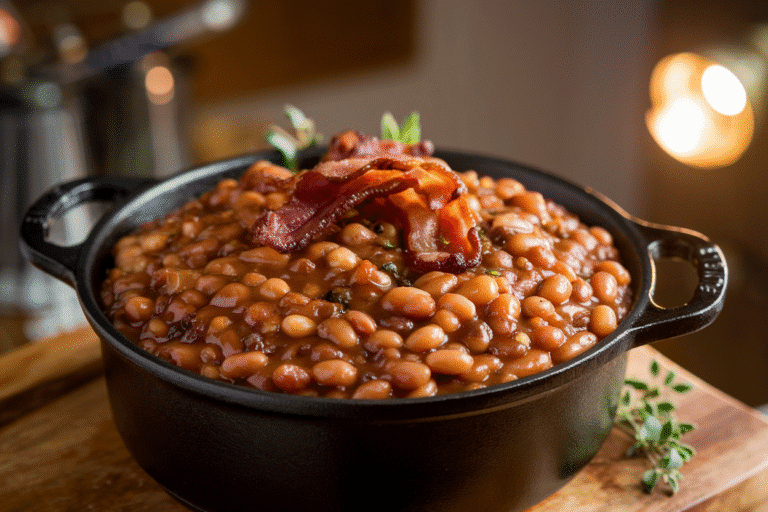
1. Render the Fat Grab a heavy-bottomed pot or a Dutch oven. Chop your bacon into small pieces and toss them in over medium heat. We aren’t just cooking the bacon; we are rendering it. You want the fat to liquefy and the meat to get crispy. Tip: Patience, grasshopper. Let it sizzle until the bits are golden brown. Remove the crispy bits and set them aside for garnish, but leave that glorious liquid gold (grease) in the pot.
2. Sauté the Trinity Toss your chopped onion, bell pepper, and celery into the hot bacon grease. Hear that sizzle? That’s the sound of flavor happening. Sauté them for about 5-7 minutes. You want the onions to turn translucent and the edges to start browning slightly. Science Note: This browning is the Maillard reaction. It creates complexity. Don’t skip it.
3. Garlic Time Add the minced garlic, smoked paprika, and thyme. Stir constantly for about 30 to 60 seconds. Warning: Do not walk away. Garlic burns faster than my motivation on a Monday morning. Once it smells incredible, move to the next step immediately.

4. The Deglaze Pour in a splash of the broth. Use a wooden spoon to scrape up the brown bits stuck to the bottom of the pot. That stuff is called fond, and it is literally concentrated flavor. Do not leave it behind.
5. Bean Time Add your rinsed and drained black-eyed peas to the pot. Pour in the rest of the broth. The liquid should just barely cover the beans. If you need a little more liquid, water is fine here. Bring it to a boil, then immediately drop the heat to low.
6. The Simmer Let it simmer uncovered for about 15-20 minutes. We want the liquid to reduce and thicken. The beans will absorb the smoky, garlicky broth. Mash a few beans against the side of the pot with your spoon—this releases starch and thickens the gravy naturally.
7. The Finish Stir in the apple cider vinegar and a dash of hot sauce. Taste it. Does it need salt? Pepper? More heat? Adjust it to your liking. Top with those reserved crispy bacon bits and serve hot.
Common Mistakes to Avoid
Even though this recipe is idiot-proof, let’s ensure you don’t accidentally ruin it.
- The “Salty Sea” Disaster: Canned beans are sodium bombs. Bacon is salty. Broth is salty. Do not salt this dish until the very end. Taste first, or you’ll be drinking water for three days straight.
- The Mush Factor: Don’t boil the beans violently for 20 minutes. A gentle simmer is key. If you boil them too hard, they will disintegrate into hummus. Which is fine, I guess, but not what we’re making.
- Skipping the Acid: If you taste the beans and they taste “flat” or “heavy,” you didn’t add enough vinegar. That splash of acid brightens the whole dish. It’s the difference between “meh” and “wow.”
- Using the Can Liquid: Look, some people swear by using the liquid in the can (aquafaba). For baking? Sure. For this recipe? No. It tastes metallic and tinny. Rinse your beans. Trust me.
Alternatives & Substitutions
Cooking is jazz, baby. Improvisation is welcome.
- Make it Vegan: Ditch the bacon. Use 2 tablespoons of olive oil or coconut oil. To replace the smokiness of the bacon, add a few drops of liquid smoke or double up on the smoked paprika. It works like a charm.
- Add Greens: Want to feel healthy? Toss in two cups of chopped kale or collard greens during the simmering step. They’ll wilt down and soak up that pot liquor. Now it’s basically a salad, right? (Let’s go with yes).
- The Meaty Version: Got leftover ham bone? Throw it in. Andouille sausage? Slice it up and brown it with the onions. This recipe is a welcoming home for all stray meats.
- Creamy Style: If you want it decadent, stir in a tablespoon of butter right at the end. It makes the sauce glossy and rich.
- Spicy Level 100: If the hot sauce isn’t enough, sauté a diced jalapeño (seeds and all) with the onion and peppers.
FAQ (Frequently Asked Questions)
1. Can I freeze this? Absolutely. In fact, like most stews, it tastes even better after it has sat in the fridge or freezer and thought about its life choices. Freeze it in an airtight container for up to 3 months.
2. Do I really have to rinse the beans? We covered this, but yes. Unless you enjoy the taste of aluminum preservatives and excessive sodium, give them a shower. It also helps reduce the… uh… gaseous after-effects. You’re welcome.
3. Can I use dried beans instead? You can, but that’s a different recipe. If you use dried, you have to soak them overnight and boil them for an hour. We are here for a fast canned black eyed peas recipe. Don’t complicate your life today.
4. What do I serve this with? Cornbread is the law of the land here. Rice is a close second (that makes it Hoppin’ John). But honestly? I’ve eaten this straight out of the bowl with a spoon while standing over the stove. No judgment.
5. Is this only for New Year’s? In the South, eating black-eyed peas on New Year’s Day brings good luck and prosperity. But why limit your luck to one day? Eat them on a Tuesday in July. Maybe you’ll find twenty bucks in your pocket. Who knows?
6. Can I use a slow cooker? Technically, yes. But since the beans are already cooked, the slow cooker is just reheating them. If you do this, only cook on LOW for 1-2 hours. Any longer and you’ll have bean puree.

Final Thoughts
There you have it. You have successfully navigated the treacherous waters of pantry cooking and emerged with a bowl of smoky, savory goodness.
This canned black eyed peas recipe proves that you don’t need a culinary degree or eight hours of free time to make food that feeds the soul. You just need a little creativity, some bacon fat, and the willingness to doctor up a tin can.
Now, go impress someone—or yourself—with your new culinary skills. You’ve earned it! And hey, if you find that pot of gold because you ate these lucky beans, don’t forget who gave you the recipe. 😉