Chicken Spring Roll Recipe: Crispy, Flavorful, and Irresistibly Delicious!
Craving a taste of Asia without the takeout prices? Look no further! This chicken spring roll recipe delivers all the satisfying crunch and savory goodness you love, right from your own kitchen. Forget greasy, bland imitations – we’re talking about perfectly crisp spring roll wrappers filled with a flavorful and juicy chicken mixture that will have everyone begging for seconds. Whether you’re looking for a crowd-pleasing appetizer, a fun weekend cooking project, or just a delicious way to use up leftover cooked chicken, these spring rolls are guaranteed to be a hit. So grab your ingredients, roll up your sleeves, and let’s get cooking!
Why This Recipe Works
This isn’t just another run-of-the-mill spring roll recipe. We’ve carefully crafted this version to ensure maximum flavor and texture. Here’s what makes it so special:
- Perfectly balanced flavors: The combination of savory chicken, vibrant vegetables, and a touch of sweetness creates a harmonious flavor profile that will tantalize your taste buds. Soy sauce, ginger, garlic, and sesame oil provide a classic Asian foundation, while a hint of sugar balances the savory notes.
- Crispy, golden-brown wrappers: We’ll guide you through the proper rolling and frying techniques to achieve that coveted crispy texture without ending up with soggy or oily spring rolls. The key is to use the right amount of filling and fry at the correct temperature.
- Versatile filling: Feel free to customize the filling to your liking! Swap out the vegetables, add different spices, or use ground turkey or pork instead of chicken. This recipe is a great base for experimentation.
- Make-ahead friendly: Spring rolls can be assembled ahead of time and stored in the refrigerator or freezer, making them perfect for entertaining or busy weeknights. This saves time and allows you to enjoy freshly fried spring rolls whenever you want.
- Clear and concise instructions: Our step-by-step instructions, complete with helpful tips and tricks, will guide you through the entire process, ensuring success even for novice cooks.
Ingredients
- Spring Roll Wrappers: 1 package (about 50 wrappers), thawed if frozen. Look for these in the refrigerated or frozen Asian food section of your grocery store.
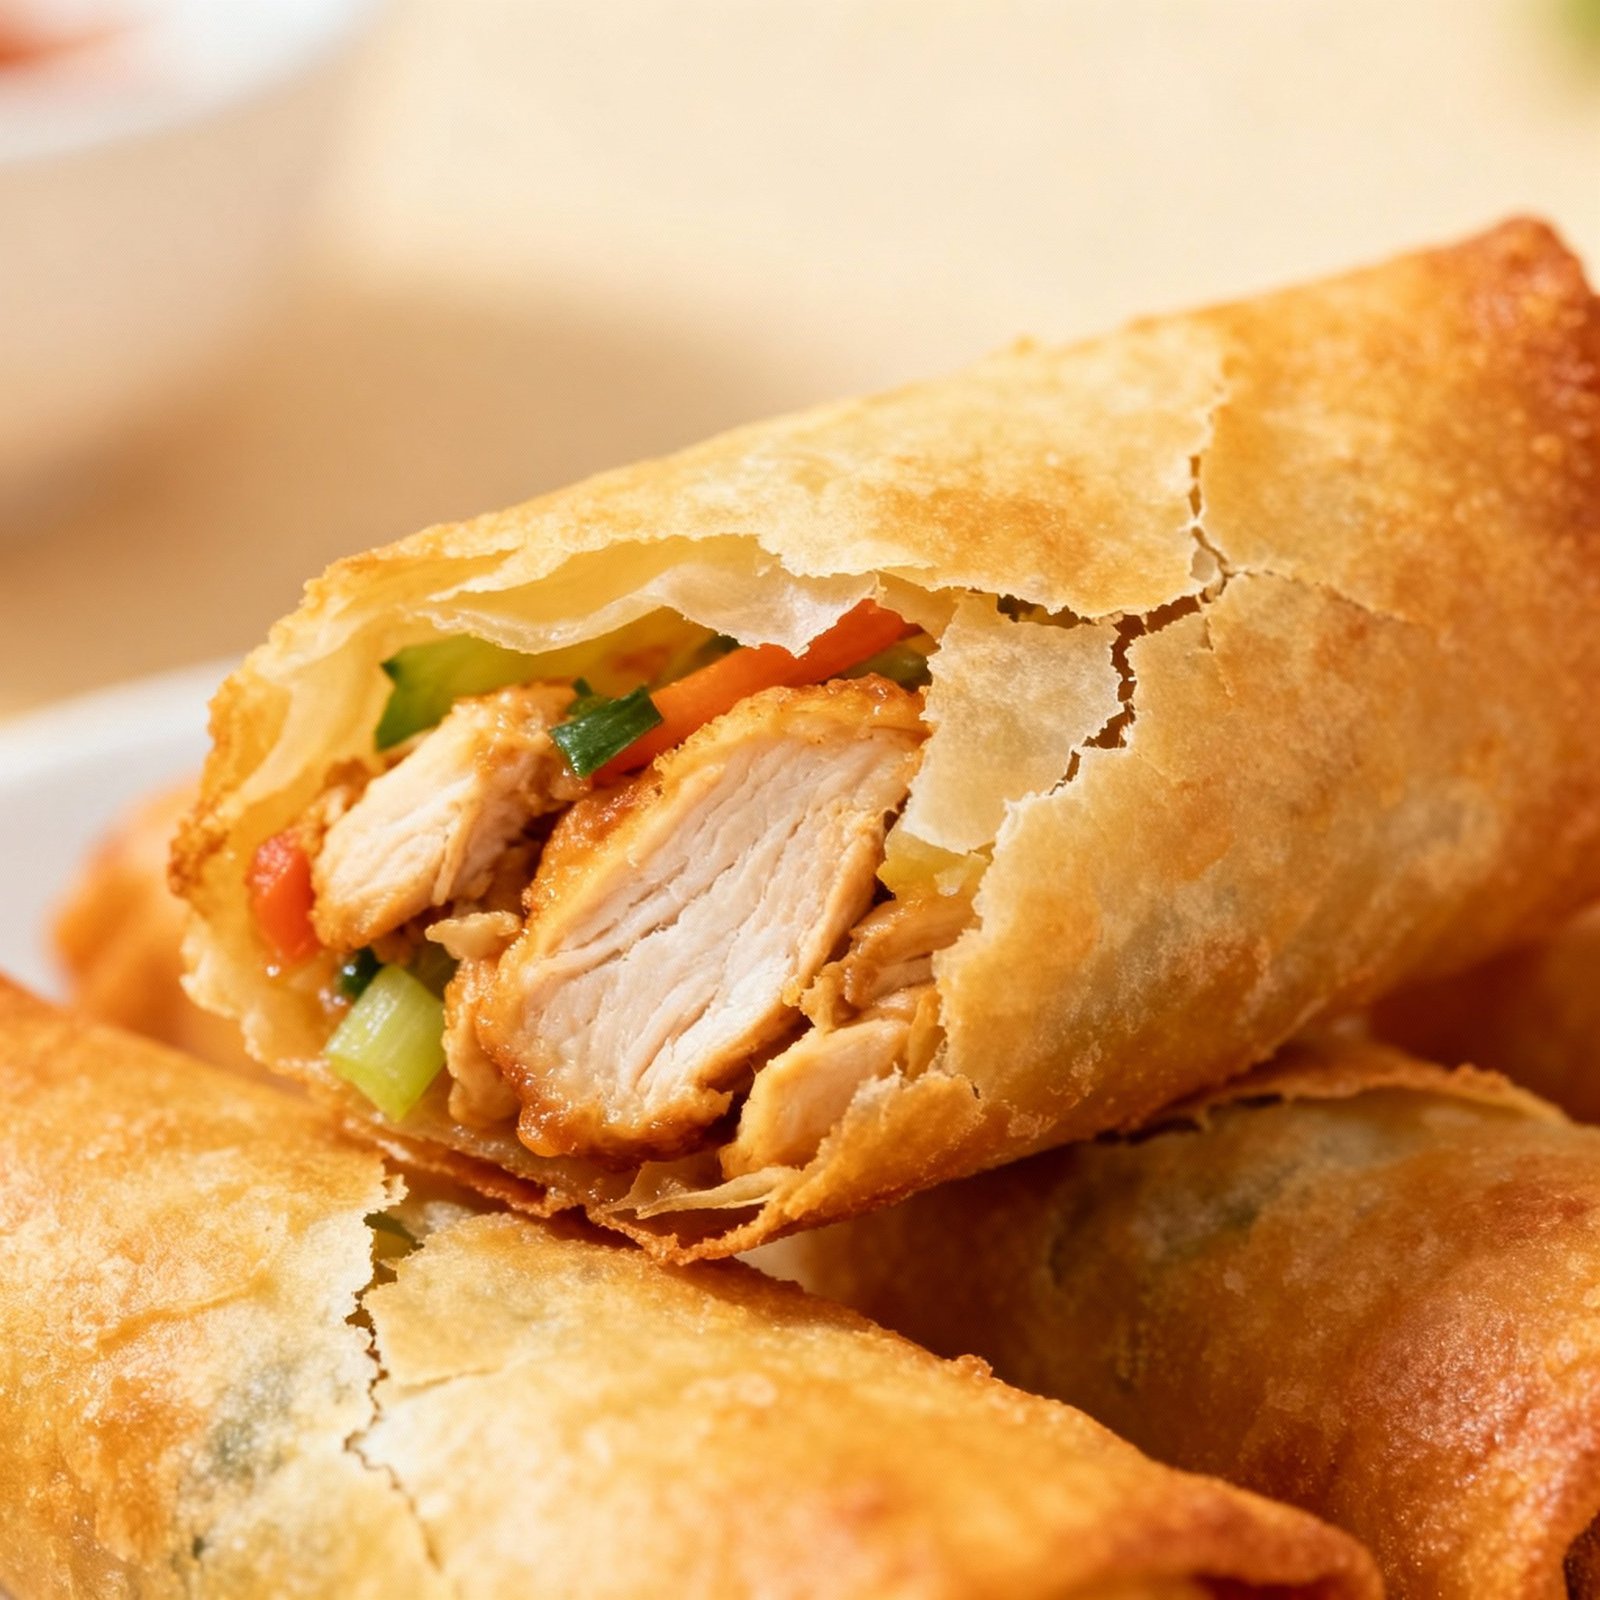
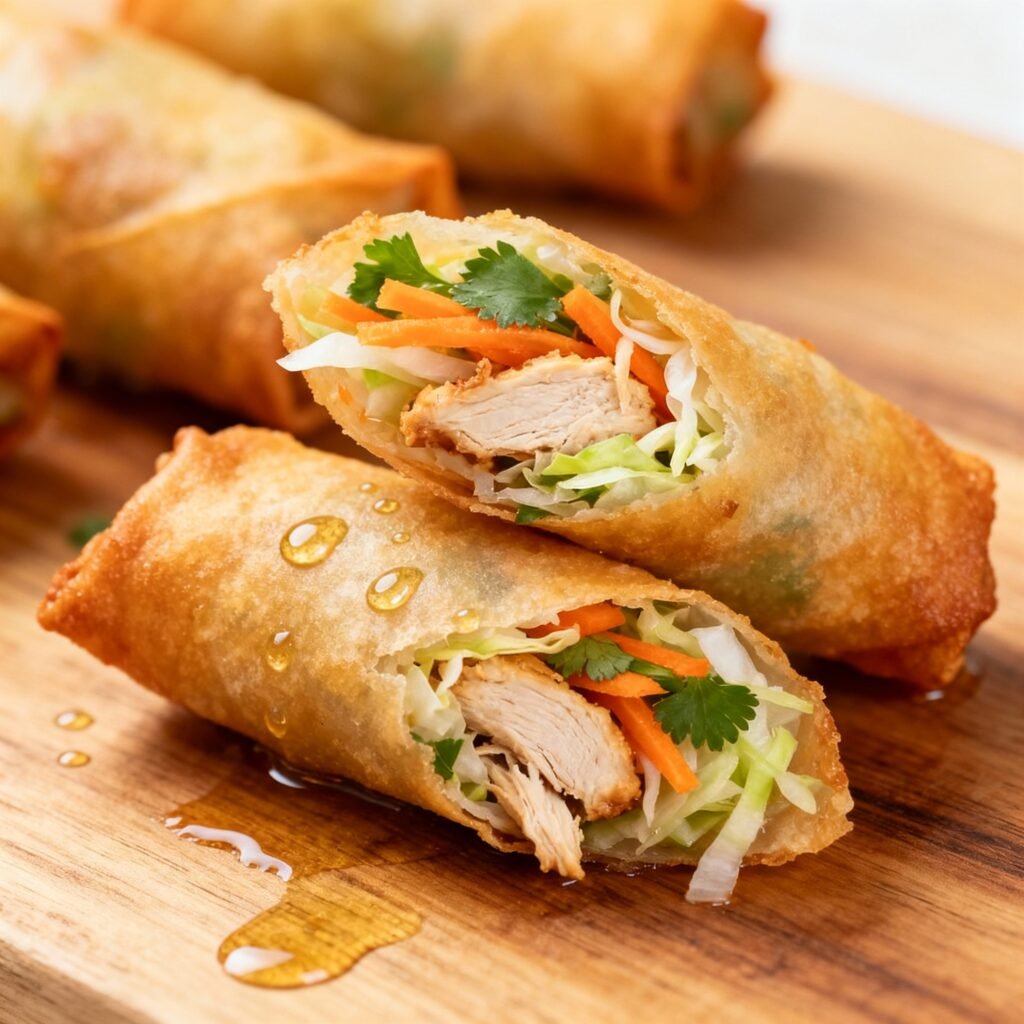
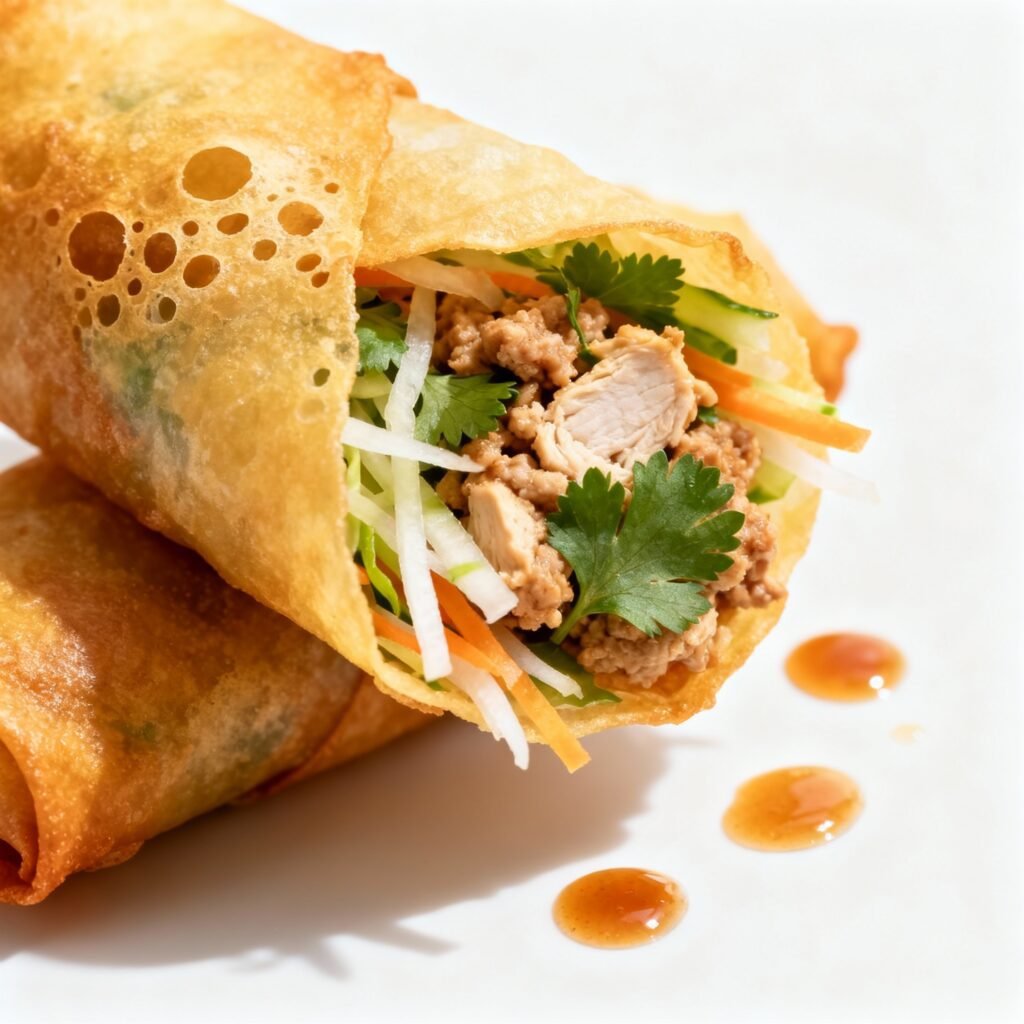
- Cooked Chicken: 1 ½ cups, shredded or finely diced. Leftover roasted chicken works perfectly!
- Shredded Cabbage: 1 ½ cups. Green or Napa cabbage works well.
- Shredded Carrots: ½ cup.
- Bean Sprouts: ½ cup, rinsed and drained.
- Green Onions: 3, thinly sliced.
- Garlic: 2 cloves, minced.
- Ginger: 1 teaspoon, minced.
- Soy Sauce: 2 tablespoons. Low-sodium soy sauce is recommended.
- Sesame Oil: 1 tablespoon.
- Rice Vinegar: 1 tablespoon.
- Granulated Sugar: 1 teaspoon.
- Cornstarch: 1 tablespoon, mixed with 2 tablespoons of water (for sealing the spring rolls).
- Vegetable Oil: For frying. Canola or peanut oil also work well.
Instructions
- Prepare the Filling: In a large bowl, combine the cooked chicken, shredded cabbage, shredded carrots, bean sprouts, green onions, minced garlic, and minced ginger.
- Add the Sauce: In a small bowl, whisk together the soy sauce, sesame oil, rice vinegar, and sugar. Pour the sauce over the chicken and vegetable mixture and toss well to combine.
- Prepare the Spring Roll Wrappers: Lay a spring roll wrapper on a clean, dry surface (such as a cutting board). Keep the remaining wrappers covered with a damp towel to prevent them from drying out.
- Fill the Spring Roll: Place about 2 tablespoons of the chicken filling in the center of the wrapper, closer to the bottom edge.
- Roll the Spring Roll: Fold the bottom edge of the wrapper over the filling, tucking it in tightly. Fold in the sides of the wrapper towards the center. Roll the spring roll tightly towards the top corner.
- Seal the Spring Roll: Brush the top corner of the wrapper with the cornstarch slurry. This will help seal the spring roll and prevent it from opening during frying.
- Repeat: Repeat steps 3-6 with the remaining wrappers and filling.
- Fry the Spring Rolls: Heat about 2 inches of vegetable oil in a large pot or deep fryer to 350°F (175°C). Carefully add the spring rolls to the hot oil, being careful not to overcrowd the pot. Fry for 3-5 minutes, or until golden brown and crispy, turning occasionally to ensure even cooking.
- Drain the Spring Rolls: Remove the spring rolls from the oil with a slotted spoon and place them on a wire rack lined with paper towels to drain excess oil.
- Serve: Serve the spring rolls immediately with your favorite dipping sauce, such as sweet chili sauce, soy sauce, or peanut sauce.
Tips for Success
- Don’t Overfill: Overfilling the spring rolls can cause them to burst during frying. Stick to about 2 tablespoons of filling per wrapper.
- Keep Wrappers Moist: Spring roll wrappers dry out quickly, making them difficult to work with. Keep them covered with a damp towel while you’re assembling the spring rolls.
- Fry at the Right Temperature: Frying at the correct temperature is crucial for achieving crispy, golden-brown spring rolls. If the oil is too hot, the spring rolls will burn on the outside before the filling is heated through. If the oil is not hot enough, the spring rolls will be greasy and soggy. Use a thermometer to ensure the oil is at 350°F (175°C).
- Don’t Overcrowd the Pot: Overcrowding the pot will lower the oil temperature and result in soggy spring rolls. Fry the spring rolls in batches, ensuring they have enough room to cook evenly.
- Use Fresh Oil: Using fresh, clean oil will result in better-tasting spring rolls. Avoid using oil that has been used to fry other foods, as it can impart unwanted flavors.
- For a Healthier Option: You can bake these spring rolls instead of frying. Preheat your oven to 400°F (200°C). Place the spring rolls on a baking sheet lined with parchment paper and brush them with vegetable oil. Bake for 15-20 minutes, or until golden brown and crispy, flipping halfway through.
Storage Instructions
Uncooked Spring Rolls: Assembled spring rolls can be stored in the refrigerator for up to 24 hours. Place them on a baking sheet lined with parchment paper, making sure they are not touching each other. Cover tightly with plastic wrap. You can also freeze uncooked spring rolls for up to 2 months. Freeze them on a baking sheet until solid, then transfer them to a freezer-safe bag or container.
Cooked Spring Rolls: Leftover cooked spring rolls can be stored in the refrigerator for up to 3 days. Reheat them in a preheated oven at 350°F (175°C) for 10-15 minutes, or until heated through and crispy. You can also reheat them in an air fryer for a few minutes.
FAQ
Can I use different vegetables in the filling?
Absolutely! Feel free to experiment with different vegetables, such as mushrooms, water chestnuts, bamboo shoots, or snow peas.
Can I use ground meat instead of shredded chicken?
Yes, ground turkey or pork can be substituted for chicken. Be sure to cook the ground meat thoroughly before adding it to the filling.
Where can I find spring roll wrappers?
Spring roll wrappers can be found in the refrigerated or frozen Asian food section of most grocery stores. Look for them near the tofu and other Asian ingredients.
Can I make these spring rolls vegetarian?
Yes, simply omit the chicken and add more vegetables, such as tofu or mushrooms.
What dipping sauce goes well with spring rolls?
Sweet chili sauce, soy sauce, peanut sauce, and hoisin sauce are all popular dipping sauces for spring rolls.
Conclusion
There you have it – a foolproof recipe for crispy, flavorful chicken spring rolls that are sure to impress! With a little practice and these helpful tips, you’ll be rolling like a pro in no time. So ditch the takeout menu and enjoy the satisfaction of creating these delicious spring rolls from scratch. Happy cooking!