Chocolate Sourdough Bread Recipe: A Decadent Delight
Imagine the tangy, slightly sour aroma of sourdough mingling with the rich, intoxicating scent of dark chocolate. That’s the magic of chocolate sourdough bread. This isn’t your average loaf; it’s a sophisticated treat, a delightful dance between savory and sweet that will elevate your breakfast, brunch, or even dessert game. Forget bland bread – this recipe delivers a moist, chewy crumb, a crackling crust, and pockets of melted chocolate that will have you reaching for slice after slice. Whether you’re a seasoned sourdough baker or a curious novice, this recipe is designed to guide you through the process, ensuring a rewarding baking experience and a loaf you’ll be proud to share (or hoard!). So, preheat your oven, gather your ingredients, and prepare to embark on a chocolate sourdough adventure!
Why This Recipe Works
This recipe is carefully crafted to balance the inherent tang of sourdough with the sweetness and richness of chocolate. Here’s why it’s a winner:
- Hydration Level: The hydration level (the ratio of water to flour) is optimized to create a moist and chewy crumb, crucial for complementing the melted chocolate.
- Sourdough Starter: A healthy, active sourdough starter is the backbone of this recipe. It provides the characteristic sourdough tang and contributes to the rise and texture of the bread. We’ll guide you on assessing your starter’s readiness.
- Cocoa Powder: The addition of cocoa powder enhances the chocolate flavor and deepens the color of the dough. Using high-quality cocoa powder makes a noticeable difference.
- Chocolate Type: We recommend using dark chocolate chunks or chips. The higher cocoa content provides a more intense chocolate flavor that balances the sourdough tang. Milk chocolate can be used, but the flavor will be milder.
- Proofing Time: The bulk fermentation (first rise) and final proofing times are flexible and depend on your kitchen temperature. We’ll provide visual cues and guidelines to help you determine when your dough is ready.
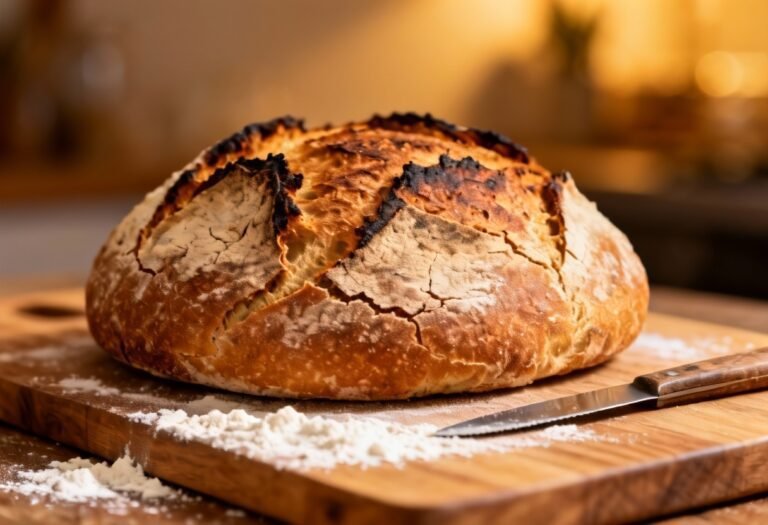
- Baking Method: Baking in a Dutch oven traps steam, creating a crispy, crackling crust and a moist interior. If you don’t have a Dutch oven, we’ll provide alternative baking instructions.
Ingredients
- 100g Active Sourdough Starter (100% hydration)
- 350g Bread Flour (strong flour with high protein content)
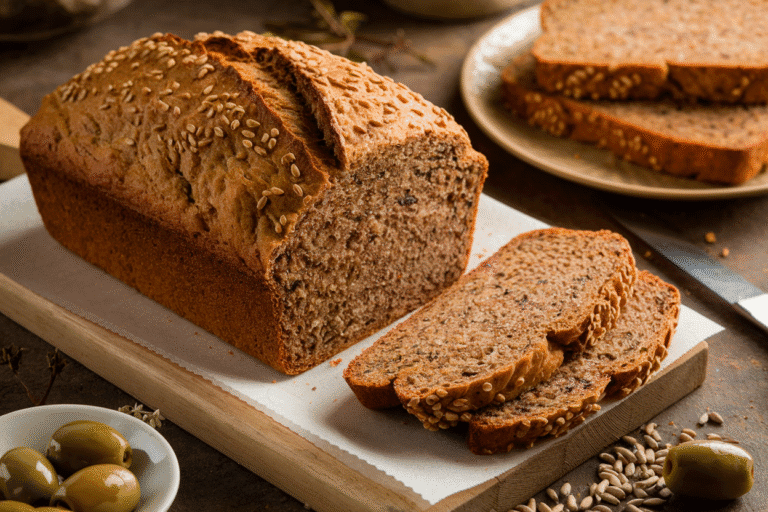
- 100g Whole Wheat Flour (adds flavor and texture)
- 350g Water (lukewarm, about 85-90°F)
- 10g Salt
- 30g Unsweetened Cocoa Powder
- 200g Dark Chocolate Chunks or Chips (60-70% cacao)

Instructions
- Prepare the Levain (if needed): If your starter isn’t at its peak activity, create a levain. About 4-6 hours before mixing the dough, mix 50g of your starter with 50g of bread flour and 50g of water. Let it rise in a warm place until doubled or tripled in size and bubbly. This will ensure a strong and active starter for your dough. If your starter is already very active and doubles quickly after feeding, you can skip this step and use it directly.
- Autolyse: In a large bowl, combine the bread flour, whole wheat flour, and water. Mix until just combined, forming a shaggy dough. Cover and let rest for 30-60 minutes. This allows the flour to fully hydrate, resulting in a better crumb structure.
- Incorporate Starter and Cocoa Powder: Add the active sourdough starter and cocoa powder to the autolysed dough. Using your hands or a dough scraper, mix until well combined. The cocoa powder may initially resist incorporation, but keep mixing until it’s evenly distributed.
- Add Salt: Add the salt and mix thoroughly until the dough starts to feel slightly smoother.
- Bulk Fermentation (First Rise): Cover the bowl and let the dough bulk ferment for 4-6 hours at room temperature (ideally 72-78°F). Perform stretch and folds every 30-60 minutes for the first 2-3 hours. To perform a stretch and fold, gently grab one side of the dough, stretch it upwards, and fold it over the center. Rotate the bowl and repeat on all four sides. This strengthens the gluten and develops the dough’s structure. The dough should roughly double in size and show signs of activity (bubbles).
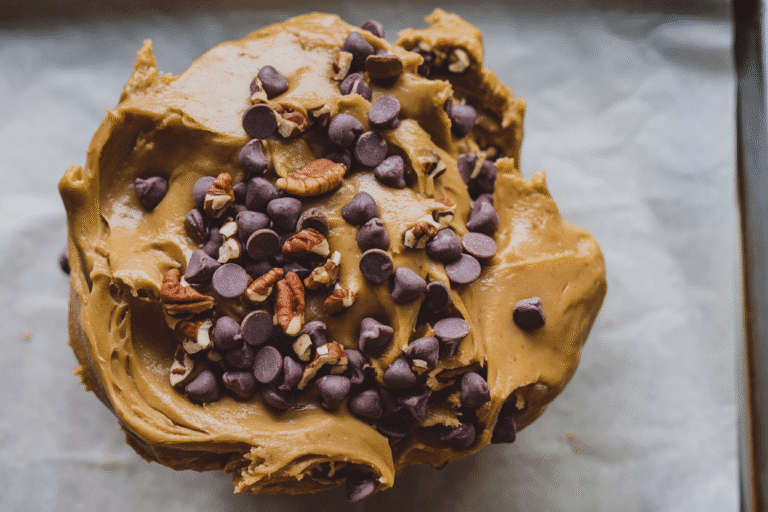
- Incorporate Chocolate: Gently fold in the dark chocolate chunks or chips. Be careful not to overmix, as this can deflate the dough.
- Shape the Dough: Lightly flour your work surface. Gently turn the dough out onto the floured surface. Shape the dough into a round or oval loaf. You can watch videos online for shaping techniques.
- Final Proof (Second Rise): Place the shaped dough in a well-floured banneton basket or a bowl lined with a floured kitchen towel. Cover and refrigerate for 12-24 hours. This slow, cold proof develops flavor and improves the crust.
- Preheat Oven: Preheat your oven to 450°F (232°C) with your Dutch oven inside for at least 30 minutes. The Dutch oven needs to be very hot to create the steam necessary for a good crust.
- Score the Dough: Carefully remove the hot Dutch oven from the oven. Gently place the dough into the hot Dutch oven. Score the top of the dough with a sharp knife or lame. Scoring allows the dough to expand properly during baking. A simple cross or a single slash is sufficient.
- Bake: Cover the Dutch oven and bake for 20 minutes. Then, remove the lid and bake for another 25-35 minutes, or until the crust is a deep brown color and the internal temperature reaches 200-210°F (93-99°C).
- Cool: Carefully remove the bread from the Dutch oven and let it cool completely on a wire rack before slicing. This is crucial for preventing a gummy texture. Resist the urge to cut into it while it’s still warm!
Tips for Success
- Use a Kitchen Scale: Weighing your ingredients is the most accurate way to ensure consistent results.
- Active Starter is Key: Make sure your sourdough starter is active and bubbly before using it. A weak starter will result in a dense, flat loaf.
- Don’t Overmix: Overmixing the dough can develop the gluten too much, resulting in a tough loaf.
- Adjust Proofing Times: Proofing times are estimates and will vary depending on your kitchen temperature. Pay attention to the dough’s appearance and feel, rather than strictly adhering to the times in the recipe. The dough should be puffy and jiggly.
- Dutch Oven Alternative: If you don’t have a Dutch oven, you can bake the bread on a baking stone or baking sheet. Create steam by placing a pan of hot water on the bottom rack of the oven during the first 20 minutes of baking.
- Experiment with Chocolate: Feel free to experiment with different types of chocolate, such as milk chocolate, white chocolate, or even chopped nuts.
Storage Instructions
Store the cooled chocolate sourdough bread in an airtight container at room temperature for up to 3 days. For longer storage, wrap the bread tightly in plastic wrap and freeze it for up to 2 months. To thaw, let it sit at room temperature for several hours or overnight.

FAQ
- Can I use all-purpose flour instead of bread flour? While bread flour is recommended for its higher protein content, which creates a stronger gluten structure, you can use all-purpose flour in a pinch. The texture of the bread may be slightly different, but it will still be delicious.
- My dough is too sticky. What should I do? A sticky dough is normal, especially with high hydration levels. Avoid adding more flour during the mixing process. Instead, use wet hands or a dough scraper to handle the dough. The stickiness will decrease as the gluten develops during bulk fermentation.
- My bread is too sour. How can I reduce the sourness? To reduce the sourness, shorten the bulk fermentation time or use a less active starter. You can also add a touch of honey or maple syrup to the dough.
- Why is my bread dense and gummy? A dense and gummy bread is usually caused by underproofing or underbaking. Make sure your starter is active, and allow the dough to proof sufficiently. Ensure that the internal temperature of the bread reaches 200-210°F (93-99°C) before removing it from the oven. Cooling completely before slicing is also crucial.
- Can I add other ingredients to this recipe? Absolutely! Feel free to add other ingredients such as dried fruit, nuts, or spices to customize the flavor of your chocolate sourdough bread.
Conclusion
Congratulations! You’ve successfully baked a loaf of delicious chocolate sourdough bread. The combination of tangy sourdough and rich chocolate is truly irresistible. This recipe is a testament to the magic of sourdough baking and the endless possibilities of flavor combinations. Enjoy your freshly baked bread with a cup of coffee, a scoop of ice cream, or simply on its own. Happy baking!