This Dutch Oven Sourdough Bread Recipe Might Ruin Store-Bought Bread Forever (You’ve Been Warned)
👩🍳 The Home Chef's Essential Kitchen
Consistently cooking incredible, healthy meals at home is so much easier when you aren't fighting with cheap tools. These are the 5 absolute powerhouse kitchen essentials that professional chefs and serious home cooks rely on every single day to get perfect results.
🍳 Lodge 10.25" Cast Iron Skillet
The single greatest value in all of cookware. It retains heat infinitely better than cheap non-stick pans, allowing you to get a restaurant-quality crust on steaks or perfect crispy edges on cornbread. With proper care, this $20 pan will literally outlive you.
🔪 Victorinox Fibrox Pro 8" Chef's Knife
A dull knife makes cooking a frustrating chore. This specific blade is the undisputed champion of the culinary world—it holds a terrifyingly sharp edge, features a comfortable non-slip grip, and performs identical to German knives that cost quadruple the price.
🌡️ ThermoPro Instant Read Thermometer
Never serve dry chicken or undercooked pork again. An instant-read thermometer is the secret difference between amateur cooks who 'guess' when protein is done, and professionals who know exactly when to pull meat off the heat for maximum juiciness.
🍲 Lodge Enameled Cast Iron Dutch Oven
The ultimate workhorse for soups, stews, braised short ribs, and baking crusty artisanal bread. The enameled interior provides incredible heat distribution for slow-cooking while eliminating the intense seasoning maintenance required by bare cast iron.
🥄 Bpa-Free Silicone Utensil Set
Throw away those melting plastic spatulas and bacteria-harboring wooden spoons. This pure silicone set is heat-resistant up to 600°F, won't scratch your expensive pans, and features seamless designs that make cleaning out thick sauces and batters effortless.
You want bakery-level sourdough without the bakery. Fair. Here’s the move: a simple, repeatable, ridiculous-crust loaf that makes your kitchen smell like Paris at 6 a.m.
This isn’t “set it and forget it” — it’s “set it and flex it.” If you’ve got a sourdough starter and a Dutch oven, you’re already 80% there. The remaining 20%? Timing, temperature, and a tiny bit of patience.
Your future toast just got promoted.
What Makes This Special
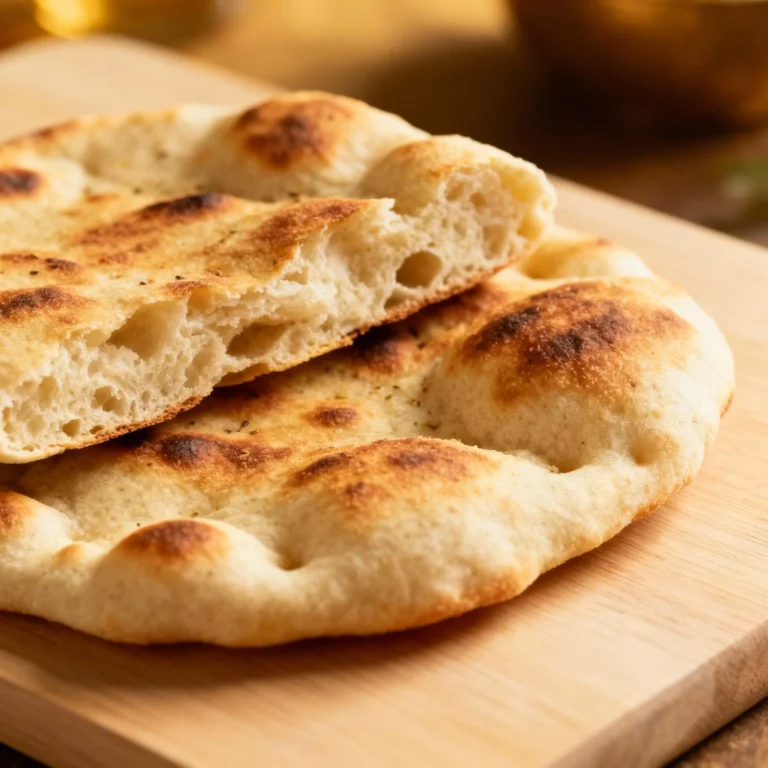
This method leverages the Dutch oven’s superpower: capturing steam for an ultra-thin, shatter-crisp crust. No spray bottles. No oven gymnastics.
Just consistent results.
We’re using a moderate hydration dough (70%) that’s beginner-friendly but still gives you that open crumb. The steps prioritize gluten strength and fermentation control, not Instagram acrobatics. And yes, it fits your schedule — a long, cold proof means you bake when you want, not when the dough says.
Ingredients Breakdown
- 500 g bread flour (high protein gives structure; you can sub 50–100 g with whole wheat for flavor)
- 350 g water (70% hydration), room temp
- 100 g active sourdough starter (100% hydration) — bubbly, doubled, passes the float test
- 10 g fine sea salt
- Rice flour for dusting the banneton (won’t stick like wheat flour)
- Optional: 10 g honey or 10 g olive oil for a softer crumb and slight sweetness
How to Make It – Instructions
- Mix (Autolyse Lite): In a large bowl, combine 500 g bread flour and 325 g water.
Stir until no dry bits remain. Cover and rest 30 minutes. This hydrates flour and jump-starts gluten with almost zero effort.
- Add Starter and Salt: Add 100 g active starter and 10 g salt (plus the remaining 25 g water).
Pinch and fold until evenly incorporated. The dough will feel sticky — good. Sticky is flavor’s wingman.
- Strength Phase (2 hours): Over the next 2 hours, perform 3–4 sets of stretch-and-folds every 30 minutes.
Wet your fingers, grab a corner, stretch up, fold over. Rotate the bowl, repeat 4 times. You’ll see the dough tighten and smooth out.
- Bulk Fermentation: Cover and let rest at 75–78°F for 3–5 hours, until the dough is puffed, jiggly, and has risen ~50–75%.
Look for bubbles along the edges. Under-proofed dough looks sleepy; over-proofed slumps like Monday.
- Pre-Shape: Lightly flour the counter. Gently turn out the dough.
Using a bench scraper, tuck edges toward the center and flip seam-side down. Drag to create surface tension. Rest 20–30 minutes uncovered.
It should relax but still hold a dome.
- Final Shape: For a boule, flip the dough seam-side up, stretch edges to the center, and cinch. Flip seam-side down and tighten again with gentle pulls. You’re building a trampoline, not a brick.
- Banneton Time: Dust a banneton or lined bowl with rice flour.
Place dough seam-side up (for a natural ear) or seam-side down if you plan to score it elaborately. Cover.
- Cold Proof: Refrigerate 8–18 hours. The fridge slows fermentation, builds flavor, and firms the dough for cleaner scoring.
FYI: longer proof = tangier loaf.
- Preheat Like You Mean It: Place your Dutch oven (lid on) in the oven and preheat to 500°F (260°C) for 45–60 minutes. Heat is free performance.
- Score and Load: Cut a parchment sling. Invert the cold dough onto the parchment.
Score with a razor: one long, shallow slash at 30–45° angle for an ear, about 1/4-inch deep. Confidence is key; hesitation is how you get Franken-loaf.
- Steam Bake: Carefully remove the Dutch oven, load the dough with parchment, cover, and bake at 475°F (246°C) for 20 minutes.
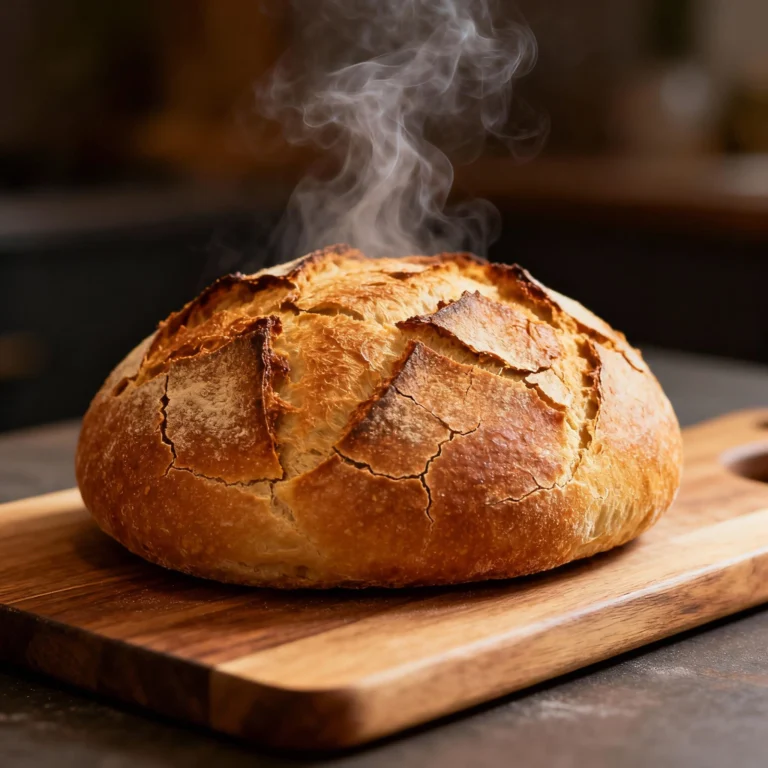
- Uncover and Finish: Remove the lid and bake another 18–25 minutes at 450°F (232°C) until deep golden-brown with a blistered crust. Internal temp should hit ~208–212°F (98–100°C).
- Cool (Yes, Really): Transfer to a rack and cool at least 1 hour.
Cutting early vents steam and wrecks the crumb. Patience tastes better.
Storage Instructions
- Short term (1–2 days): Store cut-side down on a board or in a paper bag. Keeps the crust crisp.
- Medium term (3–5 days): Wrap in a clean tea towel, then place in a bread box.
Avoid plastic unless you like soft crust.
- Freezing: Slice, then freeze in a zip bag. Toast straight from frozen. Whole loaf?
Wrap tightly in plastic, then foil; thaw at room temp in the wrapping.
- Re-crisp: 10 minutes at 350°F (177°C) restores crunch. Magic, not sorcery.
What’s Great About This
- Repeatable crust and crumb: The Dutch oven’s steam simulates a pro deck oven for consistent spring and shine.
- Schedule-friendly: The cold proof gives you control and better flavor. Your calendar says thanks.
- Balanced hydration: 70% is forgiving for beginners yet still opens up the crumb nicely.
- Minimal gear: You need a bowl, a scale, a Dutch oven, and a sharp blade.
That’s it.
Avoid These Mistakes
- Using weak starter: If it hasn’t doubled in 4–6 hours and smells floury, it’s not ready. Feed it and wait.
- Rushing bulk fermentation: Time is a hint, not a law. Judge by volume increase and jiggle, not the clock.
- Over-flouring the work surface: Excess flour disrupts gluten bonding during shaping.
Light dusting only.
- Under-preheating the Dutch oven: If it’s not ripping hot, you lose spring and crust. Heat it like you mean it.
- Cutting too soon: Steam inside needs to set the crumb. Slice early, regret forever.
Recipe Variations
- Seeded Crunch: Add 50–80 g mixed seeds (sesame, sunflower, pumpkin).
Toast first for extra flavor. Sprinkle some in the banneton for a speckled crust.
- Olive & Rosemary: Fold in 80–100 g chopped pitted olives and 1–2 tsp chopped rosemary during the second fold. Reduce water by ~10 g to account for olive moisture.
- Whole Wheat Lift: Swap 100–150 g of bread flour with whole wheat.
If dough feels tight, add 10–20 g extra water.
- Garlic Parmesan: Add 1–2 roasted garlic heads (squeezed, cooled) and 40 g finely grated Parmesan during folds. Expect a slightly tighter crumb, worth it.
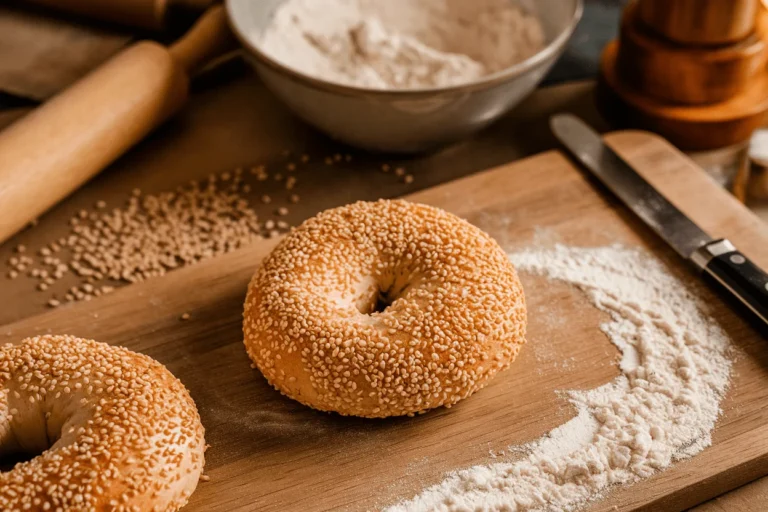
- Everything Bagel Crust: Brush the shaped dough lightly with water and roll the surface in everything seasoning before the cold proof. Crunch city.
Can I bake without a Dutch oven?
Yes.
Preheat a baking steel or stone at 500°F and add a pan of boiling water to the oven for steam. Bake on the stone, vent steam after 20 minutes, and finish dry. The Dutch oven is just easier and more consistent, IMO.
How do I know if my dough is proofed enough?
Use the poke test: gently poke the dough — if it springs back slowly and leaves a slight indentation, it’s ready.
If it snaps back fast, under-proofed. If it collapses and feels slack, over-proofed.
Can I use all-purpose flour?
Yes, but reduce water by 10–20 g since AP absorbs less. Expect a slightly softer structure and a bit less loft, still tasty.
My crust is too dark.
Help?
Lower the final bake temperature to 440–445°F, or tent loosely with foil for the last 10 minutes. Also check rack position: middle to lower-middle is safest.
Why is my loaf gummy?
Likely underbaked or sliced too soon. Bake to 208–212°F internal and cool at least one hour.
If your crumb is tight and gummy, bulk may have been short.
How do I boost sour flavor?
Proof longer and colder, use a slightly lower inoculation (80 g starter), and keep your starter on the tangier side by feeding less frequently or cooler.
What if I don’t have rice flour?
Use a 50/50 mix of all-purpose and cornstarch for dusting. It’s not identical, but it resists sticking much better than wheat flour alone.
🍰 The Master Baker & Prep Kit
Baking is a science, and meal prep requires efficiency. If you want consistently flaky pie crusts, perfectly risen cakes, and healthy meals ready for the week, these are the 5 upgrade tools that take your execution to the next level.
⚖️ OXO Good Grips 11lb Food Scale
The secret to why bakery bread and cookies are always perfect while home batches vary wildly. Measuring by weight (grams) instead of volume (cups) guarantees precise hydration and flawlessly consistent results every single time you bake.
🧑🍳 KitchenAid Classic Stand Mixer
The undisputed holy grail of the kitchen. From aggressively kneading heavy pizza doughs to whipping meringues into stiff peaks, this powerful motor saves your arms from exhaustion and cuts your hands-on prep time in half.
🍪 Silpat Premium Silicone Baking Mats
Stop wasting money on rolls of parchment paper or agonizing over cookies permanently fused to your metal pans. These reusable, professional-grade silicone mats ensure completely even heat distribution and instantly release even the stickiest caramel.
🌪️ Braun MultiQuick Immersion Blender
The ultimate shortcut tool for creamy tomato soups, lump-free gravies, and rapid smoothies. Avoid the burns and mess of dangerously transferring boiling liquids in batches to a traditional blender by simply blending right inside your cooking pot.
🍱 Premium Glass Meal Prep Containers
If you want to bake and cook healthier, batch preparation is required. These durable glass containers transition safely from freezer to microwave, never absorb tomato sauce stains, and feature airtight seals to keep your hard work fresh all week.
In Conclusion
This Dutch oven sourdough bread recipe turns your kitchen into a crust factory and your breakfast into a flex. With a lively starter, a sane hydration, and proper heat, you’ll get big oven spring, a blistered crust, and a tender, open crumb.
The process is simple, repeatable, and very forgiving once you learn the cues. Bake it once, and your toaster will never see boring bread again. Your move.