
Easy Sourdough Bread Recipe with Starter: The No-Knead Wonder
Craving that tangy, chewy sourdough bread but intimidated by the process? You’re not alone! Many bakers are drawn to the unique flavor of sourdough but find the traditional methods daunting. This recipe is designed to simplify sourdough baking, making it accessible to beginners and enjoyable for experienced bakers alike. We’re ditching the complicated kneading and lengthy proofing schedules for a streamlined, no-knead approach that delivers incredible results. Get ready to impress yourself (and your friends!) with a beautiful, crusty loaf of homemade sourdough.
Why This Recipe Works
This recipe focuses on a few key techniques that make sourdough baking easier and more reliable:
- No-Knead Method: Forget hours of hand-kneading! This method relies on a long, slow fermentation process to develop gluten, resulting in a chewy texture without the hard work.
- High Hydration: A higher water content (hydration) creates a more open crumb and a beautifully blistered crust.
- Overnight Proofing: Letting the dough proof in the refrigerator overnight (or longer) allows for deeper flavor development and better gluten structure.
- Dutch Oven Baking: Baking in a Dutch oven traps steam, creating a perfect environment for a crispy crust and a soft, airy interior.
Ingredients
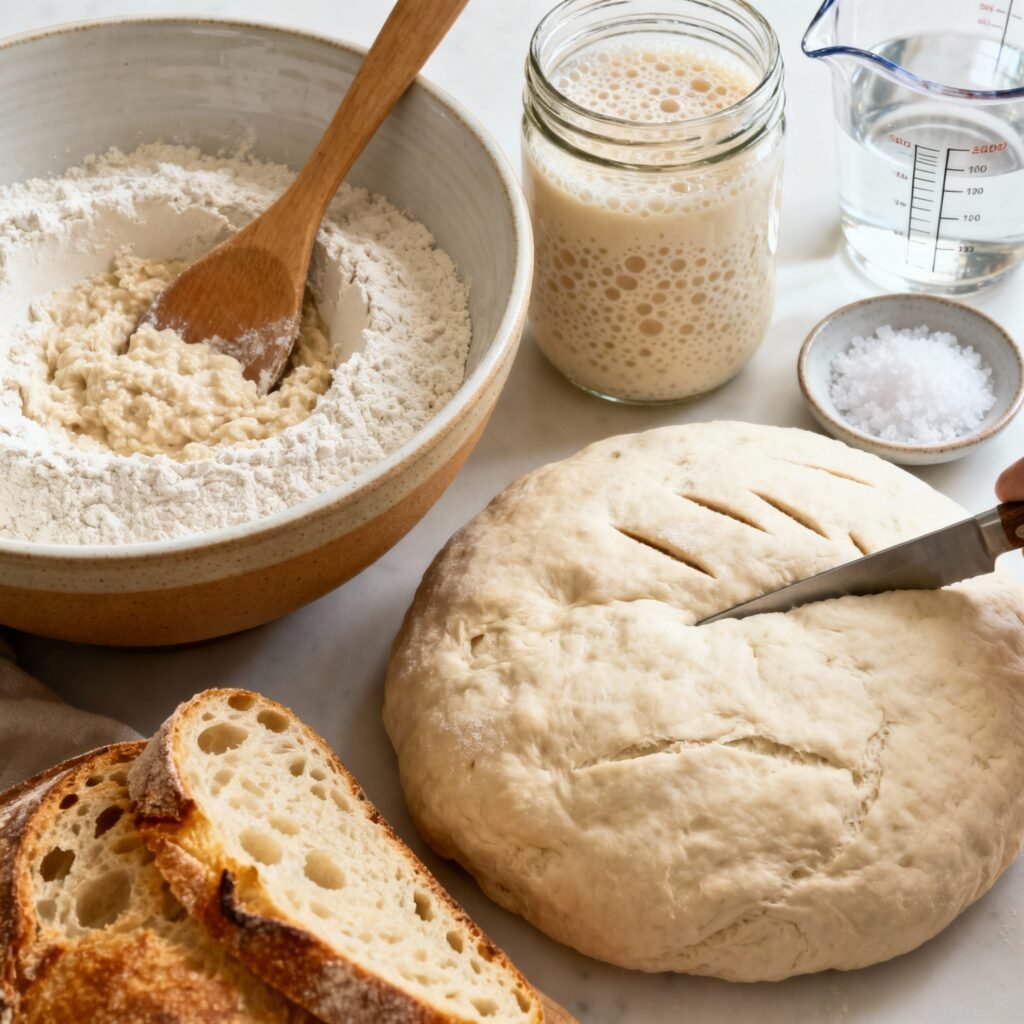
- 100g Active Sourdough Starter: Your starter should be bubbly and doubled in size after feeding. This is crucial for a good rise.
- 400g Bread Flour: Bread flour has a higher protein content than all-purpose flour, which is necessary for developing strong gluten and a chewy texture.
- 300g Warm Water (about 85-90°F): Use filtered water for the best results. The temperature is important for activating the yeast in the starter.
- 10g Salt: Salt controls the yeast activity and adds flavor to the bread.
- Optional: Rice flour or semolina flour for dusting.

Instructions
- Autolyse (30 minutes): In a large bowl, combine the bread flour and warm water. Mix until just combined – no dry flour should remain. Cover the bowl and let it rest for 30 minutes. This process, called autolyse, allows the flour to fully hydrate, resulting in a better texture.
- Incorporate Starter and Salt (5 minutes): Add the active sourdough starter and salt to the hydrated flour mixture. Use your hands or a dough scraper to gently mix until everything is well combined. The dough will be shaggy and sticky.
- Bulk Fermentation (4-6 hours): Cover the bowl and let the dough rest at room temperature for 4-6 hours. Perform stretch and folds every 30-60 minutes for the first 2-3 hours. To do this, gently grab a section of the dough, stretch it upwards, and fold it over onto itself. Rotate the bowl and repeat until you’ve stretched and folded the dough from all sides. This helps develop strength and structure.
- Shape the Dough (10 minutes): Gently flour your work surface. Turn the dough out onto the floured surface. Shape the dough into a round or oval loaf. Be gentle to avoid deflating the dough.
- Proofing (Overnight in the Refrigerator): Place the shaped dough in a well-floured banneton basket (or a bowl lined with a floured kitchen towel). Cover the basket with plastic wrap or a reusable container. Refrigerate for at least 12 hours, or up to 24 hours.
- Preheat Dutch Oven (45 minutes): Place your Dutch oven (with the lid on) in the oven and preheat to 450°F (232°C) for at least 45 minutes. The Dutch oven needs to be very hot to create that beautiful crust.
- Score the Dough (2 minutes): Carefully remove the hot Dutch oven from the oven. Remove the lid. Gently invert the dough from the banneton basket into the hot Dutch oven. Use a sharp knife or lame to score the top of the dough. This allows the bread to expand properly in the oven. A simple slash down the center is a good starting point.
- Bake (45-50 minutes): Cover the Dutch oven and bake for 20 minutes. Then, remove the lid and bake for another 25-30 minutes, or until the crust is deep golden brown and the internal temperature reaches 205-210°F (96-99°C).
- Cool Completely (2 hours): Carefully remove the bread from the Dutch oven and place it on a wire rack to cool completely before slicing. This is crucial! Cutting into the bread while it’s still hot will result in a gummy texture.
Tips for Success
- Use a Kitchen Scale: Weighing your ingredients is much more accurate than measuring by volume, especially for flour.
- Active Starter is Key: Make sure your starter is active and bubbly before using it. A weak starter will result in a flat, dense loaf.
- Don’t Over-Proof: Over-proofed dough will collapse when baked. Watch the dough, not the clock. Look for signs of expansion and air bubbles.
- Adjust Baking Time: Baking times may vary depending on your oven. Keep an eye on the bread and adjust the time as needed.
- Experiment with Scoring: Try different scoring patterns to create unique designs on your bread.
- Embrace Imperfection: Sourdough baking is a learning process. Don’t be discouraged if your first loaf isn’t perfect. Keep practicing and experimenting!
Storage Instructions
Store your sourdough bread in a bread box or wrapped in a clean kitchen towel at room temperature. It will stay fresh for 2-3 days. For longer storage, you can slice the bread and freeze it in an airtight container. To thaw, simply remove the bread from the freezer and let it come to room temperature.
FAQ
Q: My starter isn’t doubling. What should I do?
A: Make sure you’re feeding your starter regularly (usually once or twice a day) with equal parts flour and water. The temperature of your kitchen also plays a role. A warmer environment will encourage faster activity. It may take a few days or even a week for a new starter to become active.
Q: My dough is too sticky to handle. What should I do?
A: High hydration dough is naturally sticky. Use plenty of flour on your hands and work surface to prevent sticking. A dough scraper is also a helpful tool.
Q: My bread is flat and dense. What went wrong?
A: This could be due to several factors, including a weak starter, under-proofing, or over-proofing. Make sure your starter is active and bubbly, and pay attention to the signs of fermentation in your dough.
Q: Can I use all-purpose flour instead of bread flour?
A: While you can use all-purpose flour, the results will be different. Bread flour has a higher protein content, which is essential for developing strong gluten and a chewy texture. If using all-purpose flour, you may need to adjust the amount of water.
Q: Can I add other ingredients to the dough?
A: Yes! Once you’re comfortable with the basic recipe, you can experiment with adding herbs, cheese, nuts, or dried fruit to the dough.
Conclusion
Congratulations! You’ve taken the first step towards mastering the art of sourdough baking. This easy recipe provides a solid foundation for creating delicious, homemade bread. Remember to be patient, experiment with different techniques, and most importantly, have fun! The reward of a warm, crusty loaf of sourdough is well worth the effort. Happy baking!