This Easy Sourdough Bread Recipe Will Make You Feel Like a Pro Baker (Without the Drama)
👩🍳 The Home Chef's Essential Kitchen
Consistently cooking incredible, healthy meals at home is so much easier when you aren't fighting with cheap tools. These are the 5 absolute powerhouse kitchen essentials that professional chefs and serious home cooks rely on every single day to get perfect results.
🍳 Lodge 10.25" Cast Iron Skillet
The single greatest value in all of cookware. It retains heat infinitely better than cheap non-stick pans, allowing you to get a restaurant-quality crust on steaks or perfect crispy edges on cornbread. With proper care, this $20 pan will literally outlive you.
🔪 Victorinox Fibrox Pro 8" Chef's Knife
A dull knife makes cooking a frustrating chore. This specific blade is the undisputed champion of the culinary world—it holds a terrifyingly sharp edge, features a comfortable non-slip grip, and performs identical to German knives that cost quadruple the price.
🌡️ ThermoPro Instant Read Thermometer
Never serve dry chicken or undercooked pork again. An instant-read thermometer is the secret difference between amateur cooks who 'guess' when protein is done, and professionals who know exactly when to pull meat off the heat for maximum juiciness.
🍲 Lodge Enameled Cast Iron Dutch Oven
The ultimate workhorse for soups, stews, braised short ribs, and baking crusty artisanal bread. The enameled interior provides incredible heat distribution for slow-cooking while eliminating the intense seasoning maintenance required by bare cast iron.
🥄 Bpa-Free Silicone Utensil Set
Throw away those melting plastic spatulas and bacteria-harboring wooden spoons. This pure silicone set is heat-resistant up to 600°F, won't scratch your expensive pans, and features seamless designs that make cleaning out thick sauces and batters effortless.
You don’t need a wood-fired oven, a French accent, or a decade-old starter named Gerald to bake incredible sourdough. You just need a plan, some patience, and this easy sourdough bread recipe that actually works. Think crisp crust, open crumb, and that tangy aroma that makes your kitchen smell like you hacked a bakery.
If you’ve failed before, good—now you know what not to do. Give me one loaf and I’ll give you a bread you’ll brag about.
What Makes This Recipe So Good
This recipe is built for real life: minimal hands-on time, max flavor. The method leans on autolyse and stretch-and-fold to build gluten without kneading for 20 minutes like a human mixer.
Hydration is moderate, so the dough is forgiving yet still delivers an airy crumb.
We also give you flexible timing windows—because life isn’t scheduled around dough. The flavor is balanced: mild tang with a hint of sweetness from longer fermentation. It’s beginner-friendly, but good enough that seasoned bakers won’t roll their eyes.
What Goes Into This Recipe – Ingredients
- Active sourdough starter (100% hydration): 100 g (fed, bubbly, passes float test)
- Bread flour: 450 g
- Whole wheat flour: 50 g (adds flavor and color)
- Water: 350–380 g (start with 360 g; adjust as needed)
- Fine sea salt: 10 g
- Rice flour for dusting the banneton (or a mix of rice and AP flour)
- Optional add-ins: 1–2 tbsp olive oil for softer crust; seeds, herbs, or roasted garlic for flavor twists
Let’s Get Cooking – Instructions
- Make sure your starter is ready. Feed it 4–8 hours before starting.
It should be domed, bubbly, and airy. If it sinks like a rock, it’s not ready. FYI: this one step makes or breaks your loaf.
- Autolyse (30–60 minutes). In a large bowl, mix bread flour, whole wheat flour, and 340 g of water until no dry patches remain.
It’ll look shaggy—perfect. Cover and rest. This jumpstarts gluten formation without effort.
- Mix in starter and salt. Add 100 g starter and 10 g salt.
Squish and fold until combined. If dough feels very stiff, add another 10–20 g water. Aim for tacky, not soupy.
- Bulk fermentation with stretch-and-folds (3–5 hours). Cover the bowl.
Every 30 minutes for the first 2 hours, do 1 set of stretch-and-folds: grab a side, stretch up, fold over; rotate the bowl and repeat 4 times. Dough should tighten and get smoother.
- Let it rise until puffy. After folds, rest until the dough has risen ~50% and shows bubbles along the sides. It should jiggle like a waterbed.
Time depends on room temp: 72°F/22°C may take 4–5 hours; warmer is faster.
- Pre-shape (gentle). Turn dough onto a lightly floured surface. Using a bench scraper, tuck edges to form a loose round. Rest 15–20 minutes uncovered.
This relaxes the gluten so final shaping is clean.
- Final shape. For a boule: Flip the dough smooth side down, stretch top to center, sides to center, bottom to top, then tighten by dragging the round toward you on the counter. For a batard: Roll into an oval and stitch it closed. You should feel surface tension.
- Proof in a floured banneton. Dust your basket with rice flour.
Place the dough seam-side up. Cover and either:
- Room-temp proof 45–75 minutes until it slightly springs back when poked, or
- Cold proof in the fridge 8–24 hours for better flavor and scoring.
- Preheat the oven and Dutch oven. Heat to 475°F (245°C) for at least 30 minutes with the Dutch oven inside. You want it scorching.
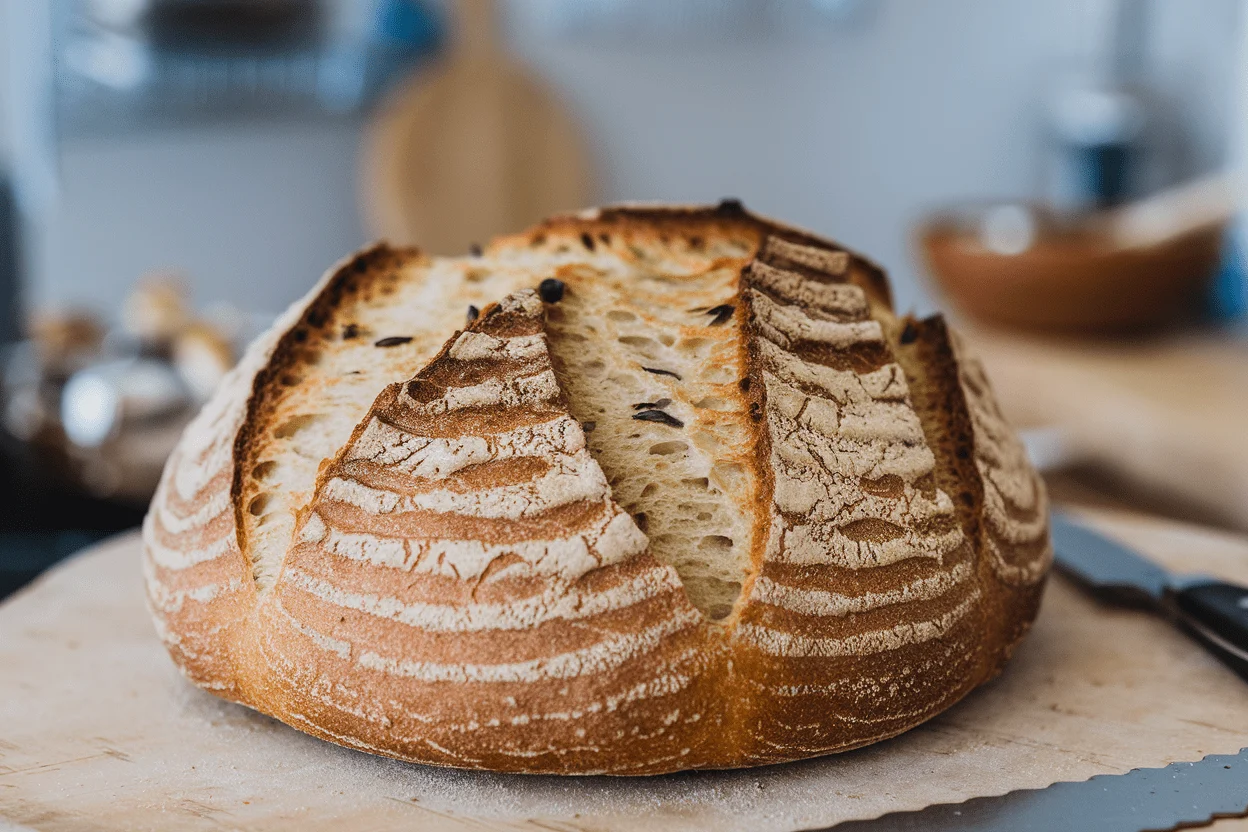
- Score and bake. Turn the dough onto parchment, seam-side down.
Score with a lame: one confident 1/2-inch slash along the top works. Lift into the hot Dutch oven, cover, and bake 20 minutes.
- Finish uncovered. Remove the lid, reduce temp to 450°F (232°C), and bake 20–25 minutes more until deep golden-brown with blistered crust. Internal temp should be around 208–212°F (97–100°C).
- Cool completely. Place on a rack and wait at least 1 hour before slicing.
Yes, it’s torture. Cutting early wrecks the crumb. Be strong.
Keeping It Fresh
Store cut-side down on a board for 24 hours to keep the crust crisp.
After that, wrap loosely in a clean towel or paper bag for up to 3 days. Avoid plastic unless you prefer a softer crust—plastic traps moisture and kills the crunch.
For longer storage, slice and freeze in a zip-top bag. Toast straight from frozen for bread that tastes like day one.
Whole loaves can be frozen too, but slices are more convenient IMO.
What’s Great About This
- Beginner-proof: Moderate hydration and simple steps reduce chaos.
- Flexible timing: Cold-proofing gives you flavor and convenience.
- Bakery-quality crust: Dutch oven steam makes it happen at home.
- Balanced flavor: Mild tang, nutty depth from whole wheat.
- No special gear required: A heavy pot, a bowl, and some nerve.
Avoid These Mistakes
- Underactive starter: If it’s not doubling and airy, you’re baking a brick. Feed it consistently for 2–3 days before baking.
- Too much water: High hydration looks cool on Instagram, but it’s a mess for beginners. Start with 360 g water and only add more if the dough can handle it.
- Overproofing: If dough collapses when scored, it went too far.
Look for a gentle spring-back on the poke test, not a crater.
- Skipping the preheat: A screaming-hot Dutch oven is your steam chamber. Lukewarm = dull crust.
- Cutting too soon: The crumb sets as it cools. Slice early, lose structure and moisture.
Patience pays.
Different Ways to Make This
- Seeded loaf: Mix in 40–60 g toasted sesame, sunflower, or pumpkin seeds after the first fold. Or roll the shaped dough in mixed seeds before proofing.
- Olive-rosemary: Add 80 g chopped olives and 1 tbsp minced rosemary during the second fold. Reduce water by ~10 g to offset olive moisture.
- Garlic-parmesan: Fold in 60 g grated Parmesan and 1 head of roasted garlic (mashed) during bulk.
Fragrant, slightly richer crumb.
- All-white loaf: Swap whole wheat for bread flour for a lighter, milder flavor and slightly more open crumb.
- No Dutch oven: Bake on a preheated steel or stone at 475°F with a pan of boiling water on the bottom rack for steam. Score confidently and bake 35–40 minutes total.
FAQ
How do I know my starter is active enough?
It should double within 4–6 hours of feeding, look bubbly and domed, and a small spoonful should float in water. If it’s sluggish, keep it warm (75–78°F/24–26°C) and feed 1–2 times a day for a few days.
Consistency wins here.
Can I use all-purpose flour instead of bread flour?
Yes, but expect a slightly softer dough and tighter crumb. If using all-purpose, hold back 10–20 g water and add only if the dough feels too stiff. Bread flour’s higher protein gives stronger structure and bigger holes.
What if my dough is sticking to everything?
Lightly wet your hands instead of flouring the dough, and use a bench scraper.
A short rest (10 minutes) also helps the gluten relax, making the dough easier to handle. If it’s still a nightmare, you probably added too much water—no shame, just adjust next time.
Do I have to cold-proof overnight?
No. A room-temp proof works fine if you watch the dough and not the clock.
Cold-proofing, though, gives better flavor, easier scoring, and a tighter schedule window. It’s the home-baker cheat code.
Why didn’t my loaf rise much in the oven?
Common culprits: underactive starter, overproofed dough, or a lukewarm oven/Dutch oven. Also check your score depth—too shallow or too timid, and the dough can’t expand where it needs to.
Can I make this gluten-free?
Not with this exact formula.
Gluten-free sourdough requires different flours, hydration, and binders. Look for a dedicated GF sourdough recipe that uses blends like rice flour, sorghum, and psyllium husk.
My Take
This easy sourdough bread recipe hits the sweet spot between “set-and-forget” and “artisan show-off.” You learn real technique—autolyse, gentle folds, proper proofing—without juggling a PhD in fermentation. The Dutch oven does the heavy lifting; you get the applause.
Once you’ve nailed this base loaf, the rest is pure creativity.
Seeds, herbs, olive swirls, you name it. Bake it once, tweak it twice, and suddenly you’re the person bringing “that bread” to every dinner. Not mad about it, right?