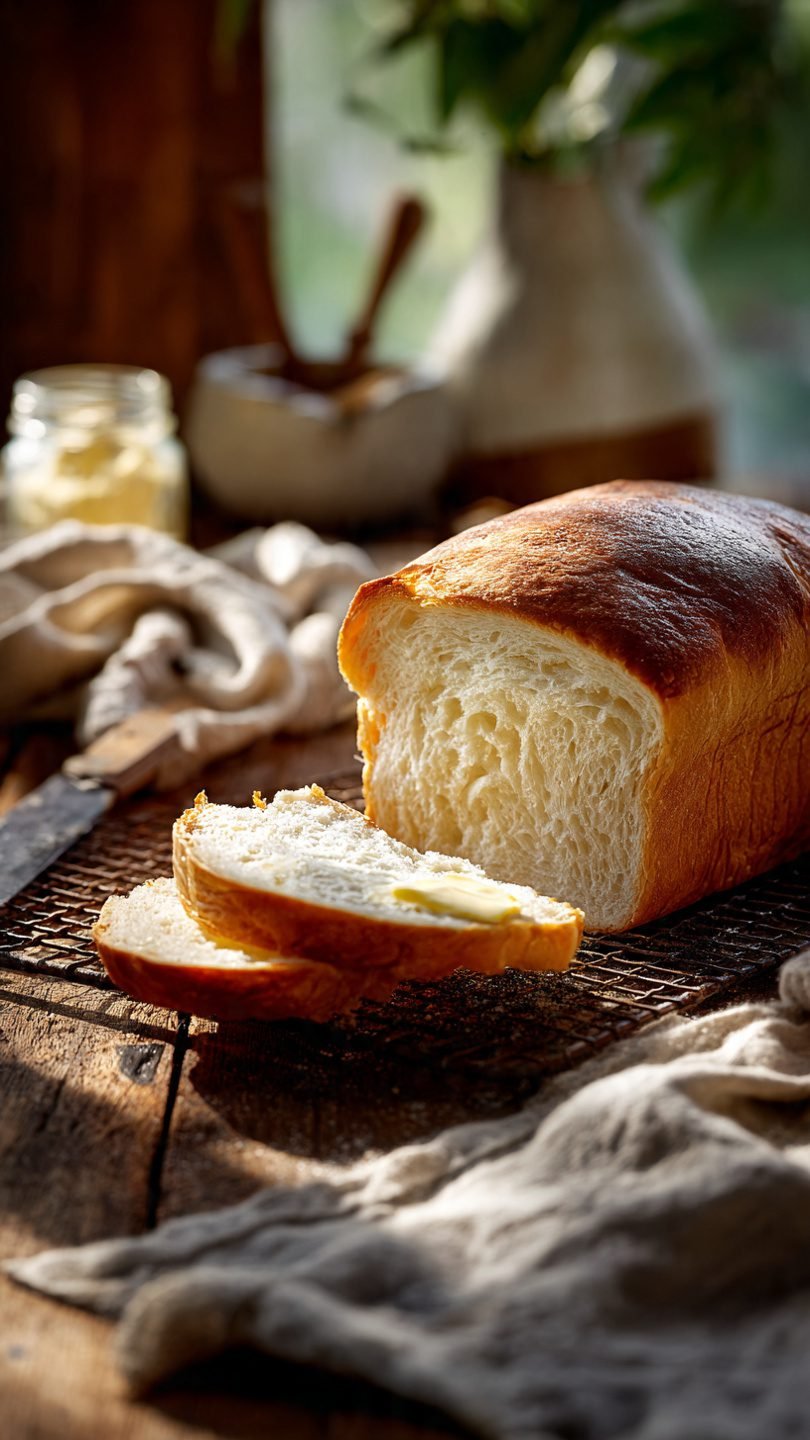
🍞 Fluffy Sandwich Bread Recipe (Easy & Soft!)
Let’s be real for a second: buying bread at the grocery store is usually a disappointment. You grab a bag, give it a little squeeze, and it feels… fine. But then you check the expiration date and realize it’s going to outlive your grandchildren because of all the preservatives.
So you’re craving something tasty but too lazy to spend forever in the kitchen, huh? Same. But here’s the secret: making bread isn’t actually hard. It’s just a lot of waiting around and trying to look busy while yeast does all the heavy lifting. This Fluffy Sandwich Bread Recipe is about to ruin store-bought loaves for you forever. It’s soft, it smells like heaven, and it makes the absolute best toast you will ever eat.
Why This Recipe is Awesome
Okay, why should you bother covering your kitchen in flour when you could just spend $3 at the store? Let me count the ways, my friend.
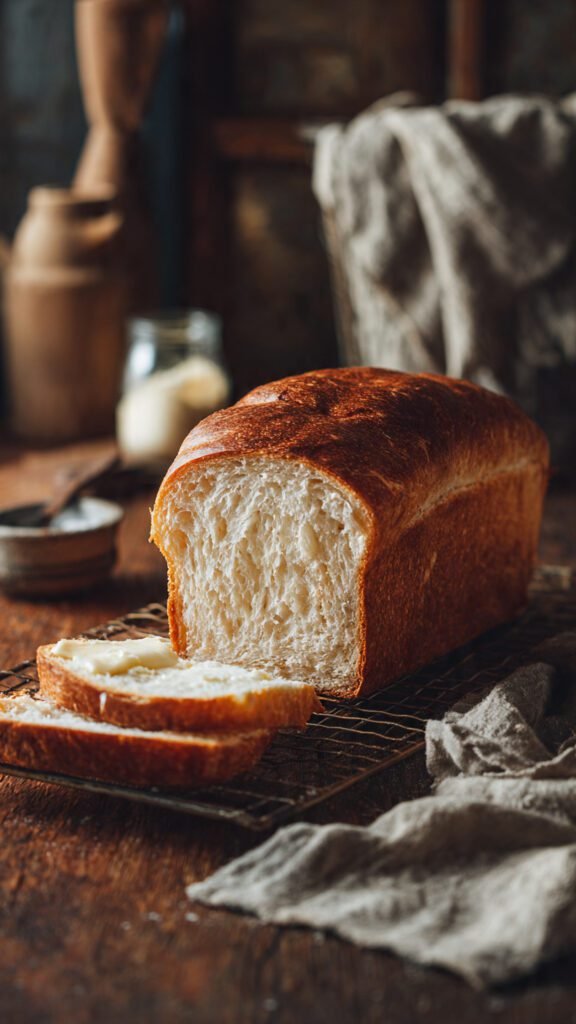
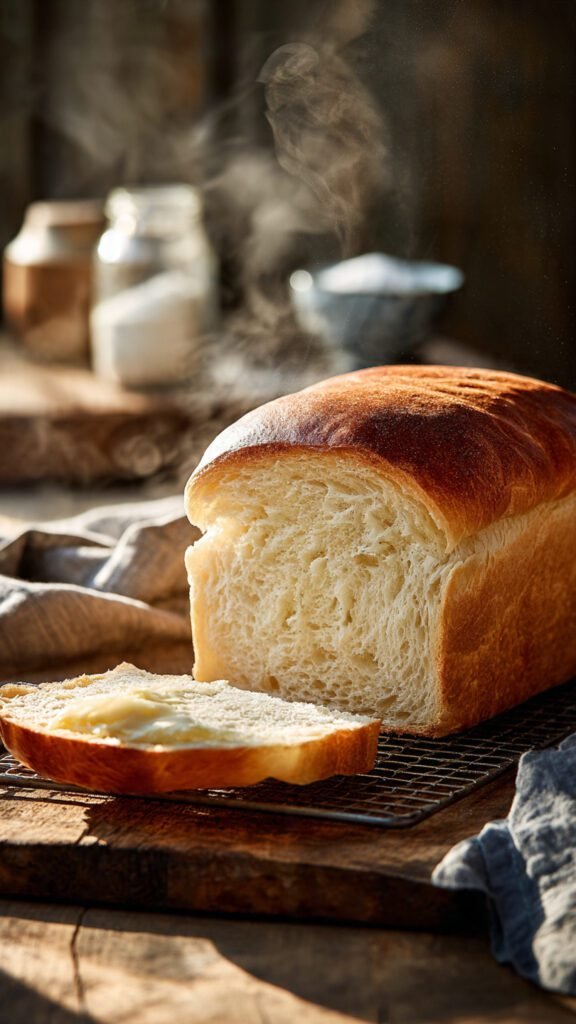
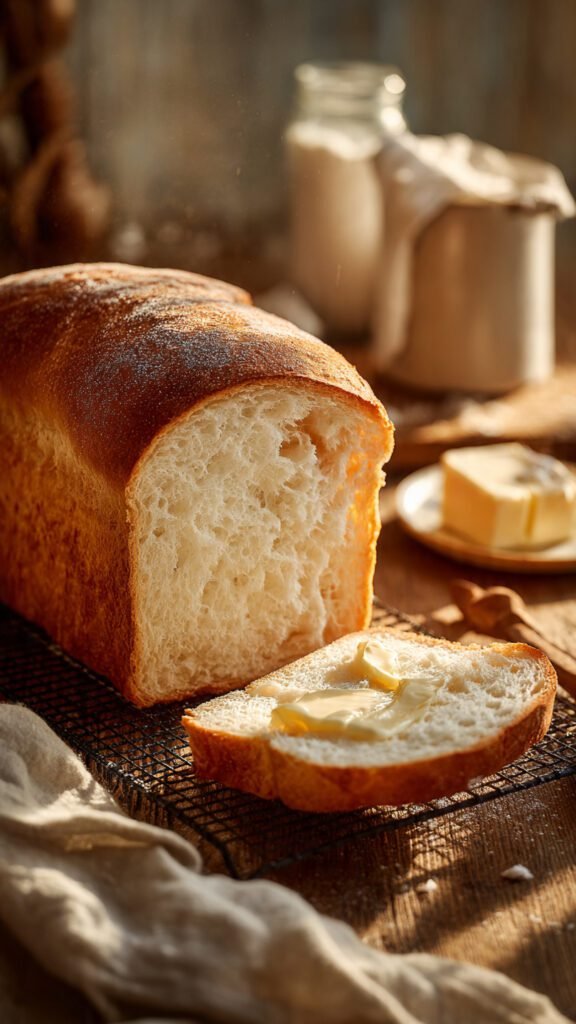
First off, the texture. We aren’t making an artisan sourdough doorstop here. We are making a loaf that is basically an edible cloud. It has that quintessential “squish” factor. You know when you see those commercials where they slowly tear the bread apart and steam rises out? That’s actually going to be you in about three hours.
Secondly, it is surprisingly forgiving. This dough is resilient. Even if you haven’t touched a packet of yeast since the great sourdough panic of 2020, you can pull this off. It uses simple, pantry-staple ingredients that you probably already have unless your cupboard is completely barren (in which case, go shopping).
Third, the smell. There is scientific proof (probably) that the smell of baking bread releases serotonin. Your house will smell better than any expensive candle you could buy at the mall. It’s a cozy, buttery, yeasty aroma that makes everyone in a 50-foot radius instantly love you.
Finally, control. You know exactly what’s in this. No unpronounceable chemicals, just pure, simple goodness. Plus, slicing into a warm loaf that you made gives you a god-complex level of satisfaction. You created life! (Well, yeast life).
Ingredients You’ll Need
Don’t panic. The list is short. If you have a well-stocked pantry, you might not even need to leave the house.
- Warm Water & Warm Milk: You want a mix of both. Water provides hydration, milk adds fat and softness. Critical Tip: Keep it around $110°F (43°C)$. Think “warm bathwater,” not “volcano lava.” If it burns your finger, it’ll kill the yeast. RIP.
- Active Dry Yeast: The magic dust. You can use Instant Yeast if that’s all you have (skip the blooming step if you do), but I like Active Dry because watching it foam up proves it’s actually alive before you waste 4 cups of flour.
- Sugar: Yeast gets hungry. Sugar is its food. It helps the yeast activate and gives the crust that golden brown tan we’re looking for. Honey works too if you’re feeling fancy.
- Unsalted Butter (Melted): Fat is flavor, but fat is also softness. This lubricates the gluten strands so the bread stretches instead of snaps.
- Bread Flour (or All-Purpose): ideally, use Bread Flour. It has higher protein, which means more gluten, which means a taller, chewier, better structure. All-purpose works, but your loaf might be a little shorter.
- Salt: Do not forget this. Bread without salt tastes like sadness and paper. It also controls the yeast so it doesn’t go crazy and explode over your counter.
Step-by-Step Instructions
Ready to get your hands dirty? Let’s do this.
1. Wake Up the Yeast
Grab a large mixing bowl or the bowl of your stand mixer. Combine your warm water, warm milk, and sugar. Sprinkle the yeast on top and give it a gentle stir. Now, walk away for 5–10 minutes.
- The Vibe Check: When you come back, it should look frothy and bubbly, kind of like a cappuccino. If it looks like flat, murky pond water, your yeast is dead (or your water was too hot). Throw it out and start over. Do not pass Go.
2. Mix in the Fat and Flour
Pour in that melted butter (make sure it’s not boiling hot!). Add about 3 cups of the flour and the salt.
- The Mix: If using a stand mixer, slap on the dough hook and mix on low. If doing this by hand, use a sturdy wooden spoon and your own brute strength. Mix until it’s a shaggy, sticky mess.
3. The Kneading (aka The Workout)
Gradually add the remaining flour only if needed. The dough should be tacky (like a Post-it note) but not sticky (like bubblegum).
- Machine: Knead on low/medium speed for about 6–8 minutes.
- By Hand: Dump it onto a floured surface and push, fold, and turn for 8–10 minutes. Put your back into it. You want the dough to transform from a lumpy mess to a smooth, elastic baby bottom.
- The Windowpane Test: Tear off a small piece of dough and stretch it thin. If it stretches until it’s translucent enough to see light through without tearing, you have achieved gluten nirvana. If it rips immediately, keep kneading.
4. The First Rise (The Nap)
Grease a large bowl with a little oil or cooking spray. Plop your dough ball inside and roll it around so it’s coated (this prevents a crust from forming on the dough skin). Cover with plastic wrap or a warm, damp towel.
- Place it somewhere warm and draft-free. Let it rise for 60–90 minutes, or until it has doubled in size.
- Science Note: This is where the yeast burps out carbon dioxide, creating those air pockets that make the bread fluffy.
5. Punch and Shape
Once it’s huge and puffy, punch it down. Literally. Give it a gentle jab to deflate it. It’s very therapeutic.
- Turn it out onto a lightly floured surface. Press it into a rectangle, roughly the width of your 9×5 loaf pan.
- The Roll: Tightly roll the dough up into a log, pinching the seams closed as you go. This surface tension is what helps it rise up rather than out. Pinch the ends and tuck them under.
6. The Second Rise (The Comeback)
Place your dough log seam-side down into a greased 9×5 inch loaf pan. Cover it again.
- Let it rise for another 30–50 minutes. You want the dough to crest about an inch over the rim of the pan. This is the “mushroom top” phase.
- Preheat: While it’s rising, preheat your oven to $350°F (175°C)$. Don’t wait until the last minute!
7. Bake It
Pop that bad boy into the oven. Bake for 30–35 minutes.
- The visual: The top should be a deep golden brown.
- The sound: Take it out and tap the top with your fingernail or a spoon. It should sound hollow, like a drum. If it sounds like a wet thud, it needs a few more minutes.
8. The Cooling (The Hardest Part)
Remove from the oven. Brush the top with a little extra butter if you want a soft crust.
- Crucial Step: Take the bread out of the pan and let it cool on a wire rack. If you leave it in the pan, the steam will get trapped and you’ll have a soggy, wet bottom. Nobody likes a soggy bottom.
- Wait: You must wait until it is completely cool before slicing. If you slice hot bread, you crush the structure and it turns gummy. I know, it hurts to wait. Stay strong.
Common Mistakes to Avoid
Even the best of us mess up. Here’s how to avoid the culinary walk of shame.
- Using “Dead” Yeast: I said it before, I’ll say it again. If it doesn’t bubble in step 1, it won’t rise later. Check the expiration date on your packet!
- Adding Too Much Flour: This is the #1 reason home bakers make bricks instead of bread. You might think the dough is too sticky, so you keep adding flour. Stop it. Trust the process. The dough should be slightly tacky. Too much flour = dry, dense bread.
- Rushing the Rise: Yeast works on its own schedule, not yours. If your kitchen is cold, it might take longer than an hour. Use your eyes, not just the clock. If it hasn’t doubled, let it sit.
- Slicing While Hot: Seriously, don’t do it. You’ll ruin two hours of work for one hot slice. The bread finishes cooking internally while it cools.
Alternatives & Substitutions
- Dairy-Free/Vegan: Swap the butter for oil (olive oil or vegetable oil) or vegan butter. Swap the dairy milk for almond milk, oat milk, or just use all water. The texture changes slightly (less rich), but it still works.
- Whole Wheat: Want to be healthy? Okay, fine. But don’t swap 100% of the white flour for whole wheat unless you want a doorstop. Go for a 50/50 split—half bread flour, half whole wheat. You might need a splash more water since whole wheat is thirsty.
- Sweetener: No sugar? Honey, maple syrup, or agave nectar work perfectly. They actually add a nice depth of flavor and keep the bread moist longer.
- Add-ins: Feeling adventurous? Toss in some herbs (rosemary is elite), shredded cheese, or cinnamon raisins during the kneading phase.
FAQ (Frequently Asked Questions)
1. Can I freeze this bread?
Absolutely. Slice it up once it’s cool, put it in a freezer-safe bag, and freeze it. When you want toast, just pop a frozen slice directly into the toaster. It toasts up beautifully.
2. Why did my bread collapse in the middle?
You probably let it rise too long during the second rise (in the pan). The yeast exhausted itself and gave up on life before it hit the oven heat. Next time, watch the height, not the clock.
3. Do I really need a stand mixer?
No way. Our ancestors didn’t have KitchenAids. They had biceps. Kneading by hand is a great workout and honestly, I think it makes the bread taste better because you put your sweat into it (figuratively, please).
4. My crust is too hard. Help?
Brush the top with melted butter immediately after taking it out of the oven. Then, cover the loaf with a clean kitchen towel while it cools on the rack. The steam gets trapped and softens the crust.
5. How long does this keep?
Since there are no preservatives (yay!), it only stays fresh for about 2–3 days at room temperature. Store it in a paper bag or bread box. If you haven’t eaten it by day 3, freeze it or turn it into French Toast.
6. Can I use margarine instead of butter?
Well, technically yes, but why hurt your soul like that? Butter adds flavor. Margarine adds… oiliness. But in a pinch, it works.
Final Thoughts
See? That wasn’t so scary. You’ve navigated the treacherous waters of yeast activation and emerged victorious with a golden, fluffy loaf of carbs.
There is honestly nothing better than a sandwich made with bread you baked yourself—or just slathering a thick slice with butter and jam. Now go impress someone—or yourself—with your new culinary skills. You’ve earned it!
(Note: If you make this, try not to eat the whole loaf in one sitting. Or do. I’m not the bread police.)