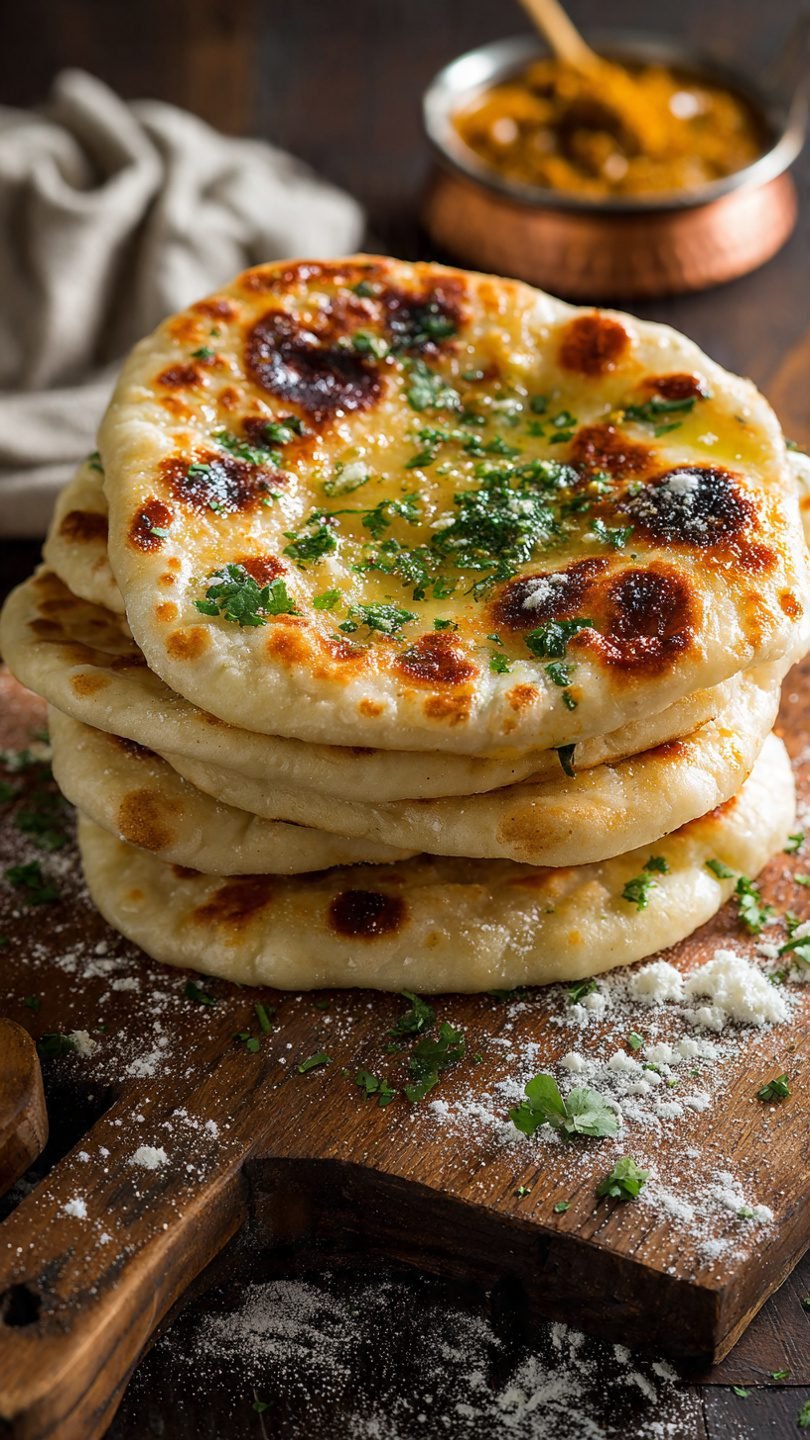
🫓 The Best Garlic Naan Bread Recipe (Better Than Takeout!)
So, you’re currently staring at your phone, thumb hovering over the “Order Now” button on your favorite food delivery app. You want the curry, sure. But let’s be real—you’re mostly in it for the warm, pillowy, garlic-drenched vessel of carbohydrates that comes with it. I see you. I am you.
But here’s the harsh truth: by the time that delivery driver navigates traffic, gets lost in your apartment complex, and finally hands you the bag, that naan is going to be a sad, sweaty, lukewarm shadow of its former self.
What if I told you that you could make restaurant-quality garlic naan bread in your own kitchen using a skillet? No tandoor oven required. No degree in culinary arts needed. Just some flour, yeast, and enough garlic to ward off vampires for a solid decade.
Put the phone down. Let’s make some magic happen.

Why This Recipe is Awesome
Look, I don’t use the phrase “life-changing” lightly (usually only for really good coffee or comfortable sweatpants), but this garlic naan bread recipe is dangerously close to earning that title.
Here is why you are going to obsess over this:
- The Texture Trifecta: We are talking about that elusive combination of textures: a crispy, charred exterior, a chewy, elastic crumb, and a pillowy softness that makes you want to use it as a mattress. Most home recipes turn out like dense crackers or dry pita pockets. Not this one. This one brings the fluff.
- No Tandoor? No Problem: Traditional naan is slapped onto the walls of a clay oven reaching 900°F (480°C). Unless you have one of those casually sitting in your living room (weird flex, but okay), you might worry you can’t replicate the taste. Wrong. We use a scorching hot cast-iron skillet to mimic that intense heat, creating those signature charred bubbles that scream “authentic.”
- It’s Cheaper Than Your Latte: Flour and water are practically free. The amount of money you save making this at home versus paying $4.99 per piece at a restaurant is significant. You can literally eat five of these for the price of one takeout order. (Please don’t eat five in one sitting… or do, I’m not your doctor.)
- The “I Made This” Factor: There is something primal and deeply satisfying about watching dough puff up in a hot pan. Serving this to friends makes you look like a domestic wizard. They don’t need to know it was actually incredibly easy.
Ingredients You’ll Need
We are keeping this simple. You likely have 90% of this stuff in your pantry right now. If you don’t, a quick run to the store is worth it.
- Warm Water: Not hot, not cold. Think “baby bathwater” temperature. If it burns your finger, it’ll kill the yeast. If it’s cold, the yeast will hit the snooze button.
- Sugar or Honey: Just a teaspoon. This isn’t for sweetness; it’s an appetizer for the yeast to wake it up.
- Active Dry Yeast: The MVP. Without this, you’re just making flat crackers.
- All-Purpose Flour: You can use bread flour if you want it extra chewy, but good old AP flour works perfectly here for a soft, tender bite.
- Plain Yogurt: Do not skip this. This is the secret weapon. The acidity and fat in the yogurt tenderize the gluten, giving the naan that distinct tangy flavor and soft texture. Greek yogurt works, but regular plain yogurt is arguably better here.
- Olive Oil: For the dough and the bowl.
- Salt: Because unseasoned bread is a crime against humanity.
- Garlic (Lots of it): Freshly minced. None of that jarred stuff that smells like regrets.
- Butter: Salted or unsalted, doesn’t matter. We are melting it to drown the finished bread.
- Fresh Cilantro: Chopped fine. It adds color and that fresh, herbaceous cut through the rich butter.
Step-by-Step Instructions
Alright, apron on. Let’s get messy.
1. Wake Up the Yeast
In a small bowl, combine your warm water, sugar, and yeast. Give it a little stir and let it sit for about 5–10 minutes.
- The Science: You’re looking for a foam party. If the mixture gets frothy and bubbly, your yeast is alive and ready to party. If it looks like flat, murky pond water after 10 minutes, throw it out. Your yeast is dead, and no amount of praying will make the bread rise.
2. The Mix
In a large mixing bowl, whisk together the flour and salt. Make a well in the center (like a little volcano). Pour in your yeast mixture, the yogurt, and the oil.
- Action: Use a sturdy spoon or a fork to mix it until it creates a shaggy, sticky dough. It’s going to look messy. That’s normal. Trust the process.

3. The Knead (Your Arm Workout)
Dump that shaggy mess onto a floured surface. Now, knead. Push the dough away with the heel of your hand, fold it back over, and turn.
- Time: Do this for about 3–5 minutes.
- Goal: You want the dough to transform from a sticky, lumpy nightmare into a smooth, elastic baby bottom. If it’s sticking to your hands like superglue, add a sprinkle more flour—but go easy! Too much flour = dry, sad naan.
4. The Rise
Grease your mixing bowl with a little oil. Plop the dough ball in and roll it around so it gets coated in oil (this prevents a crust from forming). Cover the bowl with a warm, damp towel or plastic wrap.
- Wait: Place it in a warm spot for 60 to 90 minutes. You want it to double in size. This is a great time to scroll TikTok or chop your garlic.
5. Divide and Conquer
Once the dough has puffed up like a proud cloud, punch it down (gently—it’s not a punching bag). Turn it out and divide it into 6–8 equal pieces. Roll them into little balls.
- Tip: Cover the balls with a towel while you work so they don’t dry out.
6. Roll It Out
Heat your heaviest skillet (cast iron is king here) over medium-high heat. You want this pan ripping hot.
- Take a dough ball and roll it out. Don’t worry about a perfect circle. An oval or a teardrop shape looks more rustic and “authentic.” Aim for about 1/4 inch thickness. Too thin and it burns; too thick and the inside stays raw.
7. The Cook (The Fun Part)
Place the rolled dough onto the hot, dry skillet. Do not put oil in the pan yet.
- Watch for the Bubble: Within 30 seconds, you should see large bubbles starting to rise on the surface. It’s fascinating to watch.
- The Flip: After about 1–2 minutes, when the bottom is beautifully blistered and charred, flip it. Cook the other side for another 1–2 minutes. The bubbles will char slightly—this is flavor, not failure!
8. The Garlic Butter Bath
While the naan is hot off the pan, brush it immediately with a mixture of melted butter, minced garlic, and cilantro.
- Sensory Detail: The sound of the butter sizzling slightly when it hits the hot bread, combined with the instant aroma of roasted garlic filling your kitchen, is arguably better than any perfume on the market.
Repeat until all dough is used. Stack them up to keep them warm.
Common Mistakes to Avoid
Even though this is an “idiot-proof” recipe, I have seen some things. Here is how to avoid disaster:
- The Cold Pan: If your skillet isn’t hot enough, the dough won’t bubble. It will just sit there and slowly dehydrate into a sad, flat cracker. Wait for the pan to smoke slightly.
- Over-Flouring: When kneading or rolling, it is tempting to use a mountain of flour to stop the sticking. Don’t. Excess flour burns in the skillet and makes the bread taste bitter.
- Using Old Yeast: I said it before, I’ll say it again. If your yeast packet has been open in the back of your cupboard since 2018, buy new yeast.
- Rolling Too Thin: If you roll it paper-thin, you are making tortillas, not naan. You need a little thickness to get that pillowy interior.
Alternatives & Substitutions
Cooking is an art, not a rigid set of laws. Feel free to remix this garlic naan bread recipe:
- Make it Vegan: Swap the dairy yogurt for a plain, unsweetened coconut or soy yogurt (or just use extra water/oil, though it will be less tender). Swap butter for vegan butter or olive oil for the brushing.
- Cheese Naan: This is next-level. Roll two thin circles, put a handful of mozzarella in the middle, seal the edges, and roll it out gently again. Boom. Cheese-stuffed naan. You’re welcome.
- Whole Wheat: You can substitute up to 50% of the flour with whole wheat flour. Any more than that, and it becomes very dense (think hockey puck vibes).
- The “Lazy” Version: If you hate kneading, you can let the dough sit in the fridge overnight (12–24 hours). Time develops the gluten for you. Plus, the flavor gets deeper and more complex (fermentation is cool).
FAQ (Frequently Asked Questions)
Q: Can I use baking powder instead of yeast? A: Technically, yes. That creates a “quick bread.” It will be edible, but it won’t have that signature chew or the yeasty flavor of traditional naan. It’s like watching a movie on your phone vs. in an IMAX theater. Same content, different experience.
Q: Why is my naan not bubbling? A: Your pan is likely too cold, or you rolled the dough too flat. Crank up the heat and let the dough stay a bit thicker next time.
Q: Can I freeze this garlic naan bread recipe? A: Absolutely! Cook them, let them cool completely, then freeze them in a ziplock bag with parchment paper between slices. Reheat in a toaster or warm oven. It’s the ultimate meal-prep hack.
Q: Do I really need a cast-iron skillet? A: IMO, yes. Cast iron holds heat better than stainless steel or non-stick. If you don’t have one, use the heaviest pan you own. Just don’t use a thin, flimsy frying pan, or you’ll get spotty results.
Q: Can I bake this in the oven? A: You can, especially if you have a pizza stone. Preheat the stone to 500°F (260°C) and bake for 2-3 minutes. It works well, but I still prefer the stovetop for those specific char marks.

Final Thoughts
There you have it. You have officially graduated from “person who orders takeout” to “person who makes their own garlic naan bread recipe from scratch.”
The smell of yeast and garlic butter lingering in your kitchen is the ultimate comfort. This recipe is forgiving, fun, and honestly, a little therapeutic to make. Slapping dough around is a great stress reliever.
So, serve this up with some Tikka Masala, use it as a wrap for leftovers, or just stand over the stove eating it plain while burning your fingers on the hot butter. I won’t judge.
Now go impress someone—or yourself—with your new culinary skills. You’ve earned it!