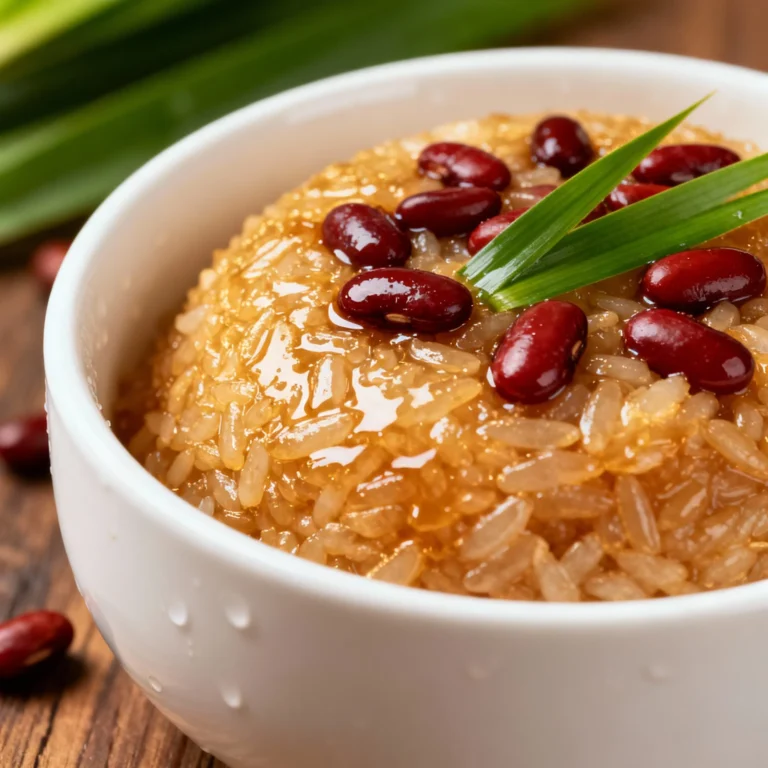
This “Heaven in a Bowl Recipe” Turns Ordinary Nights Into Legendary Desserts — Don’t Blame Me When Everyone Asks for Seconds
👩🍳 The Home Chef's Essential Kitchen
Consistently cooking incredible, healthy meals at home is so much easier when you aren't fighting with cheap tools. These are the 5 absolute powerhouse kitchen essentials that professional chefs and serious home cooks rely on every single day to get perfect results.
🍳 Lodge 10.25" Cast Iron Skillet
The single greatest value in all of cookware. It retains heat infinitely better than cheap non-stick pans, allowing you to get a restaurant-quality crust on steaks or perfect crispy edges on cornbread. With proper care, this $20 pan will literally outlive you.
🔪 Victorinox Fibrox Pro 8" Chef's Knife
A dull knife makes cooking a frustrating chore. This specific blade is the undisputed champion of the culinary world—it holds a terrifyingly sharp edge, features a comfortable non-slip grip, and performs identical to German knives that cost quadruple the price.
🌡️ ThermoPro Instant Read Thermometer
Never serve dry chicken or undercooked pork again. An instant-read thermometer is the secret difference between amateur cooks who 'guess' when protein is done, and professionals who know exactly when to pull meat off the heat for maximum juiciness.
🍲 Lodge Enameled Cast Iron Dutch Oven
The ultimate workhorse for soups, stews, braised short ribs, and baking crusty artisanal bread. The enameled interior provides incredible heat distribution for slow-cooking while eliminating the intense seasoning maintenance required by bare cast iron.
🥄 Bpa-Free Silicone Utensil Set
Throw away those melting plastic spatulas and bacteria-harboring wooden spoons. This pure silicone set is heat-resistant up to 600°F, won't scratch your expensive pans, and features seamless designs that make cleaning out thick sauces and batters effortless.
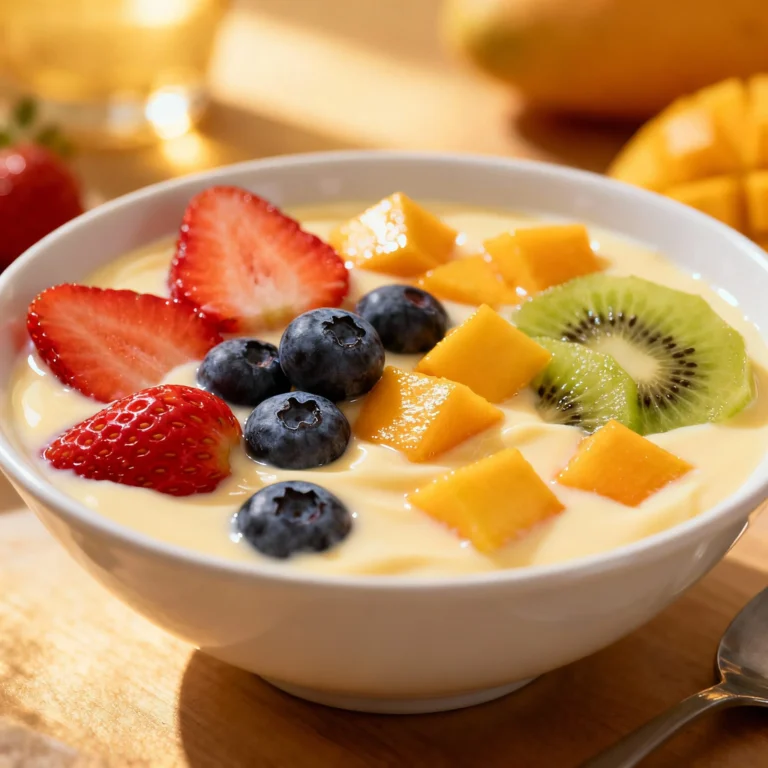
You don’t need a pastry chef or a trust fund to pull off dessert that makes people close their eyes at the first bite. This heaven in a bowl recipe is the crowd-pleasing, zero-fuss, maximal-pleasure masterpiece your taste buds have been waiting for. Layers of cake, creamy pudding, whipped clouds, and chocolate crunch—basically, your favorite dessert components stacked like a flavor skyscraper.
It’s fast, flashy, and totally addictive. And yes, it’s the dessert people will DM you about later.
What Makes This Special
This isn’t just a trifle; it’s a strategic flavor assault. You get soft cake, silky pudding, crunchy candy, and pillowy whipped topping in every spoonful.
The layers compress into a texture people associate with “fancy,” but it’s mostly assembly—not cooking.
It’s also wildly flexible: swap the cake, switch the candy, change the pudding—no one complains, they just eat faster. It scales perfectly for parties, shows well in a glass bowl, and holds up in the fridge. In short: viral-level delicious with weeknight energy.
Ingredients Breakdown
- 1 box chocolate cake mix (plus eggs, oil, water per package) or a store-bought chocolate cake
- 2 packages (3.4 oz each) instant vanilla or cheesecake pudding (or chocolate if you’re extra)
- 3 cups cold milk (for the pudding; use whole milk for maximum creaminess)
- 16 oz whipped topping (thawed) or 3 cups freshly whipped cream, lightly sweetened
- 8 oz cream cheese (softened; optional for richer, cheesecake-like layers)
- 1/3 cup powdered sugar (if using cream cheese)
- 1 cup hot fudge sauce (slightly warmed for drizzling)
- 1 to 1.5 cups crushed chocolate toffee bars (like Heath or Skor) or chopped peanut butter cups
- 1/2 cup mini chocolate chips (for texture contrast)
- 1 teaspoon vanilla extract (for the cream layer)
- Pinch of flaky sea salt (optional, to sharpen the sweetness)
How to Make It – Instructions
- Bake the cake: Prepare the chocolate cake according to package directions in a 9×13 pan.
Cool completely. Shortcut: use a store-bought chocolate cake or brownies to cut the time in half.
- Mix the pudding: Whisk instant pudding with cold milk for 2 minutes until thick. Chill for 5–10 minutes to set.
You want it spreadable, not runny.
- Optional cream cheese layer: Beat softened cream cheese with powdered sugar and vanilla until smooth. Fold in half of the whipped topping to create a light cheesecake layer. This adds depth and wow-factor.
- Prep your candy: Crush toffee bars or chop your candy of choice.
Keep some pieces bigger for crunch. Mix with mini chocolate chips.
- Cut the cake: Cube the cooled cake into 1-inch chunks. Imperfect is perfect—edges add texture.
- Layer 1: Add half the cake cubes to the bottom of a large glass trifle bowl (or a big clear mixing bowl).
Press lightly to compact.
- Layer 2: Spread half the pudding over the cake. If using cream cheese layer, dollop and spread half of it now, then pudding on top. No need for perfection; rustic looks intentional.
- Layer 3: Sprinkle a generous handful of crushed candy and mini chips.
Drizzle with warm hot fudge. Add a whisper of sea salt if you like that sweet-salty snap.
- Layer 4: Spread half of the remaining whipped topping evenly.
- Repeat: Add the rest of the cake, remaining pudding (and cream cheese layer if using), more candy, a drizzle of fudge, and finish with the remaining whipped topping.
- Final flourish: Top with extra candy crumbles and a delicate fudge zigzag for the “I’m absolutely posting this” effect.
- Chill: Cover and refrigerate for at least 1–2 hours, preferably 4+. The flavors mingle, the layers set, and the whole thing becomes next-level.
Storage Tips
- Refrigerate covered for up to 3 days.
The candy softens a bit by day two, but the flavor gets deeper.
- Do not freeze: Pudding and whipped topping can turn grainy and sad. Don’t do that to yourself.
- Make-ahead: Assemble up to 24 hours in advance. For max crunch, hold back 1/3 of the candy and add it right before serving.
Nutritional Perks
Let’s be honest: this is dessert with capital D.
Still, there are a few wins. Portion control is built-in—serve in small glasses and it still feels indulgent. Protein bump happens if you use the cream cheese layer and whole milk. Want a lighter version? Use Greek yogurt folded into the whipped topping, choose sugar-free pudding, and swap to angel food cake.
You’ll keep the layered drama without the food coma.
Common Mistakes to Avoid
- Adding warm cake: If the cake isn’t fully cooled, it melts the layers. Patience is profitable here.
- Runny pudding: Measure milk correctly and chill. If it’s loose, your trifle will slip and slide like a bad Jenga tower.
- Over-drizzling: Too much fudge can drown the cake.
Use thin ribbons between layers for balanced bites.
- Skipping the chill time: The set is non-negotiable. It’s when the magic happens.
- One-note sweets: Without a pinch of salt or textural contrast, it can taste flat. Candy crunch + a tiny salt hit = chef’s kiss.
Alternatives
- Flavor swaps: Use red velvet cake with cheesecake pudding and white chocolate chips.
Or try vanilla cake with banana pudding and crushed Nilla wafers for a banana cream twist.
- Fruit-forward: Add sliced strawberries and raspberries between layers with vanilla pudding and omit the fudge. It reads lighter but still luxurious.
- Peanut butter edition: Chocolate cake, chocolate pudding, chopped peanut butter cups, and a swirl of warmed peanut butter with fudge. Nobody complains.
- Gluten-free: Use a GF cake mix and candy that’s certified GF.
Everything else stays the same—big win.
- Lighter take: Angel food cake, sugar-free pudding, light whipped topping, and dark chocolate shavings. IMO, still hits the craving.
FAQ
Can I make this without a trifle bowl?
Absolutely. Use a 9×13 dish, a large mixing bowl, or even individual mason jars.
Clear containers just show off the layers better, but flavor doesn’t care.
What cake works best if I’m short on time?
Store-bought chocolate cake or brownies are perfect. Pre-made pound cake also works if you want a denser base with clean slices.
Can I use homemade whipped cream?
Yes, and it’s fantastic. Whip 2 cups heavy cream with 3 tablespoons powdered sugar and 1 teaspoon vanilla to soft peaks.
Keep it cold for easy spreading.
Is there a no-dairy version?
Use dairy-free pudding mix with almond or oat milk (check package ratios), coconut whipped topping, and a dairy-free cake. Swap fudge for a dark chocolate syrup that’s dairy-free.
How do I keep the candy crunchy?
Add a portion of the candy just before serving. Also, avoid over-chilling for days; the fridge softens candy over time.
A tiny sprinkle of nuts can also add lasting crunch.
Can I reduce the sweetness?
Use dark chocolate cake, dark chocolate chips, and unsweetened whipped cream. Add fresh berries to cut the sugar and a pinch of salt to sharpen the flavors.
What if my pudding is too thick?
Whisk in 1–2 tablespoons of cold milk at a time until it loosens to a spreadable consistency. Don’t overdo it or the layers will slump.
🍰 The Master Baker & Prep Kit
Baking is a science, and meal prep requires efficiency. If you want consistently flaky pie crusts, perfectly risen cakes, and healthy meals ready for the week, these are the 5 upgrade tools that take your execution to the next level.
⚖️ OXO Good Grips 11lb Food Scale
The secret to why bakery bread and cookies are always perfect while home batches vary wildly. Measuring by weight (grams) instead of volume (cups) guarantees precise hydration and flawlessly consistent results every single time you bake.
🧑🍳 KitchenAid Classic Stand Mixer
The undisputed holy grail of the kitchen. From aggressively kneading heavy pizza doughs to whipping meringues into stiff peaks, this powerful motor saves your arms from exhaustion and cuts your hands-on prep time in half.
🍪 Silpat Premium Silicone Baking Mats
Stop wasting money on rolls of parchment paper or agonizing over cookies permanently fused to your metal pans. These reusable, professional-grade silicone mats ensure completely even heat distribution and instantly release even the stickiest caramel.
🌪️ Braun MultiQuick Immersion Blender
The ultimate shortcut tool for creamy tomato soups, lump-free gravies, and rapid smoothies. Avoid the burns and mess of dangerously transferring boiling liquids in batches to a traditional blender by simply blending right inside your cooking pot.
🍱 Premium Glass Meal Prep Containers
If you want to bake and cook healthier, batch preparation is required. These durable glass containers transition safely from freezer to microwave, never absorb tomato sauce stains, and feature airtight seals to keep your hard work fresh all week.
In Conclusion
This heaven in a bowl recipe is dessert with a strategy: fast assembly, big flavor, and guaranteed applause.
It’s forgiving enough for beginners and flashy enough for your inner show-off. Layer it, chill it, and watch people circle the bowl like it’s a prize. FYI: leftovers are elite with coffee the next morning—assuming there are any.