Homemade Whipped Cream Recipe: The Easiest & Fluffiest You’ll Ever Make!
Forget store-bought tubs filled with stabilizers and artificial flavors! Making your own whipped cream at home is unbelievably easy, requires just a few ingredients, and tastes infinitely better. This recipe guarantees light, airy, and perfectly sweet whipped cream that will elevate any dessert, from a simple bowl of berries to a decadent chocolate cake. Get ready to ditch the canned stuff forever and embrace the pure deliciousness of homemade!
Why This Recipe Works
This recipe is designed for foolproof results, every time. Here’s why it’s so reliable:
- Simple Ingredients: We’re sticking to the basics: heavy cream, sugar, and vanilla extract. No complicated steps or hard-to-find ingredients needed.
- Cold is Key: Chilled equipment and ingredients are crucial for optimal whipping. The cold fat molecules in the heavy cream trap air more easily, resulting in a stable and voluminous whipped cream.
- Gradual Sweetening: Adding the sugar gradually allows it to dissolve evenly and prevents the cream from becoming grainy.
- Just the Right Amount of Vanilla: A touch of vanilla enhances the flavor without overpowering the delicate creaminess.
- Visual Cues: We provide clear visual cues at each stage of the whipping process, so you know exactly when to stop for soft peaks, medium peaks, or stiff peaks.
Ingredients
- 2 cups (480ml) Heavy Cream: Make sure it’s labeled “heavy cream” or “heavy whipping cream” with a fat content of at least 36%. This is essential for proper whipping.
- 2-4 tablespoons Granulated Sugar: Adjust the amount to your desired sweetness. Start with 2 tablespoons and add more to taste. Powdered sugar can also be used for a slightly smoother texture.
- 1 teaspoon Vanilla Extract: Pure vanilla extract is preferred for the best flavor.
Instructions
- Chill Everything: Place your mixing bowl and whisk (or the beaters of your electric mixer) in the freezer for at least 15-20 minutes. This is a critical step for creating stable whipped cream.
- Pour in the Cream: Pour the cold heavy cream into the chilled bowl.
- Start Whipping: Begin whipping the cream on medium speed.
- Add Sugar Gradually: Once the cream starts to thicken slightly (after about 1-2 minutes), gradually add the sugar, one tablespoon at a time, while continuing to whip.
- Add Vanilla: Add the vanilla extract.
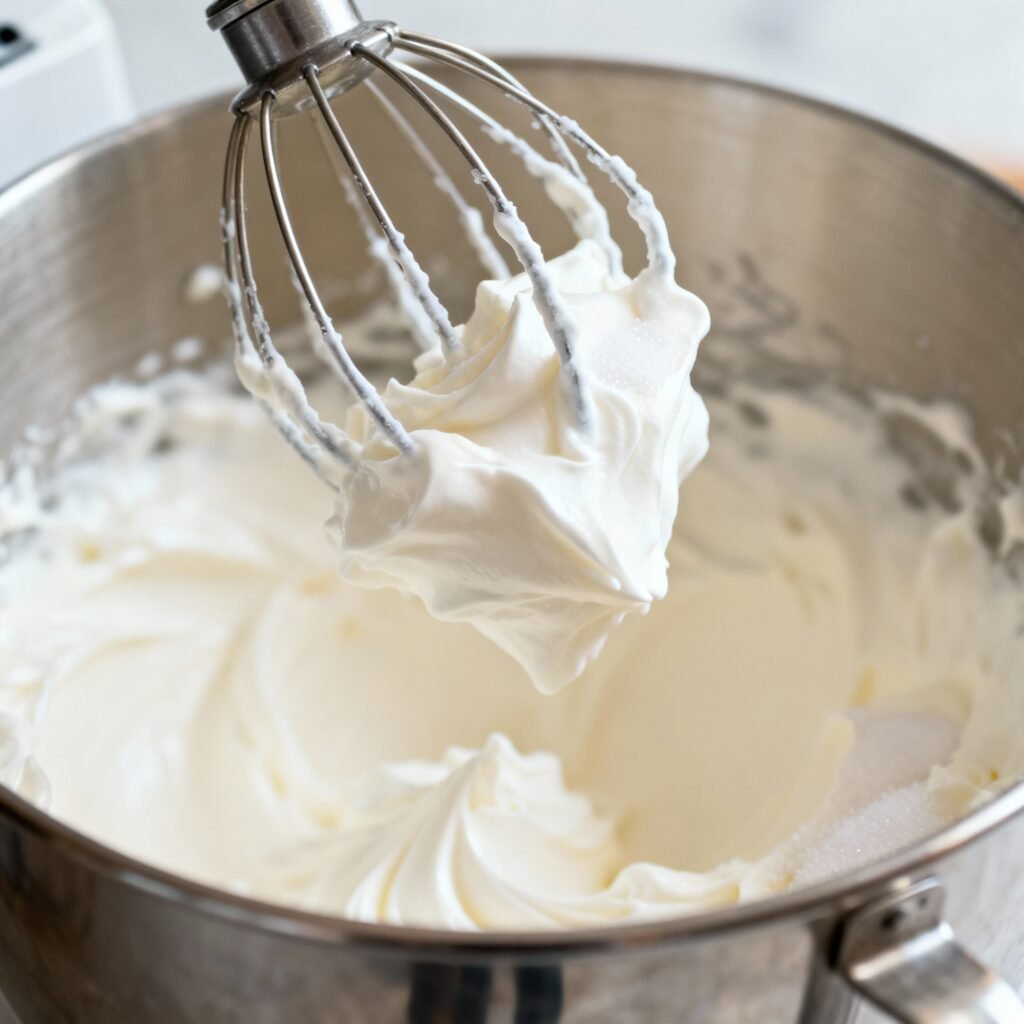
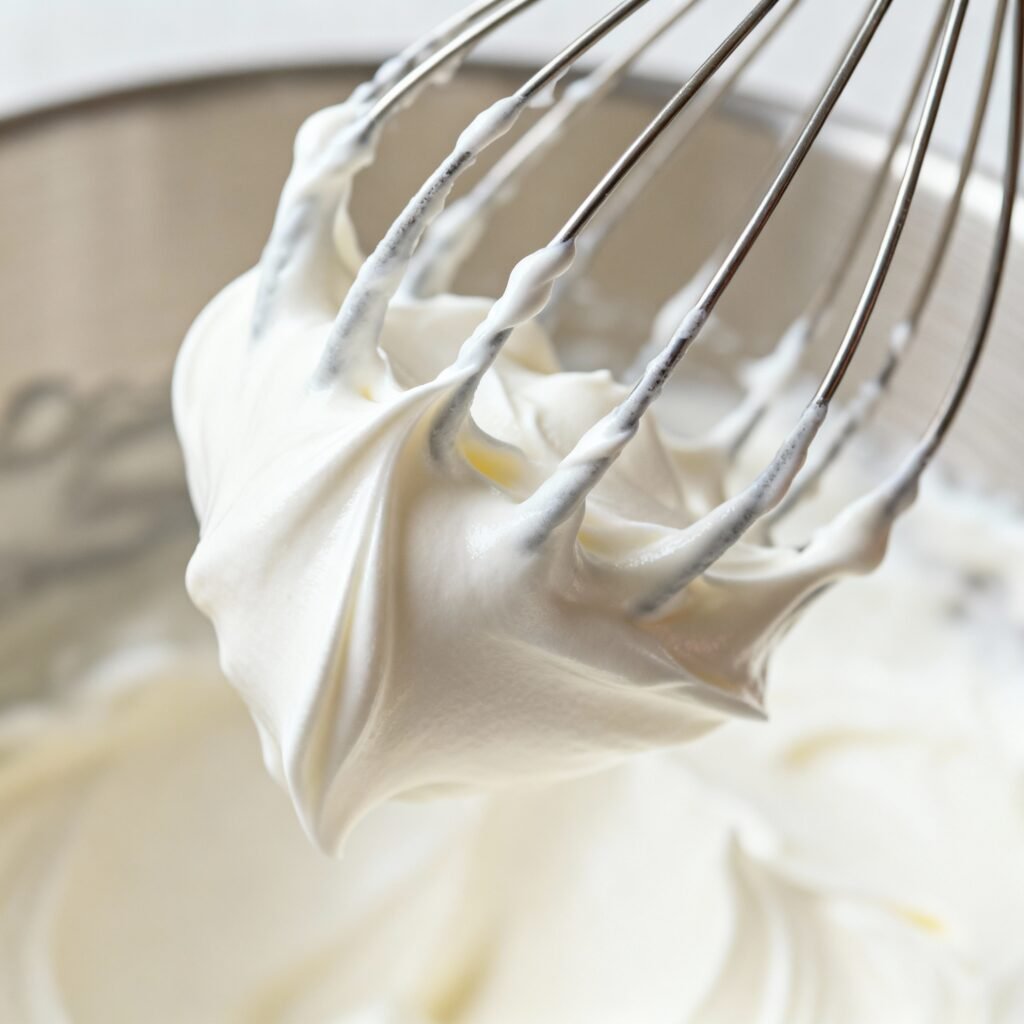
- Whip to Desired Consistency: Continue whipping until the cream reaches your desired consistency. Here’s what to look for:
- Soft Peaks: The cream forms soft, billowy peaks that curl over when the whisk is lifted. This is ideal for folding into mousses or using as a light topping.
- Medium Peaks: The peaks hold their shape better, with just a slight curl at the tip. This is a good all-purpose consistency for topping desserts.
- Stiff Peaks: The peaks stand straight up and hold their shape firmly when the whisk is lifted. Be careful not to overwhip at this stage, as the cream can turn grainy.
- Stop Whipping: Once you’ve reached your desired consistency, stop whipping immediately. Overwhipping can cause the cream to separate and become grainy.
- Serve Immediately: For the best texture and flavor, serve the whipped cream immediately.
Tips for Success
- Use Cold Ingredients: As mentioned before, this is the most important tip! Cold cream whips up faster and holds its shape better.
- Don’t Overwhip: Keep a close eye on the cream as it whips. It can go from perfect to overwhipped in a matter of seconds. If you see the cream starting to look grainy or curdled, you’ve gone too far.
- Use a Stand Mixer or Hand Mixer: While you *can* whip cream by hand, it’s a lot of work! A stand mixer or hand mixer will make the process much faster and easier.
- Adjust Sweetness to Taste: The amount of sugar in this recipe is a guideline. Feel free to adjust it to your liking.
- Add Flavor Variations: Get creative with your whipped cream! Try adding a pinch of cinnamon, a tablespoon of cocoa powder, a splash of coffee liqueur, or a few drops of peppermint extract.
- Stabilize Your Whipped Cream (Optional): If you need your whipped cream to hold its shape for several hours, you can stabilize it by adding a small amount of gelatin or cornstarch. A very small amount is all you need (about 1/4 teaspoon of gelatin bloomed in 1 tablespoon of cold water, or 1 teaspoon of cornstarch mixed with 1 tablespoon of cold water). Add the bloomed gelatin or cornstarch mixture to the cream before whipping.
Storage Instructions
Homemade whipped cream is best served immediately. However, you can store leftover whipped cream in an airtight container in the refrigerator for up to 24 hours. Be aware that it may lose some of its volume and stiffness during storage. You can try gently re-whipping it before serving, but it may not return to its original consistency. Stabilized whipped cream will hold its shape better during storage.
FAQ
- Can I use low-fat cream? No, low-fat cream will not whip properly. You need heavy cream with a fat content of at least 36%.
- Can I use powdered sugar instead of granulated sugar? Yes, powdered sugar can be used. It will result in a slightly smoother texture. Use the same amount as granulated sugar.
- My whipped cream turned out grainy. What did I do wrong? You most likely overwhipped it. Be sure to stop whipping as soon as you reach your desired consistency.
- My whipped cream is too soft. What can I do? If your whipped cream is too soft, you can try chilling it in the refrigerator for 15-20 minutes and then re-whipping it briefly. However, be careful not to overwhip it.
- Can I freeze whipped cream? Freezing whipped cream is not recommended, as it will change the texture and become icy.
- Can I make whipped cream with a handheld immersion blender? While technically possible, it’s not ideal. The texture will not be as light and airy as with a whisk or electric mixer.
Conclusion
Homemade whipped cream is a simple yet impressive addition to any dessert. With just a few ingredients and a little bit of effort, you can create a light, fluffy, and flavorful topping that will elevate your treats to the next level. So, ditch the store-bought stuff and give this recipe a try. You’ll be amazed at how easy and delicious it is!