
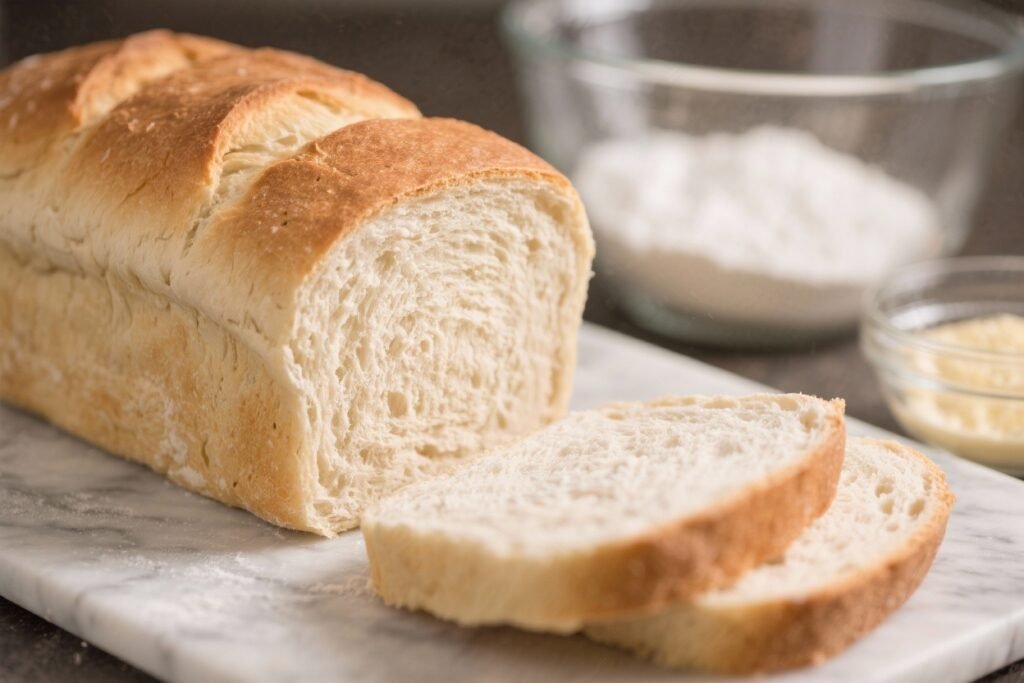
Loaf of Bread Recipe: The Easiest Homemade Bread You’ll Ever Make!
There’s nothing quite like the smell of freshly baked bread wafting through your home. It’s a comforting aroma that evokes feelings of warmth, nostalgia, and pure deliciousness. But the thought of baking bread can often feel intimidating. Visions of complicated techniques, lengthy kneading sessions, and unpredictable results can deter even the most enthusiastic home cooks. But fear not! This recipe is designed to banish those fears and empower you to create a perfect loaf of homemade bread with minimal effort and maximum satisfaction. This isn’t just a recipe; it’s a gateway to a world of homemade goodness, a skill you’ll treasure for years to come. Get ready to experience the joy of slicing into a warm, crusty loaf that you made entirely from scratch!
Why This Recipe Works
This recipe is designed for simplicity and consistent results. We’ve streamlined the process, focusing on key techniques that make a big difference without requiring advanced baking skills. Here’s what makes it so effective:
- Simple Ingredients: We use pantry staples that you likely already have on hand. No fancy flours or hard-to-find ingredients required.
- Easy Kneading (or No-Knead Option!): The kneading process is minimal. You can either knead by hand for a few minutes or opt for a no-knead version that requires just a simple mixing.
- Proper Hydration: The water-to-flour ratio is carefully balanced to create a dough that’s easy to work with and yields a moist, airy crumb.
- Controlled Rise: Allowing the dough to rise in a warm environment ensures proper gluten development, resulting in a light and flavorful bread.
- Oven Temperature: Baking at a high temperature initially creates a beautiful crust, while reducing the temperature ensures the bread is cooked through without burning.
Ingredients
- 3 cups (360g) all-purpose flour, plus more for dusting
- 1 1/2 teaspoons (7g) active dry yeast
- 1 1/2 teaspoons (9g) salt
- 1 1/2 cups (360ml) warm water (around 110°F/43°C)
- 1 tablespoon honey or sugar (optional, for yeast activation)
- 1 tablespoon olive oil (optional, for a softer crust)
Instructions
- Activate the Yeast (Optional): In a large bowl, combine the warm water and honey or sugar. Sprinkle the yeast over the top and let it sit for 5-10 minutes, until foamy. This step ensures your yeast is active. If you’re confident in your yeast, you can skip this and add the yeast directly to the flour.
- Combine Dry Ingredients: In the same bowl (or a new one if you skipped the yeast activation), whisk together the flour and salt.
- Combine Wet and Dry Ingredients: If you activated the yeast, pour the yeast mixture into the flour mixture. If not, add the yeast directly to the flour mixture and then add the warm water. Stir with a wooden spoon or spatula until a shaggy dough forms.
- Knead the Dough (Option 1: Kneading): Turn the dough out onto a lightly floured surface. Knead for 5-7 minutes, until the dough is smooth and elastic. Add more flour, 1 tablespoon at a time, if the dough is too sticky.
- Knead the Dough (Option 2: No-Knead): Cover the bowl with plastic wrap or a damp towel and let it rest for 30 minutes. After 30 minutes, use a wet hand to reach into the bowl and gently stretch and fold the dough over itself 4-5 times. Rotate the bowl and repeat. Cover and let rest for another 30 minutes. Repeat the stretch and fold process two more times, for a total of four stretch and fold sessions.
- First Rise: Place the dough in a lightly oiled bowl, turning to coat. Cover with plastic wrap or a damp towel and let it rise in a warm place for 1-1.5 hours, or until doubled in size.
- Shape the Dough: Gently punch down the dough to release the air. Turn it out onto a lightly floured surface. Shape the dough into a loaf. You can do this by gently stretching it into a rectangle and then rolling it up tightly. Pinch the seam to seal.
- Second Rise: Place the shaped loaf in a greased 9×5 inch loaf pan. Cover with plastic wrap or a damp towel and let it rise for 30-45 minutes, or until nearly doubled in size.
- Preheat the Oven: Preheat oven to 425°F (220°C).
- Bake the Bread: Brush the top of the loaf with olive oil (optional). Score the top of the loaf with a sharp knife or razor blade (optional, but helps control expansion). Bake for 20 minutes at 425°F (220°C), then reduce the oven temperature to 375°F (190°C) and bake for another 20-25 minutes, or until the loaf is golden brown and sounds hollow when tapped on the bottom.
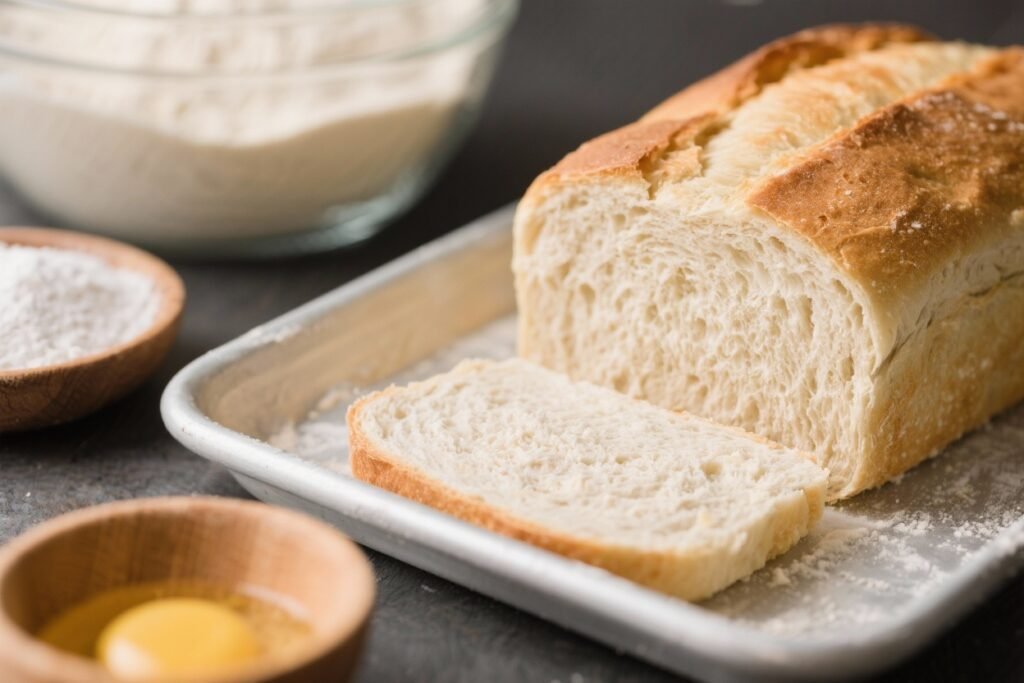
- Cool Completely: Remove the bread from the loaf pan and let it cool completely on a wire rack before slicing. This is crucial for preventing a gummy texture.
Tips for Success
- Use Warm Water: The water temperature is important for activating the yeast. Too hot, and you’ll kill the yeast. Too cold, and it won’t activate properly. Aim for around 110°F (43°C).
- Don’t Over-Knead: Over-kneading can result in a tough loaf. If you’re kneading by hand, stop when the dough is smooth and elastic.
- Proper Rise: Allow the dough to rise in a warm, draft-free place. This will ensure proper gluten development and a light, airy crumb.
- Don’t Skip the Scoring: Scoring the top of the loaf allows the bread to expand properly in the oven and prevents it from cracking unevenly.
- Cool Completely: Resist the urge to slice into the bread while it’s still warm. Cooling completely allows the crumb to set and prevents a gummy texture.
- Experiment with Add-Ins: Once you’ve mastered the basic recipe, try adding herbs, cheese, seeds, or dried fruit to customize your loaf.
Storage Instructions
Store the cooled loaf of bread in an airtight container at room temperature for up to 3 days. For longer storage, wrap the loaf tightly in plastic wrap and freeze for up to 2 months. To thaw, let the bread sit at room temperature for several hours or overnight.
FAQ
- Can I use bread flour instead of all-purpose flour? Yes, bread flour will result in a slightly chewier texture.
- Can I use instant yeast instead of active dry yeast? Yes, you can use instant yeast directly in the flour without activating it first. Use the same amount.
- My dough isn’t rising. What should I do? Make sure your yeast is fresh and that the water is the correct temperature. You may also need to find a warmer place for the dough to rise.
- My bread is dense and heavy. What went wrong? Possible reasons include using old yeast, not letting the dough rise enough, or using too much flour.
- Can I make this recipe in a bread machine? Yes, simply follow your bread machine’s instructions for a basic white bread recipe.
Conclusion
Congratulations! You’ve just made a loaf of homemade bread. From the simple act of mixing flour and water to the satisfying aroma filling your kitchen, baking bread is a truly rewarding experience. This recipe is your starting point, your foundation for a lifetime of delicious homemade bread. Don’t be afraid to experiment, to tweak the recipe to your liking, and to embrace the joy of baking. So go ahead, slice yourself a warm piece, slather it with butter, and savor the taste of homemade goodness. Happy baking!