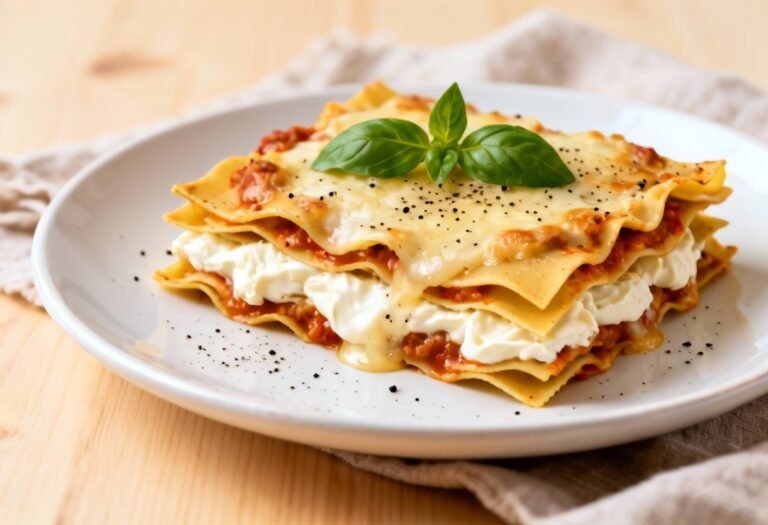
Make-Ahead Lasagna Recipe: The Ultimate Weeknight Dinner Savior
Life is busy. We all know it. Between work, family, errands, and trying to squeeze in a little self-care, finding the time to cook a delicious and satisfying dinner can feel like an impossible feat. Enter: the make-ahead lasagna. This isn’t just any lasagna recipe; it’s your secret weapon for stress-free weeknight meals. Imagine coming home after a long day, knowing that a warm, cheesy, and utterly comforting lasagna is waiting for you in the fridge, ready to be baked to golden-brown perfection. No last-minute grocery runs, no frantic chopping, just pure, unadulterated deliciousness. This recipe is designed for convenience without sacrificing flavor. We’re talking layers of rich meat sauce, creamy ricotta cheese, perfectly cooked noodles, and a generous blanket of melted mozzarella. Get ready to reclaim your evenings and enjoy a truly satisfying meal with this easy-to-prepare, make-ahead lasagna recipe.
Why This Recipe Works
This make-ahead lasagna recipe isn’t just about convenience; it’s about delivering exceptional flavor and texture every time. Here’s why it works so well:
- Flavor Development: Allowing the lasagna to sit in the refrigerator for at least 24 hours allows the flavors to meld and deepen. The sauce becomes richer, the ricotta infuses the noodles, and the overall taste is simply amplified.
- No Soggy Noodles: We use oven-ready lasagna noodles, which eliminate the need for pre-boiling. This not only saves time but also prevents the noodles from becoming mushy during baking. The sauce provides enough moisture to perfectly cook the noodles as the lasagna bakes.
- Balanced Layers: The recipe provides a precise ratio of sauce, cheese, and noodles, ensuring that each layer is perfectly balanced and complements the others. No one wants a lasagna that’s all sauce or all cheese!
- Freezer-Friendly: This lasagna freezes beautifully, making it perfect for meal prepping or stocking up for busy weeks. You can even freeze individual portions for quick and easy lunches.
- Customizable: While this recipe provides a solid foundation, it’s also easily customizable to suit your preferences. Add vegetables, different cheeses, or experiment with different types of meat.
Ingredients
- 1 pound ground beef (or Italian sausage, or a combination)
- 1 large onion, chopped
- 2 cloves garlic, minced
- 1 (28 ounce) can crushed tomatoes
- 1 (15 ounce) can tomato sauce
- 1 (6 ounce) can tomato paste
- 1 teaspoon dried oregano
- 1 teaspoon dried basil
- 1/2 teaspoon salt
- 1/4 teaspoon black pepper
- 1 (15 ounce) container ricotta cheese
- 1/2 cup grated Parmesan cheese
- 1 large egg, lightly beaten
- 1/4 cup chopped fresh parsley (optional)
- 1 (9 ounce) package oven-ready lasagna noodles
- 3 cups shredded mozzarella cheese

Instructions
- Prepare the Meat Sauce: In a large skillet or Dutch oven, brown the ground beef (or sausage) over medium-high heat. Drain off any excess grease.
- Add Aromatics: Add the chopped onion and minced garlic to the skillet and cook until softened, about 5 minutes.
- Simmer the Sauce: Stir in the crushed tomatoes, tomato sauce, tomato paste, oregano, basil, salt, and pepper. Bring to a simmer, then reduce heat and simmer for 15-20 minutes, stirring occasionally. This allows the flavors to meld together beautifully.
- Prepare the Ricotta Mixture: In a medium bowl, combine the ricotta cheese, Parmesan cheese, egg, and parsley (if using). Mix well until everything is evenly combined.
- Assemble the Lasagna: Spread a thin layer of meat sauce in the bottom of a 9×13 inch baking dish.
- Layer 1: Place a layer of oven-ready lasagna noodles over the sauce, overlapping as needed to cover the bottom of the dish.
- Layer 2: Spread half of the ricotta mixture evenly over the noodles.
- Layer 3: Sprinkle 1 cup of mozzarella cheese over the ricotta mixture.
- Layer 4: Spoon half of the remaining meat sauce over the mozzarella cheese.
- Repeat: Repeat layers 1-4.
- Final Layer: Top with the remaining lasagna noodles, the remaining meat sauce, and the remaining mozzarella cheese.
- Cover and Refrigerate: Cover the lasagna tightly with plastic wrap and then with aluminum foil. Refrigerate for at least 24 hours, or up to 3 days.
- Bake: When ready to bake, preheat oven to 375°F (190°C). Remove the plastic wrap and aluminum foil.
- Bake Covered: Bake the lasagna covered with aluminum foil for 30 minutes.
- Bake Uncovered: Remove the aluminum foil and bake for another 15-20 minutes, or until the cheese is melted and bubbly and the lasagna is heated through.
- Rest: Let the lasagna rest for 10-15 minutes before slicing and serving. This allows it to set up and makes it easier to cut.
Tips for Success
- Don’t Skimp on the Sauce: The sauce is the heart of the lasagna, so make sure to use a generous amount to keep the noodles moist and flavorful.
- Use High-Quality Ingredients: The better the ingredients, the better the lasagna. Opt for good-quality ground beef, crushed tomatoes, and mozzarella cheese.
- Don’t Overcook the Noodles: Since you’re using oven-ready noodles, they don’t need to be pre-boiled. Overcooking them will result in a mushy lasagna.
- Let it Rest: Resist the urge to cut into the lasagna immediately after baking. Letting it rest allows the layers to set and prevents it from falling apart.
- Customize to Your Liking: Feel free to add vegetables like mushrooms, spinach, or zucchini to the meat sauce. You can also experiment with different cheeses like provolone or fontina.
- Prevent Sticking: Lightly grease the baking dish before assembling the lasagna to prevent sticking.
- Check for Doneness: To ensure the lasagna is heated through, insert a knife into the center. It should feel hot to the touch.
Storage Instructions
- Refrigerating Baked Lasagna: Leftover baked lasagna can be stored in the refrigerator for up to 3-4 days. Cover tightly with plastic wrap or store in an airtight container.
- Reheating Baked Lasagna: Reheat individual slices in the microwave or in a preheated oven at 350°F (175°C) until heated through.
- Freezing Unbaked Lasagna: To freeze the unbaked lasagna, wrap it tightly in plastic wrap and then in aluminum foil. Freeze for up to 2-3 months. Thaw completely in the refrigerator before baking as directed. You may need to add 10-15 minutes to the baking time to ensure it’s heated through.
- Freezing Baked Lasagna: Baked lasagna can also be frozen. Let it cool completely, then cut it into individual portions. Wrap each portion tightly in plastic wrap and then in aluminum foil. Freeze for up to 2-3 months. Thaw in the refrigerator or microwave before reheating.

FAQ
- Can I use a different type of meat? Absolutely! Ground turkey, Italian sausage, or a combination of meats work well in this recipe.
- Can I make this vegetarian? Yes! Omit the meat and add vegetables like mushrooms, spinach, zucchini, or bell peppers to the sauce.
- Can I use regular lasagna noodles? If you prefer to use regular lasagna noodles, you’ll need to boil them according to the package directions before assembling the lasagna. Be sure to slightly undercook them, as they will continue to cook in the oven.
- Can I add more cheese? Of course! Feel free to add extra mozzarella, Parmesan, or any other cheese you enjoy.
- My lasagna is browning too quickly. What should I do? If the top of the lasagna is browning too quickly, cover it loosely with aluminum foil during the last 10-15 minutes of baking.
Conclusion
This make-ahead lasagna recipe is more than just a meal; it’s a gift to yourself. It’s the promise of a delicious and satisfying dinner without the stress and hassle of last-minute cooking. With its rich flavors, comforting textures, and easy preparation, this lasagna is sure to become a family favorite. So go ahead, make it ahead, and enjoy the extra time and peace of mind that this recipe provides. You deserve it!