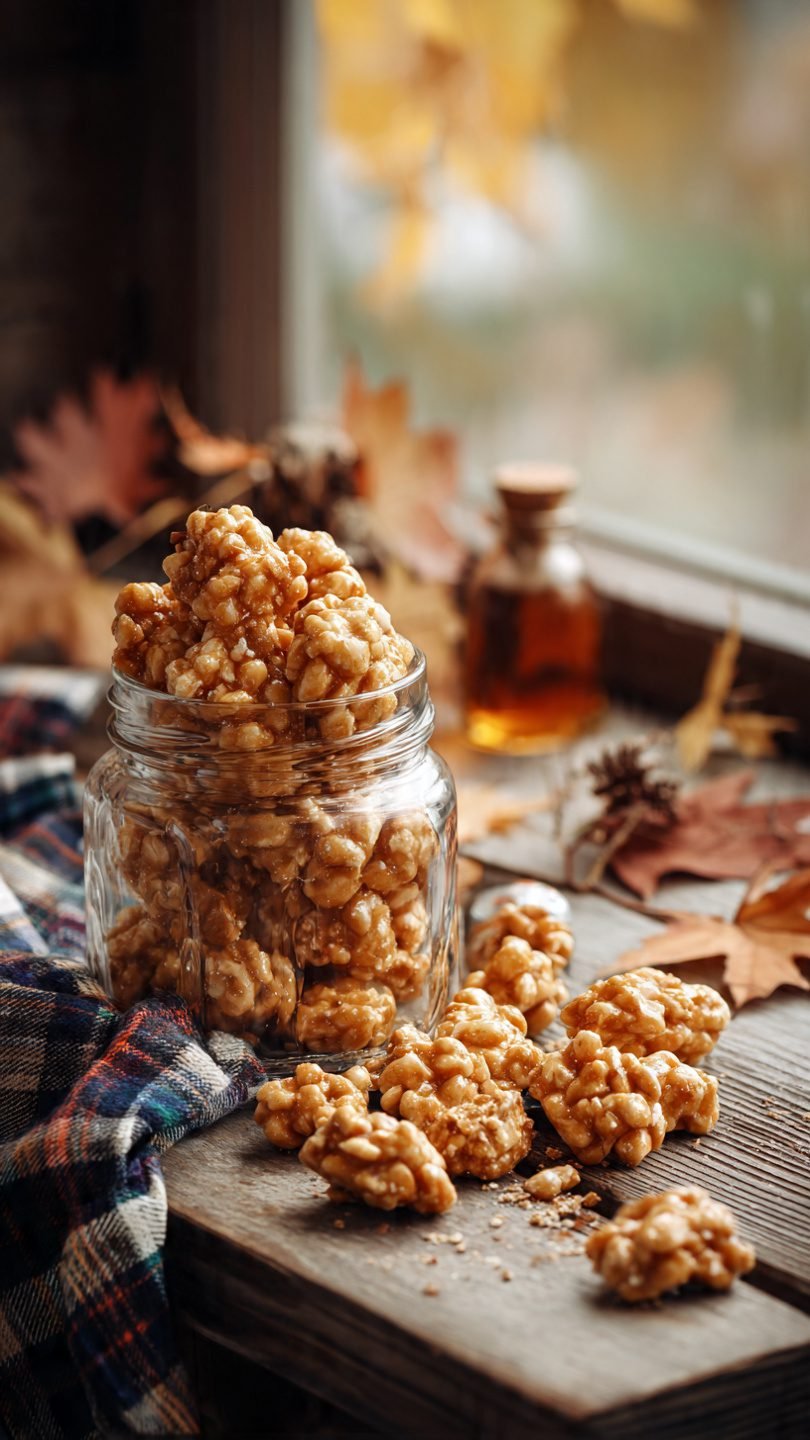
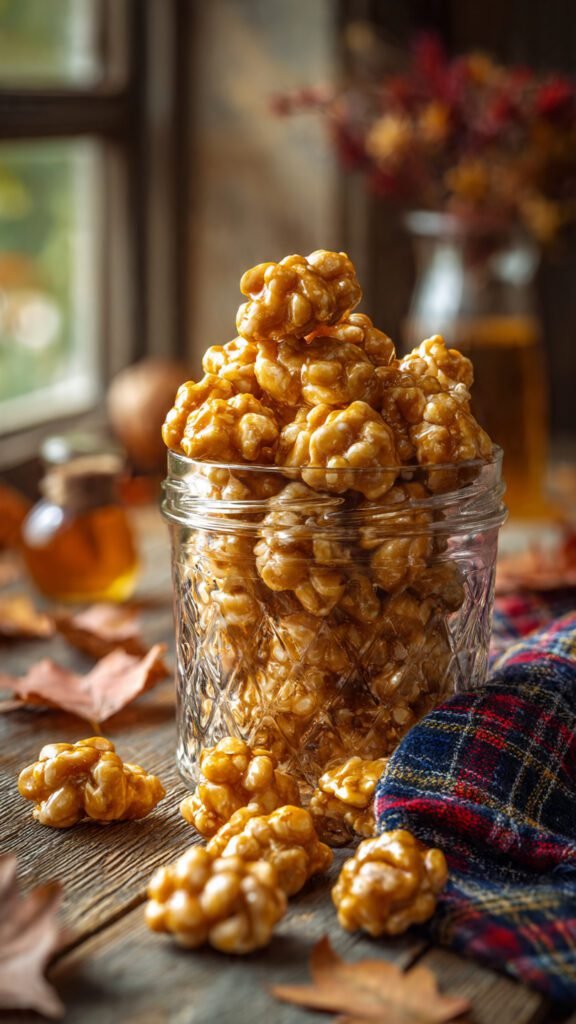
🍁 Homemade Maple Nut Goodies Candy Recipe (Retro & crunchy!)
Raise your hand if you remember those weird, lumpy, vaguely orange-brown things in the bulk candy bins at the grocery store. You know the ones. They look totally unassuming, maybe even a little boring next to the shiny gummy bears. But then, you try one.
Suddenly, it’s twenty minutes later, you’re covered in sugar crumbs, and you’ve inexplicably inhaled a quarter pound of peanuts.
Yep, we’re talking about Maple Nut Goodies. That retro, crunchy, sweet-and-salty classic that somehow tastes like autumn and nostalgia rolled into one addictive little nugget. If you’re craving that specific treat but don’t feel like driving to a horrifyingly bright supermarket to scoop them out of a plastic bin that 400 other people have breathed on, I got you.
We’re making them at home today. And honestly? They are way better fresh. Let’s make some candy magic happen.

Why This Recipe is Awesome
Okay, besides the obvious fact that candy is delicious, why should you bother making this specific Maple Nut Goodies candy recipe?
First off, the nostalgia factor is off the charts. This is one of those vintage recipes that instantly transports people back to their childhoods or their grandparents’ candy dishes. It’s a conversation starter.
Secondly, let’s talk about the texture. This isn’t brittle, and it isn’t fudge. It sits in this glorious, undiscovered country in between. You get the initial savory crunch of the roasted peanut, immediately followed by the sweet, slightly yielding, yet crisp maple coating. It’s a textural rollercoaster that your brain just really, really enjoys.
Furthermore, this recipe is shockingly simple regarding ingredients. You probably have almost everything in your pantry right now, frantically searching for a purpose. There are no weird stabilizers or un pronounceable chemicals here—just pure sugar, nuts, and butter.
Finally, let’s be real: it makes your house smell incredible. Forget those expensive scented candles. Simmering maple and sugar on the stove beats “Autumn Breeze” any day of the week. It’s warm, inviting, and promises a delicious reward at the end. It’s practically aromatherapy.
Ingredients You’ll Need
Don’t panic; the list is short. But like any good candy recipe, quality matters a little bit here.
- Cocktail Peanuts (16 oz jar): Okay, listen to me closely. Do not use raw, unsalted peanuts. We need the roasted flavor and, crucially, the SALT to balance the avalanche of sugar we are about to inflict on them. Spanish peanuts (the ones with the red skins still on) are traditional and look cooler, but regular salted cocktail peanuts work just fine.
- Granulated Sugar (2 cups): The backbone of our operation.
- Brown Sugar (1 cup, packed): This adds that deep, caramel-like molasses flavor that makes these goodies taste “old-fashioned.” Light or dark works; dark will just give you a slightly deeper color.
- Water (1 cup): Just from the tap is fine.
- Butter (2 Tablespoons): Salted butter is best here. It adds richness and helps keep the coating from being too rock hard.
- Maple Extract (1 ½ to 2 teaspoons): This is the secret weapon. FYI: You cannot swap this for real maple syrup. Real syrup has too much water content and a much milder flavor that will disappear during the boil. We need the concentrated punch of extract to get that signature taste.
- Salt (½ teaspoon): Yes, more salt. Trust the process. It makes the sweet pop.
- Optional Insurance Policy: A tiny pinch of Cream of Tartar. It helps prevent the sugar from crystallizing too soon (turning grainy before we want it to). If you’re nervous about candy making, toss a pinch in.
Step-by-Step Instructions
Candy making is science, but like, fun science where you get to eat the experiment. The key here is having everything ready before you turn on the stove (mise en place, if you want to feel fancy). Once this mixture gets hot, things move fast.
The Setup
- Prep your landing zone: Take a large baking sheet (or two) and line it with parchment paper or a silicone baking mat. Do not skip this, unless you enjoy chiseling hardened sugar off your pans for the next three days. Spray a large metal spoon or spatula with non-stick spray and set it aside.
- Get the hardware: You need a heavy-bottomed saucepan (at least 4-quart capacity, this stuff bubbles up aggressively) and a candy thermometer. Yes, you really need the thermometer. Don’t try to be a hero and eyeball it.
The Boil
- Combine the sugars: In your saucepan, dump in the granulated sugar, brown sugar, water, butter, and the extra ½ teaspoon of salt. Give it a quick stir just to combine things so the sugar isn’t sitting dry on the bottom.
- Heat it up: Clip your candy thermometer to the side of the pot, making sure the tip isn’t actually touching the metal bottom (that gives a false high reading). Turn the heat to medium-high.
- Hands off: Bring the mixture to a boil. Once it’s boiling, stop stirring. Seriously, put the spoon down. Stirring at this stage encourages premature crystallization, which leads to grainy candy instead of a smooth coating. Just let it bubble away happily. Wash down the sides of the pot occasionally with a pastry brush dipped in water if you see sugar crystals creeping up the sides.
The Science of the Crunch (Important!)
- Watch the temp: We are waiting for the mixture to reach 240°F to 245°F. In candy-speak, this is the “soft-ball stage.”
- Sensory details while you wait: You’ll notice the bubbles changing. They start out fast and thin, almost watery. As the water evaporates and the sugar concentrates, the bubbles become slower, thicker, and more glossy. The smell will shift from just “sweet steam” to a richer, caramelizing aroma.
- Flavor time: Once that thermometer hits 240°F, remove the pot from the heat immediately. Quickly and carefully stir in the maple extract. It might hiss and sputter a bit—that’s normal drama.
The Transformation
- Nut delivery: Immediately dump that entire jar of peanuts into the hot sugar magma.
- The workout: Grab your greased spoon and start stirring. And I mean stirring. You need to constantly turn the mixture over so every single peanut gets coated.
- The magic moment: At first, it’ll look glossy and wet. Keep stirring. As the sugar cools against the room-temperature nuts, it will start to look cloudy, then almost dry and sandy. This is exactly what we want! This “sugaring” process creates that unique, bumpy texture that defines a Maple Nut Goody. It takes about 2–4 minutes of vigorous stirring to reach this stage. Your arm might get tired. Power through it.
The Cooling
- Spread ’em out: Once the peanuts are coated in that matte, sandy-looking maple shell, immediately dump the whole mess onto your prepared baking sheets.
- Break it up: Use your spoon (or two forks work well here) to quickly spread the nuts out and break up any massive clumps. You want mostly individual nuts or small clusters of two or three.
- The hardest part: Let them cool completely at room temperature. Do not put them in the fridge; humidity is the enemy of crunchy candy. They need to set up hard and crisp. This usually takes about 30 to 45 minutes, depending on how cool your kitchen is.
Common Mistakes to Avoid
Listen, I’ve messed this up before. Learn from my failures so you don’t have to cry over wasted sugar.
- Thinking you don’t need a thermometer: Look, maybe your grandma could tell candy stages by dropping bits into cold water, but let’s just use technology. Missing the 240°F mark by even five degrees changes the entire texture from “chewy-crisp” to “break-your-tooth hard” or “sticky mess.”
- Using unsalted nuts: I mentioned this, but it bears repeating. If you use unsalted peanuts, the final candy will just taste overwhelmingly sickly sweet. The salt is necessary for balance. It’s the yin to the sugar’s yang.
- Making candy on a rainy day: This sounds like an old wives’ tale, but it’s true. Sugar is hygroscopic, meaning it pulls moisture from the air. High humidity can prevent your candy from setting properly, leaving it permanently tacky instead of crunchy. Save this project for a dry day.
- Walking away from the stove: Sugar syrup goes from “perfectly golden” to “acrid burnt nightmare” in roughly 15 seconds. Do not go check your Instagram while the pot is boiling on high heat. Stay present with your sugar baby.
Alternatives & Substitutions
Feeling adventurous? Here are a few ways to tweak the recipe, though IMO, the original is hard to beat.
- Switch up the nuts: Not a peanut fan? Weird, but okay. Pecans are a fantastic substitute here; they pair beautifully with maple flavor. Walnuts work too, though their skins can sometimes be a little bitter. I’d avoid smooth nuts like cashews; the coating doesn’t stick as well to their surface.
- Flavor swaps: If you hate maple (who are you?), you can sub in vanilla extract for the maple extract. You’ll basically end up with sugared vanilla peanuts. They are delicious, but they aren’t Maple Nut Goodies.
- Spicing it up: Want a kick? Add a ¼ teaspoon of cayenne pepper or chipotle powder when you add the maple extract at the end. The sweet-heat combo is surprisingly excellent.
- Dairy-Free/Vegan: You can successfully use a high-quality plant-based butter stick substitute in place of the dairy butter. The texture might be slightly different, but it totally works.
FAQ (Frequently Asked Questions)
Can I double this recipe? Technically yes, but I wouldn’t recommend it unless you have a massive pot and very strong arms. Doubling candy recipes often throws off the cooking times and makes it much harder to stir the nuts in before the sugar sets. It’s usually safer to make two separate batches.
Why did my sugar turn grainy before I added the nuts? Ugh, the dreaded premature crystallization. This usually happens because you stirred it while it was boiling, or a rogue sugar crystal on the side of the pot fell back into the syrup. Next time, try the pinch of cream of tartar trick I mentioned in the ingredients list.
How do I store these? If they last that long? Store them in an airtight container (a glass jar or Ziploc bag) at room temperature. Do not refrigerate them! They should stay fresh and crunchy for up to two weeks, making them great for holiday gifting.
My coating is sticky, not crunchy. What happened? It’s either humid in your house, or you didn’t cook the sugar syrup quite long enough to hit that 240°F mark. Sad trombone. They will still taste good, but they’ll be messier to eat.
Can I use “maple flavored syrup” instead of extract? No. Please don’t do this to yourself. Pancake syrup is mostly corn syrup and water. It will ruin the chemical balance of the candy recipe. Stick to the tiny bottle of potent extract.

Final Thoughts
There you have it. You have successfully conquered the art of the homemade Maple Nut Goody. You’ve braved molten sugar, gotten an arm workout, and created something truly delicious.
Honestly, the hardest part of this entire Maple Nut Goodies candy recipe is waiting for them to cool down on the baking sheet without sneaking “just one” and burning your tongue. (Don’t ask me how I know).
Package these up in cute little cellophane bags tied with twine for the holidays, bring them to an office party and become the local hero, or just hoard them all in a jar on your counter and eat a handful every time you walk into the kitchen. No judgment here.
Now go impress someone—or yourself—with your new culinary skills. You’ve earned it!