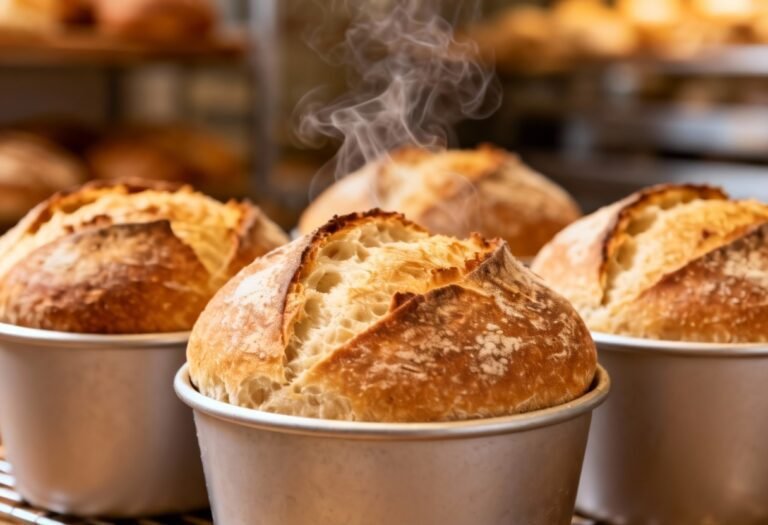
New York Rolls Recipe: The Viral Croissant Sensation You Can Make at Home!
Have you been seeing those mesmerizing, perfectly layered, cream-filled New York Rolls (also known as Supremes or Croissant Wheels) all over your social media feeds? These aren’t your average croissants. They’re a decadent, show-stopping pastry that’s taken the baking world by storm. And guess what? You don’t need to travel to a fancy bakery to enjoy them. This recipe brings the magic of New York Rolls right to your kitchen, allowing you to create these stunning treats with your own two hands. Get ready to impress your friends and family with these flaky, creamy, and utterly irresistible pastries!
Why This Recipe Works
This recipe is designed to be approachable for home bakers, even those who are new to laminated dough. Here’s why it works:
- Detailed Instructions: Each step is clearly explained with helpful tips to guide you through the process. We break down the intimidating aspects of making laminated dough into manageable steps.
- Simplified Lamination: While traditionally croissants require multiple folds and turns, this recipe uses a slightly simplified method that still delivers incredible layers without requiring professional pastry chef skills.
- Adaptable Filling: We provide a base recipe for a classic pastry cream filling, but we also encourage you to get creative and customize your rolls with your favorite flavors – chocolate, fruit, nuts, the possibilities are endless!
- Visual Cues: We highlight key visual cues to look for at each stage, ensuring you know exactly what your dough should look and feel like.
- Troubleshooting Tips: We anticipate common challenges and provide solutions to help you overcome them.
Ingredients
For the Dough:
- 2 1/4 cups (280g) all-purpose flour, plus more for dusting
- 1/4 cup (50g) granulated sugar
- 1 teaspoon salt
- 2 1/4 teaspoons (7g) active dry yeast
- 3/4 cup (180ml) lukewarm milk
- 1 large egg, lightly beaten
- 1/4 cup (60g) unsalted butter, softened
- 1 cup (226g) cold unsalted butter, for lamination
For the Pastry Cream Filling:
- 2 cups (480ml) whole milk
- 1/2 cup (100g) granulated sugar
- 1/4 cup (30g) cornstarch
- 1/4 teaspoon salt
- 4 large egg yolks
- 2 tablespoons (30g) unsalted butter
- 1 teaspoon vanilla extract
For the Glaze (Optional):
- 1/2 cup powdered sugar
- 1-2 tablespoons milk or water

Instructions
Part 1: Making the Dough
- Combine Dry Ingredients: In the bowl of a stand mixer fitted with the dough hook attachment, combine the flour, sugar, salt, and yeast.
- Add Wet Ingredients: Add the lukewarm milk and lightly beaten egg to the dry ingredients. Mix on low speed until a shaggy dough forms.
- Add Softened Butter: Add the softened butter and continue to mix on medium speed for 5-7 minutes, until the dough is smooth and elastic. The dough should be slightly tacky but not sticky.
- First Rise: Form the dough into a ball and place it in a lightly oiled bowl, turning to coat. Cover with plastic wrap and let rise in a warm place for 1-1.5 hours, or until doubled in size.
- Chill the Dough: Gently punch down the dough to release the air. Wrap it tightly in plastic wrap and chill in the refrigerator for at least 2 hours, or preferably overnight. This chilling step is crucial for developing flavor and making the dough easier to work with.
Part 2: Lamination
- Prepare the Butter Block: Place the cold butter between two sheets of parchment paper. Use a rolling pin to pound and shape the butter into a 6×8 inch rectangle, about 1/4 inch thick. It’s important that the butter is cold but pliable, not rock hard.
- Encase the Butter: On a lightly floured surface, roll the chilled dough into a 12×16 inch rectangle. Place the butter rectangle in the center of the dough. Fold one side of the dough over the butter, then fold the other side over, encasing the butter completely. Pinch the edges to seal.
- First Fold (Single Fold): Gently roll the dough into a 12×18 inch rectangle. Fold the dough into thirds, like a letter. This is your first single fold. Wrap the dough in plastic wrap and chill in the refrigerator for 30 minutes.
- Second Fold (Single Fold): Rotate the dough 90 degrees. On a lightly floured surface, roll the dough into a 12×18 inch rectangle again. Fold the dough into thirds, like a letter. This is your second single fold. Wrap the dough in plastic wrap and chill in the refrigerator for 30 minutes.
- Third Fold (Single Fold): Repeat step 4 for the third single fold. Wrap the dough in plastic wrap and chill in the refrigerator for at least 1 hour.
Part 3: Shaping and Baking
- Roll and Cut: On a lightly floured surface, roll the chilled dough into a 12×18 inch rectangle, about 1/4 inch thick. Use a sharp knife or pizza cutter to trim the edges to create a clean rectangle.
- Shape the Rolls: Cut the dough into 1-inch wide strips. Starting with one strip, roll it tightly into a spiral, tucking the end underneath to secure it. Place the roll in a greased muffin tin or on a baking sheet lined with parchment paper. Repeat with the remaining strips.
- Second Proof: Cover the rolls loosely with plastic wrap and let them proof in a warm place for 45-60 minutes, or until they have almost doubled in size.
- Bake: Preheat oven to 375°F (190°C). Brush the rolls with an egg wash (1 egg beaten with 1 tablespoon of water). Bake for 20-25 minutes, or until golden brown and cooked through.
- Cool: Let the rolls cool in the muffin tin or on the baking sheet for a few minutes before transferring them to a wire rack to cool completely.
Part 4: Pastry Cream Filling
- Heat the Milk: In a saucepan, heat the milk over medium heat until it just begins to simmer.
- Whisk Dry Ingredients: In a separate bowl, whisk together the sugar, cornstarch, and salt.
- Whisk in Egg Yolks: Add the egg yolks to the dry ingredients and whisk until smooth and pale yellow.
- Temper the Egg Yolks: Slowly pour a small amount of the hot milk into the egg yolk mixture, whisking constantly to prevent the eggs from scrambling.
- Combine and Cook: Pour the egg yolk mixture into the saucepan with the remaining milk. Cook over medium heat, whisking constantly, until the mixture thickens and comes to a boil. Continue to cook for 1 minute, whisking vigorously, to ensure the cornstarch is fully cooked.
- Finish the Cream: Remove from heat and stir in the butter and vanilla extract.
- Chill: Pour the pastry cream into a bowl, cover with plastic wrap (pressing the plastic wrap directly onto the surface of the cream to prevent a skin from forming), and chill in the refrigerator for at least 2 hours, or until cold.
Part 5: Assembling and Glazing
- Prepare the Rolls: Once the rolls are completely cool, use a serrated knife to carefully cut a hole in the center of each roll, creating space for the filling.
- Fill the Rolls: Transfer the chilled pastry cream to a piping bag fitted with a round tip. Pipe the pastry cream into the center of each roll until it is generously filled.
- Make the Glaze (Optional): In a small bowl, whisk together the powdered sugar and milk (or water) until smooth. The glaze should be thick but pourable.
- Glaze the Rolls (Optional): Drizzle the glaze over the filled rolls. You can also add sprinkles, chopped nuts, or other toppings.
- Serve: Enjoy immediately!
Tips for Success
- Keep Everything Cold: The most important tip for making laminated dough is to keep the dough and butter cold at all times. This prevents the butter from melting and ensures distinct layers.
- Don’t Overwork the Dough: Overworking the dough will develop too much gluten, resulting in a tough pastry.
- Be Patient: Lamination takes time and patience. Don’t rush the process.
- Use High-Quality Butter: The flavor of the butter will greatly impact the flavor of the final product. Use a high-quality butter with a high fat content.
- Sharp Knife is Key: A sharp knife or pizza cutter is essential for cutting the dough cleanly and creating even layers.
- Don’t Overfill: While generous filling is desirable, overfilling the rolls can make them messy and difficult to handle.
Storage Instructions
New York Rolls are best enjoyed fresh. However, you can store them in an airtight container in the refrigerator for up to 2 days. The rolls may lose some of their crispness over time. You can also freeze the unbaked rolls after shaping them. Thaw them overnight in the refrigerator before proofing and baking as directed.

FAQ
Q: Can I use different fillings?
A: Absolutely! Get creative with your fillings. Chocolate ganache, fruit curds, whipped cream, or even savory fillings like cream cheese and herbs would be delicious.
Q: Can I use puff pastry instead of making my own dough?
A: While you can use store-bought puff pastry for a quicker version, the results won’t be quite the same. Puff pastry tends to be less rich and flavorful than homemade croissant dough.
Q: My butter is melting while I’m laminating the dough. What should I do?
A: If your butter is melting, immediately wrap the dough in plastic wrap and chill it in the freezer for 10-15 minutes to firm up the butter.
Q: My rolls aren’t rising properly. What could be the problem?
A: Make sure your yeast is active and that your proofing environment is warm enough. Also, avoid overcrowding the baking sheet, as this can inhibit rising.
Conclusion
Making New York Rolls at home might seem daunting at first, but with this recipe and a little patience, you can create these impressive pastries that are sure to wow everyone. From the flaky, buttery layers to the creamy, flavorful filling, every bite is a delightful experience. So, gather your ingredients, roll up your sleeves, and get ready to bake some magic. Happy baking!