Red Velvet Waffles Recipe: A Decadent Breakfast Indulgence
Red velvet cake, with its vibrant color and subtle chocolate tang, is a beloved classic. But what if you could enjoy that same delicious flavor in a warm, crispy waffle? This red velvet waffles recipe takes the essence of red velvet and transforms it into a delightful breakfast or brunch experience. Imagine waking up to the aroma of these beautiful, crimson-hued waffles, topped with your favorite sweet treats. This recipe is surprisingly easy to make and guaranteed to impress!
Why This Recipe Works
This recipe isn’t just about adding red food coloring to a standard waffle batter. It’s carefully crafted to replicate the signature red velvet flavor and texture. Here’s why it works:
- Buttermilk: The buttermilk adds tanginess, mimicking the slightly acidic flavor of red velvet cake. It also tenderizes the waffles, creating a light and fluffy interior.
- Cocoa Powder: A small amount of cocoa powder provides the subtle chocolate undertone that is essential to red velvet.
- Vinegar and Baking Soda: This dynamic duo creates a chemical reaction that helps to create a light and airy texture. The vinegar also enhances the red color.
- Food Coloring: While we don’t want to rely solely on food coloring for flavor, it’s crucial for achieving that iconic red velvet hue. We recommend using gel food coloring for a more vibrant and concentrated color.
- Vanilla Extract: Vanilla extract enhances all the flavors, adding a touch of sweetness and complexity.
- Perfect Balance: The recipe balances wet and dry ingredients to create a batter that is pourable but not too thin, ensuring crispy edges and a soft interior.
Ingredients
- 2 cups all-purpose flour
- 2 tablespoons granulated sugar
- 2 teaspoons baking powder
- 1/2 teaspoon baking soda
- 1/4 teaspoon salt
- 2 tablespoons unsweetened cocoa powder
- 1 3/4 cups buttermilk
- 1/4 cup vegetable oil
- 1 large egg
- 1 teaspoon vanilla extract
- 1 tablespoon white vinegar
- 1-2 teaspoons red gel food coloring (or more, to desired color)
- Optional toppings: whipped cream, cream cheese frosting, fresh berries, chocolate chips, maple syrup
Instructions
- Preheat your waffle iron: Preheat your waffle iron according to the manufacturer’s instructions. Most waffle irons have an indicator light to signal when they are ready.
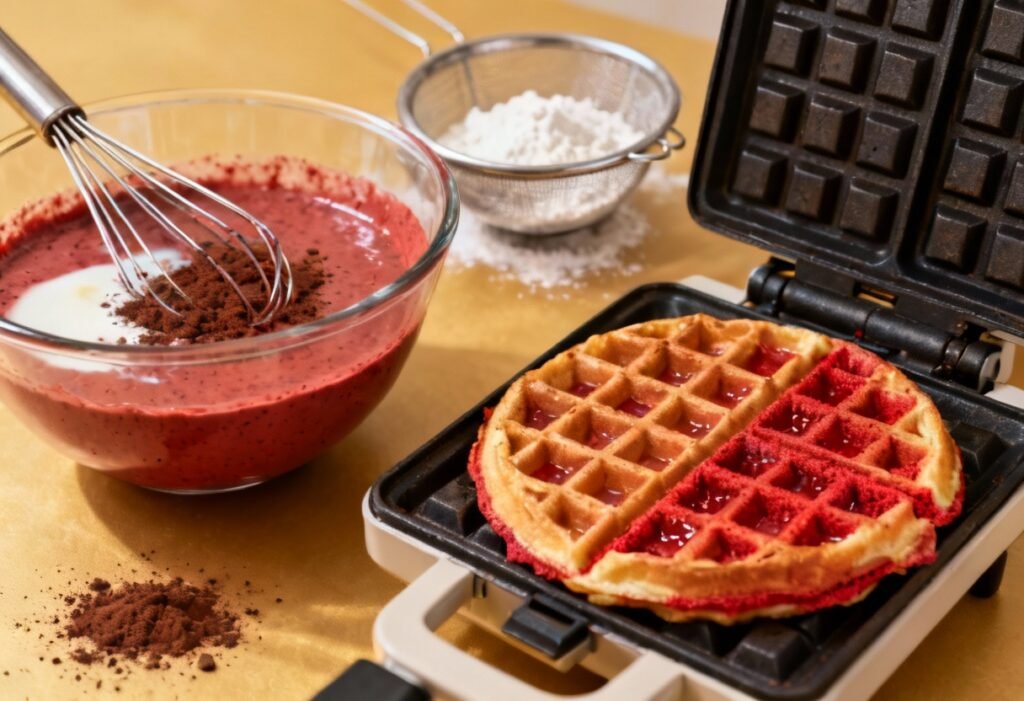
- Combine dry ingredients: In a large bowl, whisk together the flour, sugar, baking powder, baking soda, salt, and cocoa powder.
- Combine wet ingredients: In a separate bowl, whisk together the buttermilk, vegetable oil, egg, and vanilla extract.
- Add vinegar and food coloring: Add the white vinegar and red food coloring to the wet ingredients. Stir until the food coloring is evenly distributed and you achieve your desired shade of red. Start with 1 teaspoon and add more gradually until you reach the perfect color.
- Combine wet and dry ingredients: Gradually add the wet ingredients to the dry ingredients, whisking until just combined. Be careful not to overmix; a few lumps are okay. Overmixing can develop the gluten in the flour, resulting in tough waffles.
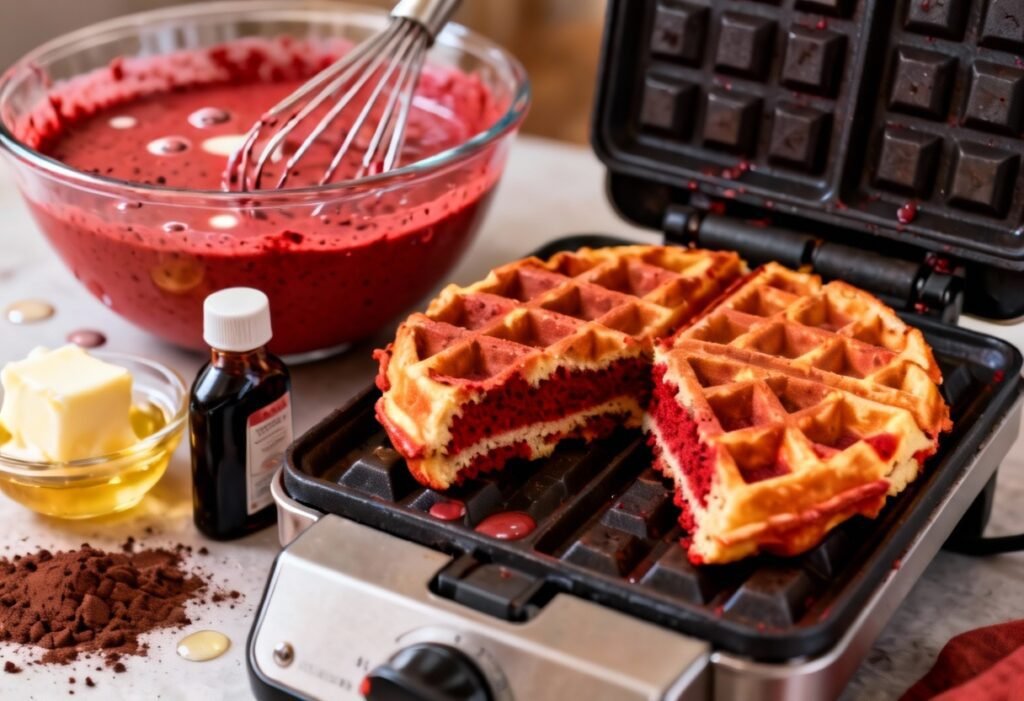
- Cook the waffles: Lightly grease your preheated waffle iron with cooking spray or melted butter. Pour the batter onto the hot waffle iron, using the amount recommended by the waffle iron manufacturer. Close the waffle iron and cook according to the manufacturer’s instructions, usually until the waffle is golden brown and crispy.
- Repeat: Carefully remove the waffle from the iron and repeat with the remaining batter.
- Serve and enjoy: Serve the red velvet waffles immediately with your favorite toppings. Whipped cream, cream cheese frosting, fresh berries, and chocolate chips are all excellent choices.
Tips for Success
- Don’t overmix the batter: Overmixing develops gluten, leading to tough waffles. Mix until just combined.
- Use gel food coloring: Gel food coloring provides a more intense and vibrant color compared to liquid food coloring.
- Adjust the food coloring to your liking: The amount of food coloring needed will vary depending on the brand and the desired intensity of the red color. Start with a small amount and add more gradually until you reach your perfect shade.
- Preheat your waffle iron properly: A hot waffle iron is essential for crispy waffles. Make sure the iron is fully preheated before adding the batter.
- Don’t open the waffle iron too early: Resist the urge to peek! Opening the waffle iron before the waffles are fully cooked can cause them to stick and tear.
- Keep waffles warm: If you’re making a large batch, keep the cooked waffles warm in a preheated oven (200°F/93°C) on a wire rack until ready to serve. This will help maintain their crispness.
- Experiment with toppings: Get creative with your toppings! Try different fruits, sauces, and sprinkles to create your own signature red velvet waffle masterpiece.
- Use quality ingredients: Using high-quality ingredients will result in better-tasting waffles.
Storage Instructions
If you have leftover red velvet waffles, you can store them in an airtight container in the refrigerator for up to 3 days. To reheat, you can use a toaster, oven, or waffle iron. For the best results, reheat in a toaster or waffle iron to restore their crispness.
Freezing Instructions:
To freeze red velvet waffles, let them cool completely. Place them in a single layer on a baking sheet and freeze for about 1-2 hours, or until solid. Then, transfer the frozen waffles to a freezer-safe bag or container. They can be stored in the freezer for up to 2 months. To reheat, you can toast them directly from frozen or bake them in a preheated oven at 350°F (175°C) for about 5-10 minutes.
FAQ
Q: Can I use regular milk instead of buttermilk?
A: While you can substitute regular milk for buttermilk, the waffles will not be as tender or tangy. If you do use regular milk, add 1 tablespoon of lemon juice or white vinegar to the milk and let it sit for 5 minutes to slightly curdle. This will mimic the acidity of buttermilk.
Q: Can I use a different type of flour?
A: All-purpose flour works best in this recipe. You can try using whole wheat flour, but the waffles may be slightly denser. If using whole wheat flour, start with a 1:1 substitution and adjust as needed.
Q: Can I make this recipe vegan?
A: Yes, you can make this recipe vegan by substituting the buttermilk with a plant-based milk alternative (such as almond milk or soy milk) mixed with 1 tablespoon of lemon juice or apple cider vinegar. Replace the egg with a flax egg (1 tablespoon ground flaxseed mixed with 3 tablespoons of water, let sit for 5 minutes).
Q: My waffles are sticking to the waffle iron. What am I doing wrong?
A: Make sure your waffle iron is properly preheated and greased. If the waffles are still sticking, try adding a little more oil to the batter. Also, avoid opening the waffle iron before the waffles are fully cooked.
Q: Can I double or triple this recipe?
A: Yes, you can easily double or triple this recipe to make a larger batch of waffles.
Conclusion
These red velvet waffles are a delightful twist on a classic dessert. They’re perfect for a special occasion breakfast, a weekend brunch, or simply a treat to brighten your day. With their vibrant color, subtle chocolate flavor, and fluffy texture, they’re sure to become a new favorite. So, gather your ingredients, preheat your waffle iron, and get ready to indulge in a truly decadent breakfast experience!