🍰 The Best Rum Cake Recipe From Scratch (Better Than Grandma’s!)
👩🍳 The Home Chef's Essential Kitchen
Consistently cooking incredible, healthy meals at home is so much easier when you aren't fighting with cheap tools. These are the 5 absolute powerhouse kitchen essentials that professional chefs and serious home cooks rely on every single day to get perfect results.
🍳 Lodge 10.25" Cast Iron Skillet
The single greatest value in all of cookware. It retains heat infinitely better than cheap non-stick pans, allowing you to get a restaurant-quality crust on steaks or perfect crispy edges on cornbread. With proper care, this $20 pan will literally outlive you.
🔪 Victorinox Fibrox Pro 8" Chef's Knife
A dull knife makes cooking a frustrating chore. This specific blade is the undisputed champion of the culinary world—it holds a terrifyingly sharp edge, features a comfortable non-slip grip, and performs identical to German knives that cost quadruple the price.
🌡️ ThermoPro Instant Read Thermometer
Never serve dry chicken or undercooked pork again. An instant-read thermometer is the secret difference between amateur cooks who 'guess' when protein is done, and professionals who know exactly when to pull meat off the heat for maximum juiciness.
🍲 Lodge Enameled Cast Iron Dutch Oven
The ultimate workhorse for soups, stews, braised short ribs, and baking crusty artisanal bread. The enameled interior provides incredible heat distribution for slow-cooking while eliminating the intense seasoning maintenance required by bare cast iron.
🥄 Bpa-Free Silicone Utensil Set
Throw away those melting plastic spatulas and bacteria-harboring wooden spoons. This pure silicone set is heat-resistant up to 600°F, won't scratch your expensive pans, and features seamless designs that make cleaning out thick sauces and batters effortless.
Let’s be honest for a second. You’re not here because you want a kale salad. You’re here because you want a dessert that doubles as a cocktail, or at least smells like one. So, you’re craving something sweet, buttery, and soaked in “holiday spirit,” but you don’t want to resort to that yellow box mix full of ingredients you can’t pronounce.
Same.
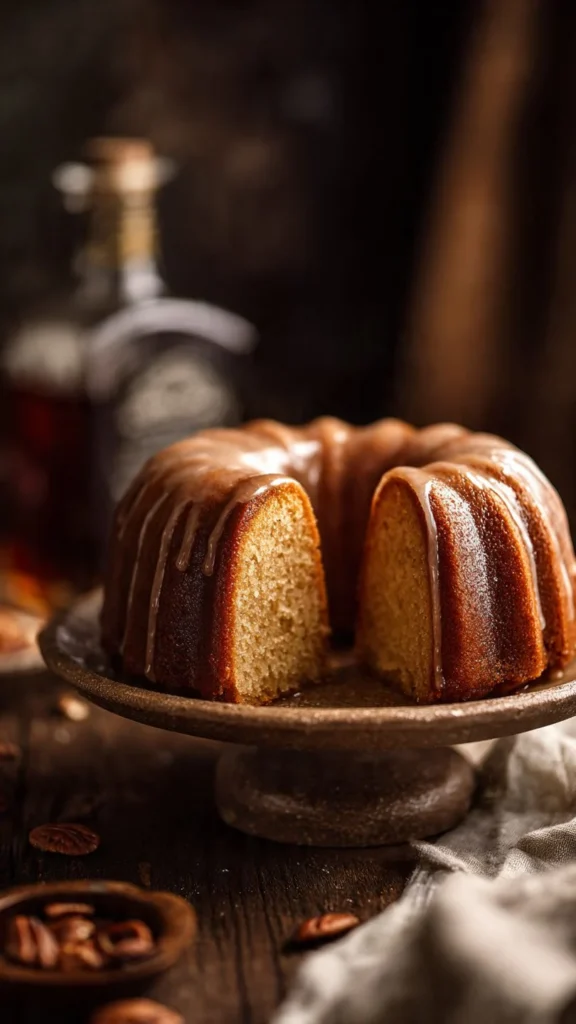
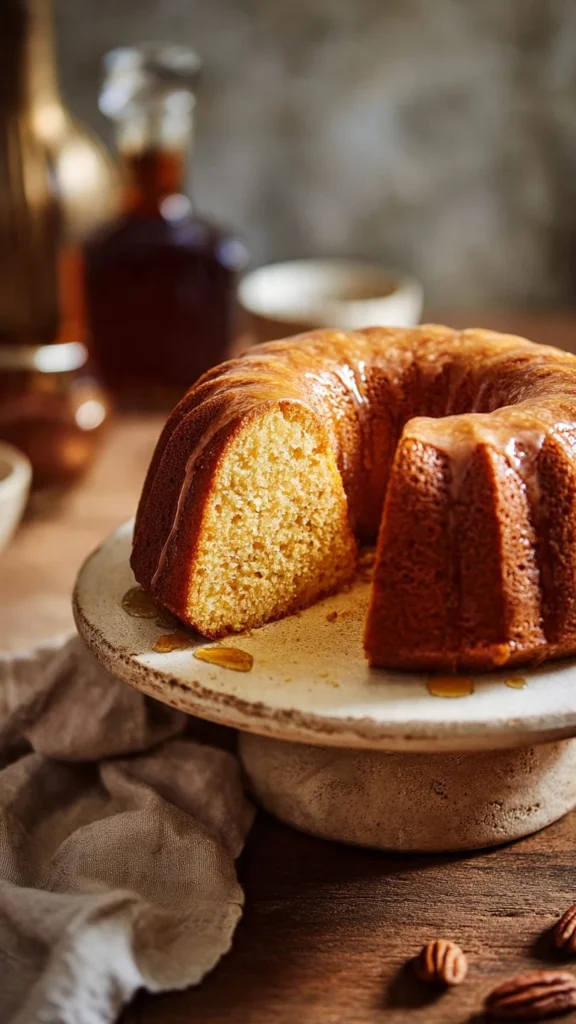
There is a time and place for shortcuts, but when it comes to the Holy Grail of holiday desserts, we are doing this rum cake recipe from scratch. We are talking about a golden, soaked-to-perfection ring of joy that will make your kitchen smell better than any expensive candle ever could. Put on your apron and grab the bottle of rum—one shot for the cake, one for the baker (kidding… mostly). Let’s bake.
Why This Recipe is Awesome
Look, I’ve eaten a lot of dry cake in my life. It’s a tragedy. A crime against taste buds. But this recipe? It’s the complete opposite of that.
It’s Actually “From Scratch” Most rum cake recipes online are just “take a box of yellow cake mix and add pudding.” While that’s fine if you’re in a rush, it lacks soul. This recipe uses real flour, real butter, and real vanilla. The texture is denser, richer, and significantly more satisfying than the fluffy, airy stuff you get from a box. It holds the booze better, meaning you get a moist bite without it turning into mush.
The “Better With Age” Factor This is one of the few foods that actually tastes better the longer you ignore it. Seriously. The science behind it is pretty cool: as the cake sits, the rum glaze seeps deeper into the crumb, mellowing out the sharp alcohol bite and transforming it into a complex, caramel-like flavor profile. It’s the meal prep of desserts. Make it on Wednesday, serve it on Saturday, and look like a genius.
The Glaze is Liquid Gold We aren’t just brushing a little sugar water on top. We are making a hot buttered rum sauce that saturates the cake from the inside out. It creates this incredible, slightly crunchy, sticky bottom (which becomes the top) that people will literally fight over.
Ingredients You’ll Need
We are keeping it real today. No “instant vanilla pudding mix.” Here is what you need to raid from your pantry.
For the Cake:
- All-Purpose Flour: The backbone of our operation. Don’t use cake flour here; we need enough structure to hold up that heavy syrup later.
- Cornstarch: Since we aren’t using cake flour, a little cornstarch helps tenderize the crumb so it doesn’t feel like bread.
- Baking Powder & Baking Soda: The heavy lifters. They give the lift. Make sure they aren’t expired. If they’ve been in your cupboard since 2018, throw them out.
- Salt: Essential. Sweet without salt is just boring.
- Unsalted Butter: Room temperature. If it’s cold, you’re doomed. If it’s melted, start over. It needs to be soft enough to dent with a finger.
- Granulated Sugar: For sweetness and aeration.
- Eggs: You’ll need 4 large ones. Room temperature is non-negotiable here (I’ll explain why later, just trust me).
- Oil (Vegetable or Canola): Butter gives flavor, but oil gives moisture. Using both is the secret weapon for a cake that stays soft for days.
- Vanilla Extract: Use the good stuff.
- The Rum: Use a dark or gold rum. Bacardi Gold, Myers’s, or Captain Morgan work great. Do not use white rum (no flavor) or super expensive sipping rum (waste of money).
- Buttermilk: This adds a tang and tenderness that water or milk just can’t compete with.
For the Butter Rum Glaze:
- More Butter: Yes, really.
- Sugar & Water: To make the syrup.
- More Rum: Obviously. This is added at the end so it doesn’t burn off.
Step-by-Step Instructions
Ready to channel your inner pastry chef? Let’s do this.
1. Prep Like You Mean It
Preheat your oven to 325°F (163°C). Grab your Bundt pan. Listen to me closely: Grease every single nook and cranny. I use a baking spray containing flour (like Baker’s Joy), or you can butter it and dust it with flour. If you miss a spot, the cake will stick, and you will cry. If you’re adding crushed walnuts or pecans, sprinkle them into the bottom of the pan now.
2. Whisk the Dry Stuff
In a medium bowl, whisk together the flour, cornstarch, baking powder, baking soda, and salt. Whisking aerates it and ensures you don’t get a clump of baking soda in one bite (yuck). Set this aside.

3. Cream the Butter and Sugar
In a large bowl (or stand mixer), beat the softened butter and sugar on medium-high speed. We aren’t just mixing; we are creaming. Let it go for about 5–7 minutes. It should look pale, fluffy, and almost white. This process punches tiny air holes into the butter, which is what makes the cake rise.
4. The Egg Parade
Add the eggs one at a time, beating well after each addition. Scrape down the sides of the bowl. This is where the emulsion happens. If your eggs were cold, the butter would curdle and look like cottage cheese. FYI: If it looks curdled anyway, don’t panic. The flour will fix it. Add the oil and vanilla now.
5. The “Dry-Wet-Dry” Dance
Turn the mixer to low. Add one-third of the flour mixture. Then pour in half of the buttermilk and the ½ cup of rum. Then more flour. Then the rest of the liquid. Finish with the flour. Science Tip: Do not overmix here! Once the flour hits the wet ingredients, gluten starts forming. We want cake, not chewy bread. Mix just until the white streaks disappear.
6. Bake It
Pour the batter into your prepared pan. Smooth the top. Bake for 50–60 minutes. Your house will start smelling amazing around the 40-minute mark. Start checking at 50 minutes. A wooden skewer inserted into the thickest part should come out clean or with a few moist crumbs.
7. The Glaze (Timing is Everything)
About 10 minutes before the cake is done, make the glaze. Combine butter, sugar, and water in a saucepan. Bring it to a boil. careful—sugar burns are no joke. Let it boil for about 3–4 minutes until slightly thickened. Remove from heat and stir in the rum. It will bubble up aggressively—it’s just saying hello.
8. The Soak
Take the cake out of the oven. While it is still hot and in the pan, poke holes all over it with a skewer. Go deep! Pour about half of the hot glaze over the hot cake. Let it sit for 20 minutes to absorb. The Flip: Invert the cake onto a serving plate. Brush or slowly pour the remaining glaze over the top and sides. It might seem like too much liquid. It’s not. It will drink it all up.
Common Mistakes to Avoid
Even the best of us have kitchen disasters. Here is how to avoid them with this rum cake recipe from scratch:
- Using a Light/White Rum: White rum disappears in baking. You need the molasses notes of a dark or gold rum to stand up to the butter and sugar.
- The “Stuck Cake” Nightmare: This usually happens because you didn’t grease the Bundt pan enough or you let the cake cool completely in the pan with the glaze. The glaze acts like glue once it cools. Flip it while it’s still warm!
- Overbaking: Because this is a dense cake, people think it needs an hour and a half. Nope. If you bake it until it’s dry as a bone, no amount of rum syrup will save it.
- Eating It Immediately: I know, I know. You want it now. But warm rum cake can taste overly “alcohol-y.” Letting it sit for at least 8 hours (or overnight) lets the flavors marry. It transforms from “boozy sponge” to “gourmet dessert.”
Alternatives & Substitutions
Cooking is an art, baking is a science… but we can still cheat a little.
- Nuts or No Nuts: Traditional rum cakes often have walnuts or pecans on the bottom (top). If you are allergic or just hate the texture of nuts interfering with your cake, leave them out. It won’t change the baking time.
- Coconut Rum Cake: Swap the dark rum for coconut rum (like Malibu) and swap the buttermilk for coconut milk. Boom—tropical vacation.
- Gluten-Free: You can use a high-quality 1-to-1 Gluten-Free baking flour blend (like King Arthur or Bob’s Red Mill). The texture will be slightly different, but the syrup helps mask any dryness that usually comes with GF baking.
- Alcohol-Free: Okay, technically this defeats the purpose of “Rum Cake,” but if you want the flavor without the buzz, use apple juice or water with a hefty tablespoon of Rum Extract.
FAQ (Frequently Asked Questions)
Can this cake get me drunk? Unless you eat the entire Bundt pan in one sitting (no judgment), no. A significant amount of alcohol evaporates during the glaze boiling process and the baking, though some remains. It’s flavor, not shots.
Do I have to refrigerate it? Please don’t! The cold refrigerator air dries out the cake and hardens the butter, making the texture feel stale. This cake has enough sugar and alcohol to act as preservatives. It sits happily at room temperature under a cake dome for up to 5 days.
Can I freeze it? Absolutely. In fact, it freezes beautifully. Wrap it tightly in plastic wrap, then foil. It can hibernate in your freezer for up to 3 months. Thaw it on the counter before devouring.
Why did my cake sink in the middle? You probably opened the oven door too early to peek. The rush of cold air collapses the structure before it sets. Or, you used too much baking powder. Patience, grasshopper.
Can I use a regular cake pan instead of a Bundt? Technically, yes, but you’ll likely need two 9-inch round pans, and the baking time will be much shorter (check at 30 minutes). But honestly, the Bundt shape is superior for soaking up the glaze evenly.
Final Thoughts
There you have it—a rum cake recipe from scratch that will make you the most popular person at the potluck, the office party, or just your own living room on a Tuesday night.
It’s buttery, it’s boozy, and it’s surprisingly easy to pull off if you respect the chemistry of the ingredients. So, stop staring at the screen, go buy some butter, and get that oven preheated. Now go impress someone—or yourself—with your new culinary skills. You’ve earned it!