This Soft Chocolate Chip Cookie Recipe Is the Internet’s New Comfort Flex (Thick, Gooey, and Ridiculously Easy)
👩🍳 The Home Chef's Essential Kitchen
Consistently cooking incredible, healthy meals at home is so much easier when you aren't fighting with cheap tools. These are the 5 absolute powerhouse kitchen essentials that professional chefs and serious home cooks rely on every single day to get perfect results.
🍳 Lodge 10.25" Cast Iron Skillet
The single greatest value in all of cookware. It retains heat infinitely better than cheap non-stick pans, allowing you to get a restaurant-quality crust on steaks or perfect crispy edges on cornbread. With proper care, this $20 pan will literally outlive you.
🔪 Victorinox Fibrox Pro 8" Chef's Knife
A dull knife makes cooking a frustrating chore. This specific blade is the undisputed champion of the culinary world—it holds a terrifyingly sharp edge, features a comfortable non-slip grip, and performs identical to German knives that cost quadruple the price.
🌡️ ThermoPro Instant Read Thermometer
Never serve dry chicken or undercooked pork again. An instant-read thermometer is the secret difference between amateur cooks who 'guess' when protein is done, and professionals who know exactly when to pull meat off the heat for maximum juiciness.
🍲 Lodge Enameled Cast Iron Dutch Oven
The ultimate workhorse for soups, stews, braised short ribs, and baking crusty artisanal bread. The enameled interior provides incredible heat distribution for slow-cooking while eliminating the intense seasoning maintenance required by bare cast iron.
🥄 Bpa-Free Silicone Utensil Set
Throw away those melting plastic spatulas and bacteria-harboring wooden spoons. This pure silicone set is heat-resistant up to 600°F, won't scratch your expensive pans, and features seamless designs that make cleaning out thick sauces and batters effortless.
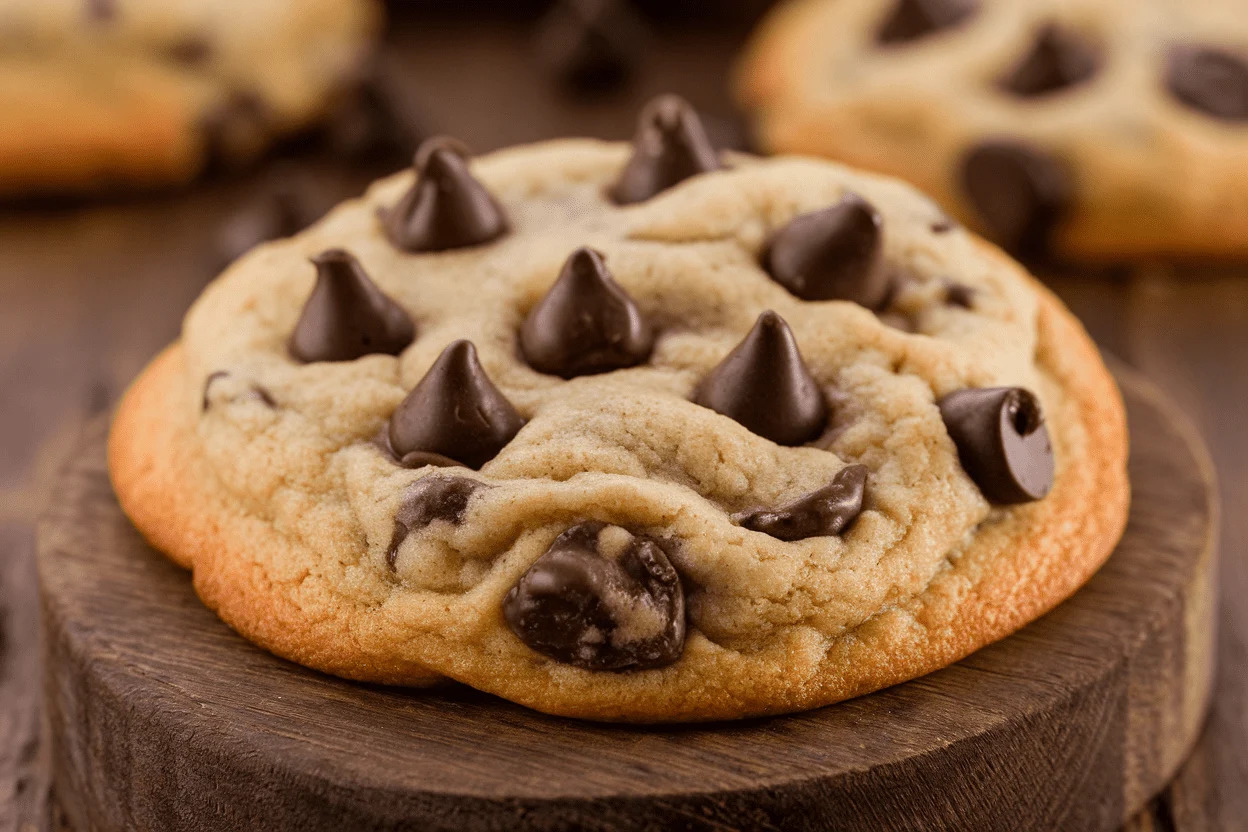
You want bakery-level cookies without the bakery price tag? Keep reading. This soft chocolate chip cookie recipe nails that chewy edge, gooey middle, and melty chip situation people line up for.
No complicated steps, no weird ingredients—just smart tweaks that stack the deck in your favor. If you’ve baked cookies that turned out flat, dry, or “meh,” this is your redemption arc. The result: soft, thick cookies that still taste amazing on day two (and three, if they last that long).
Why You’ll Love This Recipe
- Soft for days: A touch of cornstarch and extra yolk keeps the center plush and tender, not cakey.
- Big flavor, minimal fuss: Browned butter vibes—without the pan—thanks to more brown sugar than white.
- Thick, not flat: Chilling the dough prevents spreading and deepens flavor.
It’s worth the wait.
- Perfectly balanced sweetness: Dark chocolate chips offset the dough’s caramel notes so it’s not cloying.
- Customizable: Swap the chips, add nuts, or finish with flaky salt. You’re the boss here.
Shopping List – Ingredients
- 2 1/4 cups (280 g) all-purpose flour
- 2 teaspoons cornstarch (for softness)
- 1 teaspoon baking soda
- 3/4 teaspoon fine sea salt
- 3/4 cup (170 g) unsalted butter, melted and cooled
- 1 cup (200 g) packed light brown sugar
- 1/3 cup (65 g) granulated sugar
- 1 large egg + 1 large egg yolk (room temperature)
- 2 teaspoons pure vanilla extract
- 1 1/2 cups (255 g) semisweet or dark chocolate chips/chunks
- Optional: Flaky sea salt for finishing
Step-by-Step Instructions
- Prep your gear: Line two baking sheets with parchment. Set the oven to 350°F (175°C), but don’t bake yet if you’re chilling the dough (you should).
- Combine dry ingredients: In a bowl, whisk flour, cornstarch, baking soda, and salt until evenly mixed.
- Mix the wet ingredients: In a separate bowl, whisk melted, cooled butter with brown sugar and granulated sugar until glossy and smooth (about 45 seconds).
Add egg, egg yolk, and vanilla. Whisk until slightly thickened.
- Bring it together: Add the dry ingredients to the wet and stir with a spatula until just combined. Do not overmix.
Fold in chocolate chips/chunks.
- Chill the dough: Cover and chill for 30–60 minutes. This firms up the fat and improves texture and flavor. If you’re impatient, at least chill 20 minutes—your future self will thank you.
- Scoop: Use a heaping tablespoon or a #24 scoop (about 3 tablespoons) to form balls.
For bakery-style pockets, press a few extra chips onto the tops.
- Bake: Arrange on sheets with 2 inches between each. Bake for 9–11 minutes until edges are set and centers look slightly underdone. They’ll finish on the tray—trust the process.
- Finish and set: Immediately sprinkle with flaky sea salt (optional).
Let cookies cool on the sheet for 8–10 minutes before moving to a rack. This step locks in that soft center.
- Pro move: If a cookie spreads unevenly, use a round glass or biscuit cutter to “scoot” the edges into perfect circles while still warm. Instagram wins guaranteed.
How to Store
- Room temperature: Store in an airtight container for 3–4 days.
Add a slice of bread to keep them soft (moisture transfer magic).
- Fridge: Not necessary, but works for up to 1 week. Bring to room temp before eating.
- Freeze baked cookies: Wrap individually and freeze up to 3 months. Re-warm at 300°F (150°C) for 5–6 minutes.
- Freeze dough balls: Freeze scooped dough on a sheet, then bag for up to 3 months.
Bake from frozen at 350°F (175°C) for 11–13 minutes.
Health Benefits
- Built-in portion control: Individual cookies make it easier to enjoy one or two without a sugar spiral. Yes, that counts as a benefit.
- Dark chocolate perks: Choose 60–70% cacao chips for antioxidants and less sugar than milk chocolate.
- Homemade edge: You control the ingredients: no preservatives, no mystery oils, and the ability to use organic butter, pasture-raised eggs, or unbleached flour.
- Balanced fats and carbs: The butter and eggs slow down absorption a bit—less of a blood sugar rollercoaster than store-bought sweets, IMO.
Common Mistakes to Avoid
- Skipping the chill: Warm dough = flat, greasy cookies. Chilling is your insurance policy for thickness and softness.
- Overbaking: If they look fully baked in the oven, they’re already dry.
Pull when the centers are still a touch glossy.
- Hot butter trap: Melted butter is great; hot butter is not. If it’s too warm, you’ll melt the sugar and wreck the texture.
- Overmixing the flour: Stir just until combined. Overworking develops gluten and turns your cookie into a tough guy nobody invited.
- Wrong salt: Use fine salt in the dough for even distribution.
Save the flaky stuff for the finish.
- Poor measuring: Spoon-and-level the flour or weigh it. Too much flour = cakey, dry cookie sadness.
Mix It Up
- Brown butter edition: Brown the butter, cool completely, then proceed. Adds nutty depth.
Increase flour by 1–2 tablespoons if the dough feels loose.
- Chunk party: Use chopped chocolate bars for puddles and different melt zones. Mix milk and dark for contrast.
- Espresso boost: Add 1–2 teaspoons instant espresso to the sugars for mocha vibes.
- Nutty crunch: Fold in 3/4 cup toasted pecans or walnuts. Balance with a touch more chocolate because, obviously.
- Oat upgrade: Swap 1/2 cup flour for quick oats for extra chew.
- Gluten-free: Use a 1:1 gluten-free baking flour with xanthan gum.
Chill time becomes non-negotiable.
- Mini size, max yield: Scoop 1 tablespoon and bake 7–8 minutes. Perfect for lunchboxes or “I’ll just have one more” moments.
FAQ
Can I skip the cornstarch?
Yes, but expect slightly less softness. If you skip it, consider reducing flour by 1 tablespoon to keep tenderness in check.
Do I need to use melted butter?
For this recipe’s texture, yes.
Melted butter hydrates the dough differently and creates a denser, chewier center. If you prefer puffier cookies, use softened butter and cream the sugars instead.
Why are my cookies still puffy after baking?
They’ll settle as they cool. If not, you may have added a touch too much flour or baked a minute too long.
Gently tap the pan on the counter right out of the oven to deflate.
Can I reduce the sugar?
You can cut total sugar by up to 15% without wrecking texture. Any more and the cookies may dry out and lose spread. Consider swapping some chips for darker chocolate to reduce perceived sweetness.
How do I get gooey centers every time?
Slight underbake plus pan-cool time is the move.
Bake until edges set and centers look a bit soft, then let them rest on the hot sheet for 8–10 minutes.
What’s the best chocolate to use?
Semisweet (50–60%) is classic, but dark (60–70%) brings balance. Use a mix of chips and chopped bars for elite-level pools and texture.
My Take
Soft cookies are a game of small edges: a little cornstarch, an extra yolk, and disciplined chill time. Stack those wins and you get bakery-style texture in a home kitchen, zero drama.
This soft chocolate chip cookie recipe isn’t flashy—it’s optimized. Make a batch, freeze half the dough, and future-you gets fresh, warm cookies on demand. That’s not just baking; that’s lifestyle design, FYI.