Sourdough Starter Recipe Ideas: Unleash Your Inner Baker
Embark on a culinary adventure and unlock the magic of sourdough baking! Creating your own sourdough starter might seem daunting, but it’s a rewarding process that yields incredibly flavorful and artisanal bread. Forget store-bought bread – with a thriving sourdough starter, you’ll be crafting loaves with a depth of flavor and a satisfying tang that’s simply unmatched. This guide will provide you with everything you need to know to cultivate a vibrant starter and explore exciting recipe variations.
Why This Recipe Works
This recipe focuses on simplicity and consistency, using readily available ingredients and clear, easy-to-follow instructions. The key to a successful starter is patience and observation. We’ll guide you through the daily feeding process, helping you understand the signs of a healthy and active starter. This recipe avoids unnecessary complications, focusing on the fundamental principles of sourdough fermentation. By understanding these principles, you can adapt the recipe to suit your environment and preferences, creating a starter that perfectly reflects your baking style.
Ingredients
- Unbleached All-Purpose Flour: 1 cup (120g) – Provides the necessary starches for the yeast and bacteria to feed on. Unbleached flour is preferred as bleaching can inhibit starter activity.
- Whole Wheat Flour: 1/2 cup (60g) – Adds nutrients and beneficial microbes that contribute to a more robust and flavorful starter.
- Filtered Water: 1 cup (240ml) – Chlorine and other chemicals in tap water can hinder starter development. Filtered water ensures a clean environment for fermentation.
Instructions
- Day 1: Combine Ingredients: In a clean, wide-mouth glass jar or container (at least 1 quart capacity), combine the all-purpose flour, whole wheat flour, and filtered water. Mix thoroughly with a wooden spoon or spatula until no dry flour remains. The mixture should resemble a thick batter.
- Day 1: Initial Rest: Cover the jar loosely with a lid or plastic wrap (allowing for air circulation) and let it sit at room temperature (ideally 70-75°F or 21-24°C) for 24 hours.
- Day 2: First Feeding: Discard half of the starter (approximately 120g). This is important to prevent the starter from becoming too acidic and to encourage fresh growth. Add 1/2 cup (60g) unbleached all-purpose flour and 1/4 cup (60ml) filtered water to the remaining starter. Mix well until fully incorporated.
- Day 2: Rest: Cover the jar loosely and let it sit at room temperature for another 24 hours.
- Days 3-7: Daily Feedings: Repeat the discarding and feeding process every 24 hours. Discard half of the starter, then add 1/2 cup (60g) unbleached all-purpose flour and 1/4 cup (60ml) filtered water. Mix well and cover.
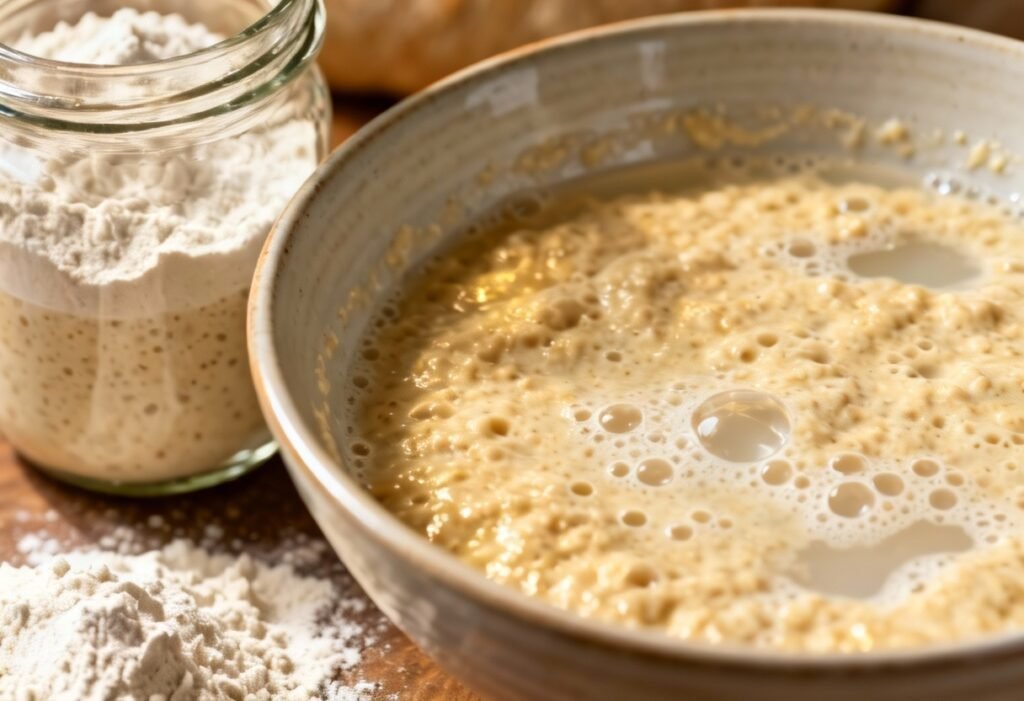
- Observation: Observe your starter closely each day. You should start to see signs of activity, such as bubbles forming on the surface and an increase in volume. The starter may also have a slightly sour or yeasty aroma.
- Increased Activity: As your starter becomes more active (typically around days 5-7), you may need to feed it twice a day (every 12 hours) to prevent it from exhausting its food supply. Look for signs of peaking – the starter will rise significantly in volume, then start to fall back down. Feed it when it’s at its peak or just starting to fall.
- Day 7 (or later): Consistency is Key: Your starter is ready to use when it consistently doubles in size within 4-8 hours after feeding, has a bubbly texture throughout, and a pleasant sour aroma. The time it takes for a starter to mature can vary depending on environmental factors like temperature and humidity.
Tips for Success
- Temperature Matters: The ideal temperature for sourdough starter development is between 70-75°F (21-24°C). Cooler temperatures will slow down the fermentation process, while warmer temperatures can accelerate it.
- Use a Scale: Measuring ingredients by weight is more accurate than measuring by volume, especially for flour. A kitchen scale will help you maintain consistent results.
- Be Patient: Sourdough starter development takes time and patience. Don’t be discouraged if your starter doesn’t become active immediately. Keep feeding it regularly, and it will eventually thrive.
- Observe and Adjust: Pay attention to your starter’s behavior and adjust the feeding schedule as needed. If it’s rising too quickly, feed it more often. If it’s not rising enough, try feeding it less often or moving it to a warmer location.
- Use a Rubber Band: Place a rubber band around the jar at the level of the starter immediately after feeding. This will help you track its rise and fall.
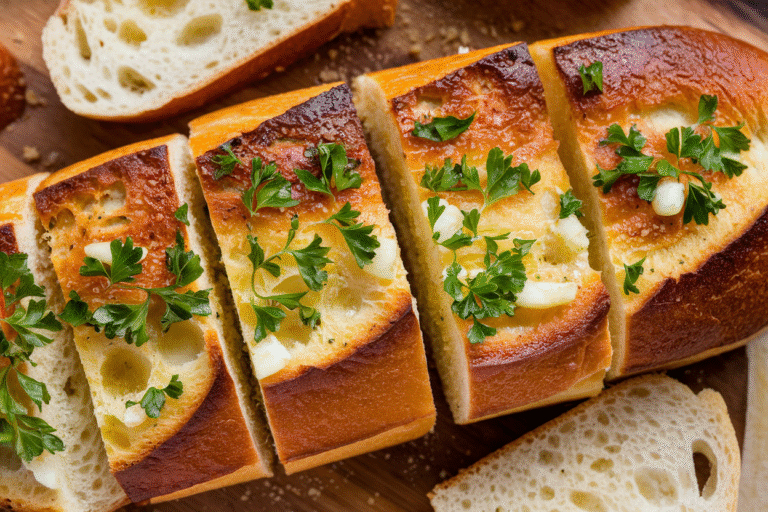
- Don’t Throw Away Discard: Sourdough discard can be used in a variety of recipes, such as pancakes, waffles, crackers, and even cakes. This reduces waste and adds a unique flavor to your baked goods.
Storage Instructions
Once your starter is active and ready to use, you can store it in the refrigerator to slow down the fermentation process. When stored in the refrigerator, you only need to feed it once a week. Before using the starter, remove it from the refrigerator and feed it 1-2 times to reactivate it. To revive a refrigerated starter, discard half, feed with equal parts flour and water (by weight), and let it sit at room temperature until bubbly and doubled in size. This may take 4-12 hours depending on how long it has been refrigerated.
For long-term storage, you can dry your sourdough starter. Spread a thin layer of active starter on parchment paper and let it air dry completely. Once dry, break it into flakes and store it in an airtight container in a cool, dry place. To rehydrate the dried starter, add a small amount of water to the flakes and let them sit for a few minutes. Then, feed the starter as usual until it becomes active again.

FAQ
Q: My starter isn’t bubbling. What should I do?
A: Don’t worry! It can take several days for a starter to become active. Make sure you’re feeding it regularly and keeping it in a warm place. You can also try adding a small amount of whole wheat flour to the feedings, as this provides more nutrients for the yeast and bacteria.
Q: My starter smells bad. Is it still good?
A: A sourdough starter will have a slightly sour smell, but it shouldn’t smell foul or rotten. If it smells like acetone or nail polish remover, it’s likely starving. Start feeding it more frequently. If the smell persists even after regular feedings, it may be contaminated and should be discarded.
Q: Can I use different types of flour?
A: Yes! You can experiment with different types of flour, such as rye flour, spelt flour, or even gluten-free flour. Keep in mind that different flours will affect the flavor and texture of your starter. Using different flour blends will require some experimentation to get a good starter.
Q: How do I know when my starter is ready to bake with?
A: Your starter is ready to bake with when it consistently doubles in size within 4-8 hours after feeding, has a bubbly texture throughout, and a pleasant sour aroma. It should also pass the “float test” – drop a small spoonful of starter into a glass of water. If it floats, it’s ready to use. If it sinks, it needs more time to develop.
Conclusion
Creating a sourdough starter is a journey, not a destination. Embrace the process, experiment with different techniques, and enjoy the satisfaction of baking your own delicious sourdough bread. With a little patience and attention, you’ll be well on your way to mastering the art of sourdough baking and enjoying the unparalleled flavor and texture that only a homemade starter can provide. Happy baking!