Starbucks Cake Pops Recipe: The Addictive Copycat You’ll Actually Nail at Home
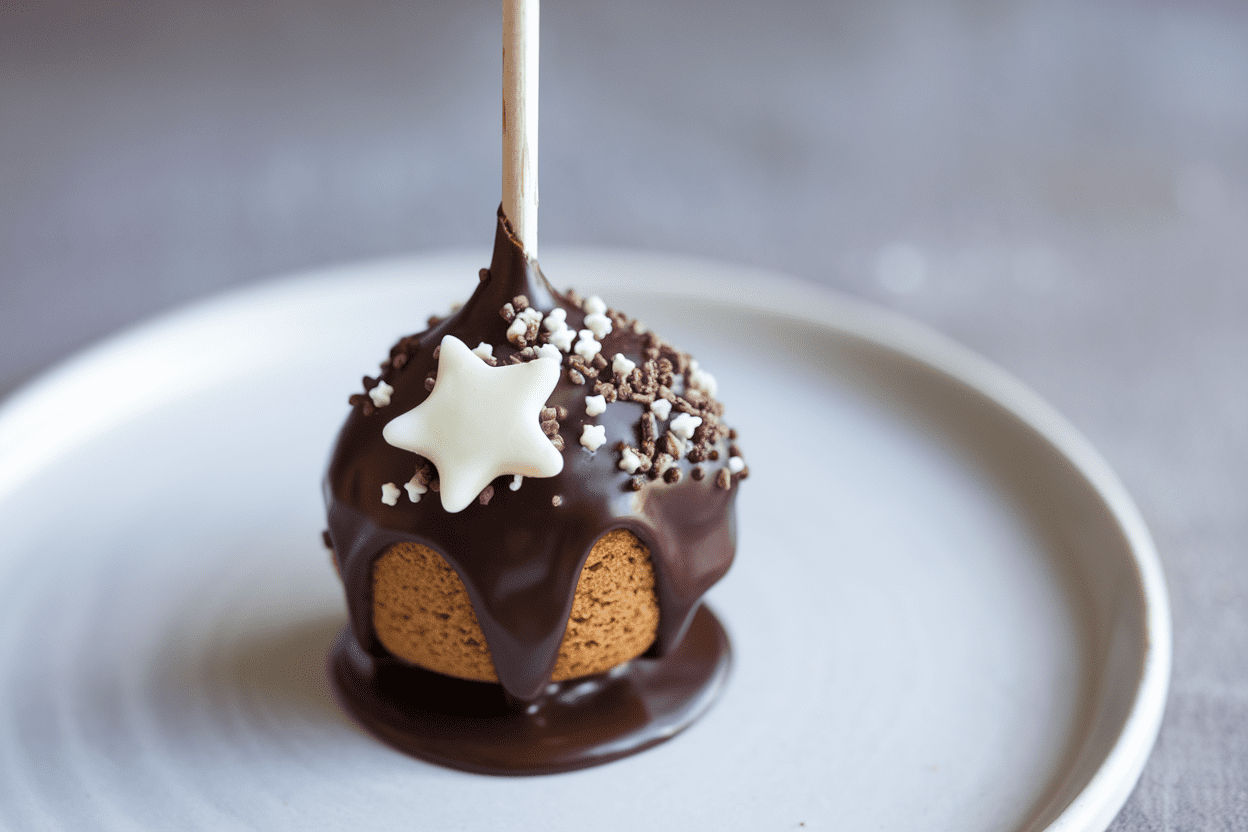
If you’ve ever told yourself, “I’ll just get a coffee,” and then walked out with three cake pops, welcome home. This Starbucks cake pops recipe gives you the same fudgy center, glossy shell, and cute-on-a-stick vibe—without the $3-per-bite regret. You’ll learn the exact texture tricks, the right chocolate to use, and how to make them look like they came from a display case.
Spoiler: they’re easier than you think. And yes, you can flex on your group chat with these.
What Makes This Special
Most copycats miss the texture. The real move?
A slightly under-baked cake blended with just enough frosting to turn into rich truffle dough. That’s how you get the signature fudgey bite—not dry crumbs.
We’re also using candy melts plus a splash of oil for that ultra-smooth, chip-free coating. No chalky shell, no weird cracking.
Just glossy pops that hold their shape and taste like nostalgia.
Finally, this recipe scales easily, freezes like a dream, and lets you riff on flavors: birthday cake, red velvet, or chocolate-on-chocolate. You’re basically opening a tiny bakery from your kitchen counter.
Shopping List – Ingredients
- For the cake:
- 1 box white cake mix (15.25 oz)
- 3 large eggs
- 1/2 cup neutral oil (canola or vegetable)
- 1 cup milk (whole milk preferred for tenderness)
- 1 teaspoon vanilla extract
- For the frosting binder:
- 1/3 to 1/2 cup vanilla buttercream (store-bought or homemade)
- For the coating:
- 16 oz pink or white candy melts (or white chocolate wafers made for melting)
- 1–2 tablespoons refined coconut oil or neutral oil (for thinning)
- Sprinkles (classic rainbow jimmies for “birthday cake” look)
- Hardware:
- 30–35 lollipop sticks
- Styrofoam block or a cardboard box poked with holes (drying rack)
- Cookie scoop (1.5 tablespoons) or scale
- Parchment paper
Cooking Instructions
- Bake the cake. Preheat oven to 350°F (175°C). Grease a 9×13-inch pan.
Whisk cake mix, eggs, oil, milk, and vanilla until smooth. Bake 23–26 minutes until the center springs back. Pull it slightly earlier than a perfect bake for a softer crumb.
- Cool and crumble. Let the cake cool 15–20 minutes, then turn into a large bowl. Remove browned edges if you want a lighter color.
Crumble with clean hands until fine—no big chunks.
- Add frosting—slowly. Start with 1/3 cup buttercream and mix into crumbs. Squeeze a bit in your hand: it should hold together like playdough without feeling greasy. Add up to 1/2 cup if needed. Proper texture beats a precise measurement.
- Portion and roll. Scoop 1–1.5 tablespoons per pop (about 20–25 g).
Roll into smooth balls. Place on a parchment-lined sheet and refrigerate 20 minutes.
- Anchor the sticks. Melt 1–2 oz of candy melts. Dip 1/2 inch of a stick into the melt, then insert halfway into each cake ball.
Chill 15 minutes to set. This step prevents “ball dropout,” aka sadness.
- Melt the coating right. In a microwave-safe cup (tall and narrow), melt remaining candy melts in 20–30 second bursts, stirring between. Add 1–2 teaspoons oil until it flows like warm honey. Thin enough to coat, not so thin it drips forever.
- Dip like a pro. Working with a few pops at a time, dip straight down, then pull up and tilt/tap gently to remove excess.
Spin slowly to smooth. If decorating, add sprinkles while still wet. Stand pops in the Styrofoam to dry.
- Set and serve. Let them harden at room temp 30 minutes.
For a firmer shell, chill 10 minutes—but don’t store long-term in the fridge uncovered (condensation is not cute).
Storage Tips
- Short-term: Store at room temperature in an airtight container up to 2 days.
- Longer-term: Refrigerate in a sealed container up to 5 days, but let them come to room temp before serving for best texture.
- Freeze uncoated balls: Up to 2 months. Thaw in the fridge overnight, then coat.
- Avoid humidity: Moisture causes sweating and color streaks on the shell. If you must refrigerate coated pops, keep them in a sealed container with a paper towel to absorb moisture.
Why This is Good for You
Look, it’s dessert, not a multivitamin.
But there’s value here. Portion control is built-in—each pop is a small treat, not a slab of cake. That’s a win if you’re watching intake.
Making them at home means cleaner ingredients and control over sweetness.
You can swap in reduced-sugar cake and frosting if you want, no judgment. And baking for friends? That’s good for the soul—and IMO, mental health points count.
Common Mistakes to Avoid
- Over-frosting the crumbs: Too much binder = greasy, saggy pops that slide off sticks.
Add frosting gradually until the dough holds together, not slick.
- Skipping the stick-dip: That tiny dab of melted coating acts like glue. Don’t skip it unless you like chaos.
- Coating too thick: Undiluted candy melts can crack. Thin with oil until it ribbons smoothly.
- Cold shock: Dipping very cold balls into hot coating causes cracks.
Keep the balls slightly chilled, not icy.
- Wrong vessel: Use a tall, narrow cup for dipping. Bowls make you swirl and tear the coating.
- Humidity and condensation: Refrigerating uncovered or in moist environments leads to sticky shells and color bleed.
Different Ways to Make This
- Classic Birthday Cake: White cake + vanilla frosting + pink coating + rainbow sprinkles.
- Chocolate Truffle: Chocolate cake + chocolate frosting + dark coating with cocoa nib dust. Intense in the best way.
- Red Velvet + Cream Cheese: Red velvet cake + cream cheese frosting + white coating.
A crowd-pleaser—just chill the balls longer; cream cheese is softer.
- Cookies & Cream: Vanilla cake + frosting + crushed chocolate sandwich cookies in the dough and on top. Dreamy crunch.
- Strawberry Shortcake: Vanilla cake + strawberry jam swirled into frosting + white coating + freeze-dried strawberry dust.
- Gluten-Free Hack: Use a GF cake mix and ensure candy melts are GF-certified. Texture stays on-point if you don’t over-frost.
- Lower Sugar: Use a reduced-sugar cake mix and Swiss meringue buttercream.
Coating sweetness will still carry the flavor, FYI.
FAQ
How do I keep the coating from cracking?
Thin the melts with a bit of oil, avoid plunging icy-cold balls into hot coating, and let dipped pops set at room temp before chilling. If your kitchen is cold, warm the coating slightly more and work in small batches.
Can I use chocolate chips instead of candy melts?
You can, but chips contain stabilizers and often seize or thicken. Use melting wafers or candy melts designed for dipping.
If using real chocolate, temper it or you’ll get dull, streaky shells.
Why are my cake pops falling off the stick?
Either the mixture is too soft or you skipped the stick “glue” step. Add more cake crumbs to firm the dough, chill briefly, dip the stick in coating before inserting, and avoid huge pops that are too heavy.
Do I need to refrigerate cake pops?
Not if you’re eating them within 1–2 days and used shelf-stable buttercream. For cream cheese frosting, refrigerate and bring to room temp before serving.
Keep them sealed to avoid condensation.
How many pops does this make?
About 30–35 standard pops using 1–1.5 tablespoons per ball. If you go jumbo, expect closer to 18–24.
Can I color white chocolate instead of buying colored melts?
Use oil-based candy coloring. Water-based gel colors can seize the chocolate.
Start with a few drops, stir, and adjust.
What’s the best way to add sprinkles neatly?
Dip, let excess drip off, then sprinkle immediately while the shell is still wet. Hold the pop over a bowl to catch extras and avoid bald spots by rotating as you sprinkle.
Can I make these without eggs?
Yes. Use an egg replacer or applesauce (1/4 cup per egg) and watch the texture—applesauce runs softer, so reduce frosting a bit.
The coating steps remain the same.
My Take
Great cake pops are all about restraint: just enough frosting to bind, just enough thinning for a mirror-smooth shell. Nail those two variables and you’ll outdo the coffee shop—no tip jar required. The best part?
They’re wildly customizable and weirdly therapeutic to dip.
If you want one pro-level flex, use a scale and make every ball identical. Uniform size = clean dip, clean set, clean look. Your friends will think you bought them—and you can let them wonder, right?
