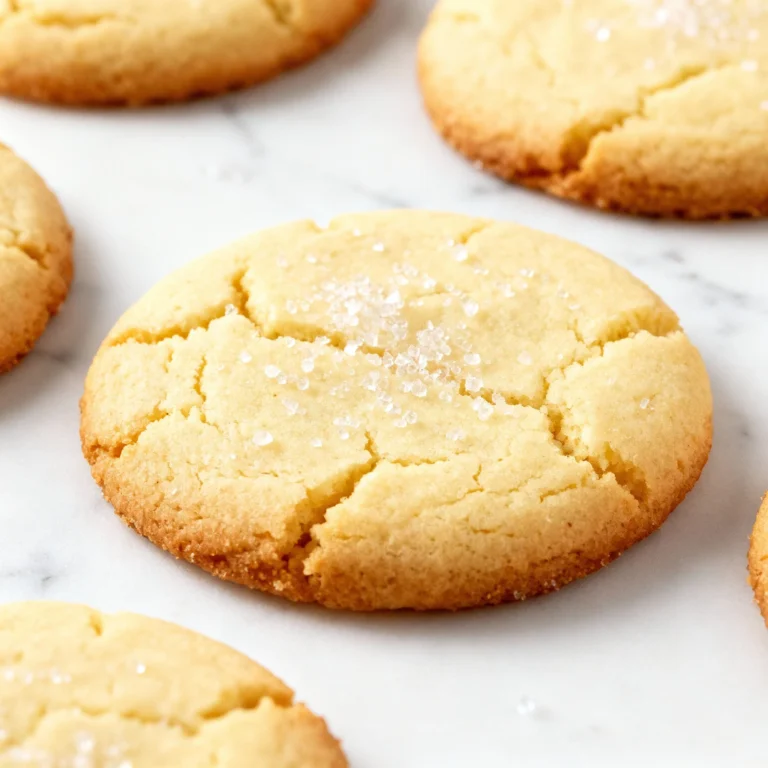
This Sugar Cookie Frosting Recipe Will Make Strangers Ask for Your Secret (And Your Kids Lick the Bowl)
👩🍳 The Home Chef's Essential Kitchen
Consistently cooking incredible, healthy meals at home is so much easier when you aren't fighting with cheap tools. These are the 5 absolute powerhouse kitchen essentials that professional chefs and serious home cooks rely on every single day to get perfect results.
🍳 Lodge 10.25" Cast Iron Skillet
The single greatest value in all of cookware. It retains heat infinitely better than cheap non-stick pans, allowing you to get a restaurant-quality crust on steaks or perfect crispy edges on cornbread. With proper care, this $20 pan will literally outlive you.
🔪 Victorinox Fibrox Pro 8" Chef's Knife
A dull knife makes cooking a frustrating chore. This specific blade is the undisputed champion of the culinary world—it holds a terrifyingly sharp edge, features a comfortable non-slip grip, and performs identical to German knives that cost quadruple the price.
🌡️ ThermoPro Instant Read Thermometer
Never serve dry chicken or undercooked pork again. An instant-read thermometer is the secret difference between amateur cooks who 'guess' when protein is done, and professionals who know exactly when to pull meat off the heat for maximum juiciness.
🍲 Lodge Enameled Cast Iron Dutch Oven
The ultimate workhorse for soups, stews, braised short ribs, and baking crusty artisanal bread. The enameled interior provides incredible heat distribution for slow-cooking while eliminating the intense seasoning maintenance required by bare cast iron.
🥄 Bpa-Free Silicone Utensil Set
Throw away those melting plastic spatulas and bacteria-harboring wooden spoons. This pure silicone set is heat-resistant up to 600°F, won't scratch your expensive pans, and features seamless designs that make cleaning out thick sauces and batters effortless.
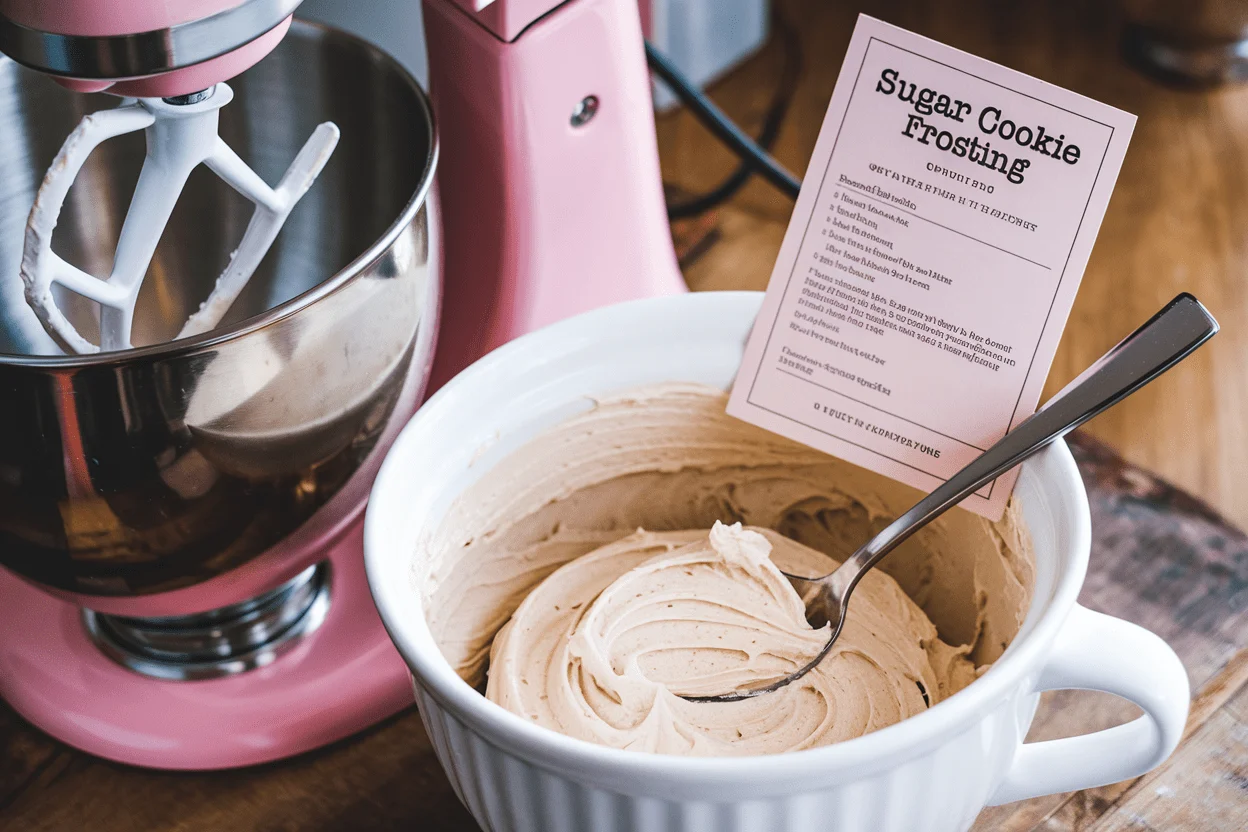
You don’t need a pastry chef or a mixer the size of a bulldozer to make frosting that slaps. You just need a handful of pantry staples and a method that actually works every time. This sugar cookie frosting recipe is creamy, pipeable, and sets with a soft crust—so your cookies look pro without tasting like plastic.
It’s the difference between “cute” and “who made these?” Ready to make your cookie game unfairly good?
Why You’ll Love This Recipe
- Soft-set finish: Dries enough to stack without becoming rock hard. No more shattered teeth or frosting smears.
- Pipeable but spreadable: Holds its shape for swirls and borders yet glides like a dream with a spatula.
- Balanced sweetness: Vanilla-almond combo gives bakery flavor without sugar-bomb vibes.
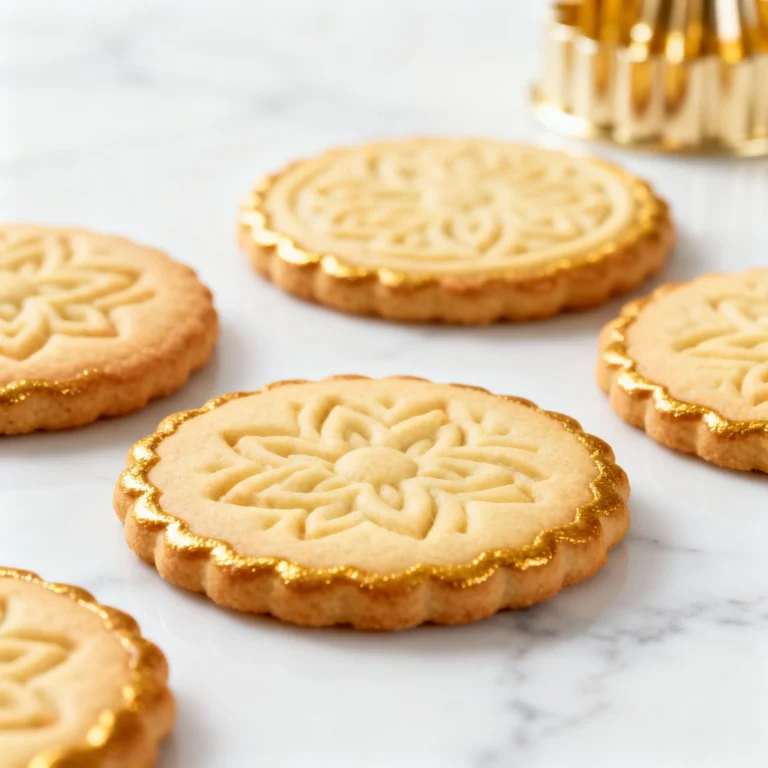
- Color-friendly: Takes gel food coloring like a champ for vibrant shades that don’t fade.
- Make-ahead friendly: Stores well, refreshes fast, and stays smooth. Your schedule wins.
What You’ll Need (Ingredients)
- 1 cup (226 g) unsalted butter, softened to cool room temp (about 65–68°F)
- 3.5–4 cups (420–480 g) powdered sugar, sifted
- 3–4 tablespoons heavy cream (or milk, but cream = silk)
- 1 tablespoon pure vanilla extract
- 1/2 teaspoon almond extract (optional but highly recommended)
- 1/4 teaspoon fine sea salt (balances sweetness)
- Gel food coloring of choice (optional)
- Sprinkles (optional, but like…obviously)
The Method – Instructions
- Start with butter at the right temp: Press it; it should yield slightly but not feel greasy.
Too cold = lumpy. Too warm = soupy.
- Cream the butter: Beat on medium for 1–2 minutes until smooth and slightly pale. You’re building a fluffy base.
- Add sugar in 3 parts: Sift first, then mix in 1 cup at a time on low until incorporated.
Scrape the bowl. Avoid sugar fog—your lungs will thank you.
- Add flavor + salt: Mix in vanilla, almond extract, and salt. Taste.
If it screams “sweet and flat,” you need that salt.
- Adjust consistency with cream: Add 1 tablespoon at a time, beating on medium until the frosting looks smooth and slightly glossy. For piping, keep it thicker; for spreading, go softer.
- Beat for 1–2 extra minutes: This adds air for a cloudlike finish. Stop before it looks bubbly; you want smooth swirls, not air holes.
- Color like a pro: Divide and tint with gel coloring.
Start with a tiny dot—gels are potent. Mix just until uniform to avoid micro-bubbles.
- Frost cooled cookies: Use an offset spatula for smooth tops or a piping bag with a round or star tip. If you want sprinkles to stick, add them immediately.
- Let it set: Leave frosted cookies at room temp 2–4 hours to get that soft crust.
Then you can stack with parchment between layers.
- Final check: If frosting sits out and crusts in the bowl, stir vigorously with a spoon to bring it back to life. A teaspoon of cream can help, too.
Preservation Guide
- Room temperature: Up to 2 days in an airtight container if your kitchen is cool (below 72°F). Keep out of direct sun or heat.
FYI: the sugar acts as a preservative.
- Refrigerator: Store frosting up to 1 week. Press plastic wrap directly on the surface, then lid. Bring to room temp and re-whip briefly before using.
- Freezer: Freeze up to 2 months.
Thaw overnight in the fridge, then bring to room temp and beat 30–60 seconds with a spoon or mixer to re-emulsify.
- On cookies: Frosted cookies keep 3–4 days at room temp in a tin or sealed container with parchment dividers. For longer, refrigerate up to 1 week.
Benefits of This Recipe
- Foolproof texture: The butter-to-sugar ratio keeps it stable and workable—no gritty surprises.
- Bakery-style flavor: Almond extract adds that “what is that?” note you taste in pro cookies.
- Customizable consistency: Cream adjusts the spread vs. pipe factor in seconds.
- Color without compromise: Gel dyes keep the texture intact and the colors saturated.
- Kid- and party-approved: Sweet, smooth, and stackable—transport without fear.
What Not to Do
- Don’t use melted butter: It’ll break the emulsion and leave you with greasy, sad frosting.
- Don’t skip sifting: Powdered sugar clumps are tiny wrecking balls for smoothness.
- Don’t over-thin: More liquid seems helpful…until your frosting slides off the cookie like it’s trying to escape.
- Don’t use liquid food coloring: It waters down the frosting and fades. Gel only, please.
- Don’t frost warm cookies: Heat melts butter.
You’ll get a transparent, sticky mess. Patience is the flex.
Alternatives
- No almond extract: Swap with more vanilla or try 1/4 teaspoon butter extract for a nostalgic bakery note.
- Dairy-free: Use vegan butter sticks and non-dairy milk (oat or soy). Add 1–2 teaspoons cornstarch if it’s too soft.
- Citrus twist: Use 1 teaspoon lemon zest and 1/2 teaspoon lemon extract for bright sugar-cookie vibes.
- Maple moment: Replace 1 tablespoon cream with real maple syrup and add a pinch of cinnamon.
- Glaze version (shiny): Mix 2 cups powdered sugar with 2–3 tablespoons milk, 1 teaspoon vanilla, and a touch of corn syrup for gloss.
It dries firmer than this butter-based frosting.
How do I fix frosting that’s too thick?
Add cream 1 teaspoon at a time and beat briefly. Go slow—over-thinning is way easier than fixing a runny mess.
My frosting is gritty. What happened?
Either the powdered sugar wasn’t sifted, or it’s a lower-quality brand with larger crystals.
Sift and beat an extra minute; a tablespoon of cream can help smooth it.
Can I make this ahead for a party?
Yes. Make up to 3 days ahead, refrigerate, then bring to room temp and re-whip. If coloring multiple shades, store each in its own container to avoid color bleed.
Will it crust so I can stack cookies?
It forms a soft crust after 2–4 hours, especially in low humidity.
Stack with parchment between layers. For firmer stacking, chill briefly to set, then store at room temp.
Can I use this on cakes or cupcakes?
Absolutely. It’s essentially American buttercream with a sugar-cookie flavor profile.
For cakes, thin slightly with cream for smoother spreads.
What if I only have salted butter?
Use it, but reduce or omit the added salt. Taste as you go. Salted butter brands vary wildly, so adjust IMO.
Is there a way to make it less sweet?
Add a squeeze of lemon juice or a pinch more salt.
Or replace 1–2 tablespoons of cream with full-fat sour cream to cut through the sweetness without ruining texture.
Can I pipe detailed designs?
Yes—aim for a thicker consistency. If the edges don’t hold, beat in more powdered sugar a tablespoon at a time until it behaves.
🍰 The Master Baker & Prep Kit
Baking is a science, and meal prep requires efficiency. If you want consistently flaky pie crusts, perfectly risen cakes, and healthy meals ready for the week, these are the 5 upgrade tools that take your execution to the next level.
⚖️ OXO Good Grips 11lb Food Scale
The secret to why bakery bread and cookies are always perfect while home batches vary wildly. Measuring by weight (grams) instead of volume (cups) guarantees precise hydration and flawlessly consistent results every single time you bake.
🧑🍳 KitchenAid Classic Stand Mixer
The undisputed holy grail of the kitchen. From aggressively kneading heavy pizza doughs to whipping meringues into stiff peaks, this powerful motor saves your arms from exhaustion and cuts your hands-on prep time in half.
🍪 Silpat Premium Silicone Baking Mats
Stop wasting money on rolls of parchment paper or agonizing over cookies permanently fused to your metal pans. These reusable, professional-grade silicone mats ensure completely even heat distribution and instantly release even the stickiest caramel.
🌪️ Braun MultiQuick Immersion Blender
The ultimate shortcut tool for creamy tomato soups, lump-free gravies, and rapid smoothies. Avoid the burns and mess of dangerously transferring boiling liquids in batches to a traditional blender by simply blending right inside your cooking pot.
🍱 Premium Glass Meal Prep Containers
If you want to bake and cook healthier, batch preparation is required. These durable glass containers transition safely from freezer to microwave, never absorb tomato sauce stains, and feature airtight seals to keep your hard work fresh all week.
In Conclusion
This sugar cookie frosting recipe nails the sweet spot: smooth, flavorful, easy to color, and sturdy enough to stack. It’s the kind of frosting that makes basic cookies look boutique and taste even better.
Keep the ingredients simple, nail the consistency with cream, and let the soft crust work its magic. Your cookies are about to get attention they absolutely didn’t ask for—but totally deserve.