🌶️ Better Than Takeout: Best Thai Chili Sauce Recipe
👩🍳 The Home Chef's Essential Kitchen
Consistently cooking incredible, healthy meals at home is so much easier when you aren't fighting with cheap tools. These are the 5 absolute powerhouse kitchen essentials that professional chefs and serious home cooks rely on every single day to get perfect results.
🍳 Lodge 10.25" Cast Iron Skillet
The single greatest value in all of cookware. It retains heat infinitely better than cheap non-stick pans, allowing you to get a restaurant-quality crust on steaks or perfect crispy edges on cornbread. With proper care, this $20 pan will literally outlive you.
🔪 Victorinox Fibrox Pro 8" Chef's Knife
A dull knife makes cooking a frustrating chore. This specific blade is the undisputed champion of the culinary world—it holds a terrifyingly sharp edge, features a comfortable non-slip grip, and performs identical to German knives that cost quadruple the price.
🌡️ ThermoPro Instant Read Thermometer
Never serve dry chicken or undercooked pork again. An instant-read thermometer is the secret difference between amateur cooks who 'guess' when protein is done, and professionals who know exactly when to pull meat off the heat for maximum juiciness.
🍲 Lodge Enameled Cast Iron Dutch Oven
The ultimate workhorse for soups, stews, braised short ribs, and baking crusty artisanal bread. The enameled interior provides incredible heat distribution for slow-cooking while eliminating the intense seasoning maintenance required by bare cast iron.
🥄 Bpa-Free Silicone Utensil Set
Throw away those melting plastic spatulas and bacteria-harboring wooden spoons. This pure silicone set is heat-resistant up to 600°F, won't scratch your expensive pans, and features seamless designs that make cleaning out thick sauces and batters effortless.
So you’re craving something tasty but too lazy to spend forever in the kitchen, huh? Same.
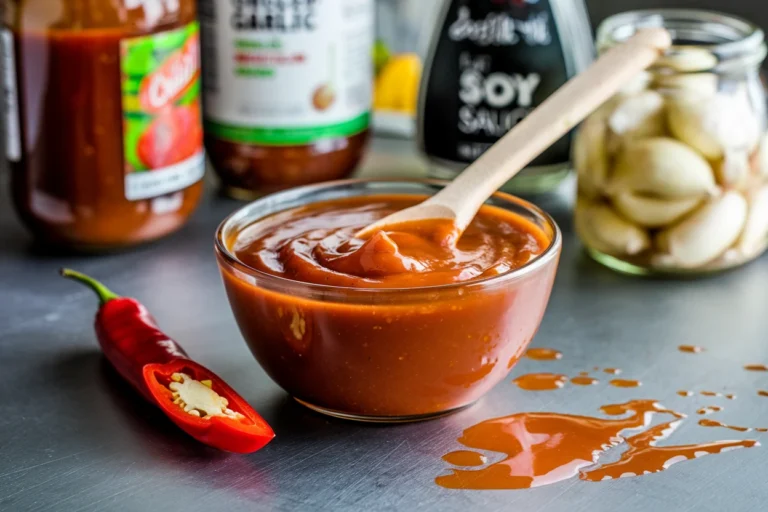
You’ve probably got that sticky, crusty bottle of neon-orange chili sauce sitting in the door of your fridge. It’s been there since 2019. It’s mostly corn syrup and sadness. Listen, I’m not judging—we’ve all been there—but you deserve better. You deserve a sauce that smacks your tastebuds awake, clears your sinuses, and makes a plain piece of cardboard taste like a Michelin-star meal.
Today, we are making a Thai Chili Sauce Recipe that is going to ruin store-bought condiments for you forever. It’s spicy, it’s sweet, it’s garlicky, and it’s surprisingly easy to make. Let’s get sticky.
Why This Recipe is Awesome
Look, I could tell you this sauce is “delightful” and “aromatic,” but let’s get real. The main reason this recipe is awesome is that it makes you look like a culinary genius with practically zero effort. It’s the ultimate “low effort, high reward” cooking project.
Here is why this specific version rocks:
- You Control the Burn: Store-bought sauces are usually designed for the masses, meaning they have the spice level of a bell pepper. Boring. When you make this at home, you are the captain of the heat. Want to cry? Add more Bird’s Eye chilies. Want to keep your tastebuds intact? Deseed those bad boys.
- No Weird Chemicals: Have you read the back of a commercial chili sauce bottle? It’s basically a science experiment. This recipe uses real garlic, real peppers, and ingredients you can actually pronounce.
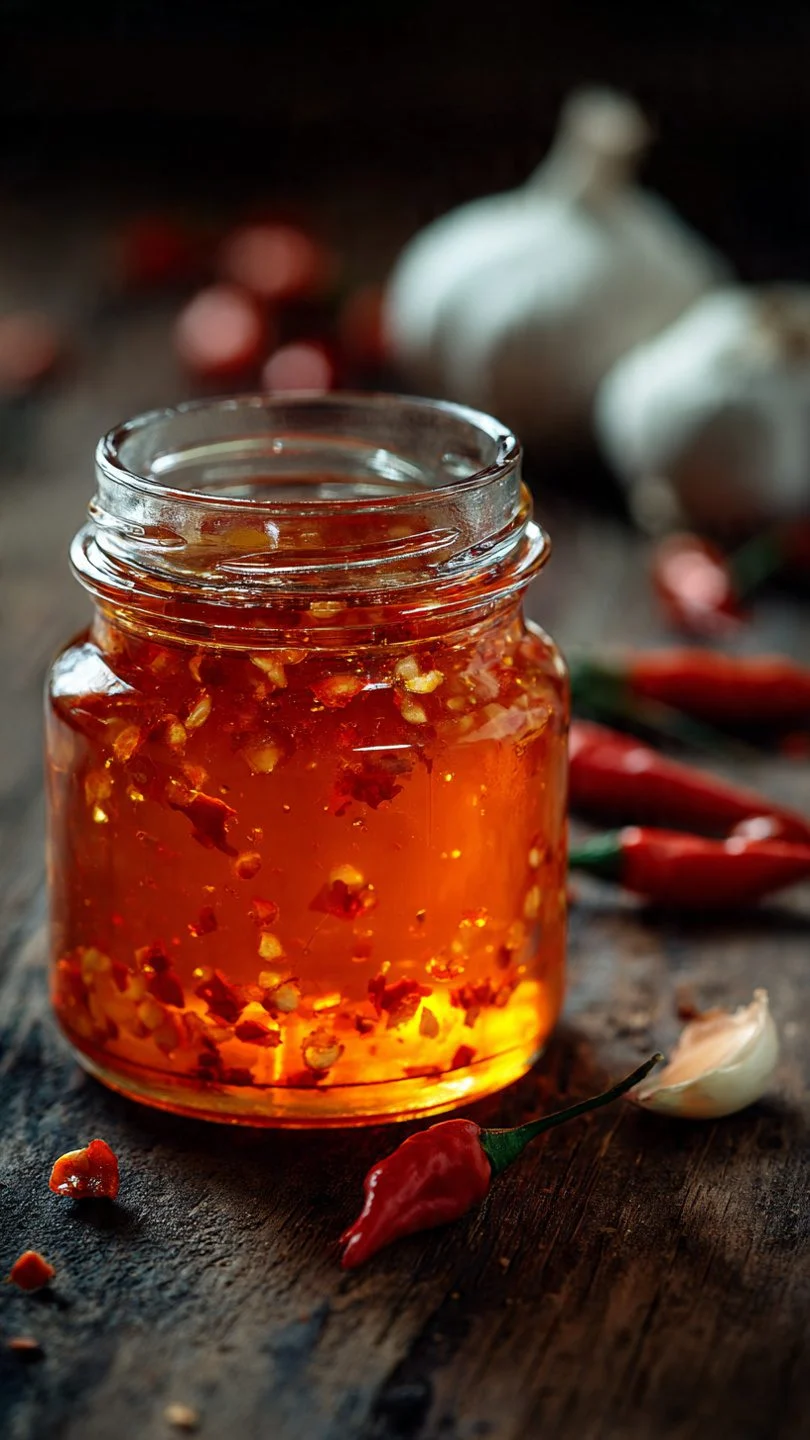
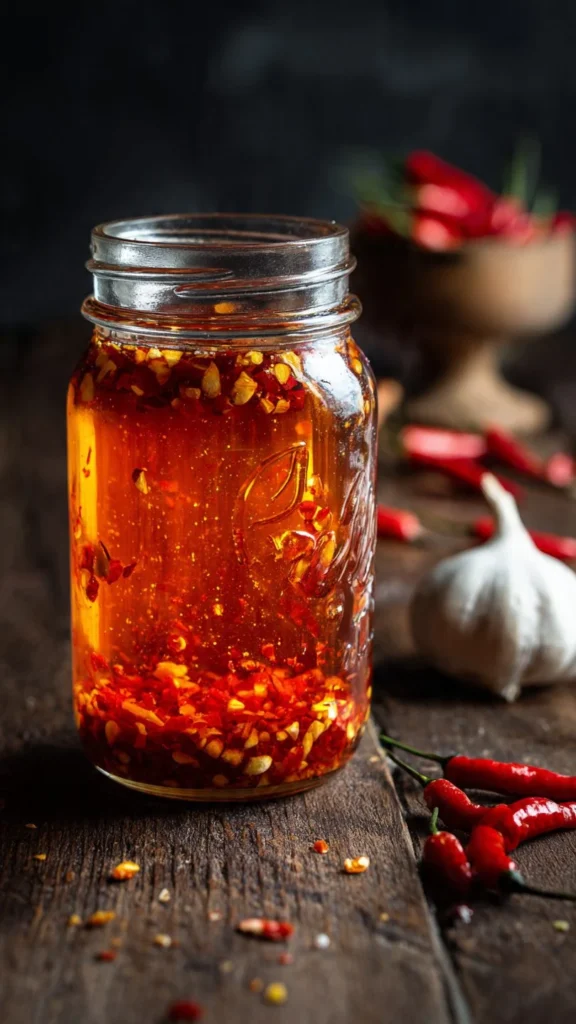
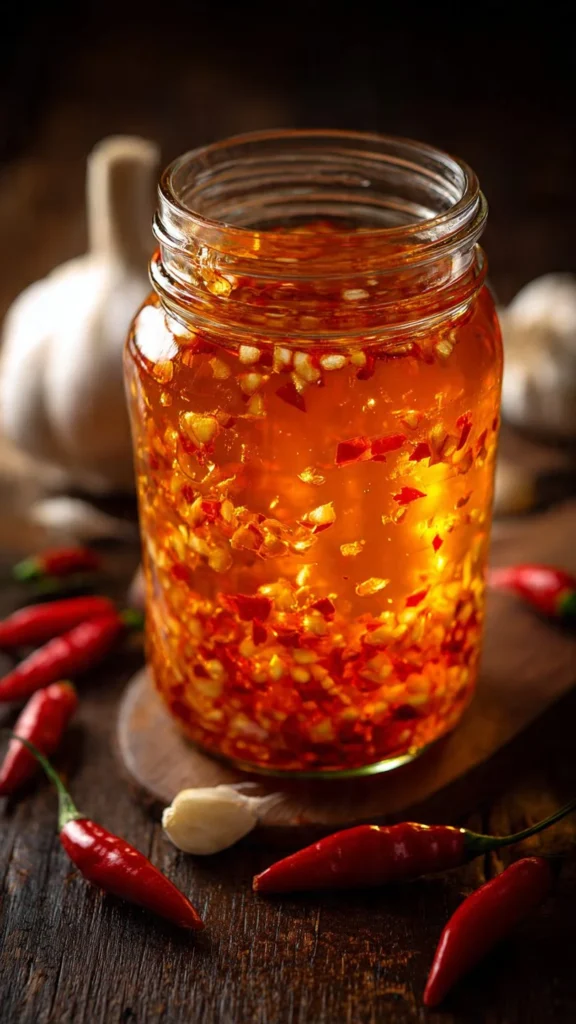
- The “Sticky” Science: We are going to nail the texture. We aren’t making flavored water here; we are making a glaze. We achieve this through a specific balance of sugar and a cornstarch slurry. This creates a suspension that allows the garlic and chili flakes to float beautifully rather than sinking to the bottom like stones.
- Versatility is King: This isn’t just for dipping egg rolls (though, obviously, do that). This sauce is a marinade for chicken, a glaze for salmon, a dressing for cucumber salad, and honestly, I’ve put it on pizza. Don’t knock it ’til you try it.
- It’s Cheap: Peppers, sugar, and vinegar cost pennies compared to the $6 premium bottle at the gourmet grocery store. You’re saving money and eating better.
Basically, it’s idiot-proof. Even if you get distracted scrolling TikTok while the pot simmers, you can probably salvage it.
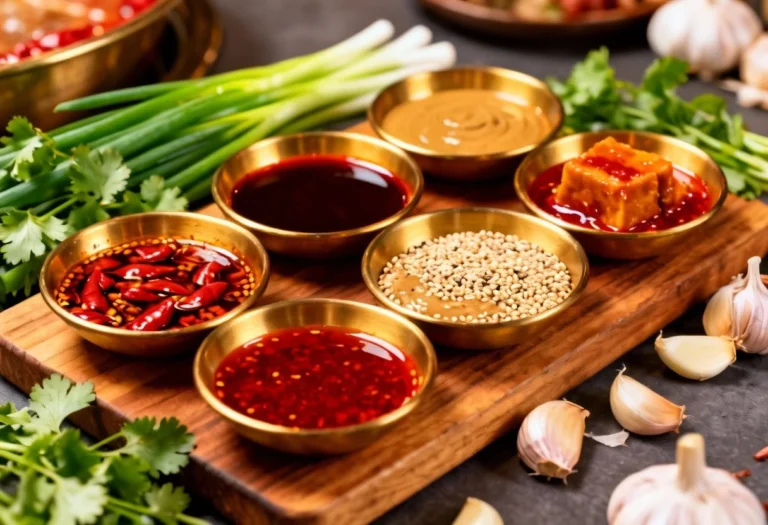
Ingredients You’ll Need
We are keeping it simple. No hunting for obscure roots in the dark corners of an import market.
- Fresh Red Chilies: You want a mix here. I use huge red jalapeños or Fresnos for the bright red color and body, and Thai Bird’s Eye Chilies for the actual kick.
- Note: If you can’t handle the heat, just use red bell pepper and pretend. I won’t tell anyone.
- Garlic: You need a lot. Like, a concerning amount of garlic. We aren’t doing “one clove.” We are doing an entire head. Vampires should fear this sauce.
- Rice Vinegar: This is crucial. Do not use distilled white vinegar unless you want your kitchen to smell like an Easter egg dying station. Rice vinegar is milder and sweeter.
- Sugar: White granulated sugar gives you that classic, glass-like transparency.
- Pro Tip: You can use a little palm sugar if you want to be fancy and add a caramel note, but plain white sugar works best for the color.
- Water: Just… water. From the tap. You know it, you love it.
- Fish Sauce: Do not skip this. This provides the umami (savory flavor). Without it, you’re just making spicy syrup. If you are vegan, use soy sauce or a vegan fish sauce substitute, but the funk of the fish sauce is the secret weapon.
- Salt: Just a pinch to balance the sweet.
- Cornstarch (or Tapioca Starch): This is our thickener. Without it, you have soup. With it, you have sauce.
Step-by-Step Instructions
Ready to feel like a chemist? Let’s brew this potion.
1. Prep Your Aromatics (The Chop Zone) First, wash your peppers. Cut the stems off. Now, you have a choice: chop everything by hand if you need to work out some aggression, or throw the garlic and peppers into a food processor. Pulse them until they are finely minced.
- Warning: Do not touch your eyes, nose, or any sensitive body parts after touching the chilies. Seriously. I learned this the hard way so you don’t have to.
2. The Dissolve Grab a medium saucepan. Combine the water, rice vinegar, sugar, salt, and fish sauce. Turn the heat to medium-high. You aren’t cooking anything yet; you’re just convincing the sugar to dissolve. Stir it casually.
- Sensory Check: The liquid should look cloudy at first, then turn clear as the sugar melts. It’ll smell distinctively vinegary—don’t inhale directly over the pot unless you want a sinus cleanse.
3. Add the Flavor Bombs Once the sugar is dissolved and the mixture is starting to bubble, dump in your minced garlic and chili mixture. Stir it in. Let this simmer on medium-low heat for about 5 to 10 minutes.
- Why? We are infusing the syrup. The garlic needs to soften so it’s not raw and biting, and the chilies need to release their capsaicin (the heat) into the liquid. The color will start to turn a vibrant, stunning red.
4. The Slurry (The Magic Trick) While the sauce simmers, grab a small bowl. Mix 2 tablespoons of cornstarch with 2 tablespoons of cold water. Mix it until it looks like milk.
- Science Tip: You cannot dump dry cornstarch into hot liquid. It will clump into gross little distinct balls of powder. You must make a cold water slurry first.
5. Thicken and Gloss Pour the slurry into the bubbling sauce while stirring constantly. Watch the magic happen. Within 30 seconds, the sauce will go from watery to thick and glossy. Let it boil for exactly one more minute to cook out the “floury” taste of the starch.
6. The Cool Down Turn off the heat. It might look a little thinner than you want right now, but relax. Sauces thicken as they cool. If you make it like glue now, it’ll be a brick later. Pour it into a clean glass jar and let it cool completely on the counter before putting a lid on it.
Common Mistakes to Avoid
Even though this is easy, things can go wrong. Here is how to avoid a kitchen disaster.
- The “Pepper Spray” Effect: If you boil the vinegar and chilies too aggressively on high heat, you are essentially creating tear gas in your kitchen. Keep the heat at a simmer, and maybe turn on the exhaust fan. Your roommates/pets/neighbors will thank you.
- The Cornstarch Clump: As mentioned, dumping dry powder into hot liquid is a rookie mistake. Don’t be a rookie. Make the slurry.
- The “Taste Test” Burn: Sugar syrup retains heat like molten lava. Do not stick your finger in the pot and lick it. You will burn your tongue off and taste nothing for a week. Dip a spoon, blow on it for a comically long time, then taste.
- Using Old Garlic: If your garlic has green sprouts coming out of it, it’s going to taste bitter. Use fresh, firm garlic. We want sweet, pungent garlic flavor, not bitter dusty flavor.
Alternatives & Substitutions
Cooking is jazz, baby. Improvise.
- Make it Vegan:
- Swap the fish sauce for a light soy sauce or tamari. It changes the color slightly (a bit darker), but the taste is still 90% there.
- Make it Keto/Sugar-Free:
- Can you do it? Yes. Should you? Eh. You can use Allulose or Erythritol. However, be warned that artificial sweeteners don’t thicken the same way sugar does, so you might need extra Xanthan gum or cornstarch to get the texture right. It also won’t have that shiny “gloss.”
- The “I Hate Spice” Version:
- Use purely Red Bell Peppers. You get the beautiful red confetti look and the garlic flavor without the fire. Great for kids or people with fragile palates.
- The “Nuclear Option”:
- If you are a heat-seeking missile, add a teaspoon of dried red chili flakes or cayenne powder in addition to the fresh chilies. Or, swap the Bird’s Eye chilies for Habaneros if you want a fruity, incredibly spicy Caribbean-Thai fusion.
FAQ (Frequently Asked Questions)
1. How long does this stuff last? Because of the high sugar and vinegar content (which are natural preservatives), it lasts quite a while. In the fridge, it’s good for about a month. But honestly, if it lasts that long, you aren’t using enough of it.
2. Can I use brown sugar? Technically, yes. But your sauce will look brown and muddy, not bright orange-red. It will also taste more like molasses. If you’re cool with that, go for it.
3. Why did my sauce turn into jelly in the fridge? Congratulations, you used too much cornstarch! Don’t panic. Just scoop out what you need and microwave it for 10 seconds, or stir in a teaspoon of warm water to loosen it up.
4. Can I can/jar this for long-term storage? This recipe isn’t formulated for water-bath canning (the pH levels might not be safe for shelf storage without refrigeration). Keep it in the fridge to avoid giving your family botulism. You’re welcome.
5. Is this the same as Sriracha? No! Sriracha is a fermented chili paste that is smooth and pureed. This is Nam Jim Gai—a sweet, dipping sauce with visible chunks of garlic and chili. They are cousins, but they aren’t twins.
6. Can I skip the fish sauce? I mean, you can, but why hurt your soul like that? Fish sauce provides the salty, savory backbone that balances the sugar. Without it, the sauce tastes “flat.”

Final Thoughts
There you have it. You have successfully navigated the treacherous waters of making your own condiments. You are now officially better than everyone who buys the bottle.
Pour this liquid gold into a mason jar, tie a ribbon on it, and give it as a gift—or hoard it all for yourself in the back of the fridge. I usually choose the latter. Whether you’re dipping crispy tofu, drizzling it over fried chicken, or just eating it with a spoon (no judgment), this Thai chili sauce recipe is going to be a staple in your rotation.
Now go impress someone—or yourself—with your new culinary skills. You’ve earned it!