The Only Vetkoek Recipe South Africa Won’t Stop Talking About (Crispy Outside, Cloud-Soft Inside)
👩🍳 The Home Chef's Essential Kitchen
Consistently cooking incredible, healthy meals at home is so much easier when you aren't fighting with cheap tools. These are the 5 absolute powerhouse kitchen essentials that professional chefs and serious home cooks rely on every single day to get perfect results.
🍳 Lodge 10.25" Cast Iron Skillet
The single greatest value in all of cookware. It retains heat infinitely better than cheap non-stick pans, allowing you to get a restaurant-quality crust on steaks or perfect crispy edges on cornbread. With proper care, this $20 pan will literally outlive you.
🔪 Victorinox Fibrox Pro 8" Chef's Knife
A dull knife makes cooking a frustrating chore. This specific blade is the undisputed champion of the culinary world—it holds a terrifyingly sharp edge, features a comfortable non-slip grip, and performs identical to German knives that cost quadruple the price.
🌡️ ThermoPro Instant Read Thermometer
Never serve dry chicken or undercooked pork again. An instant-read thermometer is the secret difference between amateur cooks who 'guess' when protein is done, and professionals who know exactly when to pull meat off the heat for maximum juiciness.
🍲 Lodge Enameled Cast Iron Dutch Oven
The ultimate workhorse for soups, stews, braised short ribs, and baking crusty artisanal bread. The enameled interior provides incredible heat distribution for slow-cooking while eliminating the intense seasoning maintenance required by bare cast iron.
🥄 Bpa-Free Silicone Utensil Set
Throw away those melting plastic spatulas and bacteria-harboring wooden spoons. This pure silicone set is heat-resistant up to 600°F, won't scratch your expensive pans, and features seamless designs that make cleaning out thick sauces and batters effortless.
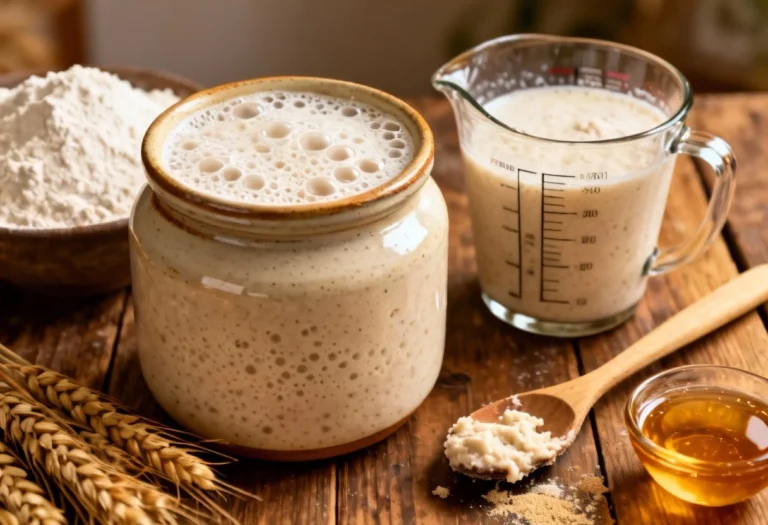
You can buy vetkoek on a Johannesburg street corner, at a school fundraiser, or from that auntie who cooks with “no measurements” and pure magic. But here’s the thing: you can make it at home—and make it better. Think: golden shells, whisper-crisp edges, and a pillow-fluffy interior begging for curry mince or jam.
If bread and doughnuts had a delicious South African baby, this would be it. Let’s get you frying like a seasoned vendor without burning the first batch (or your eyebrows).
What Makes This Recipe Awesome
- Perfect texture every time: A balanced dough that rises reliably and fries up with a crisp exterior and a soft, airy crumb.
- Simple pantry ingredients: Flour, yeast, sugar, salt, oil—nothing weird, nothing fancy.
- Flexible and forgiving: Whether you want mini vetkoek for snacks or giant ones for curry mince, this dough adapts.
- Works with any filling: Sweet, savory, or just a slick of butter and golden syrup—your call.
- Scalable: Double it for a family or halve it for a quick fix. The method still works.
Ingredients
- 4 cups (500 g) cake flour or all-purpose flour
- 2 tsp instant dry yeast
- 2 tbsp sugar
- 1 tsp fine salt
- 1½–2 cups (360–480 ml) warm water (about body temperature; not hot)
- 2 tbsp neutral oil (for the dough; can use canola or sunflower)
- Oil for deep-frying (enough to fill a pot 5–7 cm deep; sunflower or canola)
- Optional for extra softness: 2 tbsp milk powder or 2 tbsp melted butter
The Method – Instructions
- Mix the dry squad: In a large bowl, whisk together flour, yeast, sugar, and salt.
Keep salt and yeast from direct contact until mixed—yeast is alive, not invincible.
- Add the wet ingredients: Pour in 1½ cups warm water and the 2 tbsp oil. Stir with a wooden spoon until a shaggy dough forms. If dry, add more water 1 tbsp at a time.
- Knead to smooth: Tip onto a lightly oiled surface and knead 6–8 minutes until smooth and elastic.
The dough should be soft, slightly tacky, not sticky. Adjust with a dusting of flour if needed.
- First rise: Place dough in a lightly oiled bowl, cover, and let rise in a warm spot until doubled, 45–75 minutes depending on room temperature.
- Shape like a pro: Punch down gently. Divide into 10–12 equal pieces for standard vetkoek or 16–20 for mini.
Shape each into a ball, then flatten lightly into disks 1.5–2 cm thick.
- Rest the shapes: Place on a lightly floured tray, cover with a clean cloth, and rest 15–20 minutes. This relaxes gluten and prevents tough texture.
- Heat the oil: In a heavy pot, heat oil to 170–175°C (340–350°F). No thermometer?
Drop a small dough scrap—if it bubbles steadily and rises in 5–7 seconds, it’s ready.
- Fry in batches: Carefully lower 2–4 disks (don’t crowd). Fry 2–3 minutes per side until deep golden brown. They should puff nicely.
Adjust heat to maintain temperature.
- Drain and cool slightly: Remove with a slotted spoon onto a rack or paper towel. Don’t stack; steam makes them soggy.
- Serve hot: Split open and stuff with curry mince, cheese and chutney, polony and atchar, or jam and cream. Or just butter.
Always butter.
Keeping It Fresh
- Same-day is best: Vetkoek are peak-crave within 2–3 hours. That’s the sweet spot.
- Short-term storage: Cool completely and store in an airtight container at room temp for up to 24 hours. Reheat in a 170°C oven for 6–8 minutes to crisp up.
- Freeze like a champ: Freeze cooled vetkoek in a single layer, then bag for up to 2 months.
Reheat from frozen at 170°C for 10–12 minutes.
- Dough ahead: After the first rise, punch down, cover tightly, and refrigerate up to 24 hours. Shape, rest 30 minutes, then fry.
What’s Great About This
- South African soul food: It’s comfort, community, and nostalgia in one bite.
- Budget-friendly: Flour + yeast + oil = big flavor with small spend. Your wallet will high-five you.
- Party-ready: Mini vetkoek with fillings turns any gathering into a snack table people won’t leave.
- Kid-approved: Sweet versions disappear faster than you can say “save me one.”
Don’t Make These Errors
- Water too hot: Hot water kills yeast.
Aim for warm, not hot—about 38–43°C.
- Under-kneading: Weak gluten = dense results. Knead till smooth and stretchy.
- Cold oil : Oil below 165°C turns vetkoek into greasy sponges. Keep it steady at 170–175°C.
- Overcrowding the pot: Temperature drops, dough absorbs oil, sadness ensues.
Fry in small batches.
- Skipping the rest: Shaped dough needs that 15–20-minute rest for a soft interior. Don’t rush it.
- Cutting while boiling hot: Let them sit 2–3 minutes before splitting to keep the interior fluffy, not squashed.
Recipe Variations
- Classic curry mince: Fill with spiced beef or lamb mince with onions, curry powder, garlic, chutney, and peas. It’s the OG for a reason.
- Cheese and chutney: Sharp cheddar plus Mrs H.S.
Ball’s (or your fave). Sweet-salty perfection.
- Atchar and polony: Quick, tangy, and nostalgic. Add sliced tomato if you’re feeling extra.
- Sweet tooth mode: Dust warm vetkoek with cinnamon sugar, or fill with apricot jam and whipped cream.
- Herbed dough: Add 1 tsp garlic powder and 2 tsp dried mixed herbs to the flour for a savory twist.
- Air-fryer hack (FYI): Brush shaped dough with oil and air-fry at 180°C for 8–10 minutes, flipping once.
Not identical, but surprisingly good and less oily.
- Mini party bites: Make 30–35 tiny pieces, fry 1–2 minutes each side, and serve with a dipping trio: chakalaka, garlic mayo, and sweet chili.
FAQ
Can I use bread flour instead of cake or all-purpose flour?
Yes, but expect a chewier vetkoek. If using bread flour, add 1–2 tsp extra oil to the dough and knead well to keep the crumb tender.
My dough didn’t rise. What went wrong?
Likely culprit: dead yeast or too-hot water.
Check yeast freshness, keep water warm (not hot), and give it enough time in a draft-free warm spot.
How do I stop vetkoek from being oily?
Maintain oil at 170–175°C, don’t overcrowd, and drain on a rack. If they’re greasy, your oil was too cool or your dough was too wet.
Can I bake vetkoek instead of frying?
You can bake the dough at 190°C for 12–15 minutes, brushed with oil or egg wash. It won’t be traditional vetkoek, but it’ll still be tasty rolls.
How thick should I shape each piece?
Around 1.5–2 cm thick.
Too thin and they won’t puff properly; too thick and the center may undercook.
How do I know the inside is cooked?
They feel light when lifted and sound slightly hollow when tapped. If unsure, sacrifice one: split it open to check for a soft, cooked crumb (no raw streaks).
What oil is best for frying?
Use neutral, high-smoke-point oils like sunflower or canola. Avoid olive oil—it burns and adds flavor you don’t want here.
Can I sweeten the dough?
Yes.
Add an extra 1–2 tbsp sugar and 1 tsp vanilla to the dough for dessert-style vetkoek. Serve with cinnamon sugar or syrup.
Final Thoughts
Vetkoek isn’t just a snack—it’s a warm handshake from South Africa’s food culture. With a reliable dough, steady oil, and the right rest time, you can pull off bakery-level results at home, no secret auntie required.
Keep it simple, keep it hot, and keep a few aside for yourself before they vanish. One batch and you’ll understand why this vetkoek recipe South Africa keeps coming back to is worth memorizing.