The “White Bread Recipe Homemade” You’ll Brag About: Pillowy Loaves, Zero Fuss, All Flex
👩🍳 The Home Chef's Essential Kitchen
Consistently cooking incredible, healthy meals at home is so much easier when you aren't fighting with cheap tools. These are the 5 absolute powerhouse kitchen essentials that professional chefs and serious home cooks rely on every single day to get perfect results.
🍳 Lodge 10.25" Cast Iron Skillet
The single greatest value in all of cookware. It retains heat infinitely better than cheap non-stick pans, allowing you to get a restaurant-quality crust on steaks or perfect crispy edges on cornbread. With proper care, this $20 pan will literally outlive you.
🔪 Victorinox Fibrox Pro 8" Chef's Knife
A dull knife makes cooking a frustrating chore. This specific blade is the undisputed champion of the culinary world—it holds a terrifyingly sharp edge, features a comfortable non-slip grip, and performs identical to German knives that cost quadruple the price.
🌡️ ThermoPro Instant Read Thermometer
Never serve dry chicken or undercooked pork again. An instant-read thermometer is the secret difference between amateur cooks who 'guess' when protein is done, and professionals who know exactly when to pull meat off the heat for maximum juiciness.
🍲 Lodge Enameled Cast Iron Dutch Oven
The ultimate workhorse for soups, stews, braised short ribs, and baking crusty artisanal bread. The enameled interior provides incredible heat distribution for slow-cooking while eliminating the intense seasoning maintenance required by bare cast iron.
🥄 Bpa-Free Silicone Utensil Set
Throw away those melting plastic spatulas and bacteria-harboring wooden spoons. This pure silicone set is heat-resistant up to 600°F, won't scratch your expensive pans, and features seamless designs that make cleaning out thick sauces and batters effortless.
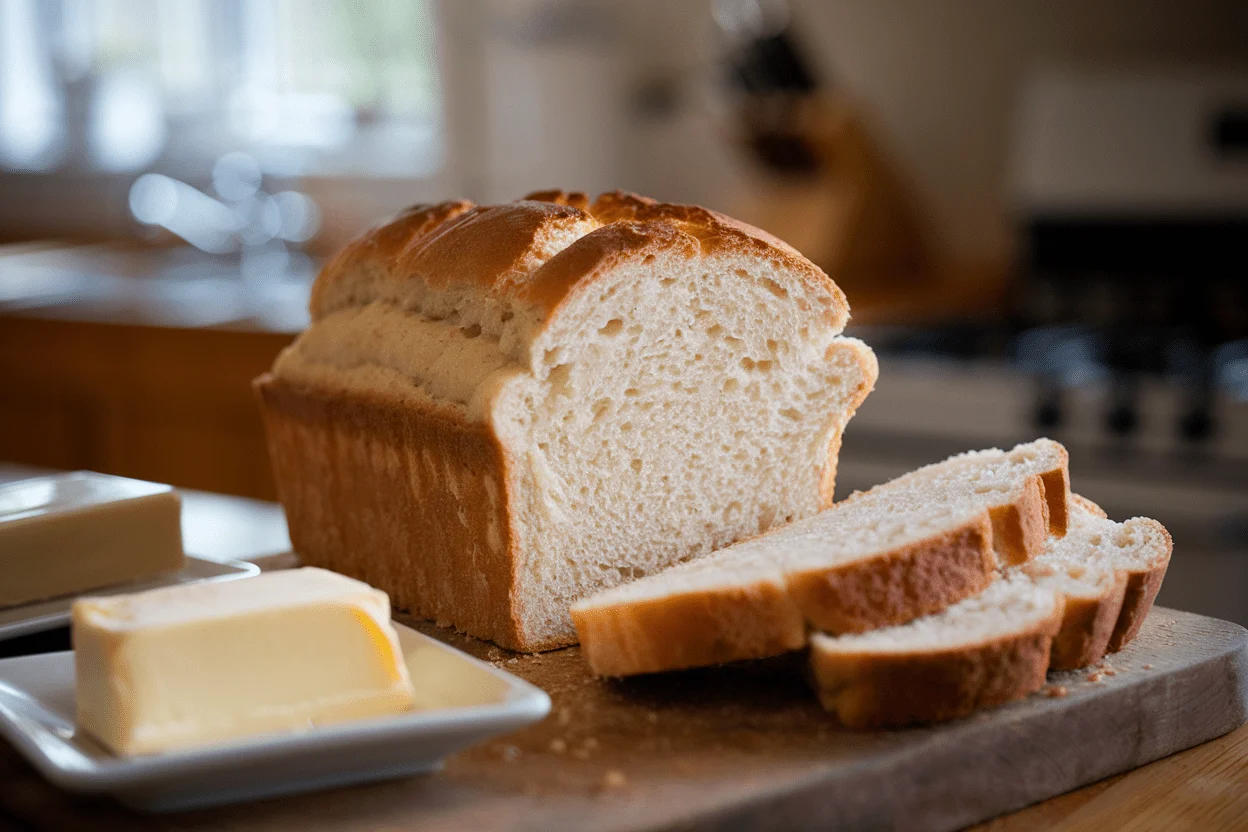
You know that smell in a bakery that makes your brain go “buy everything?” You can make that happen in your kitchen with a single loaf pan and 10 spare minutes of effort. This white bread recipe is the cheat code: minimal ingredients, big payoff, and a texture that makes store-bought taste like cardboard. The crust is tender, the crumb is cloud-soft, and the slices actually stand up to butter, jam, grilled cheese—whatever your carb-loving heart wants.
Bake it once and you’ll start judging every loaf on the shelf, harshly.
Why This Recipe Works
This formula balances hydration and fat for a soft, sliceable crumb that stays fresh. A touch of sugar feeds the yeast and boosts browning, while milk and butter tenderize like a charm. We use a two-rise method: one for flavor and structure, one for shaping and height.
The result? Even crumb, high rise, and a tight, sandwich-ready structure. Also, the method is deliberately forgiving, because life happens—and so does overproofing.
Shopping List – Ingredients
- 3 1/2 cups (420 g) bread flour (all-purpose works, but bread flour gives better chew and rise)
- 1 cup (240 ml) warm milk (around 105–110°F; whole milk preferred, but 2% is fine)
- 1/3 cup (80 ml) warm water
- 2 tablespoons (25 g) granulated sugar
- 2 1/4 teaspoons (7 g) instant yeast (or active dry; see notes in FAQs)
- 2 tablespoons (28 g) unsalted butter, softened
- 1 1/2 teaspoons (9 g) fine salt
- Optional: 1 tablespoon milk or melted butter for brushing the crust
The Method – Instructions
- Wake up the base: In a large bowl, combine warm milk, warm water, sugar, and yeast. If using instant yeast, proceed immediately.
If using active dry, wait 5–7 minutes for it to get foamy. No foam? Start over with fresh yeast.
- Build the dough: Add 3 cups of flour, salt, and butter.
Mix with a wooden spoon or dough hook until shaggy. Add remaining flour, a little at a time, until the dough is soft and slightly tacky, not sticky.
- Knead for structure: Knead 8–10 minutes by hand or 5–7 minutes on medium-low in a mixer. You’re looking for a smooth, elastic dough that passes the windowpane test (thin stretch without tearing).
- First rise: Form a ball, place in a lightly oiled bowl, cover, and let rise in a warm, draft-free spot until doubled, 60–90 minutes.
If your kitchen is chilly, give it more time. Patience > dense bread.
- Shape the loaf: Punch down gently to release gas. Turn onto a lightly floured surface.
Press into an 8×12-inch rectangle. Tightly roll from the short side into a log, pinching the seam closed. Tuck ends under for clean edges.
- Pan and proof: Place seam-side down in a greased 9×5-inch loaf pan.
Cover loosely and let rise until the dough crowns 1 inch above the rim, about 35–55 minutes. It should spring back slowly when poked.
- Preheat and prep: While the dough proofs, preheat oven to 350°F (175°C). Optional: brush the top lightly with milk for a softer crust.
- Bake: Bake 30–35 minutes until golden brown.
Internal temp should hit 195–200°F (90–93°C). If the top darkens too fast, tent loosely with foil at the 20-minute mark.
- Finish like a pro: Remove from the pan immediately. Brush the top with melted butter for a soft, glossy finish (optional, but highly recommended).
Cool at least 1 hour before slicing. Yes, waiting is hard. No, you may not skip.
How to Store
- Room temperature: Wrap in a clean tea towel or store in a bread box for up to 3 days.
Avoid the fridge—it dries bread out, IMO.
- Freezer: Slice, then freeze in a zip bag up to 2 months. Pull slices and toast straight from frozen. Clutch move for busy mornings.
- Refresh: If it loses perk, warm slices in a 300°F oven for 5–7 minutes.
It’ll taste fresh-baked again, promise.
Nutritional Perks
White bread won’t replace your salad, but this homemade version beats store-bought on additives and flavor. You control the salt, sugar, and fat, and there are no preservatives with names you can’t pronounce. Using milk adds a touch of protein and calcium, and the shorter ingredient list is a win for clean eating.
Serve with protein-rich fillings and you’ve got a balanced bite. Moderation? Sure.
Enjoyment? Mandatory.
Don’t Make These Errors
- Overheating the liquid: Milk hotter than 120°F will bully your yeast into retirement. Warm, not hot.
- Under-kneading: Weak gluten equals crumbly slices.
Knead until smooth and stretchy.
- Proofing to oblivion: If the dough collapses when poked, it’s overproofed. Keep an eye on volume, not the clock.
- Cutting too soon: Slicing hot bread squishes the crumb and releases steam. Cool first.
Then destroy it with butter.
- Flour dumping: Add flour gradually. A stiff dough makes a dense loaf. Slight tackiness is your friend.
Alternatives
- All-purpose flour: Swap 1:1 for bread flour.
Expect a slightly softer rise and more tender crumb.
- Dairy-free: Use warm water or unsweetened almond/soy milk, and replace butter with neutral oil (2 tablespoons). Crust will be slightly thinner.
- Honey loaf: Replace sugar with 2 tablespoons honey for gentle sweetness and extra browning.
- Half whole-wheat: Use 50% whole-wheat flour. Add 1–2 tablespoons extra water as needed and extend the first rise by 15 minutes.
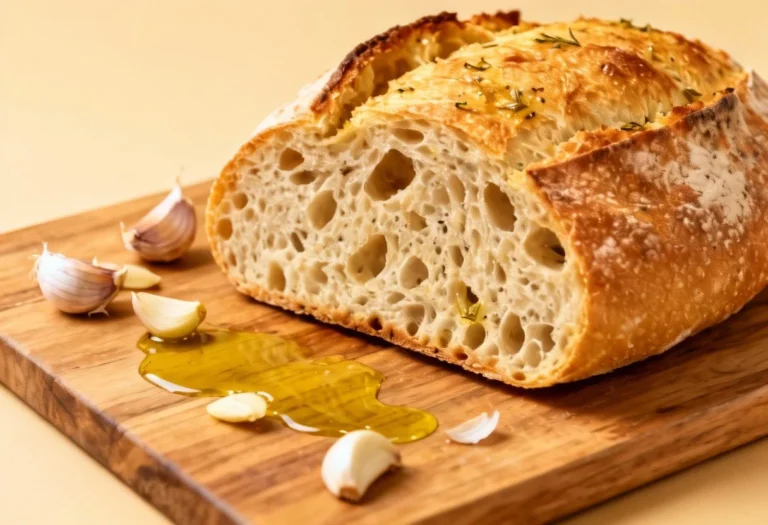
- Garlic-herb swirl: Before rolling, brush with melted butter and sprinkle garlic powder and dried herbs.
Roll, proof, bake. Hello, epic toast.
- Cinnamon sugar variation: Brush dough with butter, sprinkle cinnamon-sugar, roll tight. Dessert-ish, and totally legal.
FAQ
Can I use active dry yeast instead of instant?
Yes.
Bloom it in the warm milk, water, and sugar for 5–7 minutes until foamy before adding flour. The rest is the same, though proof times may run slightly longer.
How do I know I’ve kneaded enough?
The dough should feel smooth, elastic, and slightly tacky. If you can stretch a small piece thin enough to see light through it without tearing (windowpane), you’re good.
Why did my loaf sink in the middle?
Usually from overproofing or underbaking.
Next time, proof until it rises about 1 inch above the pan and gently springs back. Also bake to 195–200°F internal temp.
Can I make this without a stand mixer?
Absolutely. A wooden spoon and your hands work great.
It’s 8–10 minutes of kneading—consider it your arm day. FYI, slightly tacky dough is normal.
What loaf pan size is best?
A standard 9×5-inch pan gives a tall, sandwich-friendly loaf. An 8.5×4.5-inch pan will produce a higher dome and may need 2–3 extra minutes of bake time.
How do I get a softer crust?
Brush the hot loaf with melted butter right after baking, and store wrapped once fully cool.
Using milk (not water) also keeps the crust tender.
Can I cold-proof the dough overnight?
Yes. After the first knead, let it rise 20–30 minutes at room temp, then refrigerate covered overnight. Shape cold the next day, proof until puffy, and bake.
Is this good for toast and sandwiches?
It’s the MVP of both.
The crumb is tight enough for peanut butter and sturdy enough for grilled cheese. Toasts beautifully without crumbling.
Final Thoughts
This white bread recipe homemade hits the sweet spot between bakery-level quality and weeknight simplicity. The ingredients are basic, the method is straightforward, and the payoff is ridiculous.
Make one loaf, then make two—future you will thank present you every breakfast. And when friends ask for your “secret,” just smile and say, “Warm milk, a little patience, and a lot of butter.”