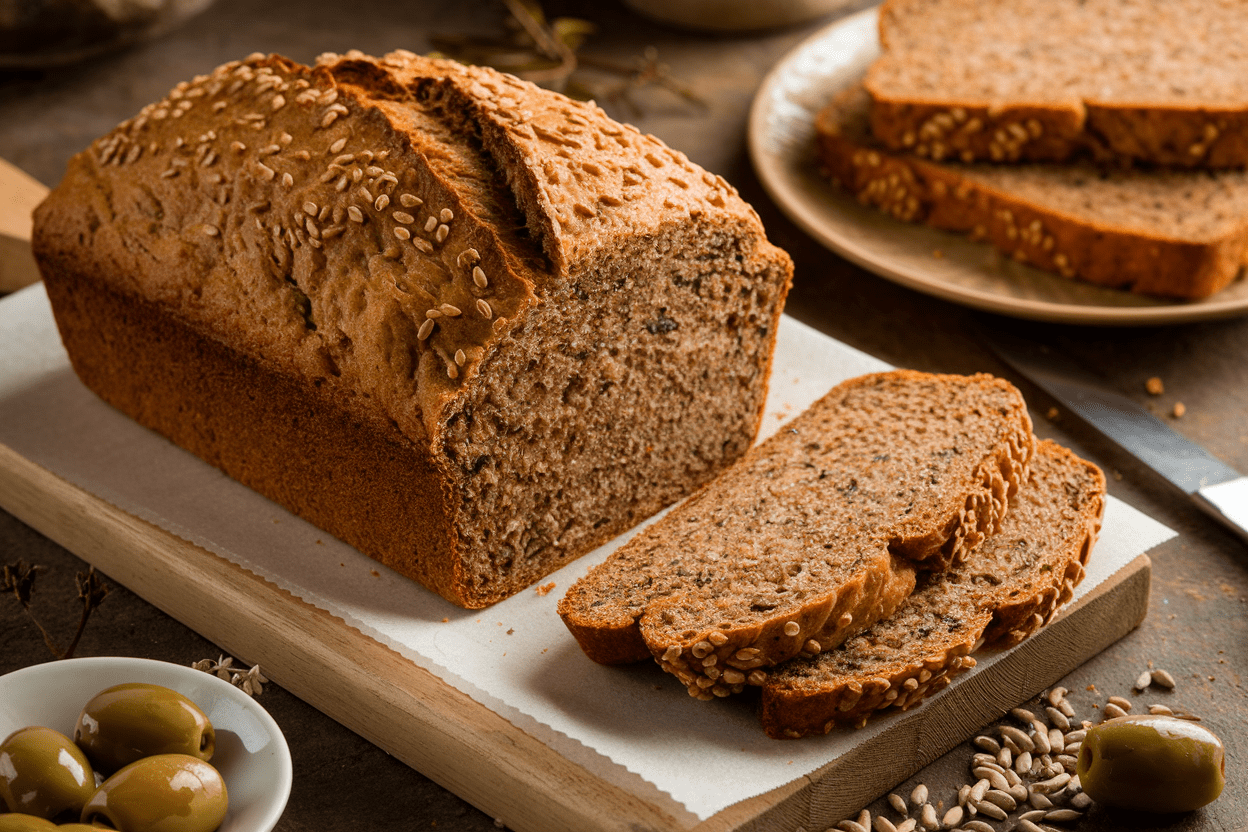
This Whole Grain Bread Recipe Will Ruin Store-Bought Loaves Forever (In the Best Way)
You don’t need a bakery to get bakery-level bread—just a bowl, your hands, and the guts to try. This whole grain bread recipe gives you a tall, chewy loaf with a nutty flavor and that “I could sell this” aroma. No gimmicks, no fancy machines, just a few pro moves that make the crust sing and the crumb soft.
Want toast that actually keeps you full till lunch? You’re home. And yes, it’s easy enough to pull off on a weeknight if you start smart.
The Secret Behind This Recipe
The magic is in two things: hydration and time.
Whole grains are thirsty, so we give them enough water to soften the bran and unlock flavor. Then we use a short autolyse—resting flour and water before kneading—which jumpstarts gluten development and makes the dough easier to handle. We also blend whole wheat with bread flour for structure, then boost rise with a touch of honey and oil.
A long, steady proof builds complexity without sourness. Finally, we bake hot with steam for a crisp crust and lofty oven spring. Simple, strategic, unstoppable.
What You’ll Need (Ingredients)
- 2 cups (260 g) whole wheat flour (preferably white whole wheat for milder flavor)
- 1 3/4 cups (230 g) bread flour (or all-purpose in a pinch)
- 1 3/4 cups (420 ml) warm water (about 100–105°F / 38–41°C)
- 2 1/4 tsp (7 g) instant yeast (or active dry, see notes)
- 2 tbsp (30 g) honey (or maple syrup)
- 2 tbsp (25 g) olive oil (or neutral oil, melted butter works too)
- 1 3/4 tsp (10 g) fine sea salt
- 2 tbsp (14 g) ground flaxseed (optional, for fiber and structure)
- 2 tbsp (15 g) wheat germ or oat bran (optional, for nuttiness)
- 1–2 tbsp mixed seeds (sunflower, sesame, pumpkin) for topping, optional
Instructions
- Autolyse (the easy head start): In a large bowl, mix the whole wheat flour, bread flour, and warm water until no dry bits remain.
It should look shaggy and sticky. Cover and rest 25–30 minutes. This softens the bran and lets gluten begin forming with basically zero effort.
- Add the good stuff: Sprinkle yeast, honey, oil, and salt over the dough.
Add flaxseed and wheat germ if using. Mix with a damp hand or a dough whisk until incorporated; the dough will be tacky but cohesive.
- Knead or fold: Knead on a lightly oiled surface for 6–8 minutes until smooth and elastic, or do 3 sets of stretch-and-folds in the bowl every 10 minutes. Aim for a soft dough that still holds shape.
If it’s soupy, add 1–2 tbsp flour; if tight, add 1–2 tsp water.
- First rise: Place dough in a lightly oiled bowl, cover, and proof 60–75 minutes at warm room temp (75–78°F / 24–26°C) until roughly doubled. If your kitchen is cool, give it 90 minutes. Don’t obsess over the clock—watch volume and feel.
- Pre-shape and rest: Turn dough onto a lightly floured surface.
Gently pat into a rectangle, then roll it into a loose log. Cover and rest 10 minutes to relax the gluten. This makes final shaping way easier.
- Final shape: Press the log gently into a rectangle again.
Tightly roll from the short side, pinching the seam. Tuck the ends under. Place seam-side down into a greased 8.5×4.5-inch loaf pan or a 9×5 for a lower, wider loaf.
- Second rise: Cover and proof 35–55 minutes until the dough crowns about 1 inch over the rim.
It should feel puffy and spring back slowly when poked. If it deflates, you went too far—still edible, just less tall.
- Prep the oven: While the dough proofs, preheat to 425°F (220°C). Place a metal pan on the lower rack for steam.
Optionally brush the loaf with water and sprinkle seeds on top.
- Bake with steam: Put the loaf in, carefully pour 1 cup hot water into the preheated pan for steam, and close the door fast. Bake 10 minutes at 425°F, then reduce to 375°F (190°C) and bake another 22–28 minutes. The top should be deep golden-brown.
- Check doneness: Internal temp should be 200–205°F (93–96°C).
If you don’t have a thermometer, tap the bottom: it should sound hollow. If pale or soft, give it 5 more minutes.
- Cool like you mean it: Remove from the pan and cool on a rack at least 1 hour before slicing. This sets the crumb.
Cutting early = gummy sadness. Resist.
Storage Instructions
- Room temp: Store the fully cooled loaf in a bread box or wrapped in a clean towel for up to 3 days. Avoid the fridge—it dries bread out, FYI.
- Freezer: Slice, then freeze in a zip bag with air pressed out for up to 2 months.
Toast straight from frozen.
- Refresh: Day-old loaf feeling tired? Warm slices in a 300°F (150°C) oven for 6–8 minutes to revive the crust.
Nutritional Perks
- High fiber, real satiety: Whole grains and flax keep you full longer and support gut health. No mid-morning crash.
- Steadier energy: The complex carbs and added seeds slow digestion for a smoother glucose response.
- Better fats + micros: Olive oil, wheat germ, and seeds add vitamin E, magnesium, and healthy fats.
Small ingredients, big dividends.
- Cleaner label: No preservatives, conditioners, or unpronounceables. Just food being food.
What Not to Do
- Don’t skip the rest time (autolyse): It makes the dough more manageable and the crumb softer. Two birds, one rest.
- Don’t drown the dough in flour: Sticky is okay.
Tight dough equals dense loaf. Oil your hands instead.
- Don’t rush proofing: Under-proofed dough will tear and blow out. Over-proofed will collapse.
Aim for puffy, not bloated.
- Don’t slice hot: You’ll compress the crumb and trap moisture. Patience tastes better.
- Don’t bake dry: Skipping steam can stunt oven spring and dull the crust. A little steam = big glow-up.
Different Ways to Make This
- Seeded powerhouse: Add 1/2 cup mixed seeds to the dough (sunflower, pumpkin, chia).
Soak chia first in 2 tbsp water.
- 100% whole grain: Use all whole wheat flour, increase water by 2–4 tbsp, and extend autolyse to 45 minutes. Expect a denser, heartier crumb.
- Overnight cold rise: After kneading, refrigerate the covered dough 8–18 hours. Shape cold, proof at room temp, bake.
Flavor goes next-level.
- Sweet breakfast version: Add 1/2 cup raisins and 1 tsp cinnamon. Swap 1 tbsp honey for 1 tbsp brown sugar. Great with butter—obviously.
- Sandwich-soft: Replace olive oil with 2 tbsp melted butter and brush the top with milk before baking for a tender crust.
- Dutch oven route: Shape as a round, proof in a bowl, then bake in a preheated Dutch oven at 450°F covered 20 minutes, uncovered 15–20.
FAQ
Can I use active dry yeast instead of instant?
Yes.
Use the same amount, but dissolve it in the warm water with the honey first and let it sit 5–10 minutes until foamy before mixing. Then proceed as written.
Why is my dough so sticky?
Whole grains vary in absorption, and higher hydration is normal here. Lightly oil your hands and counter instead of kneading in lots of flour.
If it’s truly unmanageable, add 1 tablespoon flour at a time.
How do I know when proofing is done?
The dough should be visibly puffy and pass the finger dent test: a gentle poke should spring back slowly and leave a slight indent. If it snaps back fast, keep going; if it collapses, it’s over-proofed.
Can I make this vegan?
Absolutely. Use maple syrup instead of honey and olive oil as listed.
Everything else is already plant-based.
What if I don’t have a loaf pan?
Shape it as a boule and bake on a preheated sheet or stone at 425°F with steam for the first 10 minutes. Or use a Dutch oven for best oven spring.
How do I get a softer crust?
Brush the hot loaf lightly with melted butter or cover with a towel while cooling. Reducing the final bake time by a few minutes also helps, but ensure it hits 200°F inside.
Can I add sourdough starter?
Yes—swap 1/2 cup water and 3/4 cup flour for 1 cup active starter and reduce yeast to 1 teaspoon.
Flavor gets deeper, and rise time extends 30–60 minutes.
Is white whole wheat different from regular whole wheat?
White whole wheat comes from a lighter-colored wheat variety with a milder flavor but the same nutrition. It makes softer whole grain loaves. Win-win, IMO.
My Take
This is the loaf I bake when I want maximum payoff with minimal drama.
The autolyse plus a warm, steady proof transforms whole grains from “healthy but heavy” into “wow, is this artisanal?” It’s practical, affordable, and ridiculously versatile—toast, sandwiches, croutons, all covered. Make it once, tweak it to your vibe, and you’ll wonder why you ever paid $7 for a meh bakery loaf.