Wilton Royal Icing Recipe: Achieve Icing Perfection!
Royal icing is the cornerstone of beautiful, professionally decorated cookies and cakes. Its smooth, hard finish makes it ideal for intricate designs, delicate details, and lasting beauty. This Wilton Royal Icing recipe is a tried-and-true method, known for its consistent results and ease of use. Whether you’re a seasoned decorator or just starting out, this recipe will empower you to create stunning edible art. Say goodbye to runny icing and hello to perfectly piped masterpieces!
Why This Recipe Works
This recipe relies on a few key principles to ensure its success:
- Meringue Powder: Wilton’s Meringue Powder is the secret weapon. It provides a stable protein structure, guaranteeing a strong, hard-drying icing. Unlike raw egg whites, meringue powder eliminates the risk of salmonella and offers consistent results every time.
- Precise Ratios: The balance between meringue powder, water, and powdered sugar is crucial. Too much water, and the icing will be too thin; too little, and it will be too stiff. This recipe provides the ideal proportions for optimal consistency.
- Proper Mixing: The mixing process is just as important as the ingredients. Beating the icing at the right speed and for the right duration ensures that the meringue powder is fully incorporated and that the icing achieves the desired stiffness.
- Adjustable Consistency: This recipe offers a base consistency, allowing you to easily adjust it for different decorating techniques, such as outlining, flooding, and creating intricate details.
Ingredients
- 5 tablespoons Wilton Meringue Powder
- 5 tablespoons warm water
- 4 cups (approximately 1 pound) powdered sugar, sifted
- 1 teaspoon clear vanilla extract (optional, for flavor)
- Gel food coloring (optional, for coloring)
Instructions
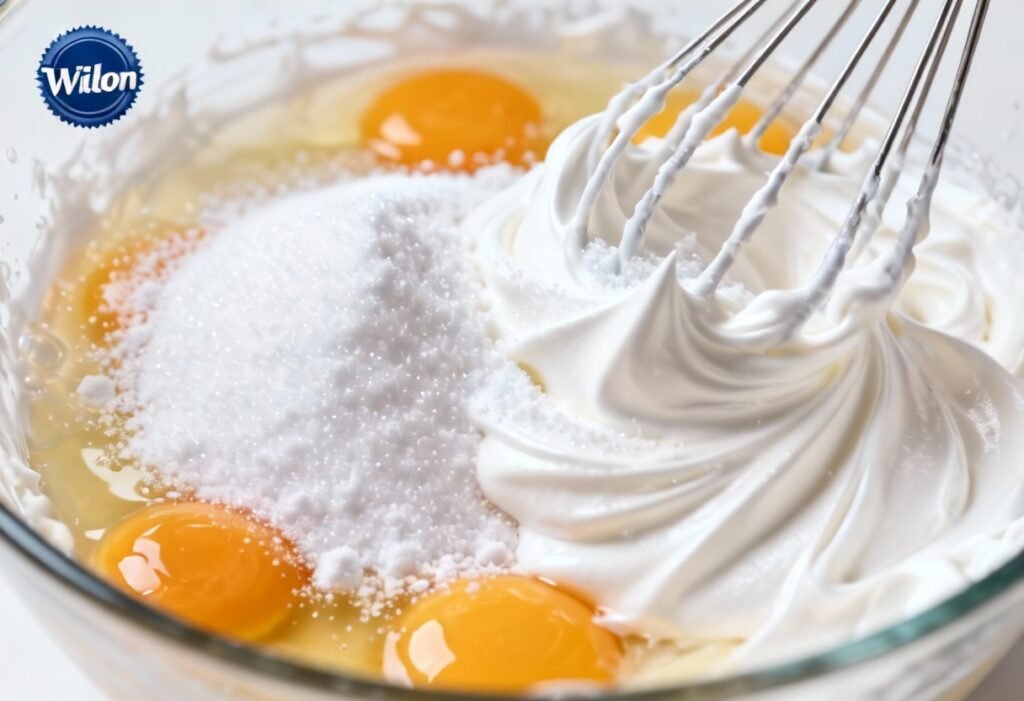
- Combine Meringue Powder and Water: In the bowl of a stand mixer fitted with the whisk attachment (or in a large bowl if using a hand mixer), combine the meringue powder and warm water. Whisk on medium-low speed until frothy, about 1 minute.
- Add Powdered Sugar: Gradually add the sifted powdered sugar, one cup at a time, mixing on low speed until fully incorporated after each addition. Sifting the powdered sugar is vital to prevent lumps in your finished icing.
- Beat to Stiff Peaks: Increase the mixer speed to medium-high and beat for 5-7 minutes, or until the icing forms stiff, glossy peaks. The icing should hold its shape well when the whisk is lifted.
- Add Flavoring (Optional): If using, add the clear vanilla extract and mix on low speed until just combined. Clear vanilla extract is recommended to avoid tinting the icing.
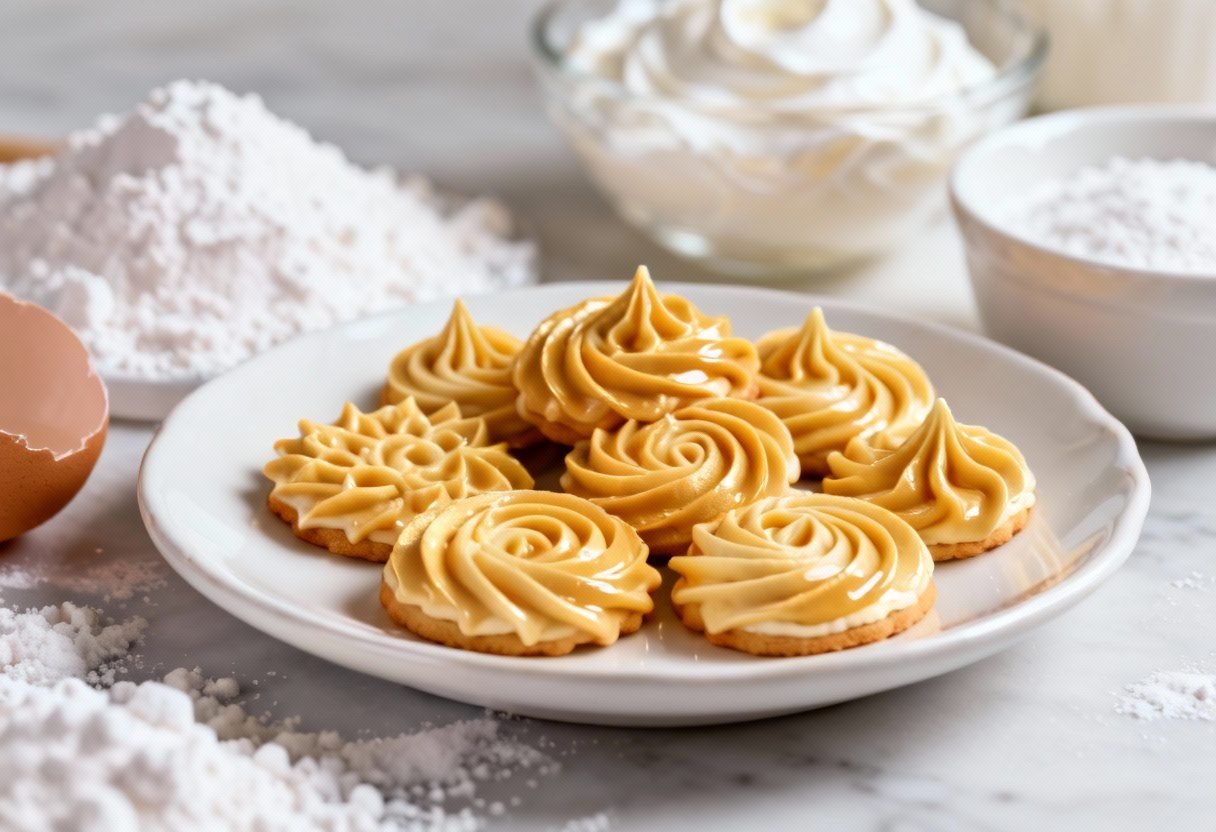
- Adjust Consistency: This is where you customize the icing for your specific decorating needs. The base recipe creates a medium consistency, suitable for outlining.
- For Outlining: The icing should hold a stiff peak and not spread quickly. This consistency is ideal for creating borders and sharp details.
- For Flooding: Add water, a teaspoon at a time, mixing well after each addition, until the icing reaches a “15-second flood” consistency. This means that if you drop a spoonful of icing back into the bowl, it should take approximately 15 seconds for the surface to smooth over.
- For Detailed Work: Use the base consistency or slightly stiffer for intricate designs.
- Color the Icing (Optional): Divide the icing into separate bowls if you want to make multiple colors. Add gel food coloring, one drop at a time, mixing well after each addition, until you achieve the desired shade. Gel food coloring is preferred over liquid food coloring because it is more concentrated and won’t change the consistency of the icing as much.
- Keep Covered: Royal icing dries out quickly, so it’s essential to keep it covered at all times. When not in use, cover the bowl with a damp paper towel and then plastic wrap, pressing the plastic wrap directly onto the surface of the icing to prevent a crust from forming. Also, cover your piping bags with a damp cloth when not in use.
Tips for Success
- Use Sifted Powdered Sugar: This is crucial to prevent lumps in your icing.
- Use Clear Vanilla Extract: Regular vanilla extract can slightly tint the icing, so clear vanilla is recommended for pure white icing.
- Gel Food Coloring is Best: Gel food coloring is more concentrated and won’t affect the consistency of the icing as much as liquid food coloring.
- Adjust Consistency Carefully: Add water or powdered sugar in small increments to achieve the desired consistency. It’s easier to thin icing than to thicken it.
- Prevent Drying: Keep the icing covered at all times to prevent it from drying out and forming a crust.
- Practice Piping: Before decorating your cookies or cakes, practice piping on parchment paper to get a feel for the icing consistency and your piping techniques.
- Troubleshooting:
- Icing too thick: Add water, a teaspoon at a time, until you reach the desired consistency.
- Icing too thin: Add sifted powdered sugar, a tablespoon at a time, until you reach the desired consistency.
- Icing has air bubbles: Gently tap the piping bag on the counter to release air bubbles. You can also use a scribe tool or toothpick to pop any bubbles on the surface of the iced cookies.
Storage Instructions
Royal icing can be stored in an airtight container at room temperature for up to 2 weeks. Before using, remix the icing to restore its smooth consistency. If the icing has become too thick, add a few drops of water and remix. If the icing has separated, remix thoroughly until it is smooth again.

FAQ
- Can I use raw egg whites instead of meringue powder? While it’s possible, using meringue powder is highly recommended for safety and consistency. Raw egg whites carry the risk of salmonella, and the consistency can be unpredictable.
- Can I freeze royal icing? Yes, royal icing can be frozen for up to 3 months. Thaw it completely at room temperature and remix before using. You may need to add a small amount of water to restore the desired consistency.
- Why is my icing cracking? Cracking can be caused by several factors, including over-baking the cookies, icing that is too thick, or drying the cookies in a dry environment. Make sure your cookies are not over-baked, adjust the icing consistency as needed, and consider using a humidifier in the room while the icing dries.
- Why is my icing not drying hard? This is usually caused by too much liquid in the icing. Make sure you are using the correct ratio of ingredients and that you have beaten the icing for the recommended time.
- Can I use this icing for gingerbread houses? Yes, this icing is excellent for gingerbread houses! Its strong, hard-drying properties make it perfect for holding the house together. Use a thicker consistency for assembling the house and a thinner consistency for decorating.
Conclusion
With this Wilton Royal Icing recipe, you’re well on your way to creating beautiful and impressive decorated treats. Remember to follow the instructions carefully, adjust the consistency to your needs, and practice your piping techniques. Enjoy the process and the delicious results! Happy decorating!