Mile High Pound Cake Recipe: The Sky-High Showstopper Your Oven’s Been Begging For
👩🍳 The Home Chef's Essential Kitchen
Consistently cooking incredible, healthy meals at home is so much easier when you aren't fighting with cheap tools. These are the 5 absolute powerhouse kitchen essentials that professional chefs and serious home cooks rely on every single day to get perfect results.
🍳 Lodge 10.25" Cast Iron Skillet
The single greatest value in all of cookware. It retains heat infinitely better than cheap non-stick pans, allowing you to get a restaurant-quality crust on steaks or perfect crispy edges on cornbread. With proper care, this $20 pan will literally outlive you.
🔪 Victorinox Fibrox Pro 8" Chef's Knife
A dull knife makes cooking a frustrating chore. This specific blade is the undisputed champion of the culinary world—it holds a terrifyingly sharp edge, features a comfortable non-slip grip, and performs identical to German knives that cost quadruple the price.
🌡️ ThermoPro Instant Read Thermometer
Never serve dry chicken or undercooked pork again. An instant-read thermometer is the secret difference between amateur cooks who 'guess' when protein is done, and professionals who know exactly when to pull meat off the heat for maximum juiciness.
🍲 Lodge Enameled Cast Iron Dutch Oven
The ultimate workhorse for soups, stews, braised short ribs, and baking crusty artisanal bread. The enameled interior provides incredible heat distribution for slow-cooking while eliminating the intense seasoning maintenance required by bare cast iron.
🥄 Bpa-Free Silicone Utensil Set
Throw away those melting plastic spatulas and bacteria-harboring wooden spoons. This pure silicone set is heat-resistant up to 600°F, won't scratch your expensive pans, and features seamless designs that make cleaning out thick sauces and batters effortless.
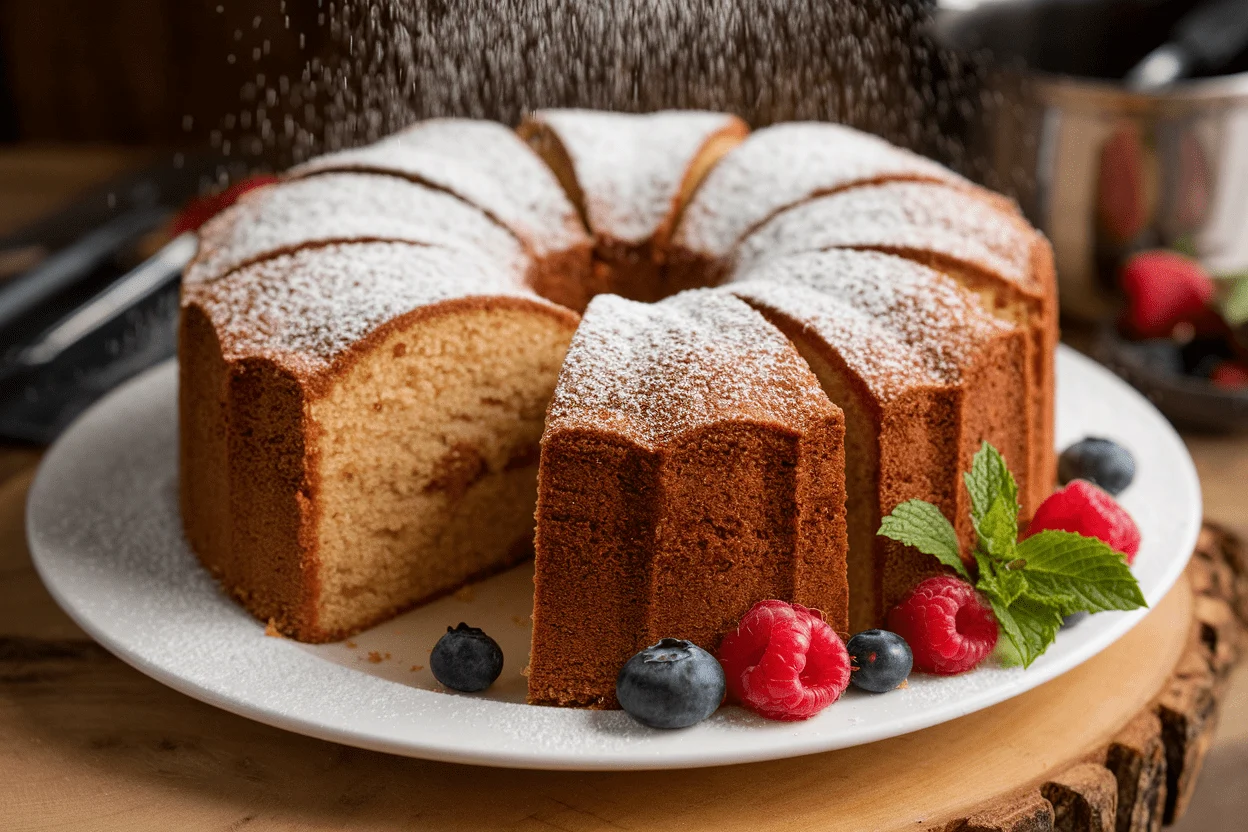
You’re three steps away from dessert glory: butter, sugar, and an unapologetically tall pound cake that makes every other loaf look like a participation trophy. This mile high pound cake recipe rises like a skyscraper and slices like velvet—dense, rich, and melt-on-the-tongue. It’s the kind of bake that wins over in-laws, impresses your boss, and silences picky eaters.
No weird tricks, no gimmicks—just classic technique leveled up. Ready to stack the odds (and the crumb) in your favor?
Why You’ll Love This Recipe
- Ridiculously tall and proud: This loaf is engineered for height without collapsing, thanks to the right ratios and oven temps.
- Buttery, velvety crumb: Creaming method + room-temp ingredients = fine, tight crumb that still feels luxurious.
- Simple ingredients, epic payoff: Nothing fancy—just the best version of what your grandma swore by.
- Flexible for any occasion: Slice for brunch, dress it up with berries for dinner, or eat it standing over the counter (we don’t judge).
- Freezer-friendly: Make once, enjoy for weeks. It actually gets better after a day as the flavors settle.
Shopping List – Ingredients
- 1 cup (226 g) unsalted butter, room temperature
- 2 1/2 cups (500 g) granulated sugar
- 6 large eggs, room temperature
- 3 cups (360 g) cake flour, spooned and leveled
- 1 cup (240 ml) full-fat sour cream, room temperature
- 1 tablespoon pure vanilla extract
- 1 teaspoon fine sea salt
- 1/2 teaspoon baking powder (just enough lift without compromising density)
- Optional flavor boosters: 1 teaspoon almond extract, zest of 1 lemon or orange
- For the pan: softened butter and flour (or baking spray with flour)
- Optional glaze: 1 cup powdered sugar + 2–3 tablespoons milk + 1/2 teaspoon vanilla
Let’s Get Cooking – Instructions
- Prep the battlefield: Preheat oven to 325°F (163°C).
Grease a 10–12 cup bundt pan or a tall tube pan thoroughly. Dust with flour and tap out the excess. A well-prepped pan is your insurance policy.
- Bring everything to room temp: Butter, eggs, and sour cream should be about 68–72°F.
Cold ingredients = curdled batter and sad rise.
- Cream like you mean it: In a stand mixer with paddle, beat butter and sugar on medium for 4–5 minutes until very pale and fluffy. You’re incorporating air—this is the base of the mile-high magic.
- Add eggs—slowly: Beat in eggs one at a time, mixing 20–30 seconds between additions and scraping the bowl often. If it looks slightly curdled, don’t panic; the flour will fix it.
- Flavor boost: Mix in vanilla (and almond extract or citrus zest if using) until just combined.
- Whisk dry team: In a separate bowl, whisk cake flour, salt, and baking powder.
No lumps, no drama.
- Alternate additions: Add the dry ingredients in three parts, alternating with the sour cream in two parts (dry–wet–dry–wet–dry). Mix on low until just combined. Overmixing = tough cake.
Stop when you see no flour streaks.
- Pan and smooth: Spoon batter into the prepared pan and smooth the top. Tap the pan firmly on the counter 2–3 times to pop big air bubbles.
- Bake low and slow: Bake at 325°F for 70–85 minutes. Start checking at 70 minutes.
A skewer should come out with a few moist crumbs, not wet batter. The top will be deep golden.
- Cool with patience: Let the cake rest in the pan on a rack for 15 minutes. Then invert carefully onto the rack and cool completely, 2–3 hours.
Slicing warm will crumble the crumb (don’t do it).
- Optional glaze: Whisk the powdered sugar, milk, and vanilla until pourable. Drizzle over the cooled cake. For a glossy finish, glaze once, wait 10 minutes, and glaze again.
Because extra.
How to Store
- Room temperature: Wrap tightly in plastic or store in an airtight cake container for up to 4 days. Flavor improves on day 2.
- Refrigerator: Not ideal—it dries out. If you must, wrap well and bring slices to room temp before serving.
- Freezer: Slice and wrap each piece in plastic, then bag.
Freeze up to 2 months. Thaw at room temp, then warm 10 seconds in the microwave for a bakery-fresh vibe.
Health Benefits
- Energy-dense fuel: Butter and sugar provide quick energy—great for celebrations, not everyday breakfasts (unless it’s your birthday, IMO).
- Protein from eggs: Each slice offers a bit of protein that helps satiety and structure.
- Mindful indulgence: A smaller slice can satisfy sweet cravings, which can help you avoid binge-y snack fests later. Balance is the real flex.
- DIY advantage: Fewer additives than store-bought cakes, and you control the ingredients (organic eggs, high-quality butter, etc.).
What Not to Do
- Don’t skip room temperature ingredients: Cold butter won’t cream right, and your cake won’t rise like a champ.
- Don’t overmix after adding flour: Gluten development equals rubbery texture.
Mix until just combined.
- Don’t crank the heat: Higher oven temps cause doming and cracking with a raw center. 325°F is your sweet spot.
- Don’t under-grease the pan: Bundt pans are notorious for sticking. Be generous with butter and flour or a baking spray with flour.
- Don’t slice too soon: Warm pound cake crumbles. Let it cool fully so the crumb sets.
Variations You Can Try
- Lemon Cloud: Add 1 tablespoon lemon zest and 2 tablespoons lemon juice; swap vanilla to 2 teaspoons.
Drizzle with lemon glaze.
- Almond Amaretto: 2 teaspoons almond extract + 2 tablespoons amaretto. Top with toasted sliced almonds.
- Brown Butter Vanilla: Brown the butter, chill until solid, then cream as usual. Deep nutty flavor, chef’s kiss.
- Cream Cheese Pound Cake: Replace 1/2 cup butter with 8 oz cream cheese.
Tangy, ultra-dense crumb.
- Marble Magic: Remove 1 cup batter, mix in 2 tablespoons cocoa powder, and swirl into the pan.
- Berry Burst: Fold in 1 cup blueberries tossed in 1 tablespoon flour. Bake an extra 5–10 minutes as needed.
- Holiday Spice: Add 1 teaspoon cinnamon, 1/4 teaspoon nutmeg, and a pinch of clove. Orange zest optional, but highly recommended.
FAQ
Why did my pound cake sink in the middle?
Overmixing, underbaking, or opening the oven too early are common culprits.
Make sure your oven is truly at 325°F (use an oven thermometer) and bake until a skewer shows only a few moist crumbs.
Can I use all-purpose flour instead of cake flour?
Yes, but expect a slightly coarser crumb. For a closer result, replace 3 cups cake flour with 2 3/4 cups all-purpose flour plus 1/4 cup cornstarch, sifted well.
What pan works best for a mile high pound cake?
A heavy 10–12 cup bundt or tube pan with a light interior promotes even baking and height. Dark pans brown faster—tent with foil near the end if needed.
How do I know when it’s done without drying it out?
Look for a deep golden top, edges pulling slightly from the pan, and a skewer with moist crumbs (not wet batter).
Internal temp should be around 205–210°F if you use a probe thermometer.
Can I cut the sugar?
You can reduce by up to 10–15% without wrecking texture, but sugar affects moisture and structure. For best rise and crumb, keep close to the original amount, FYI.
What if I don’t have sour cream?
Use full-fat Greek yogurt or crème fraîche in the same amount. Avoid low-fat; you want the richness for that signature pound cake body.
How do I prevent sticking in a bundt pan?
Brush every crevice with softened butter, dust with flour, and tap out the excess.
Alternatively, use baking spray with flour and coat thoroughly right before adding batter.
Can I make this into loaves or cupcakes?
Yes. For loaves, divide into two 8.5×4.5-inch pans and bake 55–70 minutes. For cupcakes, fill 2/3 full and bake 20–25 minutes.
Watch for the skewer test.
Does altitude affect this recipe?
At high altitude, reduce baking powder to 1/4 teaspoon, increase oven temp to 335°F, and consider adding 1–2 tablespoons extra sour cream for moisture. Check early.
The Bottom Line
This mile high pound cake recipe is proof that simple ingredients, handled right, can deliver skyscraper results. Cream thoroughly, bake low and slow, and let it cool—those are your non-negotiables.
Dress it up or keep it classic; either way, you’re getting a rich, velvety crumb that slices like a dream and tastes like victory. Bake it once and it’ll be your signature move.