Easy Pita Bread Recipe: 30 Minutes to Puffy, Chewy, Pocket-Perfect Magic
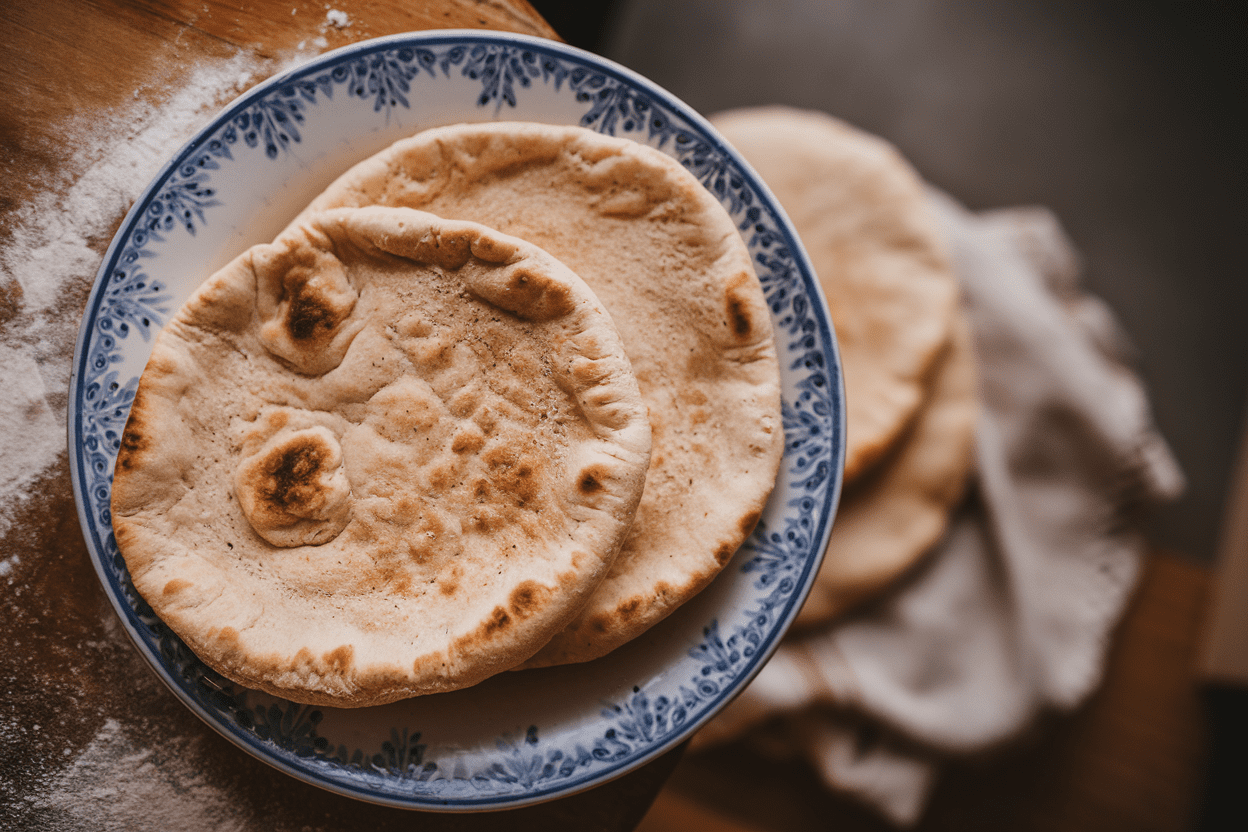
You know that warm, pillowy pita you tear open at a restaurant and think, “Why doesn’t mine do that?” This is how yours will. No fancy gear, no bakery secrets—just a simple method that gives you soft, steamy pockets with glorious puff. You’ll go from flour to “how is this so good?” in under an hour.
Make a batch once, and suddenly store-bought tastes like cardboard. Consider this your new weeknight flex.
Why You’ll Love This Recipe
- Fast and foolproof: Ready in about 30–45 minutes with minimal kneading and zero drama.
- Big puff, soft chew: That iconic pocket forms reliably when you follow the heat tricks below.
- Pan or oven friendly: No pizza stone required—your cast-iron or sheet pan works great.
- Budget win: Pennies per pita, tastes like your favorite Mediterranean spot.
- Meal-prep dream: Freeze beautifully and reheat like a champ.
What Goes Into This Recipe – Ingredients
- 2 1/4 teaspoons (7 g) instant yeast (or active dry, see notes)
- 1 teaspoon sugar (helps yeast wake up and browning)
- 1 cup (240 ml) warm water (about 105–110°F / 40–43°C)
- 2 1/2 cups (300 g) all-purpose flour (or 1/2 AP + 1/2 bread flour for extra chew)
- 1 teaspoon fine sea salt
- 1–2 tablespoons olive oil (optional, for softer pitas and flavor)
- Dusting flour (for shaping)
Optional add-ins: 1 tablespoon plain yogurt for tenderness, 1 teaspoon sesame seeds for topping, or 1/2 teaspoon garlic powder for a subtle kick.
Let’s Get Cooking – Instructions
- Activate (if using active dry yeast): In a bowl, mix warm water, sugar, and yeast. Let stand 5–10 minutes until foamy.
Using instant yeast? Skip the proof, add it directly to flour, and combine water separately.
- Make the dough: In a large bowl, mix flour and salt. Add yeast mixture (and olive oil, yogurt if using).
Stir with a spoon until shaggy. Knead by hand 5–7 minutes (or mixer 3–4) until smooth and slightly tacky.
- Quick rest: Cover and let the dough relax for 10–15 minutes. This short rest makes rolling easier and improves puff.
Yes, it matters.
- Divide: Turn out onto a lightly floured surface. Cut into 6–8 equal pieces. Shape each into a tight ball by tucking edges underneath.
- Preheat heat source:
- Oven method: Place a heavy sheet pan or baking steel/stone on the middle rack.
Preheat to 475°F/245°C for at least 15 minutes.
- Stovetop method: Preheat a cast-iron skillet over medium-high until very hot (a drop of water should sizzle aggressively).
- Oven method: Place a heavy sheet pan or baking steel/stone on the middle rack.
- Roll: Working one at a time, roll each ball into a round 6–7 inches wide and about 1/8 inch (3 mm) thick. Keep the surface lightly floured to prevent sticking. Tip: Even thickness = better pocket.
- Cook (Oven): Place 2–3 rounds onto the hot pan. Bake 2–3 minutes until they balloon dramatically.
Flip and bake 1 more minute for light browning. Remove and wrap in a clean towel to stay soft.
- Cook (Skillet): Lay a round into the dry hot pan. Cook 45–60 seconds until bubbles appear; flip and cook another 45–60 seconds.
Flip once more; it should puff fully. Adjust heat so they brown in spots but don’t scorch.
- Repeat: Keep cooked pitas wrapped in a towel while you finish the batch. Steam equals softness.
- Serve: Slice and stuff, tear and dip, or drizzle with olive oil and za’atar.
You did that.
Storage Tips
- Room temperature: Store in an airtight bag up to 2 days. Keep a paper towel inside to absorb moisture.
- Reheat: 10–15 seconds in the microwave wrapped in a damp towel, or 2–3 minutes in a 300°F/150°C oven wrapped in foil.
- Freeze: Cool completely, stack with parchment between, and freeze up to 2 months. Thaw at room temp 20 minutes, then reheat.
Health Benefits
- Simple ingredients: Flour, water, yeast, salt—no preservatives, no mystery oils, just honest carbs.
- Portion control friendly: Individual rounds make it easy to track servings and macros, IMO.
- Fiber upgrade option: Swap up to 50% whole wheat flour for extra fiber and minerals without sacrificing puff.
- Fuel for activity: A great pre- or post-workout carb, especially paired with protein like chicken or hummus.
What Not to Do
- Don’t skimp on heat: Lukewarm oven or skillet equals sad, flat bread.
Heat is what creates the steam pocket.
- Don’t roll too thick or uneven: Thick spots block puff. Aim for uniform 1/8 inch.
- Don’t over-flour the surface: Excess flour burns and dries the crust. Light dusting only.
- Don’t overproof: A long rise can make dough too gassy, leading to blowouts instead of smooth balloons.
- Don’t crowd the oven: Too many at once drops the temperature and ruins the puff.
Be patient, chef.
Mix It Up
- Whole wheat boost: 50% whole wheat + 50% bread flour, add 1–2 teaspoons extra water if needed.
- Garlic-herb: Mix 1 teaspoon garlic powder and 1 teaspoon dried oregano into the flour.
- Za’atar-topped: Brush rolled rounds lightly with olive oil, sprinkle za’atar, then bake.
- Yogurt-soft: Add 1–2 tablespoons plain yogurt to the dough for extra tenderness.
- Seeded edge: Press sesame or nigella seeds onto the surface right before cooking.
FAQ
Why didn’t my pita puff?
The usual culprits: not enough heat, dough rolled too thick or uneven, or a skillet/stone that wasn’t fully preheated. Also, dry dough struggles to steam—if your dough feels stiff, add a teaspoon or two of water next time.
Can I use whole wheat flour only?
Yes, but expect a denser chew and less dramatic puff. For the best pocket plus nutrition, go 50/50 whole wheat and bread flour and bump hydration slightly.
Is a pizza stone required?
Nope.
A preheated heavy sheet pan or cast-iron skillet works beautifully. The key is ripping-hot contact heat for instant steam generation.
Can I make the dough ahead?
Absolutely. Refrigerate the dough (lightly oiled bowl, covered) up to 24 hours.
Let it sit at room temp 30–45 minutes before rolling so it relaxes and puffs well.
What if I only have active dry yeast?
Proof it with the warm water and sugar for 5–10 minutes until foamy, then proceed. If it doesn’t foam, the yeast is likely dead—grab a fresh packet.
How do I keep pitas soft after cooking?
Stack them and wrap in a clean kitchen towel right away. The trapped steam keeps them tender.
Later, reheat briefly in a microwave with a damp towel or in a warm oven wrapped in foil.
Can I make mini pitas?
Yes—divide into 10–12 pieces and roll to 4–5 inches. They cook even faster, so watch closely. Perfect for sliders or party dips, FYI.
The Bottom Line
This easy pita bread recipe turns flour and water into bakery-level pockets with shockingly little effort.
Keep the heat high, roll evenly, and wrap them warm—those three moves guarantee success. After one batch, store-bought won’t cut it. Make extra, freeze some, and enjoy fresh, steamy pitas anytime you want real flavor without the fuss.
