🥢 Korean Rice Cake Recipe: Chewy, Bouncy & Better Than Takeout
👩🍳 The Home Chef's Essential Kitchen
Consistently cooking incredible, healthy meals at home is so much easier when you aren't fighting with cheap tools. These are the 5 absolute powerhouse kitchen essentials that professional chefs and serious home cooks rely on every single day to get perfect results.
🍳 Lodge 10.25" Cast Iron Skillet
The single greatest value in all of cookware. It retains heat infinitely better than cheap non-stick pans, allowing you to get a restaurant-quality crust on steaks or perfect crispy edges on cornbread. With proper care, this $20 pan will literally outlive you.
🔪 Victorinox Fibrox Pro 8" Chef's Knife
A dull knife makes cooking a frustrating chore. This specific blade is the undisputed champion of the culinary world—it holds a terrifyingly sharp edge, features a comfortable non-slip grip, and performs identical to German knives that cost quadruple the price.
🌡️ ThermoPro Instant Read Thermometer
Never serve dry chicken or undercooked pork again. An instant-read thermometer is the secret difference between amateur cooks who 'guess' when protein is done, and professionals who know exactly when to pull meat off the heat for maximum juiciness.
🍲 Lodge Enameled Cast Iron Dutch Oven
The ultimate workhorse for soups, stews, braised short ribs, and baking crusty artisanal bread. The enameled interior provides incredible heat distribution for slow-cooking while eliminating the intense seasoning maintenance required by bare cast iron.
🥄 Bpa-Free Silicone Utensil Set
Throw away those melting plastic spatulas and bacteria-harboring wooden spoons. This pure silicone set is heat-resistant up to 600°F, won't scratch your expensive pans, and features seamless designs that make cleaning out thick sauces and batters effortless.
So, you’ve been binge-watching K-Dramas again, haven’t you? I see you. You’re sitting there, watching the main character aggressively devour a bowl of spicy Tteokbokki, and suddenly, your popcorn looks incredibly sad. You’re craving that chew. That bounce. That spicy, starchy goodness.
But then you go to the Asian market, buy a pack of rock-hard, frozen rice cakes, cook them, and… they crack. They turn to mush. Or worse, they taste like the plastic bag they came in.
Tragic.
Look, I’ve been there. I’ve suffered through the gummy, subpar store-bought logs. But today, we are breaking the cycle. We are making Korean rice cakes (Garaetteok) from scratch. Is it a little bit of a workout? Yes. Is it worth it to feel like a culinary god when you pull a perfect, shiny, chewy rice cylinder out of the steamer? Absolutely.
Grab your apron and maybe a stress ball (you’ll see why later). Let’s make some magic.
Why This Recipe is Awesome
Okay, aside from the obvious bragging rights (“Oh, these? I made them by hand. No big deal.”), there are some genuine reasons why making your own Korean rice cake recipe is superior to buying the vacuum-sealed stuff.
1. The “Q” Texture is Unmatched In the culinary world, specifically in Asian cuisine, there is a concept often referred to as “Q.” It describes that perfect balance of texture—bouncy, chewy, elastic, but soft. Store-bought cakes often lean too hard (waxy) or too soft (mushy). When you make this fresh, you hit that “Q” sweet spot that makes your teeth happy. It’s like biting into a savory, dense cloud.
2. No Weird Preservatives Have you ever looked at the back of a package of commercial rice cakes? It’s usually rice, salt, and then a bunch of words that look like a chemistry final exam (hello, ethyl alcohol preservatives). This recipe? It’s literally just rice, water, salt, and oil. That’s it. It’s clean eating, mostly because we’re cleaning the plate afterward.
3. It’s Cheaper Than Therapy The secret to good Garaetteok is pounding the dough. And let me tell you, there is nothing—and I mean nothing—more therapeutic than taking out your frustrations on a ball of hot rice dough. Had a bad meeting? Pound the dough. Ghosted by a date? Pound the dough. It’s productive rage.
4. You Can Customize the Shape Want traditional long cylinders for Tteokbokki? Done. Want diagonal slices for Tteokguk (rice cake soup)? Easy. Want to make adorable little star shapes because you’re extra? I won’t stop you. You’re the artist here.
Ingredients You’ll Need
We are keeping this list short, sweet, and vital. Don’t try to get fancy and substitute things here, or the science won’t work.
- Short-Grain White Rice Flour (Frozen “Wet” Flour is Best):
- The Deal: You want “wet” milled flour found in the freezer section of Korean markets. It has higher moisture content.
- The “I can’t find that” Option: You can use dry bag rice flour (usually the Thai brand with the red logo), but you will need to adjust your water levels significantly (I’ll explain in the steps).
- The Warning: Do not use Glutinous Rice Flour. I repeat: DO NOT. That is for mochi/sticky rice cakes. If you use that, you will end up with a puddle of goo, not a bouncy cylinder. Look for “Rice Flour” or “Tteok-ssal-garu.”
- Water:
- Needs to be boiling. Not “hot from the tap,” not “simmering.” We need screaming, angry boiling water to partially cook the starch instantly.
- Fine Sea Salt:
- Flavor, obviously. Without it, you’re eating unseasoned paste. Sad.
- Sesame Oil:
- This isn’t for the dough itself, but for coating the finished cakes so they don’t stick together like a codependent couple. It also adds that signature nutty aroma.
Step-by-Step Instructions
Alright, let’s get down to business. Put on some music, roll up your sleeves, and let’s get steamy.
Phase 1: The Hydration Station
1. Sift Like You Mean It First, dump your rice flour into a large mixing bowl. Take a sieve and sift that flour. Why? Because clumps are the enemy of smooth texture. We want a fine, snowy powder. Add your salt here and whisk it in.
2. The Scald (Adding Water) This is the most critical scientific moment. We are doing a “hot water dough.”
- Boil your water.
- Slowly pour the boiling water into the flour while mixing with a spoon or chopsticks.
- Don’t use your hands yet unless you enjoy third-degree burns.
- Texture Check: You aren’t looking for a smooth dough yet. You’re looking for a crumbly texture that holds together when you squeeze it in your fist like a snowball. If it’s too dry/powdery, add a teaspoon more water. If it’s a sludge, you added too much (add more flour).
Phase 2: The Steam
3. Steamer Setup Get your steamer ready. You can use a bamboo steamer, a metal pot insert, or even a microwave if you’re living on the edge (though steaming is better for texture). Line the bottom with a damp cheesecloth or parchment paper (poke holes in the paper for steam to pass through).
4. The Cook Toss your crumbly dough chunks into the steamer. Spread them out loosely—don’t pack them down into a brick. We want the steam to circulate.
- Time: Steam on high heat for about 20 to 25 minutes.
- Sensory Detail: Your kitchen should smell faintly sweet and earthy, like perfectly cooked rice. When you open the lid, the dough should look translucent and feel slightly rubbery, not chalky.
Phase 3: The Workout (Pounding)
5. Attack the Dough Dump the hot (very hot!) steamed dough onto a silicone mat or a clean surface lightly greased with sesame oil.
- The Method: You need to pound this dough to align the starch molecules. This creates the chew.
- Tools: You can use a pestle, a rolling pin, or a stand mixer with a dough hook (if you’re lazy, which I respect).
- The Process: Beat the dough. Fold it over. Beat it again. Repeat this for at least 10–15 minutes.
- Science Note: As you pound, you are removing air pockets and compacting the starch. The dough will transform from a rough, lumpy mass into a glossy, smooth, elastic ball. It should bounce back when you poke it.
6. The Stretch Test You know you’re done when you can pull the dough, and it stretches nicely without snapping immediately. It should look shiny, like white porcelain.
Phase 4: Shaping
7. Roll It Out Divide your dough into manageable sections. Roll them into logs.
- Tip: Use your palms to roll back and forth, moving from the center of the log outward to elongate it. Aim for the thickness of a fat marker or your thumb (classic Tteokbokki size).
8. The Ice Bath Have a bowl of cold water nearby. Once shaped, drop the logs into the cold water for 30 seconds. This “shocks” the starch, setting the shape and firming up the outside so they aren’t sticky.
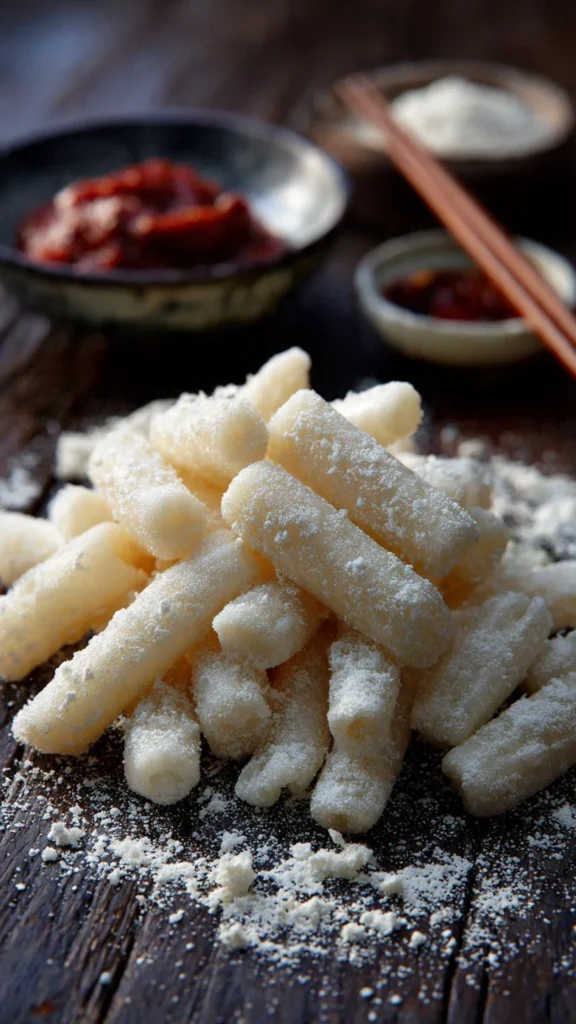
9. Oil Up Remove from water, pat dry with a paper towel, and toss them in a bowl with a little sesame oil. Coat them lightly. This prevents sticking and adds flavor.
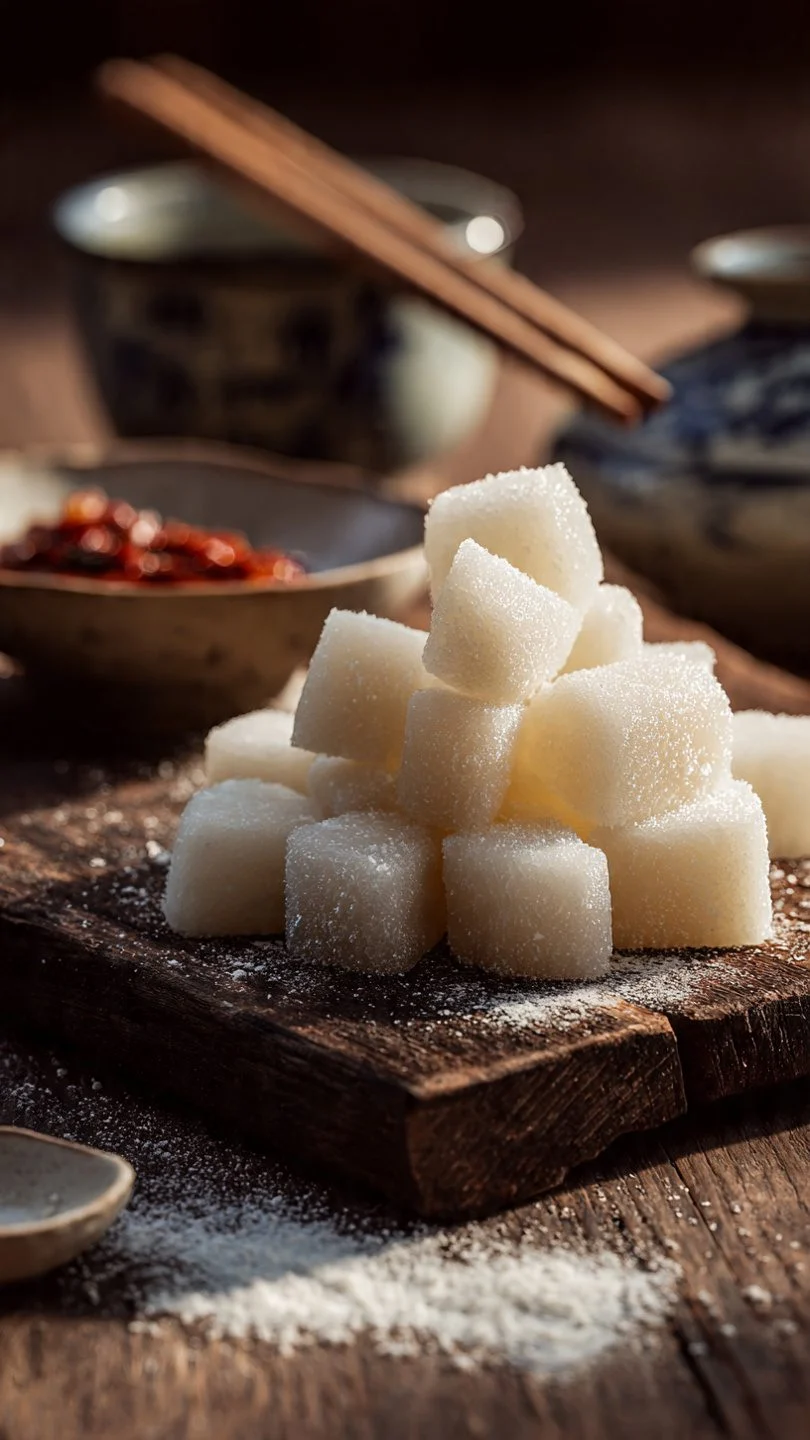
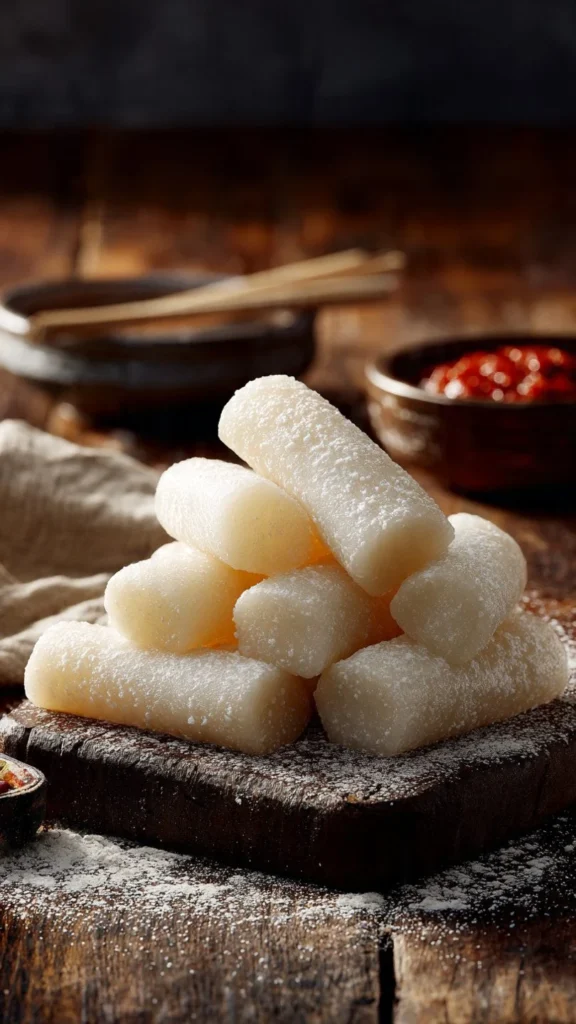
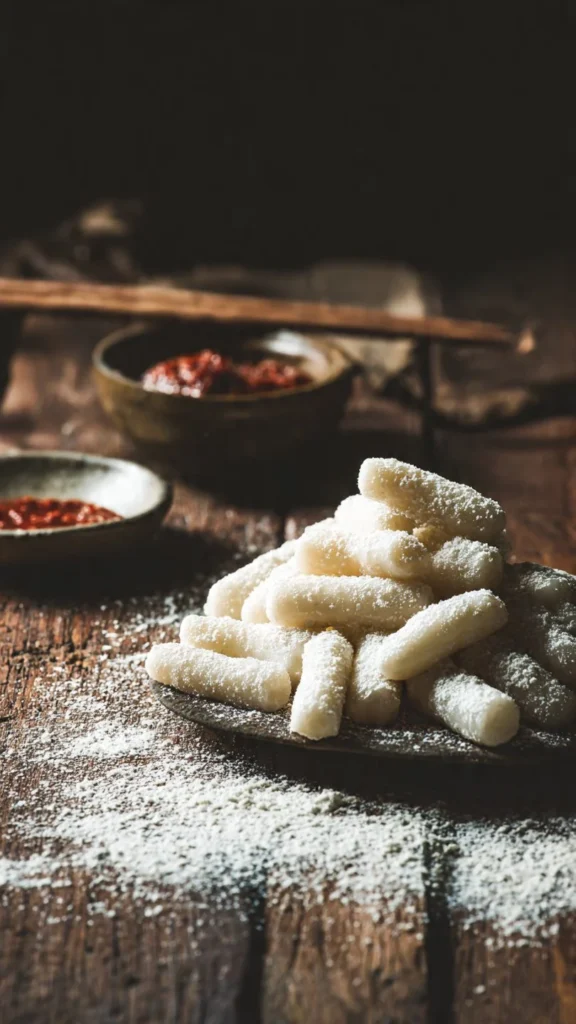
10. Slice & Dice Trim the ends (eat those immediately, chef’s tax). Cut the logs into 2-3 inch pieces. Boom. You just made Garaetteok.
Common Mistakes to Avoid
Even smart cooks mess this up. Here’s how to avoid the “Facepalm” moments.
- Using “Glutinous” Rice Flour: I cannot stress this enough. If the bag says “Sweet Rice Flour” or “Glutinous,” put it back. You aren’t making Mochi. You need regular Short Grain Rice flour.
- The Luke-Warm Water Fail: If your water isn’t boiling when it hits the flour, the starch won’t gelatinize properly. You’ll end up with a powdery, gritty dough that falls apart in the steamer.
- Under-Pounding: If you stop kneading after 2 minutes because your arms are tired, your rice cakes will be brittle. They will snap when cooked in sauce later. push through the burn! Or just use a stand mixer.
- Letting it Dry Out: Rice dough dries out faster than my skin in winter. Always keep the parts you aren’t working on covered with a damp cloth or plastic wrap.
Alternatives & Substitutions
Cooking is an art, not a prison. Here’s how to tweak things.
- The Flour Situation:
- Store-bought Dry Flour: If you use the dry bag stuff, you usually need more water than fresh/frozen flour. A good ratio is typically 1:1 volume (1 cup flour to 1 cup water), but add the water slowly to gauge it.
- Soaked Rice Method: Hardcore? Soak short-grain sushi rice overnight, drain it, and blitz it in a high-powered blender (like a Vitamix) until it’s a damp powder. This makes the best cakes, but it’s high effort.
- Colors & Flavors:
- Want pink rice cakes? Add a drop of beet juice to the water.
- Green? Matcha or spinach juice.
- Yellow? Turmeric.
- Make a rainbow bowl. It tastes the same but looks awesome on Instagram.
- Shapes:
- Tteokguk-tteok: If you want the thin ovals for soup, let the logs harden in the fridge for 24 hours (so they are firm), then slice them diagonally with a sharp knife.
FAQ (Frequently Asked Questions)
1. Can I use a stand mixer? Please do. Unless you are training for an arm wrestling championship, the stand mixer (dough hook, medium speed) is a lifesaver. Just let it run for about 10 minutes until the dough is glossy.
2. My dough is cracking when I roll it. Why does the universe hate me? The universe is fine; your dough is just dry. Dip your hands in water and knead that moisture back into the dough. If it’s really dry, steam it again for 2 minutes.
3. How do I store these? Fresh is best (eaten same day). If you must store them, wrap them airtight and freeze them. Do not refrigerate fresh rice cakes for long periods; the starch retrogrades (science speak for “gets hard and nasty”) very quickly in the fridge.
4. Why did my rice cakes melt in the soup? You probably used glutinous rice flour, didn’t you? I told you not to! Or, you cooked them way too long. Fresh rice cakes only need a few minutes in hot sauce to soften.
5. Can I use brown rice flour? Technically, yes. It will be nuttier and slightly less chewy/elastic because of the bran content. It’s healthier, sure, but IMO, white rice is king for texture here.
6. Is this gluten-free? Yes! Despite the confusing name “glutinous rice” (which we aren’t using anyway) and the stickiness, rice is naturally gluten-free. Just check your flour factory labels for cross-contamination if you have Celiac.
7. Can I fry these? Oh my sweet summer child, YES. Pan-fry them in a little oil until the skin is crispy and blistered, then dip in honey or spicy sauce. It’s called Tteok-kkochi and it’s life-changing.
Final Thoughts
See? That wasn’t so scary. You’ve successfully navigated the world of steaming, pounding, and rolling, and now you have a pile of beautiful, glistening Korean rice cakes.
Whether you throw them into a fiery gochujang sauce, simmer them in a beef bone broth, or just eat them straight up dipped in honey (seriously, try it), you’ve leveled up your kitchen game. The texture of fresh tteok is something money can’t buy—well, actually it can, but yours is better because you made it with love. And sweat. Probably a little sweat.
Now go impress someone—or yourself—with your new culinary skills. You’ve earned it!