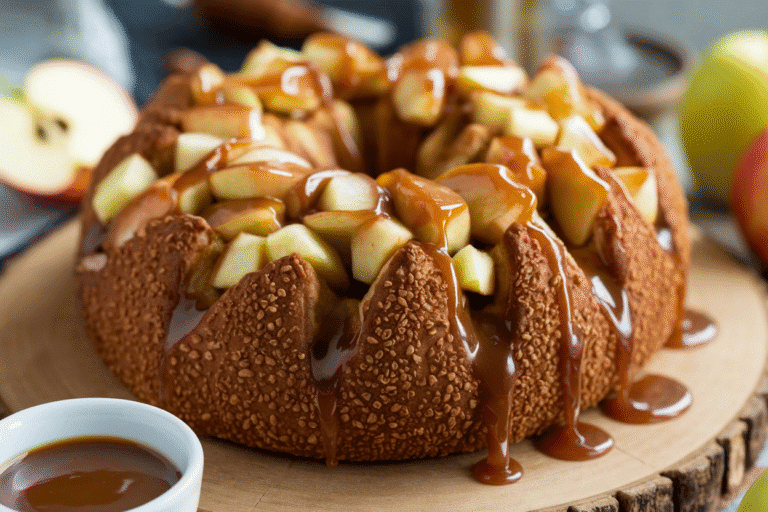
Apple Fritter Bread Recipe Easy: The Coziest Slice You’ll Ever Bake!
Imagine biting into a warm, cinnamon-spiced apple fritter, but in the form of a comforting, easy-to-slice loaf. That’s exactly what this apple fritter bread recipe delivers! Forget the deep fryer and the complicated dough – this recipe brings all the deliciousness of a classic apple fritter to your kitchen in a simple, foolproof way. Perfect for breakfast, brunch, or a sweet afternoon treat, this bread is guaranteed to become a new family favorite. The aroma alone will fill your home with the inviting scent of fall, no matter the season. Get ready to experience apple fritter bliss without the fuss!
Why This Recipe Works
This recipe is designed for simplicity and maximum flavor. Here’s why it’s a winner:
- Quick & Easy: We’ve skipped the traditional yeast dough, opting for a quick bread base that comes together in minutes. No kneading, no rising – just mix and bake!
- Fritter Flavor: The combination of cinnamon, nutmeg, and diced apples perfectly mimics the flavors of a classic apple fritter.
- Moist & Tender: The addition of sour cream (or Greek yogurt) ensures a wonderfully moist and tender crumb.
- Irresistible Glaze: The simple powdered sugar glaze adds the perfect touch of sweetness and that signature fritter look.
- Customizable: Easily adapt the recipe to your preferences. Add chopped nuts, raisins, or even a hint of caramel for an extra layer of flavor.
Ingredients
- For the Bread:
- 2 cups all-purpose flour
- 1 teaspoon baking soda
- 1/2 teaspoon baking powder
- 1/2 teaspoon salt
- 1 teaspoon ground cinnamon
- 1/4 teaspoon ground nutmeg
- 1 cup granulated sugar
- 1/2 cup packed light brown sugar
- 1/2 cup (1 stick) unsalted butter, melted
- 2 large eggs
- 1 teaspoon vanilla extract
- 1 cup sour cream (or Greek yogurt)
- 2 cups peeled and diced apples (about 2 medium apples, such as Honeycrisp or Granny Smith)
- For the Glaze:
- 2 cups powdered sugar
- 1/4 cup milk (or apple cider)
- 1/2 teaspoon vanilla extract

Instructions
- Preheat and Prepare: Preheat your oven to 350°F (175°C). Grease and flour a 9×5 inch loaf pan. You can also line the pan with parchment paper, leaving an overhang for easy removal.
- Combine Dry Ingredients: In a large bowl, whisk together the flour, baking soda, baking powder, salt, cinnamon, and nutmeg.
- Combine Wet Ingredients: In a separate bowl, whisk together the granulated sugar, brown sugar, melted butter, eggs, and vanilla extract until well combined.
- Combine Wet and Dry: Gradually add the dry ingredients to the wet ingredients, mixing until just combined. Do not overmix.
- Add Sour Cream and Apples: Stir in the sour cream (or Greek yogurt) until just combined. Gently fold in the diced apples.
- Pour into Pan and Bake: Pour the batter into the prepared loaf pan and spread evenly.
- Bake: Bake for 50-60 minutes, or until a wooden skewer inserted into the center comes out clean or with a few moist crumbs.
- Cool: Let the bread cool in the pan for 10-15 minutes before transferring it to a wire rack to cool completely.
- Make the Glaze: While the bread is cooling, prepare the glaze. In a medium bowl, whisk together the powdered sugar, milk (or apple cider), and vanilla extract until smooth. Add more milk, one tablespoon at a time, if needed to reach your desired consistency.
- Glaze the Bread: Once the bread is completely cool, drizzle the glaze evenly over the top. Let the glaze set for a few minutes before slicing and serving.
Tips for Success
- Don’t Overmix: Overmixing can lead to a tough bread. Mix the wet and dry ingredients until just combined.
- Use Room Temperature Ingredients: Using room temperature eggs and sour cream will help the batter come together more smoothly.
- Choose the Right Apples: Use apples that hold their shape well during baking, such as Honeycrisp, Granny Smith, or Braeburn.
- Adjust Baking Time: Baking times may vary depending on your oven. Check the bread for doneness using a wooden skewer.
- Cool Completely Before Glazing: Glazing warm bread will cause the glaze to melt and run off. Make sure the bread is completely cool before glazing.
- Add Nuts or Raisins: For extra flavor and texture, add 1/2 cup of chopped nuts (such as walnuts or pecans) or raisins to the batter.
Storage Instructions
Store the apple fritter bread in an airtight container at room temperature for up to 3 days. You can also store it in the refrigerator for up to 5 days. For longer storage, wrap the bread tightly in plastic wrap and then in foil and freeze for up to 2 months. Thaw overnight in the refrigerator before serving.

FAQ
- Can I use a different type of flour? While all-purpose flour works best, you can substitute with a gluten-free all-purpose flour blend. Be sure to follow the instructions on the package for best results.
- Can I use apple pie spice instead of cinnamon and nutmeg? Yes, you can substitute with 1 1/4 teaspoons of apple pie spice.
- Can I make this recipe into muffins? Yes! Line a muffin tin with paper liners and fill each liner about 2/3 full. Bake for 18-22 minutes, or until a wooden skewer inserted into the center comes out clean.
- What if I don’t have sour cream? You can substitute with plain Greek yogurt or even unsweetened applesauce.
- Can I add a streusel topping? Absolutely! A streusel topping made with flour, butter, sugar, and cinnamon would be a delicious addition. Sprinkle it over the batter before baking.
- My bread is browning too quickly. What should I do? If the bread is browning too quickly, tent it loosely with aluminum foil for the last 15-20 minutes of baking.
Conclusion
This easy apple fritter bread recipe is a guaranteed crowd-pleaser. It’s simple to make, bursting with delicious apple and cinnamon flavors, and incredibly comforting. Whether you’re baking for a special occasion or just craving a sweet treat, this bread is the perfect choice. So, gather your ingredients, preheat your oven, and get ready to enjoy the coziest slice you’ll ever bake. Happy baking!