Basque Burnt Cheesecake Recipe: Effortless Elegance!
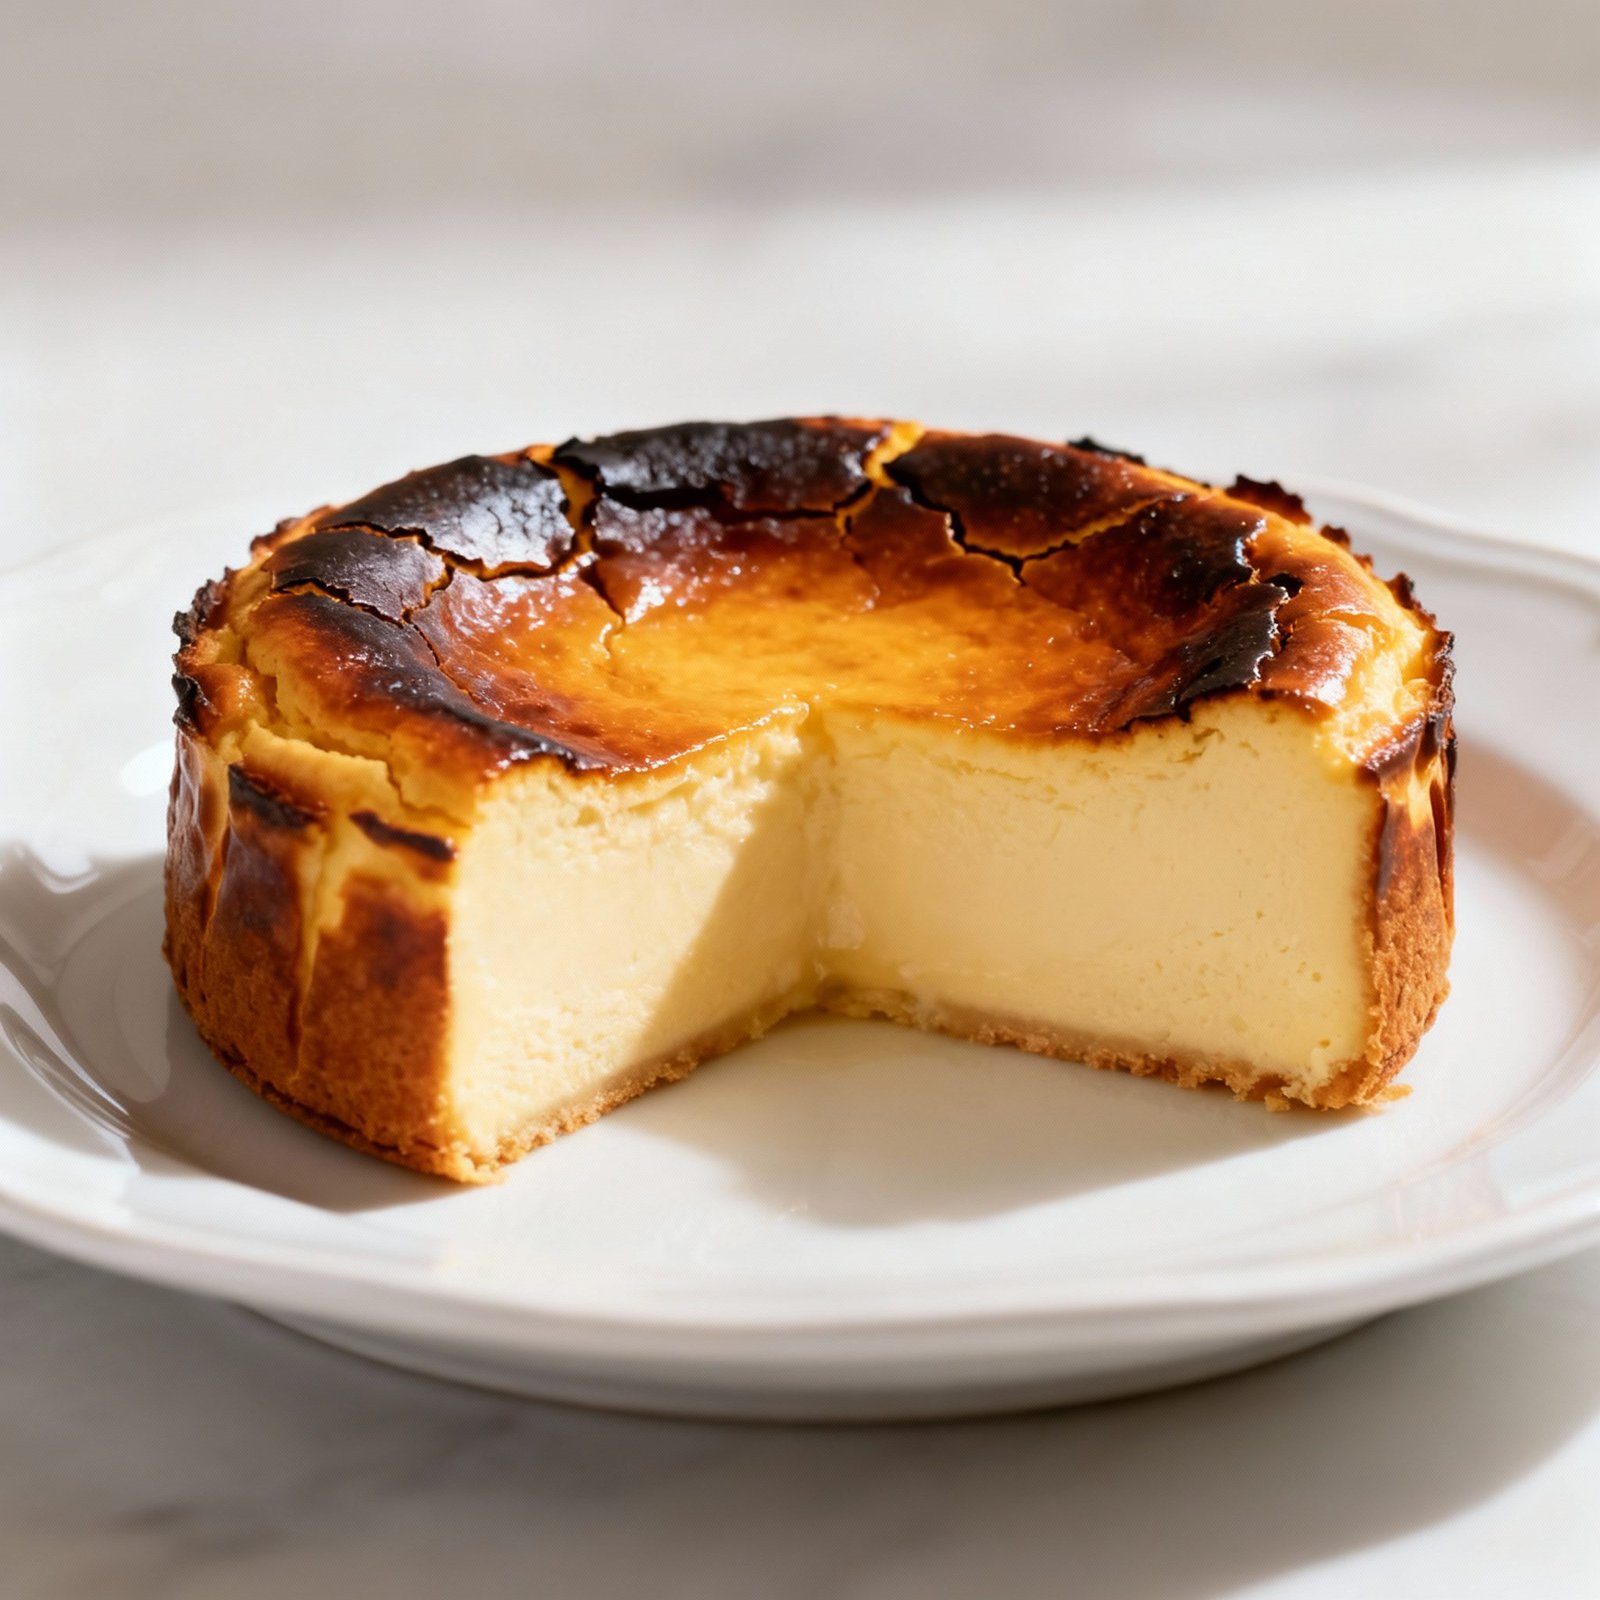
Basque Burnt Cheesecake. The name itself evokes a sense of rustic charm and intriguing imperfection. Unlike its perfectly smooth, uniformly colored cousins, this cheesecake embraces a deeply caramelized, almost blackened exterior, hinting at the creamy, molten heart within. It’s a dessert that celebrates the beauty of simplicity and the allure of the unexpected. Forget fussy techniques and elaborate decorations; this recipe is all about letting the ingredients shine and the oven work its magic. Prepare to be captivated by its unique flavor profile – a delightful dance between the rich tang of cream cheese, the subtle sweetness of sugar, and the complex, slightly bitter notes of the caramelized crust. This isn’t just a cheesecake; it’s an experience.
Why This Recipe Works
This Basque Burnt Cheesecake recipe is designed for both novice and experienced bakers, offering a straightforward approach to achieving stunning results. Here’s why it’s so successful:
- Simple Ingredients: The recipe relies on a handful of readily available ingredients, eliminating the need for specialized components. This makes it accessible and budget-friendly.
- Minimal Mixing: Overmixing cheesecake batter can lead to a tough texture. This recipe emphasizes gentle mixing, ensuring a light and airy consistency.
- High Baking Temperature: The high oven temperature is key to achieving the signature “burnt” exterior while maintaining a creamy, almost liquid center. It rapidly caramelizes the sugars, creating the distinctive flavor and appearance.
- No Water Bath Required: Unlike traditional cheesecakes, this recipe doesn’t require a water bath. This simplifies the baking process and eliminates the risk of water seeping into the cheesecake. The high heat and shorter baking time prevent cracking.
- Embracing Imperfection: The beauty of Basque Burnt Cheesecake lies in its rustic appearance. Cracks, uneven browning, and a slightly sunken center are all part of its charm, making it a forgiving and stress-free dessert to bake.
Ingredients
- 900g (4 x 8oz packages) Cream Cheese: Full-fat cream cheese is essential for a rich and creamy texture. Make sure it’s softened to room temperature for easy mixing.
- 1 ½ cups (300g) Granulated Sugar: Provides sweetness and contributes to the caramelization of the crust.
- 6 Large Eggs: Bind the ingredients together and add richness.
- 2 cups (480ml) Heavy Cream: Adds moisture and creates a luxurious, melt-in-your-mouth texture.
- 1 teaspoon Vanilla Extract: Enhances the flavor and adds a touch of warmth.
- Pinch of Salt: Balances the sweetness and enhances the other flavors.

Instructions
- Prepare the Oven and Pan: Preheat your oven to 400°F (200°C). Line a 9-inch springform pan with two layers of parchment paper, ensuring the paper extends several inches above the rim of the pan. This will allow the cheesecake to rise without sticking and create the characteristic rustic look. Don’t worry about making it perfectly smooth; the wrinkles add to the charm.
- Soften the Cream Cheese: In a large bowl, beat the softened cream cheese with an electric mixer until smooth and creamy. This is crucial for preventing lumps in the batter.
- Add Sugar: Gradually add the granulated sugar to the cream cheese, beating until well combined. Scrape down the sides of the bowl to ensure all the sugar is incorporated.
- Incorporate the Eggs: Add the eggs one at a time, beating well after each addition. Be careful not to overmix at this stage. Overmixing can incorporate too much air into the batter, leading to a less creamy texture.
- Add Heavy Cream and Vanilla: Pour in the heavy cream and vanilla extract. Mix on low speed until just combined. The batter should be smooth and lump-free.
- Add Salt: Add a pinch of salt and mix until just combined.
- Pour into the Prepared Pan: Pour the batter into the prepared springform pan. The batter will be quite liquid, which is perfectly normal.
- Bake: Bake for 50-60 minutes, or until the top is deeply browned and caramelized, almost burnt in appearance. The center should still be jiggly. Don’t be alarmed by the appearance; this is exactly what you want.
- Cool Completely: Turn off the oven and let the cheesecake cool completely in the oven with the door slightly ajar. This gradual cooling helps prevent cracking. This can take several hours.
- Chill: Once cooled to room temperature, cover the cheesecake loosely with plastic wrap and chill in the refrigerator for at least 4 hours, or preferably overnight. This allows the flavors to meld and the texture to set.
- Serve: Carefully remove the cheesecake from the springform pan. Peel away the parchment paper. Slice and serve chilled. Enjoy the creamy interior and the slightly bitter, caramelized crust.
Tips for Success
- Use Full-Fat Cream Cheese: Low-fat or non-fat cream cheese will not produce the same rich, creamy texture.
- Soften the Cream Cheese: Softened cream cheese is essential for a smooth, lump-free batter. Leave it at room temperature for at least an hour before baking.
- Don’t Overmix: Overmixing can lead to a tough texture. Mix until just combined.
- Embrace the Burnt Appearance: The deeply caramelized crust is what makes this cheesecake unique. Don’t be afraid of the “burnt” look.
- Cool Completely: Cooling the cheesecake slowly in the oven helps prevent cracking.
- Chill Thoroughly: Chilling the cheesecake for at least 4 hours allows the flavors to meld and the texture to set properly.
- Parchment Paper is Key: Double-layering the parchment paper prevents leaks and allows for easy removal of the cheesecake.
Storage Instructions
Store leftover Basque Burnt Cheesecake in an airtight container in the refrigerator for up to 3-4 days. The cheesecake is best enjoyed within the first 2 days, as the texture may change slightly over time.

FAQ
Q: Can I use a different size pan?
A: While a 9-inch springform pan is ideal, you can use an 8-inch pan. However, the baking time may need to be adjusted, and the cheesecake will be taller.
Q: Can I reduce the sugar?
A: Reducing the sugar may affect the caramelization of the crust. It’s best to stick to the recommended amount for optimal results.
Q: My cheesecake cracked. What did I do wrong?
A: Some cracking is normal for Basque Burnt Cheesecake. However, rapid temperature changes can exacerbate cracking. Make sure to cool the cheesecake slowly in the oven with the door ajar.
Q: Can I freeze Basque Burnt Cheesecake?
A: While you can freeze it, the texture may change slightly upon thawing. Wrap the cheesecake tightly in plastic wrap and then foil before freezing. Thaw in the refrigerator overnight before serving.
Q: Why is my cheesecake so jiggly in the middle after baking?
A: That’s exactly what you want! The center should still be jiggly when you take it out of the oven. It will firm up as it cools and chills.
Conclusion
Basque Burnt Cheesecake is a testament to the fact that sometimes, the simplest recipes are the most rewarding. Its unconventional appearance and intensely delicious flavor make it a show-stopping dessert that’s surprisingly easy to prepare. So, embrace the imperfections, let the oven work its magic, and prepare to indulge in a cheesecake experience unlike any other. This recipe is guaranteed to impress your friends and family and become a new favorite in your baking repertoire. Happy baking!