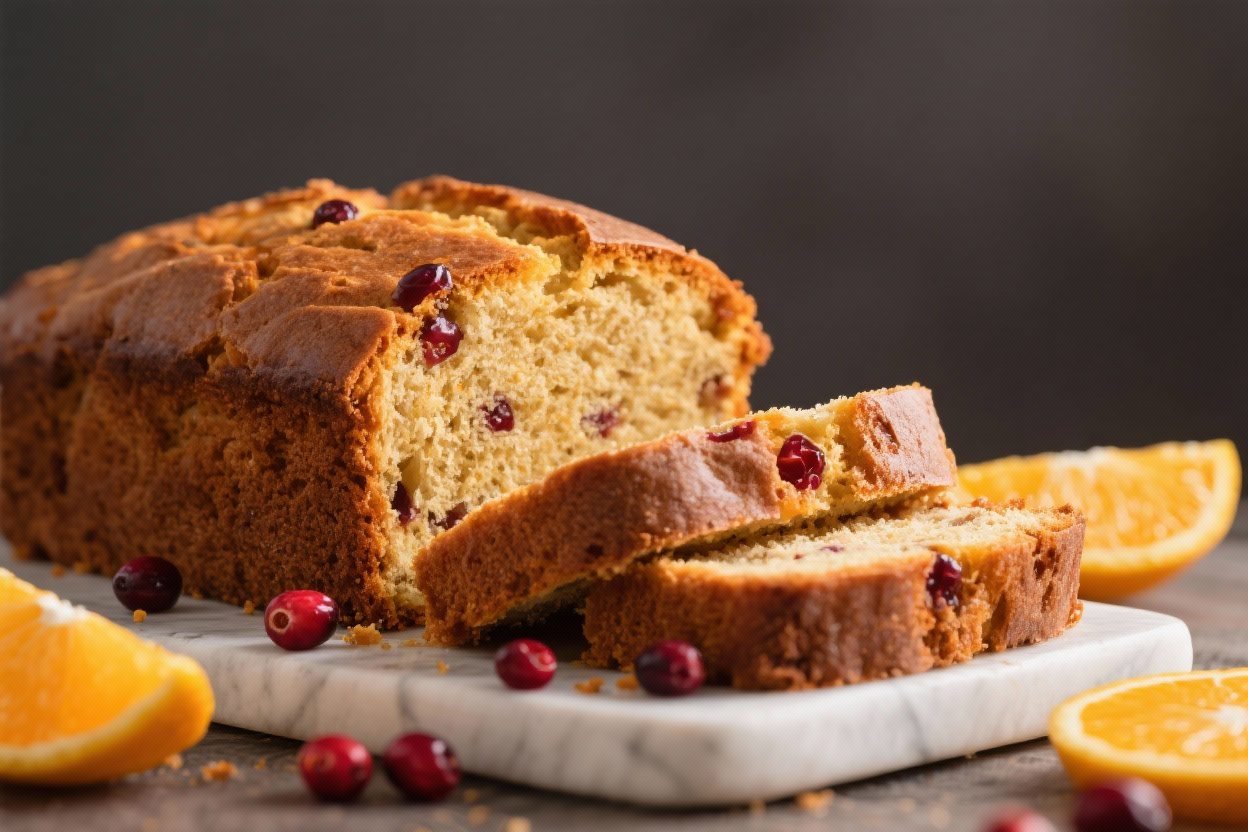
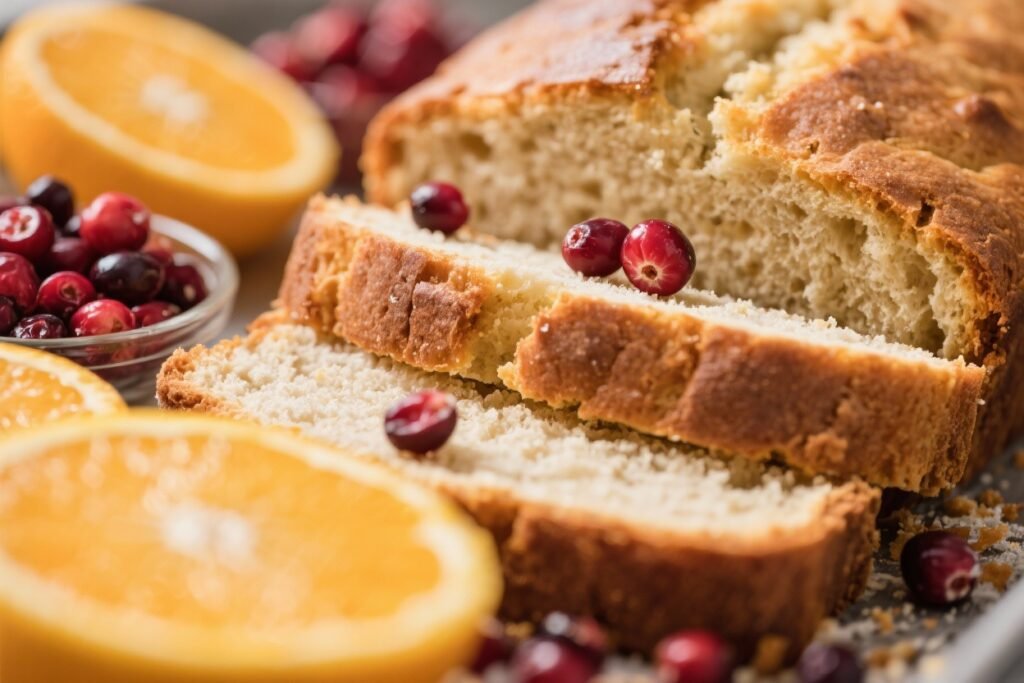
Cranberry Orange Bread Recipe: A Burst of Sunshine in Every Slice!
The holiday season is synonymous with certain flavors, and cranberry and orange are definitely high on that list. This Cranberry Orange Bread recipe perfectly captures the essence of the season, delivering a moist, flavorful, and utterly irresistible loaf that’s perfect for breakfast, brunch, or a sweet treat any time of day. Forget those dry, bland breads you might have had before; this one is a game-changer. Imagine waking up to the aroma of citrus and cranberries filling your kitchen, or serving a warm slice alongside a cup of coffee to your guests. This bread is not just a recipe; it’s an experience. It’s simple enough for beginner bakers, yet impressive enough to share with even the most discerning palates. Prepare to be amazed by the delightful combination of tart cranberries and bright orange zest in this easy-to-make bread. It’s about to become your new favorite!
Why This Recipe Works
This Cranberry Orange Bread recipe isn’t just delicious; it’s also carefully crafted to ensure consistent results every time. Here’s why it works so well:
- The Right Ratio of Wet to Dry Ingredients: Too much flour and your bread will be dry and crumbly. Too much liquid and it will be dense and soggy. This recipe strikes the perfect balance, resulting in a moist and tender crumb.
- The Importance of Orange Zest: Orange juice adds moisture, but the zest is where the real flavor lies. The zest’s essential oils are incredibly aromatic and deliver a concentrated burst of citrus that elevates the entire bread.
- The Magic of Buttermilk (or a Buttermilk Substitute): Buttermilk adds a subtle tang and helps to tenderize the gluten in the flour, resulting in a softer, more delicate crumb. If you don’t have buttermilk on hand, a simple substitute (more on that later!) works beautifully.
- The Even Distribution of Cranberries: Tossing the cranberries in a little flour before adding them to the batter helps to prevent them from sinking to the bottom of the loaf during baking. This ensures that every slice is packed with cranberry goodness.
- The Power of a Good Glaze (Optional, but Recommended!): A simple orange glaze adds a touch of sweetness and a beautiful sheen to the finished loaf, making it even more irresistible.
Ingredients
- All-Purpose Flour: 3 cups
- Granulated Sugar: 1 cup
- Baking Powder: 1 tablespoon
- Baking Soda: 1/2 teaspoon
- Salt: 1/2 teaspoon
- Orange Zest: 2 tablespoons (from about 2 large oranges)
- Orange Juice: 1/2 cup (freshly squeezed is best!)
- Buttermilk: 1 cup (or 1 cup milk + 1 tablespoon lemon juice or white vinegar)
- Eggs: 2 large
- Vegetable Oil: 1/4 cup (or melted coconut oil)
- Vanilla Extract: 1 teaspoon
- Fresh or Frozen Cranberries: 1 1/2 cups (thawed if frozen, patted dry)
- All-Purpose Flour (for tossing cranberries): 1 tablespoon
- Glaze (Optional):
- Powdered Sugar: 1 cup
- Orange Juice: 2-3 tablespoons
Instructions
- Preheat and Prepare: Preheat your oven to 350°F (175°C). Grease and flour a 9×5 inch loaf pan. This prevents the bread from sticking and ensures easy removal.
- Combine Dry Ingredients: In a large bowl, whisk together the flour, sugar, baking powder, baking soda, and salt. Add the orange zest and whisk again to distribute it evenly throughout the flour mixture. This helps to infuse the entire bread with orange flavor.
- Combine Wet Ingredients: In a separate bowl, whisk together the orange juice, buttermilk (or substitute), eggs, oil, and vanilla extract. Make sure everything is well combined.
- Combine Wet and Dry: Pour the wet ingredients into the dry ingredients and stir until just combined. Be careful not to overmix! Overmixing develops the gluten in the flour, which can result in a tough bread. A few lumps are okay.
- Prepare the Cranberries: In a small bowl, toss the cranberries with 1 tablespoon of flour. This helps to prevent them from sinking to the bottom of the loaf during baking.
- Fold in Cranberries: Gently fold the floured cranberries into the batter until evenly distributed.
- Pour into Pan: Pour the batter into the prepared loaf pan and spread it evenly.
- Bake: Bake for 50-60 minutes, or until a wooden skewer inserted into the center comes out clean or with just a few moist crumbs attached.
- Cool: Let the bread cool in the pan for 10 minutes before transferring it to a wire rack to cool completely.
- Prepare the Glaze (Optional): While the bread is cooling, prepare the glaze by whisking together the powdered sugar and orange juice until smooth. Add more orange juice, one tablespoon at a time, until you reach your desired consistency.
- Glaze the Bread: Once the bread is completely cool, drizzle the glaze over the top. Let the glaze set for a few minutes before slicing and serving.
Tips for Success
Here are a few tips to ensure your Cranberry Orange Bread turns out perfectly every time:
- Don’t Overmix: Overmixing is the enemy of tender bread. Mix the wet and dry ingredients until just combined. A few lumps are perfectly fine.
- Use Room Temperature Ingredients: Room temperature ingredients combine more easily and result in a smoother batter.
- Measure Flour Accurately: The best way to measure flour is to use a kitchen scale. If you don’t have a scale, spoon the flour into your measuring cup and level it off with a knife. Avoid scooping the flour directly from the bag, as this can pack it down and result in too much flour.
- Adjust Baking Time as Needed: Oven temperatures can vary, so keep an eye on your bread and adjust the baking time as needed. If the top of the bread is browning too quickly, tent it with foil.
- Let it Cool Completely: Resist the urge to slice into the bread while it’s still warm. Letting it cool completely allows the crumb to set and prevents it from being gummy.
- Fresh vs. Frozen Cranberries: Both fresh and frozen cranberries work well in this recipe. If using frozen cranberries, thaw them completely and pat them dry before using.
Storage Instructions
To keep your Cranberry Orange Bread fresh, store it properly:
- Room Temperature: Store the bread in an airtight container at room temperature for up to 3 days.
- Refrigerator: For longer storage, store the bread in the refrigerator for up to a week.
- Freezer: You can also freeze the bread for up to 2 months. Wrap it tightly in plastic wrap and then in aluminum foil. Thaw overnight in the refrigerator before serving.
FAQ
Q: Can I use dried cranberries instead of fresh or frozen?
A: Yes, you can use dried cranberries, but keep in mind that they are sweeter and chewier than fresh or frozen cranberries. Reduce the amount of sugar in the recipe slightly if using dried cranberries. You may also want to soak them in warm water or orange juice for about 15 minutes before adding them to the batter to plump them up.
Q: Can I make this recipe gluten-free?
A: Yes, you can substitute a gluten-free all-purpose flour blend for the regular all-purpose flour. Be sure to use a blend that contains xanthan gum, as this will help to bind the ingredients together. You may also need to add a little extra liquid to the batter, as gluten-free flours tend to absorb more moisture.
Q: Can I add nuts to this bread?
A: Absolutely! Chopped walnuts or pecans would be a delicious addition. Add about 1/2 cup of chopped nuts to the batter along with the cranberries.
Q: What can I use if I don’t have buttermilk?
A: A simple buttermilk substitute can be made by adding 1 tablespoon of lemon juice or white vinegar to 1 cup of milk. Let it sit for 5 minutes before using.
Q: Can I make this into muffins?
A: Yes! Fill muffin liners about 2/3 full and bake at 375°F (190°C) for 18-22 minutes, or until a toothpick inserted into the center comes out clean.
Conclusion
This Cranberry Orange Bread recipe is more than just a recipe; it’s a celebration of flavors. The tart cranberries, the bright orange zest, and the moist, tender crumb create a symphony of tastes and textures that will leave you wanting more. Whether you’re baking it for a holiday gathering, a weekend brunch, or simply a sweet treat for yourself, this bread is sure to impress. So, gather your ingredients, preheat your oven, and get ready to experience a burst of sunshine in every slice! Happy baking!