🪱 The Best Easy Dirt Cake Recipe (No Bake!)
So you’re craving something tasty but too lazy to spend forever in the kitchen, huh? Same.
Listen, we have all been there. You want a dessert that screams “I made an effort,” but your energy levels are screaming “I want to lie on the couch and watch three seasons of a show I’ve already seen.” Enter the Dirt Cake. If you grew up in the 90s or early 2000s, this dessert basically holds the structural integrity of your childhood memories. It’s creamy, it’s crunchy, it features gummy worms, and best of all? It requires zero heat. That’s right—keep that oven off, friend. We don’t need that kind of negativity (or heat) in our lives today.
This isn’t just a recipe; it’s a portal back to a simpler time when your biggest worry was whether you’d get the piece of cake with the most gummy worms. So, grab your mixing bowl and let’s make some magic happen.

Why This Recipe is Awesome
Okay, aside from the fact that it’s culturally iconic, let’s talk about why this specific easy dirt cake recipe deserves a spot in your heavy rotation.
1. It is Literally Idiot-Proof I’m serious. You could make this with one eye closed and a spatula in your non-dominant hand. It’s nearly impossible to mess up unless you, like, forget to buy the Oreos. Even I—someone who has managed to burn water before—didn’t mess it up. It relies on pre-made components (hello, instant pudding and Cool Whip) coming together to create something greater than the sum of its parts.
2. The Texture Symphony Let’s get a little “foodie” for a second. The magic of a dirt cake lies in the layers. You have the crunchy, gritty texture of the crushed Oreos acting as your “soil.” Then, you hit that layer of velvety, tangy cream cheese mixed with sweet vanilla pudding. It’s cool, it’s smooth, and when you get a bite that has both the crunch and the cream? Chef’s kiss. It hits every sensory pleasure point in your brain.
3. No-Bake Nation I cannot stress this enough: Not turning on the oven is a lifestyle. Especially in the summer, or honestly, any Tuesday night. This is a “mix and chill” situation. It frees up your oven for other things (like storing sweaters, Carrie Bradshaw style) and keeps your kitchen cool.
4. It Feeds a Crowd (Or Just You) This recipe makes a massive 9×13 pan, or a giant flower pot, or about 12 individual cups. It is the ultimate potluck weapon. You walk in with a dirt cake, and suddenly you are the most popular person at the BBQ. It’s science.
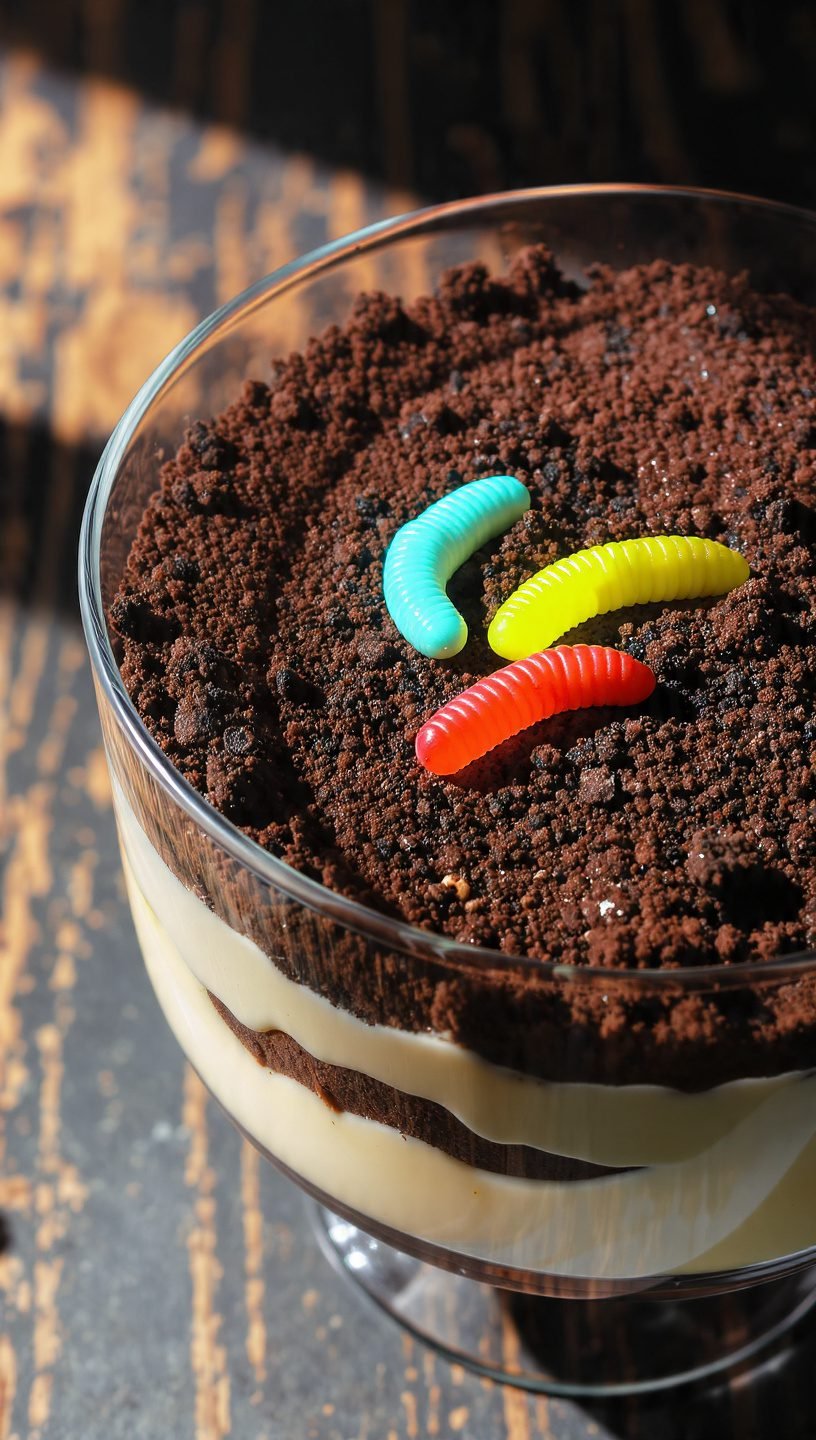
5. The Customizable aesthetic You can serve this in a glass trifle bowl to show off those gorgeous geological layers, throw it in a plastic sand bucket for a kid’s beach party, or put it in an actual (clean/new) flower pot with fake flowers sticking out of it to confuse and delight your guests.
Ingredients You’ll Need
Here is your shopping list. Don’t try to get too fancy here; we want the processed stuff. This is not the time for organic, hand-churned artisan butter. We want the stuff that tastes like childhood.
- Oreos (1 Family Size Package): You need the classic sandwich cookie. Not the “Thin” ones (too fragile), not the “Double Stuf” (too much cream-to-cookie ratio disrupts the soil consistency). Just the O.G. package. You’ll be crushing these into oblivion.
- Cream Cheese (1 Block / 8oz): Important: This needs to be softened to room temperature. If you try to mix cold cream cheese, you will end up with lumpy pudding, and nobody wants lumpy pudding.
- Unsalted Butter (1/4 Cup): Also softened. This adds a rich, savory undertone that cuts through the sugar. margarine is okay here, but butter is better.
- Confectioners’ Sugar (1 Cup): Also known as powdered sugar. This sweetens up the cream cheese layer and helps stabilize it so your cake doesn’t turn into soup.
- Instant Vanilla Pudding Mix (2 Boxes / 3.4oz each): Make sure it says “Instant.” If you buy the “Cook & Serve” kind, this recipe will fail, and you will be sad. You can also use French Vanilla for a deeper flavor, or Chocolate pudding if you want “Mud” instead of “Dirt.”
- Milk (3 Cups): Whole milk is best for creaminess, but 2% works fine. Skim milk might make it a little watery, so proceed with caution.
- Cool Whip (1 Container / 12-16oz): Thawed! Do not try to fold in a frozen block of Cool Whip. It won’t work. You can use homemade whipped cream if you’re feeling fancy, but the stabilizers in Cool Whip actually help this cake hold its shape better.
- Gummy Worms (1 Bag): The garnish of champions. Essential for the aesthetic.
Step-by-Step Instructions
Alright, apron on (or not, I’m not your mom). Let’s build this masterpiece.
1. Demolish the Cookies Take your Oreos and crush them. You have two options here.
- Option A (The Civilized Way): Put them in a food processor and pulse until they look like potting soil.
- Option B (The Therapy Way): Put them in a large Ziploc bag, seal it tight (remove the air!), and beat the living daylights out of it with a rolling pin or a heavy frying pan.
- Goal: You want fine crumbs, but a few bigger chunks are totally fine for texture. Set these aside.
2. The Cream Cheese Base In a large mixing bowl, throw in your softened cream cheese, softened butter, and powdered sugar. Use a hand mixer on medium speed and beat it until it is smooth, fluffy, and creamy.
- Sensory Check: It should look white and velvety, with zero lumps. Scrape down the sides of the bowl to make sure everything is incorporated. This is the “tangy” element that balances the sweetness.
3. The Pudding Situation In a separate bowl, whisk together the milk, the pudding mix, and the vanilla extract (if you’re adding a splash). Whisk vigorously for about 2 minutes. You will feel the mixture start to thicken up as the hydrocolloids in the instant pudding react with the milk proteins.
- Note: It doesn’t need to be fully set like a firm jello, but it should be thick enough that it doesn’t splash.

4. The Great Union Pour the thickened pudding mixture into the bowl with the cream cheese mixture. Fold them together gently. Once combined, fold in the thawed Cool Whip.
- Technique Tip: Fold, don’t stir. Use a spatula to gently scoop from the bottom and flip over the top. We want to keep the air in the Cool Whip so the filling stays light and mousse-like, rather than dense and heavy.
5. Layering (The Geology Lesson) Now, grab your serving vessel (9×13 pan, trifle bowl, or flower pot).
- Layer 1: Sprinkle about 1/3 of your Oreo crumbs across the bottom.
- Layer 2: Spoon half of the pudding/cream mixture over the crumbs. Spread it out gently.
- Layer 3: Sprinkle another 1/3 of the crumbs.
- Layer 4: The rest of the pudding mixture.
- Layer 5: The final “Topsoil” layer. Dump the remaining Oreo crumbs on top and spread them edge-to-edge so no white filling is visible. It should look like a box of dirt.
6. The Chill Factor This is the hardest part. You have to wait. Cover the dish with plastic wrap and put it in the fridge.
- Time: Minimum 4 hours, but overnight is best.
- Why? The moisture from the filling needs to seep into the cookie crumbs slightly, softening them into a cake-like consistency, while the filling needs to firm up so you can slice it (or scoop it) cleanly.
7. Decorate Right before serving, add your gummy worms. Poke them halfway into the “dirt” so it looks like they are crawling out.
Common Mistakes to Avoid
Even though I said this is idiot-proof, there are a few ways to derail the train. Let’s avoid them.
- Thinking you don’t need to thaw the Cool Whip: If you try to mix frozen Cool Whip, you will get weird frozen lumps in your pudding. Put it in the fridge the night before, or on the counter for 30 minutes.
- Using “Cook & Serve” Pudding: I mentioned this before, but I’m mentioning it again because it happens all the time. “Cook & Serve” requires boiling heat to activate the starch. If you use it cold, you will just have sweet, gritty milk soup. Instant only, folks.
- Rushing the Chill Time: If you eat this immediately after making it, it’s just pudding with crunchy cookies. It’s not bad, but it’s not Dirt Cake. The magic happens during the 4+ hour rest when the flavors meld and the structure sets.
- Buying Low-Fat Cream Cheese: Listen, we are making a dessert made of cookies and pudding. This is not the time to count calories. Low-fat cream cheese has a higher water content and can make the filling runny. Go for full fat. Your soul will thank you.
Alternatives & Substitutions
Want to switch things up? Here are some ways to remix the classic easy dirt cake recipe.
- The “Sand” Cake (Golden Oreos): Swap the chocolate Oreos for Golden Oreos (vanilla). The crumbs look like sand! Use vanilla pudding, and decorate with little cocktail umbrellas or gummy sharks. Boom—beach theme.
- The Chocolate Lover: Use Chocolate Fudge instant pudding instead of Vanilla. This makes the “dirt” even muddier and richer. It’s intense, but delicious.
- Individual Cups: Instead of one big pan, layer these into clear plastic cups (about 9oz size). This is way easier for parties because you don’t have to scoop it out later. Plus, no fighting over who got more worms.
- Gluten-Free? Honestly, this is an easy fix. Just buy the Gluten-Free Oreos (they taste almost exactly the same) and double-check that your pudding mix is GF (most are).
- The “Adult” Version: Add a splash of Baileys or Kahlua into the milk/pudding mixture. You’re welcome. (Just, uh, keep those away from the kids’ table).
FAQ (Frequently Asked Questions)
Q: Can I use margarine instead of butter? A: Well, technically yes, but why hurt your soul like that? Butter provides a creamy mouthfeel that oil-based margarine just can’t match. But if it’s all you have, it won’t ruin the cake.
Q: Can I make this days in advance? A: Yes! This is actually one of the few desserts that gets better with age (to a point). You can make it 2 days in advance. After day 3, the Oreos start to get a little too soggy, but it’s still edible.
Q: My pudding mixture looks too runny! What did I do? A: You probably used skim milk or didn’t whisk the pudding long enough before adding it to the cream cheese. Don’t panic. Add a little more powdered sugar or a tiny bit more instant pudding powder to tighten it up.
Q: Can I freeze Dirt Cake? A: Surprisingly, yes! It freezes like an ice cream cake. Just let it thaw in the fridge for about 30 minutes before serving, otherwise, you’ll bend your spoon trying to scoop it.
Q: Do I remove the cream from the Oreos before crushing? A: NO! Who has time for that? Plus, the cream adds sweetness and helps the crumbs clump together just a little bit, giving it that perfect soil texture. Keep the cream.
Q: Why is my cream cheese lumpy? A: You didn’t let it soften, did you? I told you! If you’re in a jam, zap the cream cheese in the microwave for 10-15 seconds (without the foil wrapper!) to soften it up before mixing.

Final Thoughts
There you have it—the blueprint for the most nostalgic, crowd-pleasing, low-effort dessert in history. Whether you’re making this for a Halloween party, a summer BBQ, or just because it’s Tuesday and you deserve a treat, this easy dirt cake recipe is going to deliver.
It brings people together. It reminds us that food doesn’t have to be complicated or pretentious to be absolutely delicious. Sometimes, you just need sugar, cream, and a gummy worm.
Now go impress someone—or yourself—with your new culinary skills. You’ve earned it!