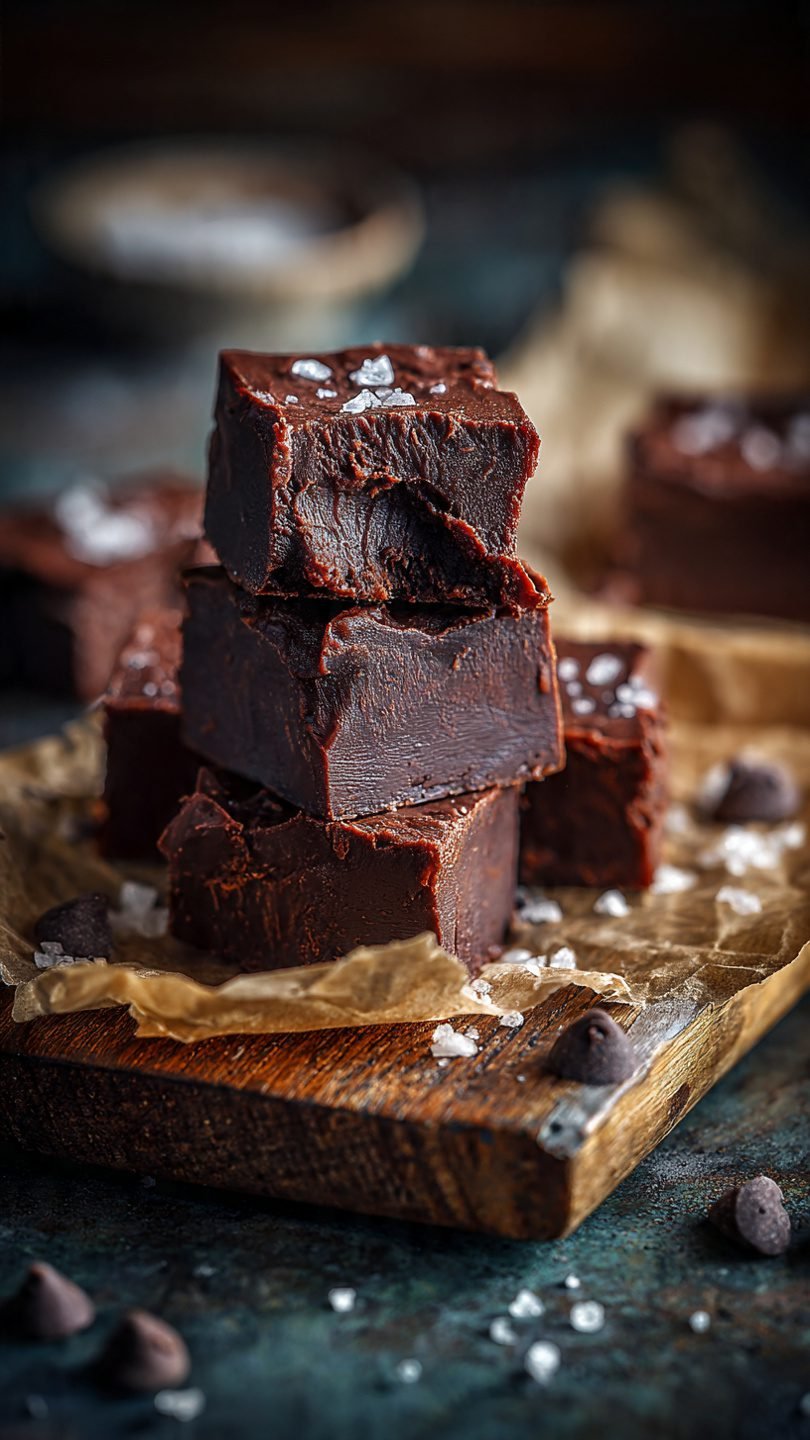
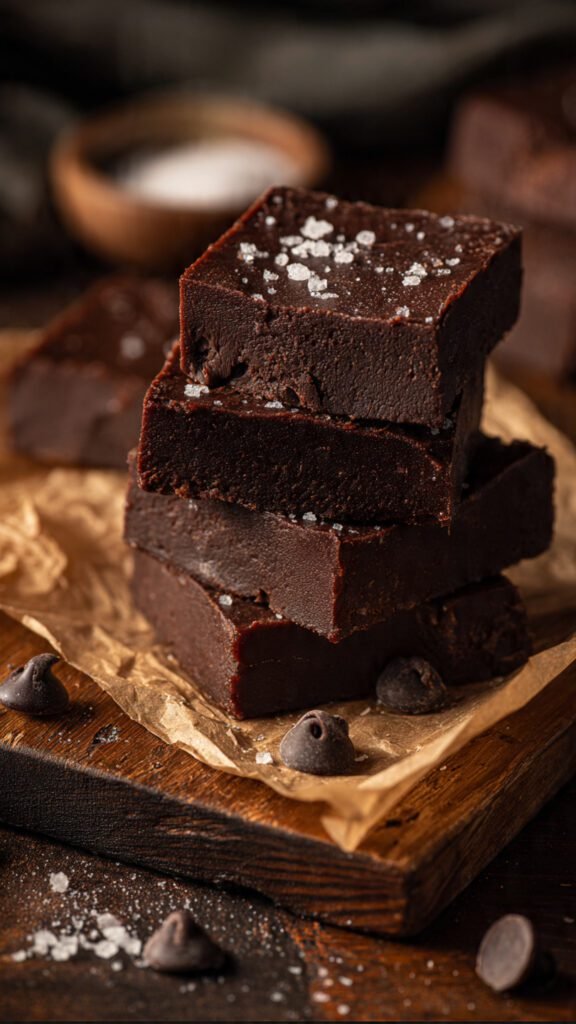
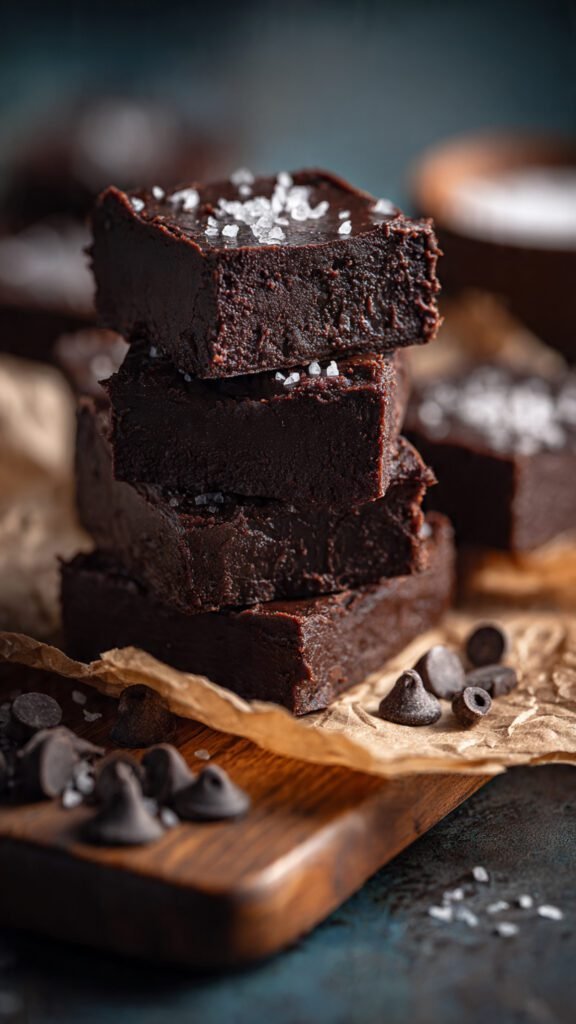
🍫 The Best Easy Fudge Recipe With Condensed Milk
So, you’re craving something decadently chocolatey, but you are absolutely too lazy to spend forever in the kitchen dealing with candy thermometers and “soft ball stages,” huh? Same.
Let’s be real: traditional old-school fudge is a high-maintenance diva. It demands precision, humidity control, and a level of patience I simply do not possess on a Friday night. But this recipe? This is the cool, laid-back cousin of baking. It requires almost zero effort, yet somehow delivers results that taste like you went to pastry school.
If you can stir stuff in a bowl, you are overqualified for this job. Let’s make some magic.
Why This Recipe is Awesome
Look, I’m not saying this is the greatest kitchen hack of the century, but I’m not not saying that. This easy fudge recipe with condensed milk is the gold standard for high-reward, low-effort desserts.
1. It is Literally Foolproof When people say a recipe is “easy,” they usually mean “easy if you know what sauté means.” But this? This is genuinely hard to mess up. I have made this while distracted by a Netflix binge, and it still came out perfect. There is no tempering of chocolate. There is no boiling sugar syrup until it hits 234°F (112°C). It’s just melting and mixing. It is the participation trophy of desserts, except the trophy is delicious chocolate.
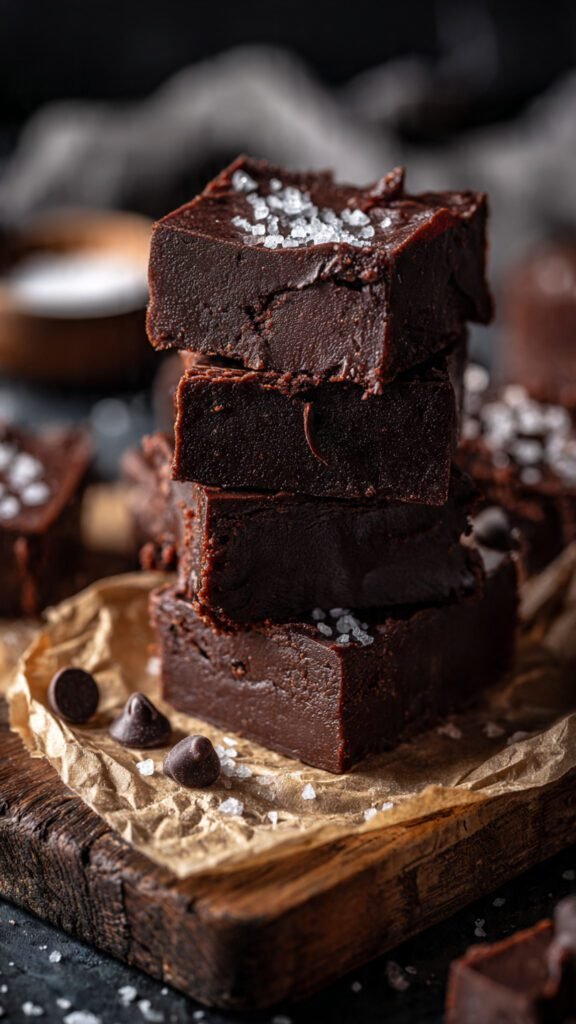
2. The Texture is Insane Traditional fudge can sometimes turn out grainy or dry if you look at it the wrong way. Because sweetened condensed milk is already thick, creamy, and pre-sweetened, it acts as a stabilizer. It ensures that every bite is silky, dense, and has that perfect “tooth-sink” quality—firm enough to hold its shape, but soft enough to melt on your tongue immediately.
3. It’s the Ultimate “I Forgot to Buy a Gift” Solution Holidays? Birthdays? Forgot your anniversary? (Yikes). Cut this fudge into cute squares, throw it in a tin with some parchment paper, and tie a ribbon around it. Suddenly, you’re not “forgetful,” you’re “thoughtful and domestic.”
4. The Science is on Your Side Here is a tiny bit of nerd talk: The reason this works so well is that condensed milk has had most of the water removed and sugar added. When you heat it with chocolate, the fat in the chocolate emulsifies with the thick milk solids. You are bypassing the crystallization process that makes regular candy-making so scary. It’s chemistry, but the tasty kind.
Ingredients You’ll Need
You don’t need a shopping cart for this. You barely need a basket. Here is the lineup for greatness:
- Chocolate Chips (3 cups / approx. 500g): This is the main event. Do not use the cheapest chips you can find. Since there are only two main ingredients, the quality of the chocolate matters.
- Pro Tip: Semi-sweet is the classic choice. Milk chocolate makes it very sweet (borderline tooth-ache territory), and dark chocolate makes it sophisticated and rich. I like a mix of semi-sweet and dark.
- Sweetened Condensed Milk (1 can / 14 oz): The glue that holds our lives (and this fudge) together.
- Critical: Make sure you grab Sweetened Condensed Milk, not Evaporated Milk. Evaporated milk is thin and unsweetened; if you use that, you will just have hot, watery chocolate soup.
- Butter (1 tbsp): Optional, but highly recommended. It adds a glossy sheen to the finished product that makes it look professional.
- Vanilla Extract (1 tsp): This adds depth so it doesn’t just taste like flat sugar.
- Pinch of Salt: Do not skip this! Salt wakes up the chocolate flavor and cuts through the intense sweetness.
Step-by-Step Instructions
Ready to feel like a chocolatier? Let’s do this.
1. Prep Your Battle Station
First things first: Line your pan. Grab an 8×8 inch (20×20 cm) square pan. Line it with parchment paper or aluminum foil.
- The Hack: Leave an overhang of paper on the sides. This creates “handles” so you can easily lift the entire block of fudge out later. If you skip this, you will be digging fudge out with a spoon like a caveman. (Which is fine, but not for guests).
2. The Great Meltdown
You have two choices here. Choose your fighter:
- Option A: The Microwave (The “I need it now” method) Combine your chocolate chips, sweetened condensed milk, and butter in a microwave-safe bowl. Heat it in 30-second intervals.
- Important: Stir vigorously between each interval. The bowl will hold heat, and the chocolate will keep melting while you stir. If you just blast it for 2 minutes straight, the chocolate will burn, seize up, and turn into a gritty rock. Don’t do that. usually, 90 seconds total is plenty.
- Option B: The Stovetop (The “I feel fancy” method) Set up a double boiler (or just put a glass bowl over a pot of simmering water—don’t let the water touch the bowl!). Toss in the chocolate, milk, and butter. Stir gently and constantly until melted and smooth. This method is safer because it’s much harder to burn the chocolate.
3. Flavor Injection
Once the mixture is completely melted, smooth, and looking glossy enough to see your reflection in, remove it from the heat. Immediately stir in the vanilla extract and that pinch of salt.
- Sensory Check: The mixture should be thick, heavy, and reluctant to fall off the spoon. It should smell like heaven.
4. The Spread
Pour the mixture into your prepared pan. Use a rubber spatula to smooth the top.
- Optional: If you are adding toppings (sea salt, sprinkles, nuts), do it right now while the fudge is sticky. If you wait 10 minutes, nothing will stick.
5. The Hardest Part: Waiting
Put the pan in the fridge. You need to let it set for at least 2 to 3 hours. I know, it hurts to wait.
- Cheater Tip: You can put it in the freezer for 1 hour to speed it up, but the texture is slightly better (creamier) if it cools down gradually in the fridge.
6. Slice and Devour
Once it is firm, use the parchment paper handles to lift the block out of the pan. Place it on a cutting board.
- Pro Tip: Run a sharp knife under hot water and wipe it dry before cutting. The hot blade will glide through the cold fudge like butter, giving you those sharp, clean edges. Cut into small squares—it’s rich!
Common Mistakes to Avoid
Even though this easy fudge recipe with condensed milk is simple, things can go wrong if you get too cocky.
1. The Water Enemy (Seizing) Chocolate hates water. If even a tiny drop of water splashes into your melting chocolate (like steam from the double boiler or a wet spoon), the chocolate will “seize.” This means it instantly turns into a hard, grainy, clumpy mess that cannot be saved. Keep everything bone dry.
2. Overcooking the Mixture If you heat the mixture too long or at too high a temperature, the cocoa butter can separate from the solids. You’ll end up with a pool of oil on top of your fudge. If you see oil pooling, you’ve gone too far.
- The Fix: Sometimes, stirring in a tiny splash of cold heavy cream can bring it back together, but it’s risky.
3. Using “Chocolate Flavored” Chips Check the bag. If it says “chocolate flavored baking chips” instead of “real semi-sweet chocolate,” put it back. Those are made with vegetable oils instead of cocoa butter. They don’t melt right, and they taste waxy. Treat yourself to the real stuff.
4. Ignoring the Salt I mentioned this before, but it bears repeating. Sweetened condensed milk is very sweet. Without salt, the fudge can be cloying. That pinch of salt is the difference between “okay” fudge and “OMG” fudge.
Alternatives & Substitutions
You’ve mastered the base recipe. Now let’s get weird (in a good way).
1. The “Salty Ex” (Sea Salt & Caramel) Swirl a few tablespoons of thick caramel sauce into the mixture right before you pour it into the pan. Don’t mix it fully; leave ribbons of caramel. Top generously with flaky sea salt.
2. The Nutty Professor Add 1 cup of walnuts, pecans, or pistachios. Toast the nuts in a dry pan for 2 minutes first to release their oils. The crunch against the soft fudge is texture perfection.
3. White Chocolate Raspberry Swap the semi-sweet chips for white chocolate chips. (Note: White chocolate melts faster and burns easier, so go low and slow!). Once melted, swirl in some dried cranberries or freeze-dried raspberries. It looks festive and tastes tart and sweet.
4. Peanut Butter Dream Use peanut butter chips instead of chocolate, or just swirl 1/2 cup of creamy peanut butter into the standard chocolate base. It’s like a giant, square buckeye candy.
5. The Peppermint Bark Remix Add 1/2 teaspoon of peppermint extract instead of vanilla. Crush up some candy canes and sprinkle them on top. Boom—Christmas in a bite.
FAQ (Frequently Asked Questions)
1. Can I use evaporated milk instead? No. Absolutely not. Do not pass go, do not collect $200. Evaporated milk is just milk with less water. It has no sugar and is too thin. Your fudge will not set. It will be a puddle of sadness.
2. Can I use margarine instead of butter? Well, technically yes, but why hurt your soul like that? Butter provides flavor and a better mouthfeel. Margarine has a higher water content which could mess with the texture. Stick to the real dairy if you can.
3. My fudge is too soft! What happened? You probably didn’t chill it long enough, or you measured your chocolate by heart instead of by cup. If you don’t use enough chocolate chips, the ratio is off, and the condensed milk won’t have enough structure to hold up. Pop it in the freezer; it might just need to be eaten cold.
4. How long does this store for? If you hide it well enough so your family doesn’t find it? It lasts about 2 weeks in an airtight container at room temperature, or up to a month in the fridge.
5. Can I freeze this fudge? Yes! It freezes beautifully. Wrap the block (or slices) in plastic wrap, then foil, then put it in a bag. It stays good for 3 months. It’s a great emergency snack for when you have a bad day.
6. Is this gluten-free? Generally, yes! Most chocolate chips and condensed milk are naturally gluten-free. However, if you are serving this to someone with Celiac disease, always check the labels to ensure they were processed in a gluten-free facility.
7. Why is my fudge grainy? You likely overheated the chocolate or used a wooden spoon that retained odors/moisture. Or, you used cheap chocolate chips that have fillers. Low heat and good chocolate are the keys to smoothness.
Final Thoughts
There you have it. You are now the proud owner of a recipe that makes you look like a domestic god/goddess but actually takes less effort than folding laundry.
This easy fudge recipe with condensed milk is more than just sugar and cocoa; it’s a confidence booster. It’s the ace up your sleeve for potlucks, the peace offering for arguments, and the perfect companion for a movie marathon.
So, go raid your pantry. Melt that chocolate. Lick the spoon (I won’t tell). Now go impress someone—or just impress yourself—with your new culinary skills. You’ve earned it!