🍪 Sugar Cookie Icing Recipe That Hardens The Secret to Perfectly Decorated Cookies
👩🍳 The Home Chef's Essential Kitchen
Consistently cooking incredible, healthy meals at home is so much easier when you aren't fighting with cheap tools. These are the 5 absolute powerhouse kitchen essentials that professional chefs and serious home cooks rely on every single day to get perfect results.
🍳 Lodge 10.25" Cast Iron Skillet
The single greatest value in all of cookware. It retains heat infinitely better than cheap non-stick pans, allowing you to get a restaurant-quality crust on steaks or perfect crispy edges on cornbread. With proper care, this $20 pan will literally outlive you.
🔪 Victorinox Fibrox Pro 8" Chef's Knife
A dull knife makes cooking a frustrating chore. This specific blade is the undisputed champion of the culinary world—it holds a terrifyingly sharp edge, features a comfortable non-slip grip, and performs identical to German knives that cost quadruple the price.
🌡️ ThermoPro Instant Read Thermometer
Never serve dry chicken or undercooked pork again. An instant-read thermometer is the secret difference between amateur cooks who 'guess' when protein is done, and professionals who know exactly when to pull meat off the heat for maximum juiciness.
🍲 Lodge Enameled Cast Iron Dutch Oven
The ultimate workhorse for soups, stews, braised short ribs, and baking crusty artisanal bread. The enameled interior provides incredible heat distribution for slow-cooking while eliminating the intense seasoning maintenance required by bare cast iron.
🥄 Bpa-Free Silicone Utensil Set
Throw away those melting plastic spatulas and bacteria-harboring wooden spoons. This pure silicone set is heat-resistant up to 600°F, won't scratch your expensive pans, and features seamless designs that make cleaning out thick sauces and batters effortless.
There’s a certain magic that happens when a humble sugar cookie transforms into a miniature work of art. The crisp, buttery edges, the tender crumb, and then… the icing. Ah, the icing! For many home bakers, the dream of beautifully decorated sugar cookies, adorned with a smooth, glossy, and perfectly hardened icing, often feels just out of reach. You might have experienced the frustration of runny glazes that refuse to set, or brittle icings that crack at the slightest touch, leaving your festive creations looking less than picture-perfect. But what if we told you that achieving that professional, bakery-quality finish is not only possible but surprisingly simple?
Enter our ultimate Sugar Cookie Icing Recipe That Hardens. This isn’t just any icing recipe; it’s the culmination of countless batches, a symphony of simple ingredients brought together to create an icing that truly delivers. Imagine a delicate, vanilla-scented coating that glides effortlessly onto your cookies, then gracefully sets to a firm, smooth, and slightly shiny finish. It’s an icing that won’t smudge when stacked, won’t melt at room temperature, and most importantly, tastes absolutely divine, adding another layer of sweet perfection to your already delicious sugar cookies. Forget the fuss and embrace the joy of decorating with confidence!
Whether you’re a seasoned cookie decorator or just starting your journey, this recipe will become your trusted companion. It’s forgiving, versatile, and yields consistently beautiful results every single time. Get ready to impress your friends and family with cookies that look like they’ve stepped out of a gourmet bakery display, all thanks to this easy-to-master, utterly delectable Sugar Cookie Icing Recipe That Hardens. Prepare to fall in love with decorating again!

Why This Recipe Works
This Sugar Cookie Icing Recipe That Hardens isn’t just another set of instructions; it’s a carefully balanced formula designed for success, delivering that coveted hard, smooth, and vibrant finish without sacrificing flavor or ease of use. Here’s why it stands head and shoulders above other recipes:
- Perfect Ingredient Ratio: The precise balance of powdered sugar to liquid is the secret sauce. Powdered sugar, also known as confectioners’ sugar, is finely milled with a small amount of cornstarch, which is crucial for stability and a smooth texture. When combined with just the right amount of liquid, it forms a thick, stable suspension that sets beautifully without becoming overly brittle.
- The Power of Corn Syrup: While optional, a touch of light corn syrup is a game-changer. It acts as a plasticizer, giving the icing a lovely sheen and preventing it from becoming too fragile or prone to cracking once dry. It also helps the icing set more quickly and with a smoother, more professional appearance, almost like a thin, edible glaze.
- Vanilla’s Sweet Embrace: We don’t skimp on the vanilla extract. A generous amount ensures that the icing isn’t just sweet, but also infused with a warm, inviting flavor that complements the butteriness of sugar cookies perfectly. It elevates the taste from merely sugary to delightfully gourmet.
- Adjustable Consistency: This recipe is incredibly adaptable. By simply adjusting the amount of liquid, you can achieve various consistencies – from a thick, pipeable outline icing to a thinner “flood” icing that spreads smoothly to fill in your designs. This versatility makes it ideal for intricate decorating techniques.
- Quick Drying Time: Thanks to its balanced composition, this icing dries relatively quickly, typically forming a crust within an hour and fully hardening within 6-24 hours, depending on thickness and humidity. This means you can stack your beautifully decorated cookies without fear of smudging, making them perfect for gifting or transporting.
- Beautiful Finish: The end result is a glossy, opaque, and perfectly smooth surface that makes colors pop and designs truly shine. It gives your homemade cookies that coveted bakery-quality look that will have everyone asking for your secret.
Ingredients
Gathering your ingredients is the first step to creating this magical icing. You’ll find these items are pantry staples, making this recipe not only effective but also incredibly convenient.
- 4 cups (480g) powdered sugar (confectioners’ sugar), sifted – This is the foundation of our icing, providing the necessary bulk and structure. Sifting is non-negotiable for a lump-free result!
- 5-7 tablespoons milk (or water), divided – The liquid component that brings the icing together. Start with less and add more gradually to achieve your desired consistency. Whole milk often yields a slightly creamier texture, but water works perfectly fine for a crisp finish.
- 1 teaspoon pure vanilla extract – Essential for that classic, comforting sugar cookie flavor. Don’t underestimate its power to elevate the taste!
- 1-2 tablespoons light corn syrup (optional, but highly recommended) – Our secret weapon for a beautiful sheen and flexibility, preventing cracks.
- Gel food coloring (optional) – For vibrant, beautiful colors without thinning your icing. Liquid food coloring can be used, but use sparingly.
Instructions
Creating this perfect icing is a straightforward process, but paying attention to each step will ensure you achieve that coveted smooth, hard finish. Read through the instructions once before you begin to familiarize yourself with the process.
- Prepare Your Workspace and Sift: First, ensure your mixing bowl and utensils are clean and dry. In a large bowl, meticulously sift the 4 cups of powdered sugar. This step is crucial for preventing lumps and ensuring a silky-smooth icing. Don’t skip it! Even if your powdered sugar looks fine, sifting breaks up any hidden clumps and aerates it.
- Combine Wet Ingredients: In a separate small bowl or measuring cup, whisk together 5 tablespoons of milk (or water), the vanilla extract, and the light corn syrup (if using). The corn syrup will help create a beautiful sheen and prevent the icing from becoming too brittle, giving it a slight elasticity that resists cracking.
- Gradually Incorporate Liquid: Pour about half of the liquid mixture into the sifted powdered sugar. Using a whisk or an electric hand mixer on low speed, begin to mix. The mixture will look very thick and crumbly at first.
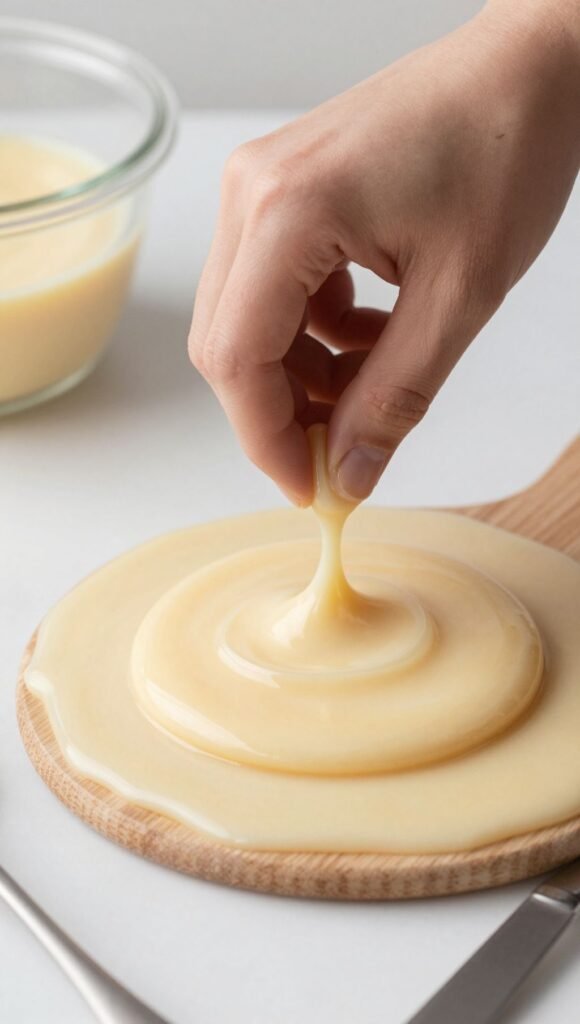
- Achieve the Right Consistency: Continue adding the remaining liquid mixture, one tablespoon at a time, mixing thoroughly after each addition. You are looking for a smooth, thick consistency. For outlining cookies, you’ll want an icing that holds its shape when piped but can still be squeezed from a bag. For “flooding” (filling in areas), you’ll want a slightly thinner consistency that settles flat but isn’t watery.
- Test Consistency for Outlining: To test for outlining consistency, lift your whisk or spoon; the icing should fall in a thick ribbon that holds its shape for a few seconds before slowly melting back into the bowl. If it’s too thick, add a tiny splash more milk (or water), a mere half teaspoon at a time. If it’s too thin, add a tablespoon of sifted powdered sugar until the desired consistency is reached. This is often referred to as “20-second icing” – if you draw a line through it with a spoon, the line should disappear in about 20 seconds.
- Divide and Color (Optional): If you plan to use multiple colors, divide the icing into separate bowls now. Add gel food coloring, a tiny drop at a time, to each bowl and mix thoroughly until you achieve your desired hue. Gel colors are preferred as they are concentrated and won’t significantly alter the icing’s consistency like liquid food colorings might.
- Adjust for Flooding (if needed): If you’re going to flood your cookies, you’ll need a slightly thinner consistency than your outlining icing. Take a portion of your outlining icing and add a few drops of milk (or water) at a time, mixing until it reaches a “10-second icing” consistency (a line drawn through it disappears in about 10 seconds). This thinner icing will spread smoothly and evenly to fill in your outlined areas.
- Transfer to Piping Bags: Spoon the icing into piping bags fitted with small round tips (like PME #1.5, #2, or Wilton #2, #3 for outlining, and slightly larger tips or just snip the end of the bag for flooding). Alternatively, you can use squeeze bottles for easy flooding.
- Decorate Your Cookies: Outline your cooled sugar cookies with the thicker icing, then immediately fill in the outlined areas with the slightly thinner “flood” icing. Use a clean toothpick or scribe tool to gently spread the flood icing to the edges and pop any air bubbles for a perfectly smooth surface.
- Allow to Dry Completely: This is the most important step for hardening! Place your decorated cookies on a wire rack in a single layer, undisturbed, at room temperature. Allow them to dry for at least 6-8 hours, or preferably overnight (12-24 hours), especially if you’ve applied thick layers of icing or live in a humid environment. The icing should be completely hard to the touch before stacking or packaging.
Tips for Success
Achieving perfectly decorated sugar cookies with hard, beautiful icing is an art, but these pro tips will help you master it with ease and confidence.
- Sift Your Powdered Sugar Religiously: We cannot stress this enough! Powdered sugar, even freshly opened, often contains small clumps. Sifting ensures that your icing will be incredibly smooth and lump-free, which is critical for precise piping and a flawless finish. A single lump can clog your piping tip or create an unsightly bump on your cookie.
- Master Consistency Control: This is the single most important factor for successful cookie decorating.
- For Outlining and Detail Work: Aim for a “20-second icing.” When you drag a knife or spoon through it, the line should disappear within 20 seconds. It should be thick enough to hold its shape but fluid enough to pipe smoothly.
- For Flooding (Filling In): Aim for a “10-second icing.” This thinner consistency allows the icing to spread and settle flat quickly, creating a smooth, even surface. Add liquid in tiny increments (half a teaspoon at a time) to reach this consistency, as it’s easy to go too thin.
If your icing is too thick, add more liquid (milk or water) a few drops at a time. If it’s too thin, add more sifted powdered sugar, a tablespoon at a time, until the desired consistency is achieved.
- Embrace Light Corn Syrup: While optional, the addition of light corn syrup is a secret weapon. It gives the dried icing a lovely, subtle sheen, making your cookies look even more professional. More importantly, it adds a touch of elasticity, which helps prevent the icing from becoming overly brittle and cracking once it’s fully hardened. This is especially helpful if your cookies will be transported or handled frequently.
- Patience is a Virtue – Especially with Drying: Do not rush the drying process! For the icing to harden completely and prevent smudging, it needs ample time. Place decorated cookies on a flat surface or wire rack in a single layer, away from high humidity. Depending on the thickness of your icing and your local climate, this can take anywhere from 6 to 24 hours. A ceiling fan on low or a dehumidifier in the room can help speed things up, but avoid direct heat sources, which can cause cracking.
- Experiment with Flavor Variations: While vanilla is a classic, don’t be afraid to experiment! Swap out the vanilla extract for almond extract for a delicate nutty flavor, lemon extract for a bright, zesty kick, or peppermint extract for festive holiday cookies. You can also use a combination of extracts to create unique flavor profiles that perfectly complement your sugar cookie base. Just ensure you use pure extracts for the best flavor.
Storage Instructions
Proper storage is key to maintaining the freshness of both your unused icing and your beautifully decorated cookies.
Unused Icing:
If you have leftover icing, transfer it to an airtight container. Press a piece of plastic wrap directly onto the surface of the icing before sealing the container. This prevents a crust from forming and keeps the icing fresh. Store it in the refrigerator for up to 2 weeks. When you’re ready to use it again, let it come to room temperature, then give it a good stir. You might need to add a tiny drop of milk or water to restore its original consistency, as it may thicken slightly in the fridge.
Decorated Cookies:
Once your icing has completely hardened (this is crucial!), store the decorated sugar cookies in an airtight container at room temperature. Layer them carefully between sheets of parchment paper or wax paper to prevent any accidental sticking or damage to the delicate icing. Stored this way, your cookies will remain fresh and delicious for 1-2 weeks. Avoid refrigerating decorated cookies, as the condensation can cause the icing to become sticky or dull its beautiful sheen.
Freezing Decorated Cookies:
Yes, you can freeze fully iced and hardened sugar cookies! Place the completely dry cookies in a single layer on a baking sheet and freeze for about an hour until firm. Then, transfer them to an airtight freezer-safe container, layering them with parchment paper. They can be frozen for up to 3 months. To thaw, simply remove them from the freezer and let them come to room temperature in their container (this prevents condensation from forming on the icing). Once thawed, they’ll be just as delicious and beautiful as when they were first decorated.
FAQ
Here are some common questions about making and using this Sugar Cookie Icing Recipe That Hardens, along with helpful answers to ensure your success.
Q1: Why isn’t my icing hardening completely? It’s still a bit sticky.
A1: There are a few common culprits. The most frequent reason is too much liquid in your icing. Even a small excess can prevent it from setting properly. Try adding a tablespoon or two of sifted powdered sugar to thicken it slightly. Another major factor is humidity. High humidity in the air can significantly slow down or even prevent icing from fully hardening. Ensure your cookies are drying in a low-humidity environment. Lastly, ensure you’ve given them enough time; thick layers of icing can take up to 24 hours to fully cure.
Q2: Can I make this icing dairy-free or vegan?
A2: Absolutely! This recipe is easily adaptable. Simply substitute the regular milk with an equal amount of water or your favorite plant-based milk, such as almond milk, soy milk, or oat milk. Ensure your vanilla extract is also alcohol-free or a vegan-certified brand. The light corn syrup is already vegan. The taste and hardening properties will remain largely the same, making it perfect for those with dietary restrictions.
Q3: How long does it typically take for the icing to dry completely?
A3: The drying time can vary based on several factors: the thickness of your icing application, the amount of liquid used, and the humidity in your environment. Generally, a thin layer of icing will form a crust within 30-60 minutes. For it to be completely hardened and stackable, especially with thicker flood layers, it’s best to allow at least 6-8 hours, and ideally 12-24 hours. Placing them on a wire rack in a room with good air circulation and low humidity will expedite the process.
Q4: My icing looks dull once dry, not glossy. What went wrong?
A4: A dull finish can often be attributed to a few things. First, ensure you are using light corn syrup (if desired for gloss) in your recipe; it’s excellent for adding shine. Second, too much liquid in your icing can sometimes result in a less glossy finish. Third, the drying environment plays a role; very low humidity can sometimes dry the icing too quickly, leading to a matte finish, while very high humidity can prevent it from drying properly and appearing dull. Ensure your cookies are allowed to dry undisturbed and at a consistent room temperature.
🍰 The Master Baker & Prep Kit
Baking is a science, and meal prep requires efficiency. If you want consistently flaky pie crusts, perfectly risen cakes, and healthy meals ready for the week, these are the 5 upgrade tools that take your execution to the next level.
⚖️ OXO Good Grips 11lb Food Scale
The secret to why bakery bread and cookies are always perfect while home batches vary wildly. Measuring by weight (grams) instead of volume (cups) guarantees precise hydration and flawlessly consistent results every single time you bake.
🧑🍳 KitchenAid Classic Stand Mixer
The undisputed holy grail of the kitchen. From aggressively kneading heavy pizza doughs to whipping meringues into stiff peaks, this powerful motor saves your arms from exhaustion and cuts your hands-on prep time in half.
🍪 Silpat Premium Silicone Baking Mats
Stop wasting money on rolls of parchment paper or agonizing over cookies permanently fused to your metal pans. These reusable, professional-grade silicone mats ensure completely even heat distribution and instantly release even the stickiest caramel.
🌪️ Braun MultiQuick Immersion Blender
The ultimate shortcut tool for creamy tomato soups, lump-free gravies, and rapid smoothies. Avoid the burns and mess of dangerously transferring boiling liquids in batches to a traditional blender by simply blending right inside your cooking pot.
🍱 Premium Glass Meal Prep Containers
If you want to bake and cook healthier, batch preparation is required. These durable glass containers transition safely from freezer to microwave, never absorb tomato sauce stains, and feature airtight seals to keep your hard work fresh all week.
Conclusion
And there you have it – the ultimate Sugar Cookie Icing Recipe That Hardens, your new secret weapon for creating stunning, bakery-worthy sugar cookies right in your own kitchen! No more runny messes, no more brittle, cracking designs, just smooth, glossy perfection that tastes as incredible as it looks. We’ve walked through every step, every ingredient, and every pro tip to ensure your decorating journey is filled with joy, creativity, and delicious success.
Imagine the delight on faces as they bite into your beautifully adorned cookies, experiencing that delicate crunch of perfectly set icing, followed by the sweet, vanilla-infused tenderness of the cookie beneath. This recipe isn’t just about making icing; it’s about unlocking your inner cookie artist, celebrating special moments, and sharing handmade love with those you cherish. So, gather your ingredients, put on your apron, and get ready to transform ordinary sugar cookies into extraordinary edible masterpieces.
We encourage you to try this recipe for your next baking adventure – whether it’s for a holiday, a birthday, or just a delightful afternoon treat. Don’t forget to share your amazing creations with us! Happy baking, and happy decorating!