Honey Wheat Bread Recipe That Makes Your Kitchen Smell Like a Boutique Bakery (and Your Toaster Beg for Seconds)
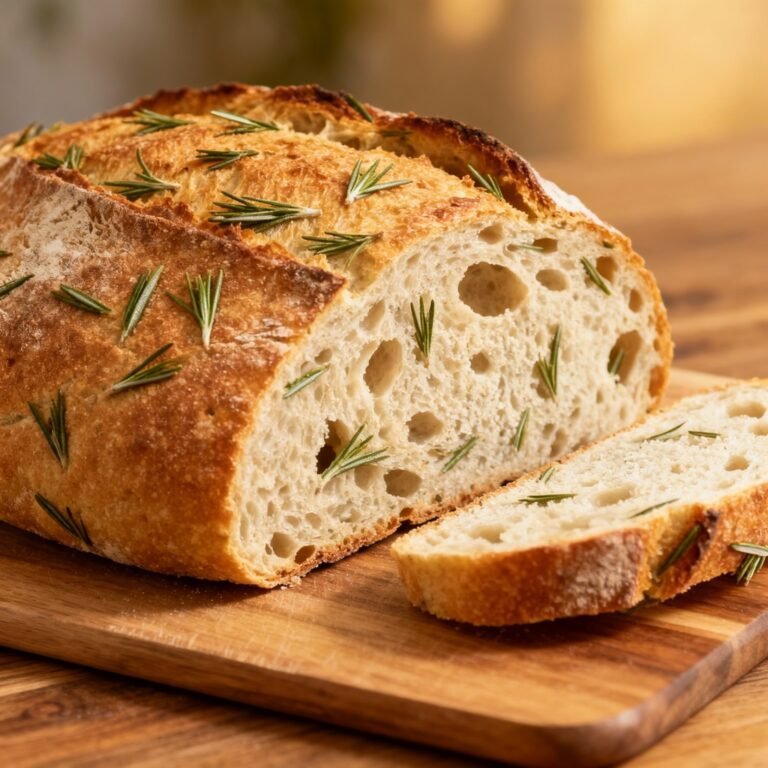
You know that moment when you slice into warm bread and the whole room goes quiet? That’s this honey wheat bread recipe. It’s soft, springy, lightly sweet, and ridiculously good with butter—or, let’s be honest, straight from the loaf.
No machine needed, no culinary degree required, just a bowl, your hands, and some patience. Bake this once, and store-bought loaves start looking like cardboard cosplay. Ready to make a bread you’ll brag about?
Why This Recipe Works
This loaf nails the balance: whole wheat flour for nutrition and flavor, and bread flour for structure and that tender chew.
Honey adds both subtle sweetness and moisture, so the crumb stays soft longer (science and deliciousness in one jar). Olive oil keeps it supple without heaviness, and a touch of milk makes it downright plush.
The method uses a brief autolyse—letting the flour and liquid mingle—so the dough becomes easier to knead and more elastic. Two rises give the bread time to develop flavor and that Instagram-level dome. The result?
A loaf that slices clean, toasts like a dream, and makes sandwiches feel fancy.
Shopping List – Ingredients
- 2 cups (240 g) whole wheat flour
- 2 cups (260 g) bread flour (or all-purpose in a pinch)
- 1 packet (2 1/4 tsp) instant or active dry yeast
- 1 1/4 cups (295 ml) warm water (about 105–115°F/40–46°C)
- 1/2 cup (120 ml) warm milk (dairy or unsweetened oat/soy)
- 1/4 cup (85 g) honey
- 2 tbsp (28 g) olive oil or melted butter
- 1 1/2 tsp fine sea salt
- Optional: 1 tbsp vital wheat gluten (for extra rise if using 100% whole wheat)
- Optional: 1–2 tbsp rolled oats or seeds for topping
The Method – Instructions
- Proof the yeast (if using active dry): In a large bowl, whisk warm water, warm milk, and honey. Sprinkle yeast on top and wait 5–10 minutes until foamy. If using instant yeast, skip the wait—just mix it right in.
- Combine the dry ingredients: In a separate bowl, stir whole wheat flour, bread flour, and salt.
If using vital wheat gluten, add it here.
- Make the dough: Add the dry mixture to the wet, along with olive oil. Stir until a shaggy dough forms. If it looks dry, add 1–2 tbsp more warm water.
If it’s soupy, sprinkle in a bit more flour.
- Rest (mini autolyse): Let the shaggy dough sit uncovered for 10 minutes. This relaxes the flour and makes kneading easier. Your arms will thank you.
- Knead: Turn the dough onto a lightly floured surface and knead 8–10 minutes until smooth and slightly tacky.
Aim for a soft, elastic feel that pulls cleanly from the counter. Windowpane test: a small piece should stretch thin without tearing.
- First rise: Place dough in a lightly oiled bowl, cover with a damp towel or plastic wrap, and let rise at warm room temp until doubled, about 60–90 minutes. Cold kitchen?
Tuck it in the oven with the light on.
- Shape the loaf: Gently deflate the dough. Pat into an 8×12-inch rectangle. Roll tightly from the short side into a log, pinching the seam.
Tuck ends under for a tidy look.
- Pan and proof: Place in a greased 9×5-inch loaf pan, seam-side down. Lightly mist with water and sprinkle oats or seeds if you like. Cover and proof until the dough crowns about 1 inch above the pan, 35–55 minutes.
- Preheat and prep: Heat oven to 350°F (175°C).
For extra oven spring, place a small tray of hot water on the lower rack. Not required, but it’s a nice flex.
- Bake: Bake 30–38 minutes until the top is deep golden and the internal temp hits 190–195°F (88–90°C). If the top browns too fast, tent with foil for the last 10 minutes.
- Finish with gloss: Optional but excellent—brush the hot loaf with a teaspoon of honey melted with a teaspoon of butter.
Shiny, slightly sticky, very bakery-core.
- Cool (seriously): Remove from pan after 10 minutes and cool on a rack at least 1 hour. Slicing early squashes the crumb. Patience is flavor.
Storage Tips
- Room temp: Wrap in a clean towel or store in a bread box for up to 3 days.
Avoid the fridge—it dries bread faster than your group chat dries jokes.
- Freezer: Slice, wrap tightly, and freeze up to 2 months. Pop slices straight into the toaster.
- Refresh: Day-old bread reboots with 5 minutes in a 325°F (165°C) oven. Add a tiny water spritz for steam.
What’s Great About This
- Soft, structured crumb: Perfect for sandwiches and toast—no crumbling mess.
- Balanced flavor: Gentle honey sweetness without dessert energy.
- Flexible ingredients: Works with dairy or non-dairy milk, olive oil or butter, instant or active yeast.
- Beginner-friendly: Clear cues and forgiving dough.
Your first loaf can be a win, IMO.
- Meal-prep gold: Slices freeze beautifully for easy weekday breakfasts.
Don’t Make These Errors
- Overheating liquids: Boiling water nukes yeast. Keep it warm, not hot. Think “nice bath,” not “hot tub scandal.”
- Under-kneading: If the dough tears easily and feels rough, it’s not ready.
Knead until smooth and stretchy.
- Skipping the cool-down: Cutting too soon compresses the crumb and traps steam. Give it an hour—minimum.
- Flour overload: A sticky dough isn’t a problem; a dry dough is. Dust the counter lightly; don’t dump flour like it’s confetti.
- Under-proofing: If the dough hasn’t risen above the pan, wait.
Baking too early = dense loaf and sad slices.
Alternatives
- 100% whole wheat: Use 4 cups whole wheat flour plus 1–2 tbsp vital wheat gluten. Add 1–3 tbsp extra water as needed.
- No milk: Replace milk with equal water. Loaf will be slightly less tender but still great.
- Oil-free: Omit oil and add 1 extra tablespoon honey.
Crust will be a bit chewier.
- Seeded edition: Fold in 1/2 cup mixed seeds (sunflower, flax, pumpkin) after the first rise. Toast seeds first for big flavor.
- Molasses twist: Swap 1–2 tbsp honey for molasses for deeper color and a hint of malt.
FAQ
Can I make this without a stand mixer?
Absolutely. Hand kneading works perfectly.
Expect 8–10 minutes of rhythmic kneading until the dough is smooth and elastic. Consider it your mini arm workout.
What if I only have all-purpose flour?
Use 2 cups whole wheat and 2 cups all-purpose. The loaf will be slightly less chewy and may need 1–2 tablespoons less water.
Still awesome.
How do I know it’s proofed enough before baking?
Use the poke test: gently press the dough. If the dent springs back slowly and not fully, it’s ready. Instant rebound means it needs more time; no rebound means it’s over-proofed.
Can I use sugar instead of honey?
Yes.
Use 3 tablespoons granulated sugar and add 1 extra tablespoon water. Flavor will be less floral, but the crumb stays soft.
Why did my loaf collapse?
Likely over-proofing or too much liquid. Next time, proof just until domed over the pan and check your measurements.
Also ensure your oven is fully preheated.
Can I make rolls with this dough?
Totally. After the first rise, divide into 12 pieces, shape into balls, proof 25–35 minutes, and bake at 375°F (190°C) for 15–18 minutes.
How do I get a softer crust?
Brush the hot loaf with melted butter or a honey-butter mix and cover loosely with a towel while it cools. Steam equals softness.
Is this recipe healthy?
It’s a balanced loaf with whole grains, modest honey, and healthy fats.
It beats ultra-processed bread, FYI, but portion sizes still matter.
The Bottom Line
This honey wheat bread recipe gives you bakery-level results without drama: tender crumb, golden crust, and a flavor that upgrades everything from PB&J to soup night. The steps are simple, the ingredients flexible, and the payoff huge. Make it once, and your kitchen gets a standing ovation from your toaster—and everyone at your table.