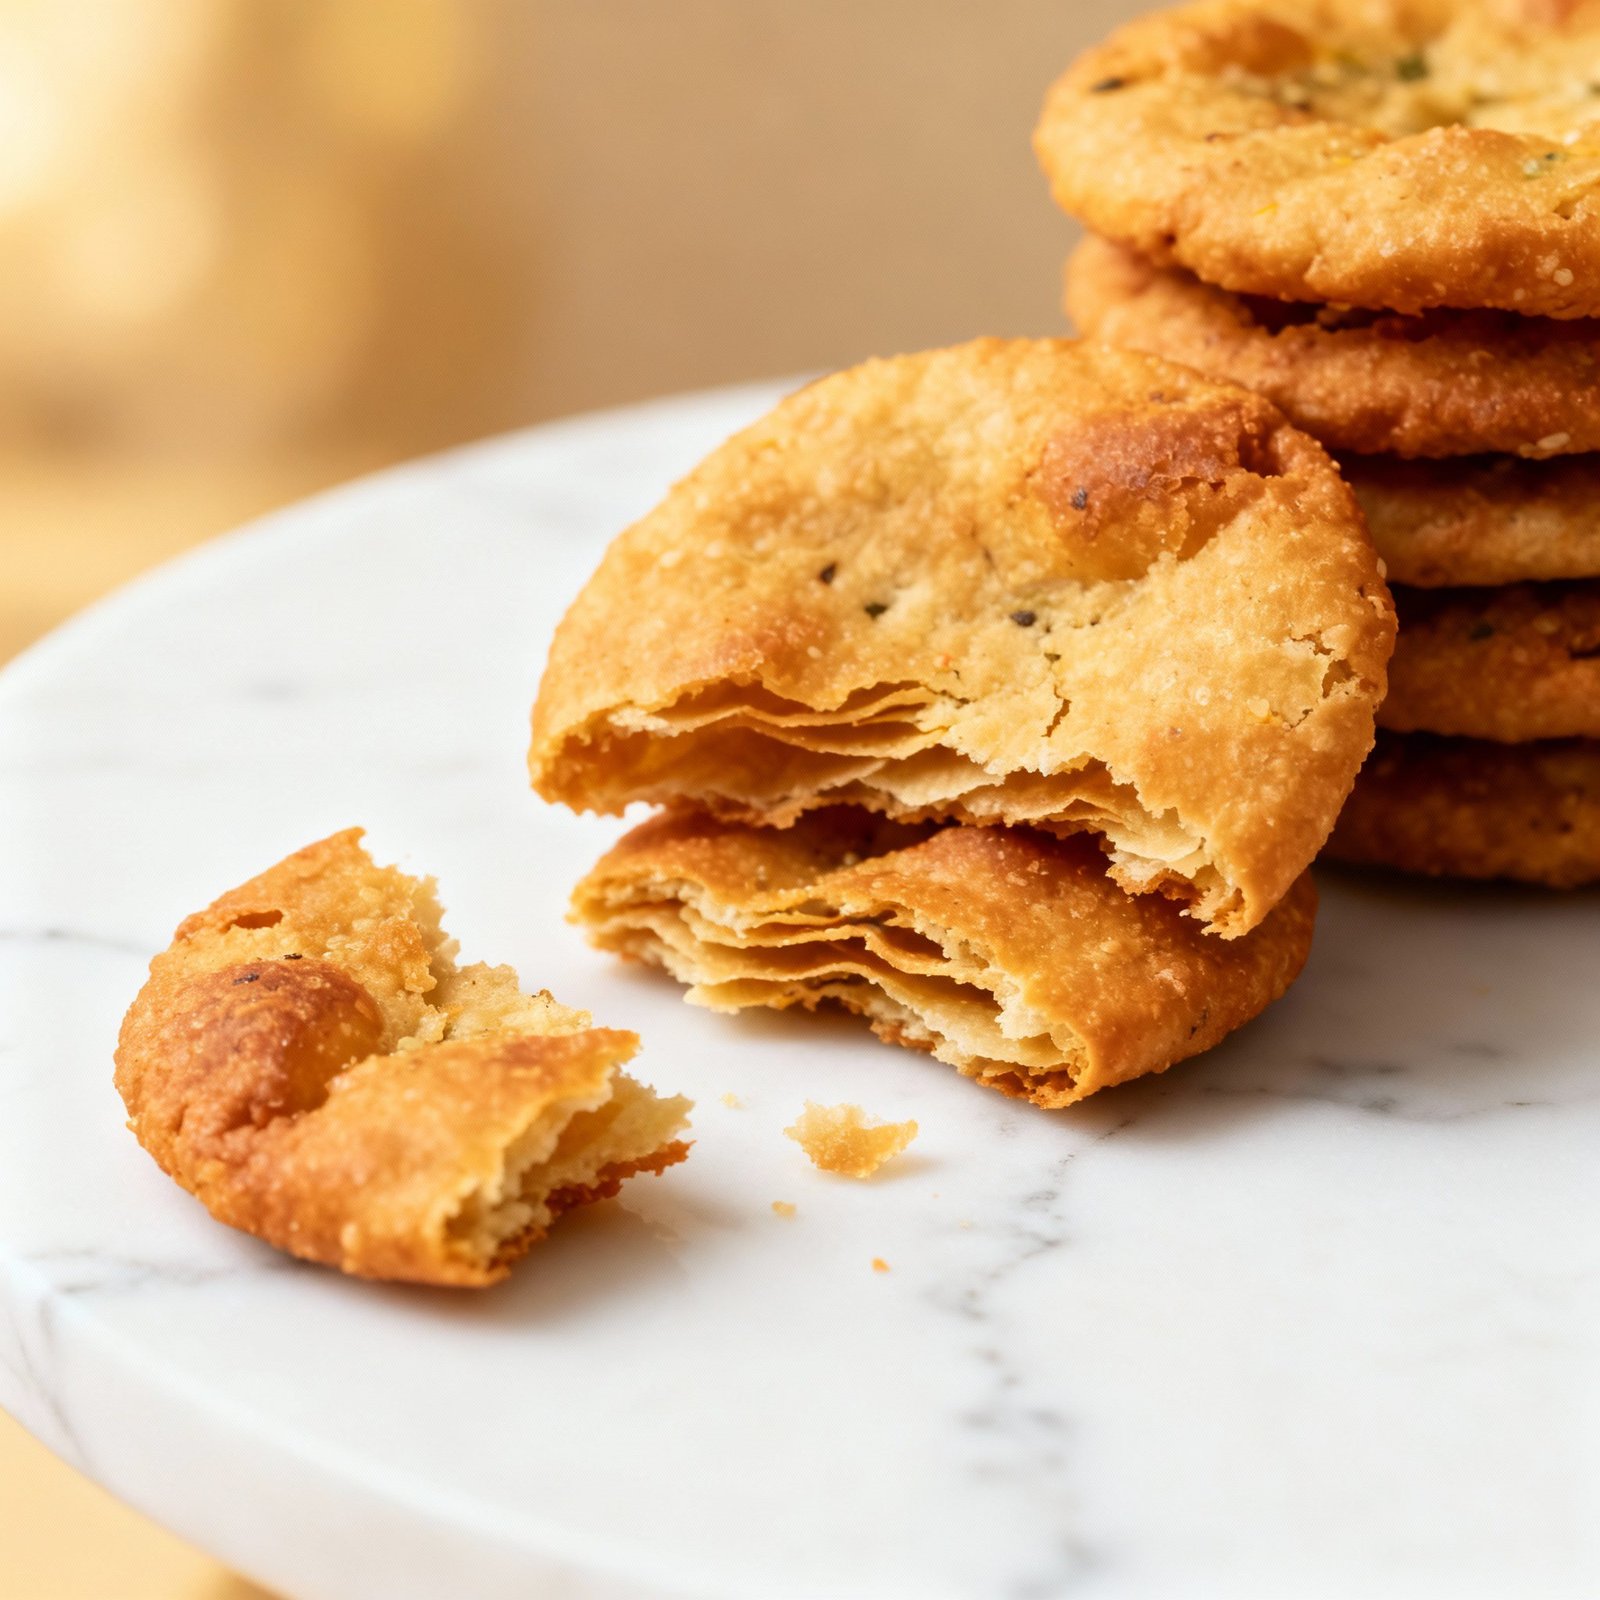
Mathri Recipe Indian Snacks: The Crispiest, Flakiest Bite!
Mathri! Just the word conjures up images of festive occasions, chai time gatherings, and the sheer joy of biting into a crispy, savory snack. These flaky, biscuit-like treats are a staple in Indian households, especially during Diwali and other celebrations. But honestly, mathri are so delicious, they deserve to be enjoyed year-round. This recipe will guide you through creating the perfect batch of mathri – crispy, flaky, and absolutely irresistible!
Why This Recipe Works
This mathri recipe is designed for success, even for beginner cooks. Here’s why it works so well:
- Perfect Ratio of Ingredients: The precise balance of flour, fat, and spices ensures a light and flaky texture. We’ve tested and refined the proportions to guarantee consistent results.
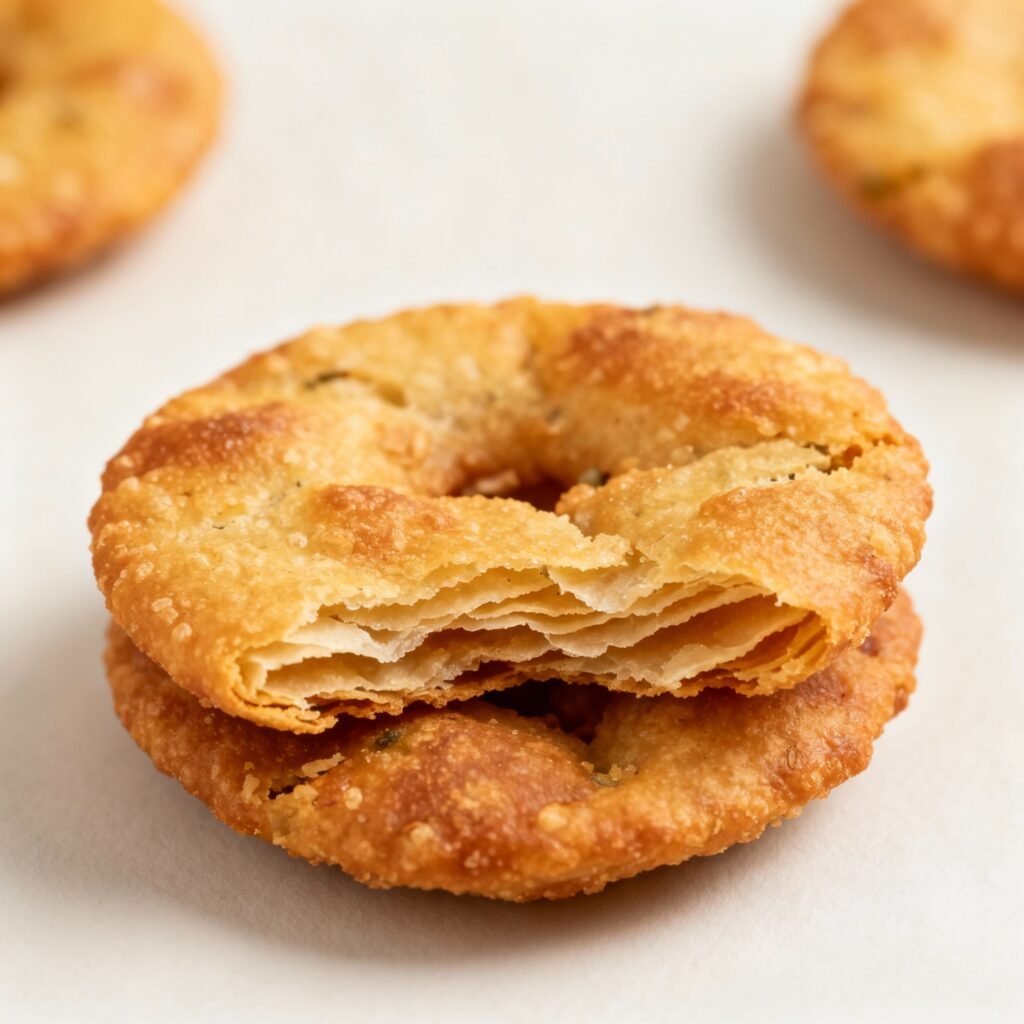
- Proper Kneading Technique: The dough is kneaded just enough to bring it together, preventing gluten development and ensuring a tender, melt-in-your-mouth texture.
- Resting Time is Key: Allowing the dough to rest relaxes the gluten, making it easier to roll out and prevents shrinkage during frying.
- Medium-Low Frying Temperature: Frying at the correct temperature is crucial for achieving a golden brown color and a crispy, even texture. Too high, and they’ll burn on the outside while remaining doughy inside. Too low, and they’ll absorb too much oil.
- Detailed Instructions: Each step is clearly explained with helpful tips, making the process straightforward and easy to follow.
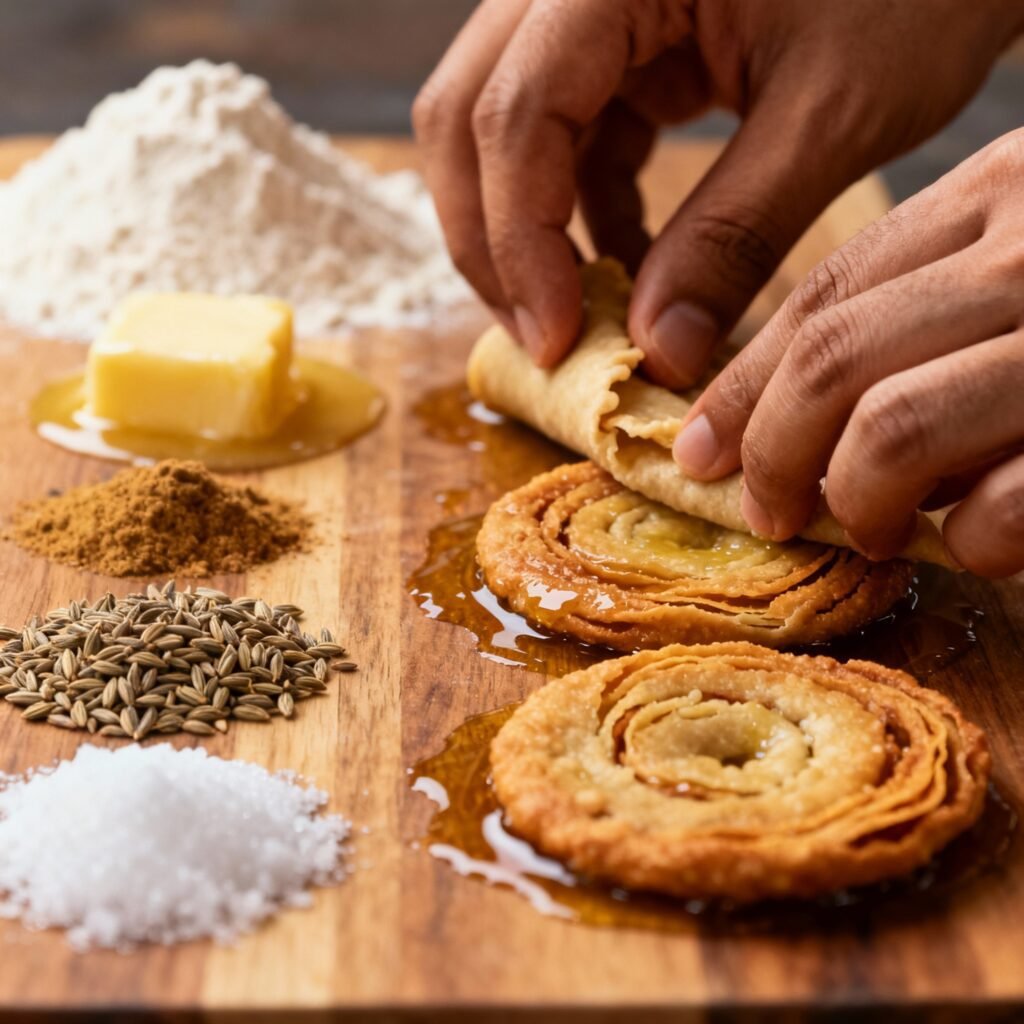
Ingredients
- 2 cups (250g) All-Purpose Flour (Maida): This is the base of our mathri.
- 1/2 cup (120ml) Ghee or Vegetable Oil: The fat is essential for creating the flaky texture. Ghee adds a rich, nutty flavor, while vegetable oil provides a lighter option.
- 1 teaspoon Ajwain (Carom Seeds): Ajwain adds a distinctive flavor and aids digestion.
- 1/2 teaspoon Cumin Seeds (Jeera): Cumin seeds contribute a warm, earthy note.
- 1/2 teaspoon Black Peppercorns, coarsely crushed: Adds a subtle spice and enhances the overall flavor.
- 1/2 teaspoon Salt: To balance the flavors.
- 1/4 teaspoon Asafoetida (Hing): Optional, but adds a unique savory depth. Use sparingly, as it has a strong flavor.
- Water: For kneading the dough (approximately 1/2 cup, added gradually).
- Oil: For deep frying. Use a neutral oil like vegetable oil or canola oil.
Instructions
- Prepare the Dough: In a large bowl, combine the flour, ghee (or oil), ajwain, cumin seeds, crushed black peppercorns, salt, and asafoetida (if using).
- Mix the Dry Ingredients: Rub the ghee into the flour with your fingertips until the mixture resembles breadcrumbs. This step is crucial for creating the flaky layers.
- Add Water Gradually: Gradually add water, a little at a time, and knead into a firm, tight dough. Do not over-knead. The dough should come together but not be sticky.
- Rest the Dough: Cover the dough with a damp cloth or plastic wrap and let it rest for at least 30 minutes. This allows the gluten to relax, resulting in a more tender mathri.
- Divide and Roll: After the dough has rested, divide it into small, equal-sized portions (about 1-inch in diameter). Roll each portion into a small, slightly thick circle (about 2-3 inches in diameter). They shouldn’t be too thin.
- Prick the Mathri: Use a fork to prick the surface of each mathri several times. This prevents them from puffing up too much during frying.
- Heat the Oil: Heat oil in a deep frying pan or kadai over medium-low heat. The oil should be hot enough to cook the mathri slowly and evenly. Test the oil by dropping a small piece of dough into it. If it sizzles gently and rises slowly, the oil is ready.
- Fry the Mathri: Gently slide the mathri into the hot oil, ensuring not to overcrowd the pan. Fry them over medium-low heat until they are golden brown and crispy on both sides, turning occasionally. This usually takes about 8-10 minutes per batch.
- Drain the Oil: Remove the fried mathri with a slotted spoon and place them on a paper towel-lined plate to drain excess oil.
- Cool Completely: Allow the mathri to cool completely before storing them in an airtight container. This will ensure they remain crispy.
- Serve and Enjoy: Serve the mathri as a snack with tea, coffee, or your favorite chutney. They are also a great addition to a festive platter.
Tips for Success
- Don’t Over-Knead: Over-kneading develops the gluten, making the mathri tough. Knead just enough to bring the dough together.
- Resting is Crucial: Don’t skip the resting time. It allows the gluten to relax, resulting in a flakier texture.
- Control the Frying Temperature: Maintaining a medium-low frying temperature is key to achieving a golden brown color and crispy texture without burning.
- Prick Thoroughly: Pricking the mathri prevents them from puffing up like pooris during frying.
- Cool Completely Before Storing: Ensure the mathri are completely cool before storing them to prevent them from becoming soggy.
- Experiment with Flavors: Feel free to add other spices like red chili powder, dried fenugreek leaves (kasuri methi), or ginger powder to customize the flavor.
Storage Instructions
Mathri can be stored in an airtight container at room temperature for up to 2-3 weeks. Ensure they are completely cool before storing to maintain their crispness. Avoid storing them in a humid environment.
FAQ
Q: Can I use whole wheat flour instead of all-purpose flour?
A: Yes, you can use whole wheat flour, but the texture will be slightly denser. You may need to add a little more water to the dough.
Q: Can I bake the mathri instead of frying?
A: Yes, you can bake them. Preheat your oven to 350°F (175°C) and bake for 20-25 minutes, or until golden brown. However, the texture will be different from fried mathri; they will be less flaky and more biscuit-like.
Q: My mathri are turning out hard. What am I doing wrong?
A: You may be over-kneading the dough or using too much water. Also, make sure you are frying them at a low enough temperature. Over-frying can also make them hard.
Q: Can I make mathri ahead of time?
A: Absolutely! Mathri are perfect for making ahead of time. They stay crispy for weeks when stored properly.
Q: My mathri are absorbing too much oil. What can I do?
A: Ensure the oil is hot enough before frying. If the oil is not hot enough, the mathri will absorb more oil. Also, don’t overcrowd the pan, as this will lower the oil temperature.
Conclusion
With this recipe and these helpful tips, you’re well on your way to creating the most delicious, crispy, and flaky mathri you’ve ever tasted! Mathri are a delightful snack that brings joy to any occasion. So gather your ingredients, follow the instructions, and get ready to enjoy a batch of homemade goodness. Happy cooking!