Snow Crab Legs Recipe Baked: Effortless Elegance on Your Plate
Craving succulent, sweet snow crab legs but intimidated by the thought of steaming or boiling? Fear not! This baked snow crab legs recipe is your ticket to a restaurant-quality meal with minimal effort and maximum flavor. Baking crab legs preserves their delicate texture and allows the flavors to meld beautifully, creating a truly unforgettable dining experience. Get ready to impress your family and friends with this surprisingly simple and utterly delicious dish.
Why This Recipe Works
Baking snow crab legs offers several advantages over other cooking methods. Here’s why this recipe is a winner:
- Even Cooking: The oven’s consistent heat ensures the crab legs cook evenly, preventing some parts from becoming overcooked and rubbery while others remain cold.
- Flavor Infusion: Baking allows the butter, garlic, and herbs to infuse deeply into the crab meat, creating a richer, more flavorful experience than steaming or boiling.
- Minimal Mess: Compared to boiling, baking is significantly less messy. No large pots of water to deal with!
- Hands-Off Approach: Once the crab legs are in the oven, you’re free to focus on preparing side dishes or simply relaxing.
- Preserves Moisture: Baking in foil helps trap moisture, preventing the crab legs from drying out.
Ingredients
- 2 pounds snow crab legs, thawed
- 1/2 cup (1 stick) unsalted butter, melted
- 4 cloves garlic, minced
- 1 tablespoon lemon juice
- 1 teaspoon Old Bay seasoning
- 1/2 teaspoon paprika
- 1/4 teaspoon red pepper flakes (optional, for heat)
- 2 tablespoons chopped fresh parsley, for garnish
- Lemon wedges, for serving

Instructions
- Preheat Oven: Preheat your oven to 375°F (190°C).
- Prepare the Crab Legs: If the crab legs are frozen, ensure they are completely thawed. You can thaw them overnight in the refrigerator or by placing them in a colander under cold running water for about 30-45 minutes.
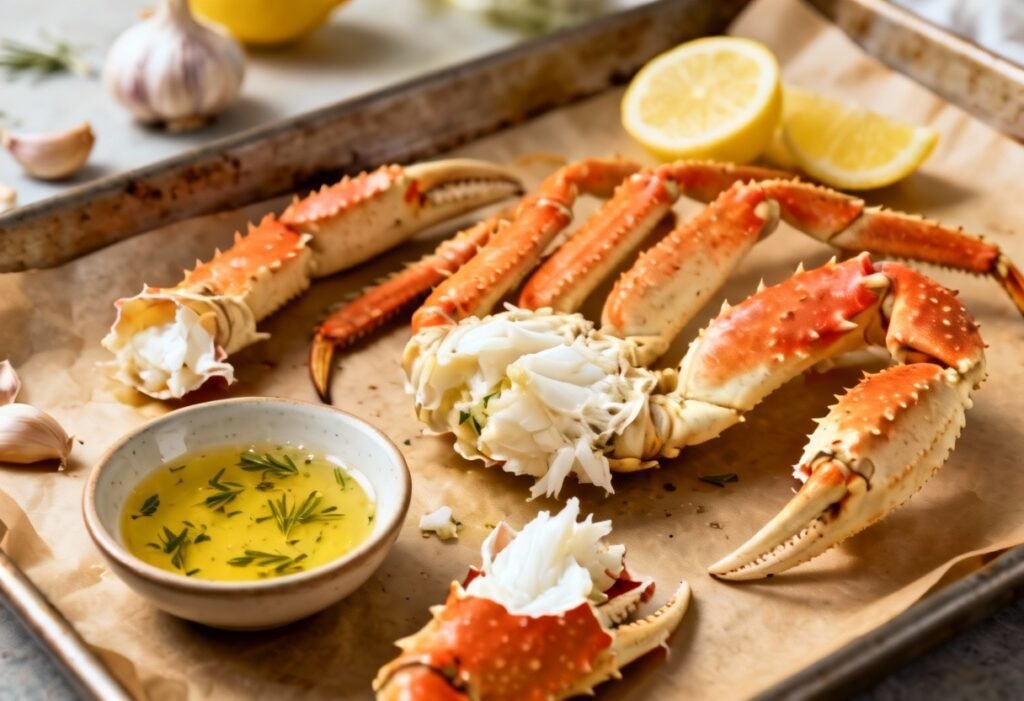
- Make the Garlic Butter Sauce: In a small bowl, combine the melted butter, minced garlic, lemon juice, Old Bay seasoning, paprika, and red pepper flakes (if using). Whisk until well combined.
- Arrange the Crab Legs: Line a large baking sheet with aluminum foil. Arrange the snow crab legs in a single layer on the foil.
- Drizzle with Sauce: Generously drizzle the garlic butter sauce over the crab legs, ensuring they are well coated.
- Seal the Foil: Tightly seal the aluminum foil around the crab legs, creating a packet. This will help trap the moisture and steam the crab legs as they bake.
- Bake: Bake in the preheated oven for 12-15 minutes, or until the crab legs are heated through. The exact baking time will depend on the thickness of the crab legs and your oven.
- Check for Doneness: The crab legs are done when they are heated through and the meat is easily pulled from the shell.
- Serve: Carefully remove the crab legs from the oven. Open the foil packet, being cautious of the steam. Garnish with fresh parsley and serve immediately with lemon wedges.
Tips for Success
Here are a few tips to ensure your baked snow crab legs turn out perfectly every time:
- Don’t Overcook: Overcooking crab legs will result in dry, rubbery meat. Keep a close eye on them and check for doneness frequently.
- Use Fresh Garlic: Freshly minced garlic provides the best flavor. Avoid using garlic powder if possible.
- Adjust Seasoning to Taste: Feel free to adjust the amount of Old Bay seasoning, paprika, and red pepper flakes to your liking.
- Thaw Completely: Ensure the crab legs are completely thawed before baking. This will help them cook evenly.
- Use High-Quality Butter: Using high-quality butter will enhance the flavor of the sauce.
- Add a Splash of White Wine: For an extra layer of flavor, add a splash of dry white wine to the garlic butter sauce.
- Broil for a Crispy Finish (Optional): For a slightly crispy finish, you can broil the crab legs for 1-2 minutes after baking. Watch them carefully to prevent burning.
Storage Instructions
Leftover baked snow crab legs can be stored in an airtight container in the refrigerator for up to 2 days. Reheat gently in the oven or microwave until heated through. Be careful not to overheat, as this can dry out the crab meat.
FAQ
Q: Can I use frozen crab legs?
A: Yes, you can use frozen crab legs. Just make sure to thaw them completely before baking.
Q: How do I know when the crab legs are done?
A: The crab legs are done when they are heated through and the meat is easily pulled from the shell. The shell will also turn a brighter shade of red.
Q: Can I bake the crab legs without foil?
A: While you can bake the crab legs without foil, it’s not recommended. Baking in foil helps trap moisture and prevents the crab legs from drying out. If you choose to bake without foil, reduce the baking time slightly and keep a close eye on them.
Q: What side dishes go well with snow crab legs?
A: Snow crab legs pair well with a variety of side dishes, such as:
- Coleslaw
- Corn on the cob
- Roasted vegetables (asparagus, broccoli, potatoes)
- Garlic bread
- Rice pilaf
- Mac and cheese
Q: Can I use different seasonings?
A: Absolutely! Feel free to experiment with different seasonings to create your own unique flavor profile. Some other options include Cajun seasoning, lemon pepper, or Italian seasoning.
Conclusion
This baked snow crab legs recipe is a simple and delicious way to enjoy this seafood delicacy. With minimal effort and maximum flavor, you’ll be able to impress your family and friends with a restaurant-quality meal in the comfort of your own home. So, gather your ingredients, preheat your oven, and get ready to savor the sweet, succulent taste of perfectly baked snow crab legs. Enjoy!