Stove Top Bread Recipe: The Easiest Crusty Loaf You’ll Ever Make!
Craving fresh, homemade bread but don’t want to heat up your entire kitchen with the oven? Or maybe you don’t even *have* an oven! This stove top bread recipe is your answer. Forget kneading, proofing for hours, and complicated techniques. This method delivers a surprisingly delicious, crusty loaf directly from your stovetop. It’s perfect for beginners, small kitchens, or anyone looking for a quick and satisfying bread fix. Get ready to impress yourself (and your taste buds) with this incredibly simple and rewarding recipe!
Why This Recipe Works
The magic of this stove top bread lies in a few key elements:
- Simple Ingredients: We’re using pantry staples – flour, water, yeast, and salt. No fancy flours or complicated starters needed.
- No-Knead Approach: This recipe is virtually hands-off. A quick mix is all it takes. The long, slow rise develops the gluten and flavor without any strenuous kneading.
- Low and Slow Cooking: Cooking the bread in a heavy-bottomed pot over low heat creates a steamy environment that mimics a Dutch oven. This results in a beautifully crusty exterior and a soft, chewy interior.
- Versatility: This recipe is a blank canvas! Add herbs, cheese, spices, or seeds to customize your loaf. The possibilities are endless.
Ingredients
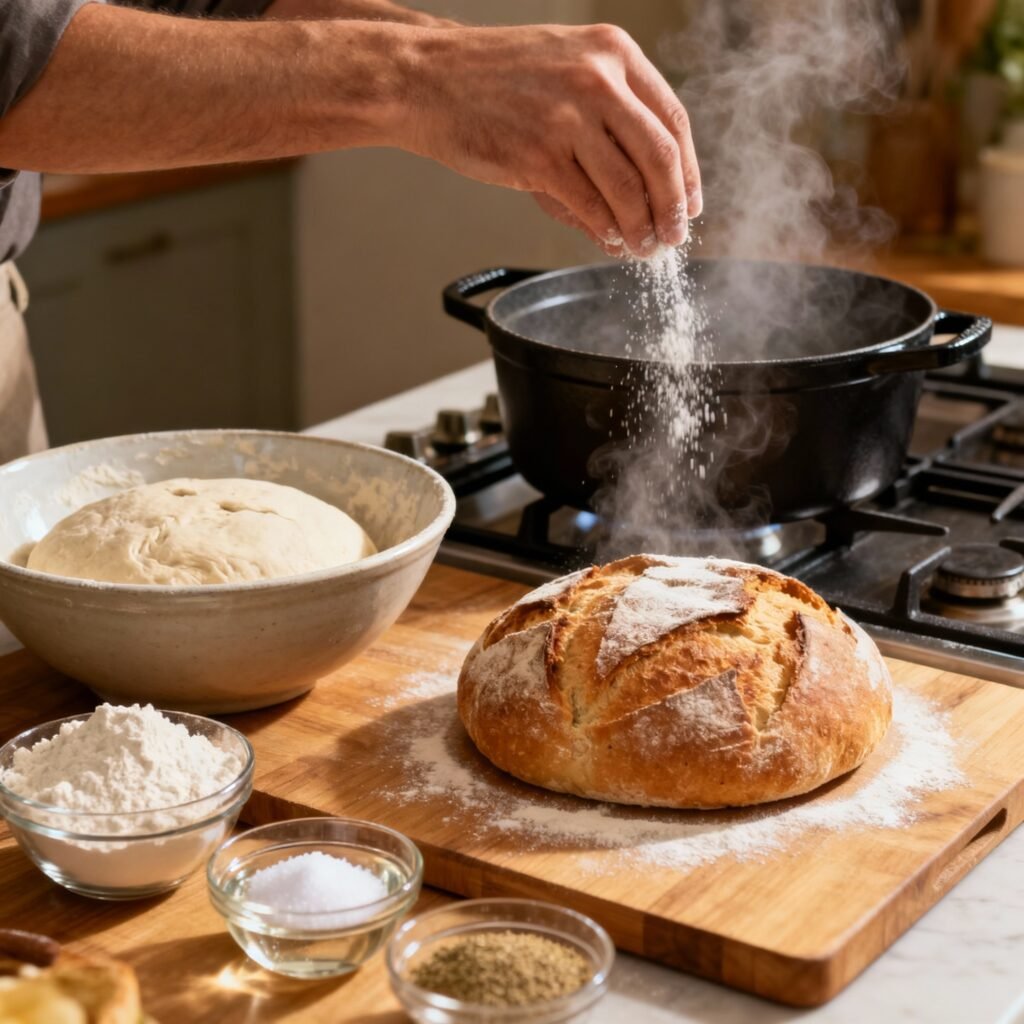
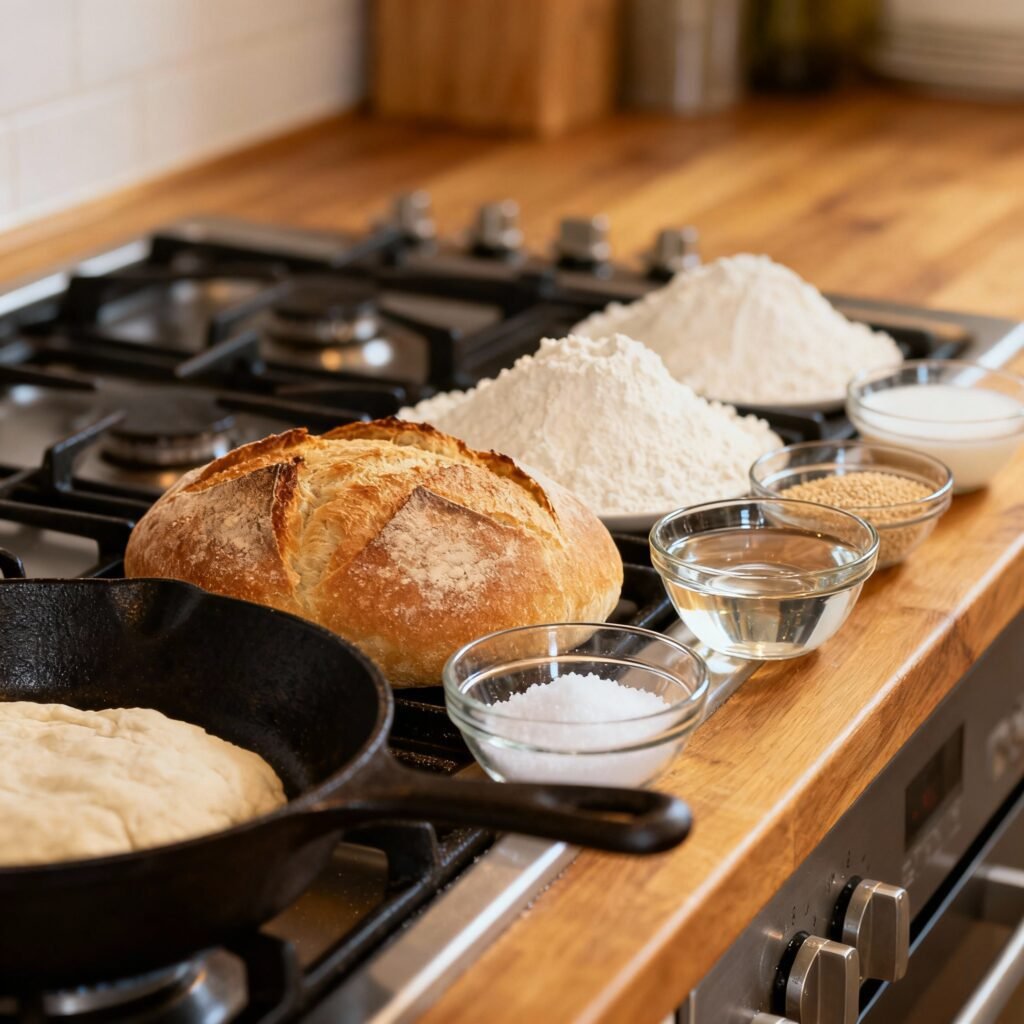
- 3 cups (360g) all-purpose flour, plus more for dusting
- 1 ½ cups (360ml) warm water (about 105-115°F or 40-46°C)
- 1 ¼ teaspoons (4g) active dry yeast
- 1 ½ teaspoons (9g) salt
- 1 tablespoon olive oil (optional, for coating the pot)
Instructions
- Combine Dry Ingredients: In a large bowl, whisk together the flour, yeast, and salt.
- Add Water: Pour the warm water into the bowl and stir until just combined. The dough will be shaggy and sticky – that’s perfectly normal!
- First Rise (Bulk Fermentation): Cover the bowl with plastic wrap or a clean kitchen towel. Let it rise in a warm place for at least 12 hours, or up to 18 hours. The longer it rises, the more flavorful the bread will be. You should see lots of bubbles forming in the dough.
- Shape the Dough: Lightly flour a work surface. Gently turn the dough out onto the floured surface. It will be very soft and sticky. Using floured hands, gently shape the dough into a round or oval loaf. Don’t overwork it!
- Second Rise (Proofing): Line a bowl with parchment paper. Place the shaped dough in the bowl. Cover with plastic wrap or a clean kitchen towel and let it rise for another 30-60 minutes. The dough should almost double in size.
- Prepare the Pot: Lightly grease a heavy-bottomed pot (cast iron is ideal) with olive oil or butter. You can also line the bottom with parchment paper for easy removal.
- Transfer the Dough: Carefully transfer the dough from the bowl into the prepared pot. If you used parchment paper, lift the parchment paper to transfer the dough.
- Cook on the Stovetop: Cover the pot with a tight-fitting lid. Place the pot on the stovetop over the lowest possible heat. Cook for 45 minutes.
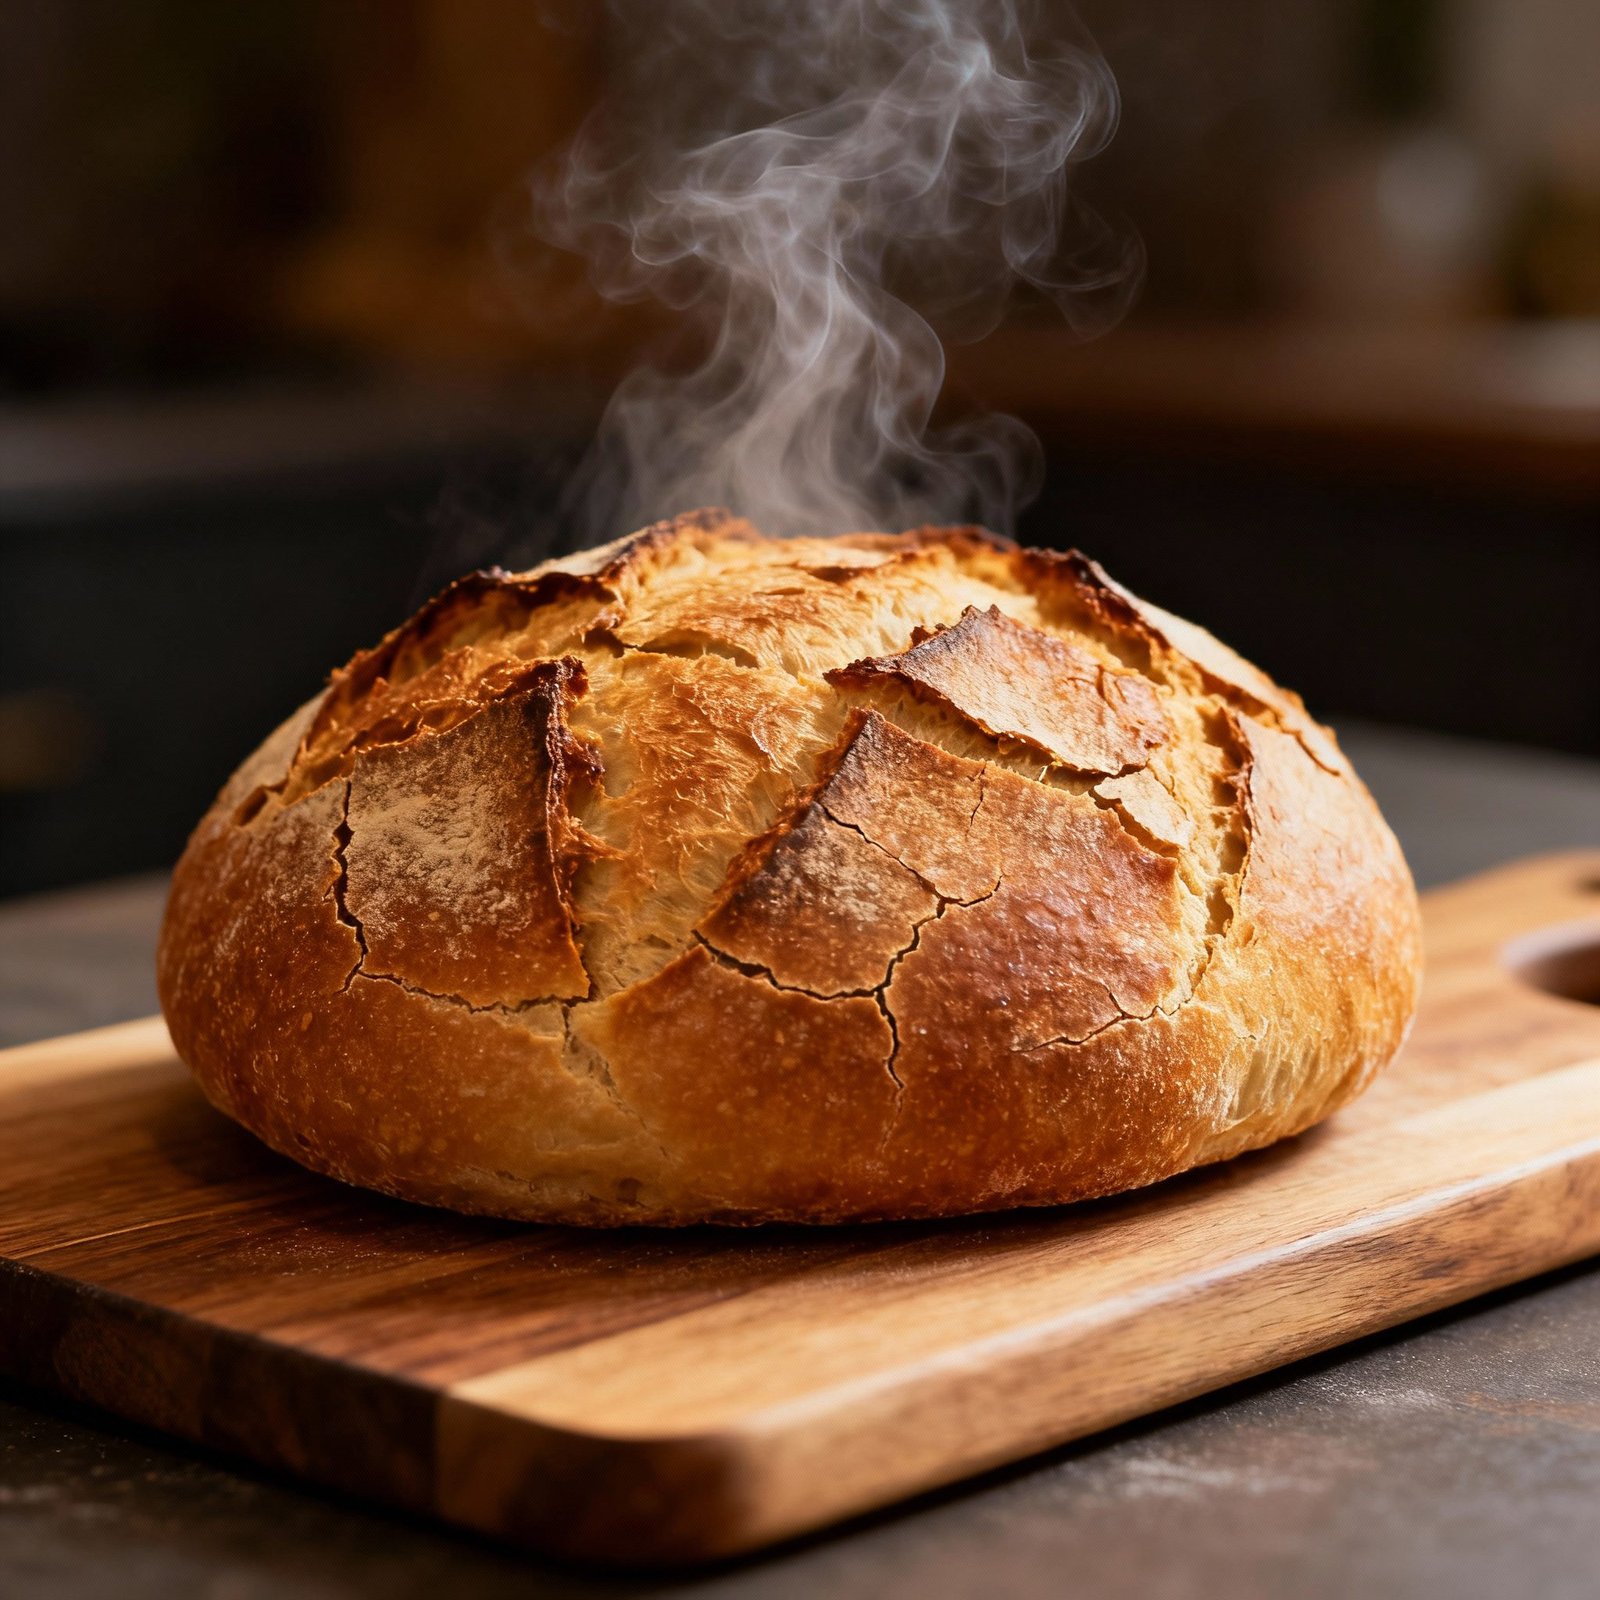
- Check for Doneness: After 45 minutes, carefully remove the lid. The top of the bread should be lightly golden. If it’s not golden enough, you can increase the heat slightly for the last 5-10 minutes, but watch it closely to prevent burning.
- Cooling: Carefully remove the bread from the pot and place it on a wire rack to cool completely before slicing. This is crucial! Slicing into warm bread will result in a gummy texture.
Tips for Success
- Water Temperature: The water temperature is crucial for activating the yeast. Too hot and you’ll kill the yeast; too cold and it won’t activate properly. Use a thermometer to ensure the water is between 105-115°F (40-46°C).
- Don’t Overmix: Overmixing the dough will develop too much gluten and result in a tough bread. Mix until just combined.
- Low Heat is Key: Cooking over low heat is essential for even cooking and preventing the bottom of the bread from burning. If you notice the bottom is getting too dark, you can place a heat diffuser or trivet under the pot.
- Patience is a Virtue: Don’t rush the rising times. The longer the dough rises, the more flavorful and airy the bread will be.
- Experiment with Flavors: Once you’ve mastered the basic recipe, try adding different herbs, cheeses, spices, or seeds to customize your loaf. Some popular additions include rosemary, garlic, cheddar cheese, everything bagel seasoning, and sunflower seeds.
- Pot Size Matters: Use a pot that’s large enough to accommodate the dough as it rises during cooking. A 6-quart Dutch oven or a similar sized pot works well.
- Check for Doneness: If you are unsure if your bread is done, insert a toothpick into the center. If it comes out clean, it’s ready.
Storage Instructions
Store the cooled bread in a bread bag or an airtight container at room temperature for up to 3 days. For longer storage, you can freeze the bread. Slice the bread before freezing for easier thawing. Wrap the slices tightly in plastic wrap and then place them in a freezer bag. Frozen bread can be stored for up to 2 months.
FAQ
- Can I use instant yeast instead of active dry yeast? Yes, you can. Use the same amount of instant yeast. You can skip the step of proofing the yeast in water. Just add it directly to the flour.
- Can I use a different type of flour? While all-purpose flour is recommended for this recipe, you can experiment with other types of flour, such as bread flour or whole wheat flour. Keep in mind that using different flours may affect the texture and flavor of the bread.
- My bread is too dense. What did I do wrong? The most common causes of dense bread are using water that was too hot or too cold, not allowing the dough to rise for long enough, or overmixing the dough.
- My bread is burning on the bottom. What can I do? Make sure you are using the lowest possible heat setting on your stovetop. You can also place a heat diffuser or trivet under the pot to help distribute the heat more evenly.
- Can I make this recipe in a slow cooker? While this recipe is specifically designed for the stovetop, you can adapt it for a slow cooker. Line the slow cooker with parchment paper and cook on low for 2-3 hours. Check the bread frequently to prevent burning.
Conclusion
This stove top bread recipe is a game-changer for anyone who loves fresh bread but wants a quick, easy, and oven-free alternative. With its simple ingredients, no-knead approach, and customizable flavors, this recipe is sure to become a staple in your kitchen. So, ditch the store-bought bread and get ready to enjoy the satisfying experience of baking your own crusty, delicious loaf right on your stovetop. Happy baking!